What's on this page
- Why range hood cleaning matters
- Signs your range hood is overdue
- How a range hood works: ducted vs recirculating
- Microwave hoods over the range
- Before you start: what you need
- Step 1: Cut the power and clear the cooktop
- Step 2: Remove the grease filters
- Step 3: Soak the filters in hot soapy water and baking soda
- Step 4: Scrub and rinse the filters
- Step 5: Degrease the underside and housing
- Step 6: Replace a recirculating hood’s charcoal filter
- Step 7: Wipe the fan blades and check the airflow path
- Step 8: Dry, refit, and set a degreasing schedule
- Range hood maintenance: the five clocks it runs on
- Where the job stops, and the rules that never bend
- Grease in the ductwork, and why that is not a cleaning job
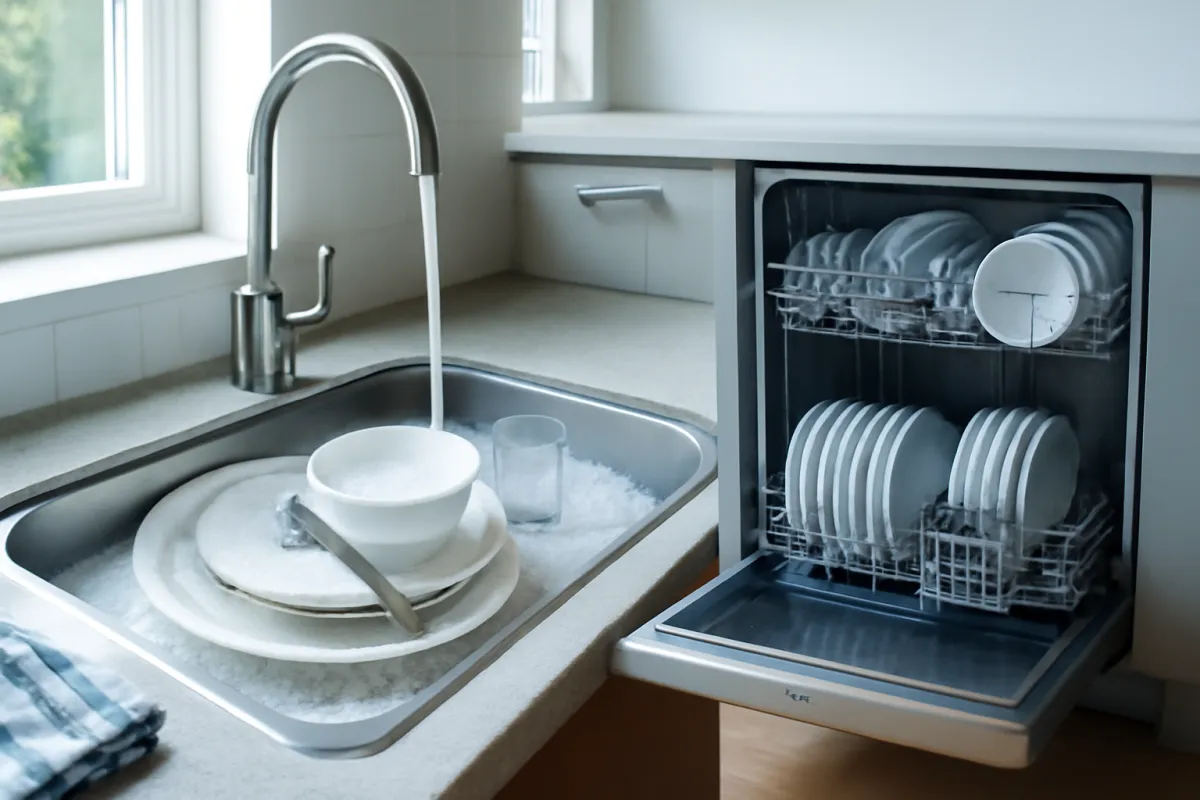
- Can range hood filters go in the dishwasher?
- When to replace a filter instead of cleaning it
- A worked example: a frying household’s hood revival
- How often to clean a range hood
- What the routine costs to run
- How to slow the grease buildup
- Maintaining a hood you have just inherited
- Common mistakes when cleaning a range hood
- Troubleshooting: harder range hood problems
- Your range hood maintenance checklist
- The bottom line
Short answer: Clean a range hood by soaking the metal grease filters in the hottest tap water with dish soap and a slow half cup of baking soda, then scrubbing, rinsing, and drying them, and wiping the housing and fan blade faces with soapy water with the breaker off. Soak the filters about every six weeks for typical cooking, every three weeks for heavy frying, and replace a recirculating hood's charcoal filter on the maker's schedule.
Range hood cleaning is the fix for the sticky film that creeps across the kitchen, the cooking smells that outstay dinner, and the fan that roars without actually catching the smoke, and learning how to clean a range hood takes nothing more exotic than the hottest water your tap will run, dish soap, and half a cup of baking soda. The hood is the appliance most kitchens forget exists, because it works overhead and out of sight: every night it inhales the aerosolized grease your cooking throws up, and everything it catches stays in it. The metal filters mat shut, the fan blades cake and unbalance, and the hood quietly becomes a grease reservoir hanging over your stove, pulling less air each month while the film it should have caught settles on your cabinets instead.
These notes give you a step by step method for range hood cleaning, and then the part most cleaning walkthroughs leave out: the range hood maintenance schedule that stops you ever needing the hard version of the clean again. Filters out and into a hot soapy soak, the underside and housing degreased, the fan blade faces wiped, the charcoal filter of a recirculating hood replaced on schedule, everything dried and refitted, and then five recurring clocks that keep it there. We also cover the ducted versus ductless difference honestly, over the range microwave hoods, the dishwasher question, where the homeowner job stops and a technician’s starts, and the airflow troubleshooting for a hood that has gone weak.
The hood’s opposite number in kitchen grime is the machine below it, so pair this with our walkthrough on how to clean an oven, and see the eight point appliance maintenance plan for the whole rotation. Feed how often and how hard you cook into the degreasing schedule planner as you read, and it will set your filter interval instead of leaving you with a generic month.
Key takeaways
- A range hood's grime is one substance, aerosolized cooking grease, and it concentrates in the metal filters first, which is why the filter soak is most of the job.
- The core method is filters soaked in the hottest tap water with dish soap and a slow half cup of baking soda, scrubbed, rinsed, and dried, while the housing and fan blade faces get a soapy wipe with the breaker off.
- Maintenance runs on five clocks, not one: every cook, weekly, your filter interval, quarterly, and annually, with the charcoal swap on its own manufacturer schedule.
- A recirculating hood's charcoal filter is a replacement part, not a washable one: once its pores saturate, smells pass straight through, and only a fresh filter restores odor capture.
- Soak the filters about every six weeks for typical mixed cooking most nights, about every three weeks for heavy frying, and the hood keeps pulling for roughly an hour of mostly unattended soak time.
Why range hood cleaning matters
Before the sink fills, it is worth being clear about what a range hood collects and why the buildup matters more than it seems. Everything that sizzles, sears, and fries releases microscopic droplets of fat into the air, and the hood’s whole purpose is to capture that aerosol before it settles on your kitchen. The metal filters are designed as grease traps: their mesh or baffles force the air through direction changes that fling the droplets onto metal, where they collect. That means a working hood is supposed to get greasy, constantly, and everything it catches accumulates until you remove it. The stacked bar below shows an illustrative split of where the grease ends up in a neglected hood, and it explains why the filters dominate the job.
Where range hood grease collects
An illustrative split of the accumulated grease in a regularly used, rarely cleaned range hood. Segments sum to 100 percent. Your mix shifts with cooking style and hood design.
The filters carry the biggest share by design, they are the trap, which is why the soak is most of the job. The fan's smaller share matters most for noise and airflow. The split is illustrative.
The consequences of skipping this job stack up in order. Matted filters choke airflow, so the hood catches less and the grease film migrates to cabinets, walls, and ceiling, which are far harder to clean than a filter. Trapped grease holds cooking odors and releases them back into the kitchen for days. A caked blower runs loud, unbalanced, and weak. And a saturated hood directly over open burners is a real kitchen fire consideration: accumulated grease is fuel, and keeping it thin is part of basic stove safety. A clean hood, by contrast, is the quiet workhorse that makes the whole kitchen easier to keep, which is why it belongs in the same rotation as the oven below it.
Signs your range hood is overdue
The hood tells you it is due in ways that read as kitchen annoyances rather than appliance problems, which is why they go unanswered. The clearest is smell: cooking odors that linger into the next morning mean the hood is no longer capturing and clearing them, either because matted filters are blocking flow or, on a recirculating hood, because the charcoal is saturated and passing smells straight through. Close behind is visible smoke drifting past the hood instead of into it while you sear, the live demonstration that airflow has collapsed.
Then come the physical signs. Look up: filters that appear matted, furry, or wet shiny, with drips forming at their lower edges, are past due, and a drip of grease landing on the cooktop is the hood formally surrendering. Touch the underside: a tacky film where there used to be smooth metal is settled aerosol the filters no longer catch. Listen: a fan that has grown louder, rattly, or droning is often a blower wheel unbalanced by caked grease rather than a dying motor.
And notice the kitchen itself, because a sticky film on nearby cabinet tops and the smell of old fryer oil in a kitchen that has not fried anything are both the hood’s job landing on everything else. Any one sign means run the routine below. Drips or passed smoke mean this week. A sign that appears again within days of a full clean is the one exception, and it points at the airflow path or the motor rather than at grease, which the troubleshooting section further down takes apart.
How a range hood works: ducted vs recirculating
One distinction shapes half this job, so settle it before the steps: whether your hood is ducted or recirculating. A ducted hood pulls air through its grease filters and pushes it through a duct to the outdoors, taking heat, steam, smoke, and smell out of the house entirely. A recirculating, or ductless, hood has no duct: it pulls air through the same metal grease filters, then through a charcoal filter that adsorbs smoke and odor molecules, and returns the air to the kitchen. You can usually tell in ten seconds: a duct or chimney rising from the hood into the wall, ceiling, or cabinet above suggests ducted, while vents on the hood’s front or top edge blowing air back at the room during use mean recirculating. The manual settles any doubt.
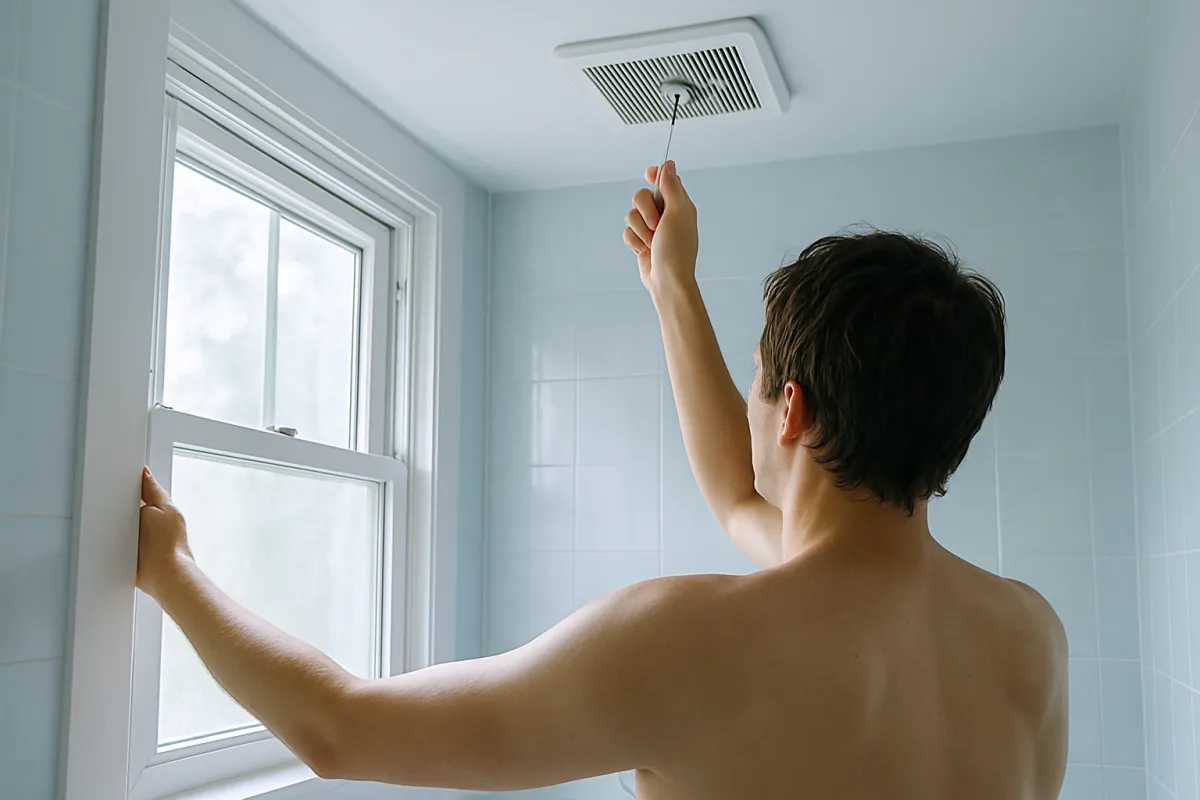
The cleaning consequences are direct. Both types depend on the same metal grease filters, so the soak in the steps ahead is universal. The recirculating hood adds a consumable, the charcoal filter, which cannot be washed and must be replaced on schedule, covered in Step 6. Its owners should also be honest that even a perfect hood of this type removes smell and grease but returns heat and moisture to the room, which makes cracking a window while frying a worthwhile habit and part of the broader case in our notes on improving indoor air quality. The ducted hood adds a path to keep clear: the damper and the visible duct opening checked in Step 7. Know which you own, and every step below tells you what applies.
Microwave hoods over the range
A large share of kitchens have no separate hood at all: the ventilation is built into an over the range microwave, and that combination changes a few details without changing the method. The metal grease filters usually sit in the microwave’s underside, one or two panels that slide out of slots at the front lip, and they soak exactly like a hood’s. Most of these units ship configured to recirculate, venting through a grille along the top front, which means they also carry a charcoal filter, typically behind the vent grille at the top rather than beside the grease filters. Many can be converted to duct outside, and whether yours is currently ducted or recirculating is a question for the manual, not for guessing from the outside.
Two practical differences matter. The first is heat and reach: the underside of a microwave sits lower over the cooktop than most hoods, so it collects film faster and it is genuinely warm after cooking, which is one more reason the cooktop must be cold and the unit off at the breaker before you start. The second is that the microwave’s interior is a separate cleaning job on its own clock, covered in our walkthrough on cleaning a microwave, and the two jobs pair well in one session: steam the cavity while the grease filters soak.
The charcoal filter on these units is the most commonly missed part in the whole category, because it is out of sight behind a grille that many owners have never removed, and because nothing visibly fails when it saturates. Check the manual for its location and its release, note the model number, and put it on the same recurring reminder as the grease filter soak. Everything past the filter frames on a microwave hood, meaning the blower, the wiring, and the high voltage components inside the cabinet, is technician territory without exception.
Before you start: what you need
This is a beginner job with no tools beyond what releases the filters, usually bare hands, and its one real hazard is honest: you are working over a cooktop, on an electrical appliance with a fan in it, with water involved. So the setup rules are firm. Switch the hood off at its controls and then cut its power at the breaker before any filter or fan work begins. That is not a precaution reserved for nervous owners, it is the baseline: an unpowered fan is the only kind that fingers, cloths, and brushes go near. Make sure the cooktop below is off and fully cool, then cover it with towels or newspaper, which catches drips and the occasional dropped filter. Plan about an hour, of which half is the filter soak running unattended.
The kit, mostly from under the sink:
- Degreasing dish soap, the single most important product in the job.
- Baking soda, about half a cup for the soak, plus a little for stubborn patches.
- The hottest tap water you can run, in a sink, basin, or deep baking tray that fits the filters.
- A dish brush or non-abrasive scrub pad, plus an old toothbrush for corners and slots.
- Microfiber cloths, several, for the housing, blade faces, and drying.
- Rubber gloves, because hot water and grease are the whole job.
- Optional: a kitchen degreaser spray, for heavy housing film, tested on a hidden spot first.
- A replacement charcoal filter, if your hood recirculates and the current one is due.
- The manual, for filter release, dishwasher guidance, and the charcoal schedule.
One thing to check now rather than mid job: how the filters release. Most slide toward one end against a spring or open with a small latch or loop, and knowing the motion before your hands are greasy saves fumbling overhead. Kit staged, towels down, breaker off: start the clock.
Step 1: Cut the power and clear the cooktop
Start with the two minute setup that makes everything after it safe and tidy. Switch the hood off at its controls, then go to the panel and switch off the breaker that feeds it. Every later step puts fingers, cloths, or a brush past the filter frames and near the blower, and the breaker is what guarantees the fan cannot start while they are in there. If you cannot identify the breaker with confidence, that is worth resolving before the filters come out rather than after; on a plug in unit inside a cabinet, unplugging it does the same job. Confirm the cooktop is off and cool, then lay old towels or a few sheets of newspaper across it and the counter within drip range. Grease filters coming out overhead will drip, and a soapy filter is slippery enough to escape.
Use the same two minutes to stage the job. Fill the sink, basin, or deep tray with the hottest water your tap delivers, squeeze in a generous shot of dish soap, and set the baking soda, brush, and cloths within reach, so the filters can go straight from hood to soak without a greasy tour of the kitchen. If your hood recirculates, set the replacement charcoal filter nearby too. Watch out for one understandable shortcut: doing this job right after cooking, while the hood is warm and the grease is soft. The softness is real, but a hot cooktop under your forearms is not worth it, and the hot water soak softens the grease just as well with the burners cold.
Step 2: Remove the grease filters
Stand where you can see the filter frames, and release them the way the manual or a quick look suggests: most metal filters slide a short distance toward a spring loaded end and then drop free, others have a latch, loop, or knob on the frame. Support each filter with your spare hand as it releases, because they come free suddenly, and tilt it flat as it comes down so pooled grease cannot run off an edge. Carry each straight to the soak. While the openings are empty, glance up into the hood with a flashlight: you are noting how much film sits on the interior surfaces and the visible fan, which decides how thorough Steps 5 and 7 need to be, and checking for surprises like a previous owner’s missing charcoal filter.
Expect the filters to look worse out than they did in place; matted gray mesh and tan drips are normal for an overdue hood, not a sign of ruin, and the soak handles them. Watch out for two small traps. First, note each filter’s orientation and position as it comes out, because some hoods use different sizes side by side, and a phone photo beats memory. Second, handle mesh filters by their frames: the aluminum mesh layers are soft, and a thumb pressed through the middle of a grease heavy filter can dent the layers enough to change how air flows through them. Filters in the water, and the clock on this job effectively pauses while chemistry works.
Step 3: Soak the filters in hot soapy water and baking soda
The soak is the heart of the job, and it works because kitchen grease is temperature sensitive: fats that hold like glue at room temperature soften and release in genuinely hot water, and dish soap’s surfactants then carry them off the metal. With the filters submerged in the hottest tap water and a good dose of dish soap, sprinkle roughly half a cup of baking soda over them slowly, a spoonful at a time, because it foams enthusiastically against the grease and dumping it invites an overflow. The baking soda adds mild alkalinity that helps saponify the grease and a gentle abrasive that will matter in the scrub. Then leave it alone for fifteen to thirty minutes, topping up with hot water if it cools noticeably.
For filters at the archaeology stage, matted solid, dripping, years since last cleaned, escalate the same chemistry rather than reaching for something harsh: the simmer pot method. Fill your largest pot with water and a few tablespoons of baking soda, bring it to a gentle simmer, and lower each filter in for two or three minutes per end, tongs recommended, since near boiling water melts and floats off buildup that a sink soak only softens. Watch out for two materials notes here. Keep the simmer gentle and brief for aluminum mesh, which dislikes prolonged aggressive treatment. And do not substitute oven cleaner or other strong alkalis for the soak on aluminum, which they can corrode and darken; no cleaner is safe on every filter material by default, so check the manual before anything stronger than soap meets your filters. Heat, soap, soda, and time: while they work, you clean the hood itself.
Step 4: Scrub and rinse the filters
Come back to the soak and the water will have gone convincingly gray brown, which is the point of it. Take each filter and work over both faces with the dish brush or a non-abrasive pad, following the run of the mesh or the line of the baffles rather than scrubbing across them, and let the softened grease roll off rather than trying to grind it off. The toothbrush earns its place along frame edges, in handle slots, and at the corners where mesh meets frame. For any patch that still feels tacky, a sprinkle of baking soda directly on the brush gives just enough grit, and a stubborn filter can simply go back into the water for a second soak. Repeat soaks beat force every time.
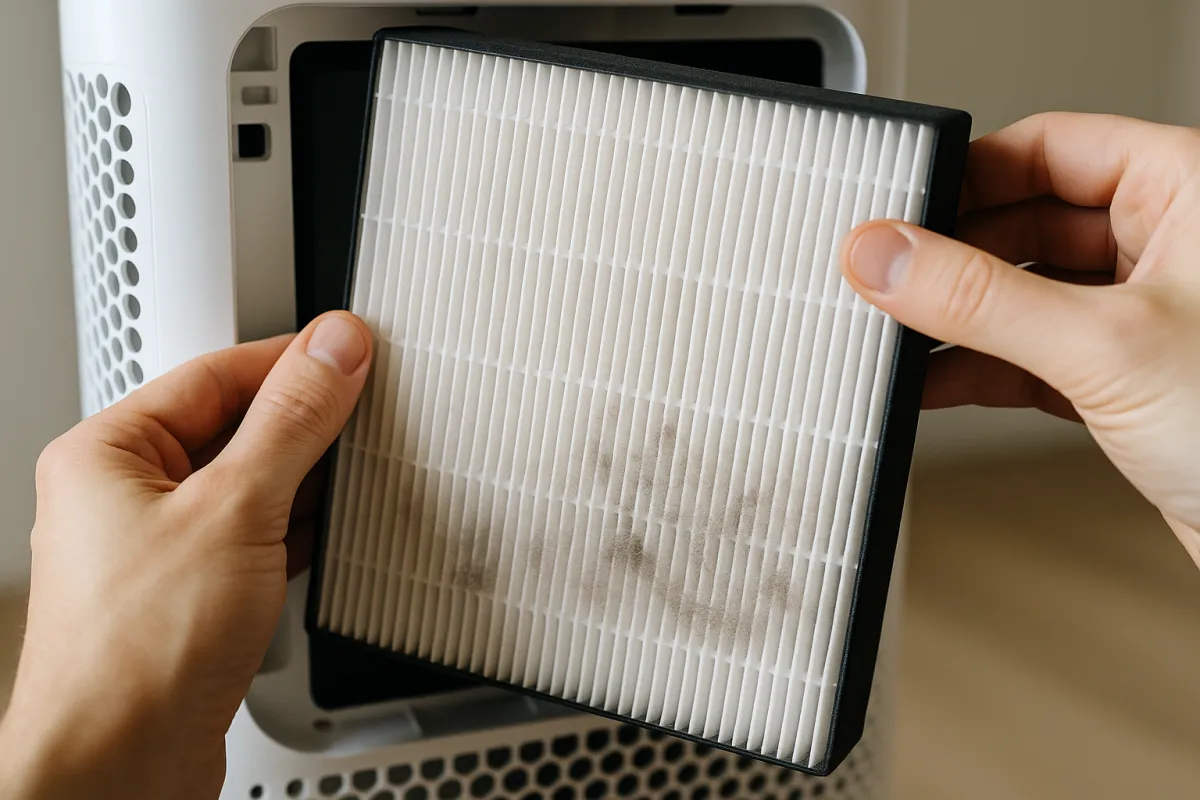
Rinse each filter under hot running water until the water sheets off clean and the metal squeaks rather than slides under a thumb. Then run the pass or fail check: hold the filter up to a window or light. A clean mesh filter shows daylight evenly across its face, and clean baffles show clear, bright channels; dull matted patches mean another soak round for that filter. Shake off the water and stand the filters to drain on a towel, since they finish drying in Step 8. Watch out for the dishwasher shortcut here without checking the manual: stainless baffles are commonly listed as safe for it, but aluminum mesh can come out permanently darkened, and the full trade offs are covered after the steps. Filters passing the light test, move to the hood they came from.
Step 5: Degrease the underside and housing
With the filters draining, the hood itself gets its wipe down, and the method is the same chemistry on a cloth: hot water with dish soap, wrung so it is damp rather than dripping, because you are working overhead around lights and a fan and nothing electrical wants a stream of water. Work across the underside first, the surfaces that face the cooktop, where settled aerosol builds its thickest film: around the filter openings, along seams and edges, over the light lenses once they are confirmed cool, and up the visible chimney or canopy. Refresh the cloth often, because the film transfers to it fast, and a saturated cloth just relocates grease.
For film that a soapy cloth smears rather than lifts, step up deliberately. A paste of baking soda worked with the cloth gives gentle abrasion, and a kitchen degreaser sprayed onto the cloth, never directly at the hood where overspray finds lamps, switches, and the cooktop, does the rest. Test any degreaser on a hidden patch first: no product is safe on every finish by default, strong alkalis can mark aluminum and some painted or coated housings, and the hidden patch is how you find out cheaply.
On stainless, finish by wiping along the grain with a clean damp cloth and then a dry one, which clears residue without scratching, and resist steel wool and scouring powder everywhere, since they scratch permanently what grease only temporarily dulls. The full grain and buff method is in our notes on cleaning stainless steel appliances. Watch out for the controls: wipe switches and touch panels with a barely damp cloth only, and keep liquid away from any seam it could run into. The kitchen facing surfaces done, the machinery inside is next.
Step 6: Replace a recirculating hood’s charcoal filter
If your hood is ducted, confirm it and skip ahead; this step belongs to recirculating hoods, and it is the one they most often miss. Behind or above the metal grease filters sits the charcoal filter, a cartridge, pad, or pair of round canisters of activated carbon, and its job is chemical rather than mechanical: it adsorbs smoke and odor molecules into microscopic pores as the air passes through. Those pores fill, and a filled charcoal filter is finished. It cannot be washed, soaked, or usefully revived, since water degrades loose charcoal media and a rinsed filter is a spent filter that is now also damp. Replacement is the only maintenance it takes, and skipped replacement is exactly why ductless kitchens drift back into holding onto every dinner’s smell.
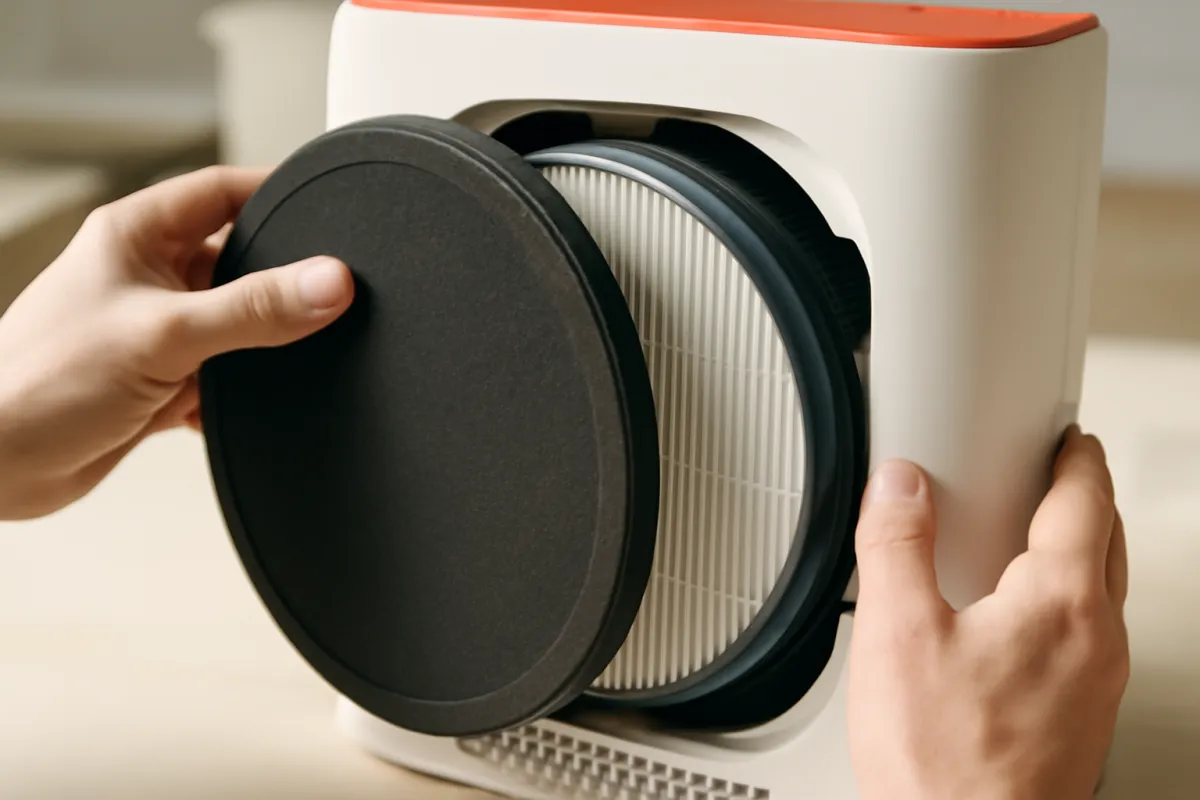
With the grease filters already out, the charcoal filter is accessible: most twist off a mount on the blower housing or unclip from a frame, with the motion printed in the manual. Check its state honestly, since a charcoal filter that smells strongly of old cooking when sniffed up close is telling you its pores are full, and fit the replacement that matches your model, seating or twisting it fully home so air cannot bypass around its edge. Set the schedule with the swap: manufacturers commonly suggest somewhere between every few months and a year depending on cooking volume, so a household that fries most nights leans to the early end of that range. Watch out for buying by eye rather than model number, since near fits that leave a bypass gap filter nothing.
Step 7: Wipe the fan blades and check the airflow path
Now the machinery, with the breaker still off from Step 1: this step is why the job started there. Through the filter openings you can usually see and reach the leading faces of the fan blades or the blower wheel. Wipe what you can comfortably reach with a damp soapy cloth wrapped over a finger or a long handled brush, turning the wheel gently by hand to bring each blade around. Caked blades matter twice: grease mass unbalances the wheel, which is the drone and rattle of a dirty hood, and a blunted blade profile moves less air. Do not force anything, do not take the blower housing apart, and do not remove any panel with wiring behind it. What you cannot reach through the filter opening is a job for a qualified appliance technician, not for improvisation with a screwdriver.
On a ducted hood, finish with the part of the air path you can actually see. The damper is the one way flap where the hood meets the duct, visible above the blower on most designs: it should swing freely and fall closed, and a flap glued half open or half shut with grease strangles airflow and lets outdoor air drift back in, so wipe its edges and pivot clean. If the duct exits through an outside wall nearby, glance at the exterior cap from safe ground level when convenient, because its flap or screen also mats with grease and lint over the years. Anything requiring a ladder at height or a roof is a different risk category and a different job. This is the same duct logic as the dryer vent’s annual clean, a path you cannot see doing work you only notice when it stops.
Step 8: Dry, refit, and set a degreasing schedule
Reassembly has one rule: everything goes back dry. Towel the filters and stand them until fully dry, because a damp mesh refitted into a dusty airstream pastes itself a head start on the next grease layer, and damp anywhere near the hood’s electrics is unwelcome regardless. Refit the charcoal filter first where one exists, then slide or latch the metal filters home in the positions and orientation your photo from Step 2 recorded, seating each fully so no bypass gap remains at the frames. Restore the breaker only once your hands are out and everything is dry, then run the fan briefly on each speed. It should sound smoother and pull noticeably harder at the filter face, which is the rare pleasure of an appliance visibly and audibly improved by an hour’s work.
Then close the loop the way every cleaning job here closes, with a schedule, because the hood re-greases at the rate you cook. The working rhythm for most kitchens: a quick wipe of the underside weekly with the cooktop cleaning, the filter soak about every six weeks for a household cooking most nights with mixed methods, sooner with heavy frying, the full routine including fan and housing quarterly, and the charcoal swap on its own reminder for ductless hoods. Put your cooking pattern into the degreasing schedule planner and it will pin the filter interval to your kitchen rather than to a generic number. Watch out for the trap of letting the schedule live in memory, where it reliably dies. The next section turns those intervals into five clocks that a phone can actually carry.
Range hood maintenance: the five clocks it runs on
The reason a hood ever reaches the archaeology stage is that owners treat cleaning as a single event with no calendar attached. Range hood maintenance is not one interval, it is five, and they run at wildly different speeds. Written out as clocks rather than as a to do list, the whole thing becomes about ten minutes of attention a week plus one hour four or five times a year, which is a smaller commitment than most people assume they are avoiding.
Every cook. Switch the hood on before the pan gets hot rather than when smoke appears, match the speed to what you are cooking, and leave it running a few minutes after the burners go off. This is the only clock that costs nothing and changes everything downstream, because a hood that captures the aerosol is a hood whose washable filters take the load instead of your ceiling.
Weekly. Wipe the underside and the front edges with a hot soapy cloth while you clean the cooktop. Thin film comes off in seconds; the same film left for a quarter needs a paste and pressure.
On your filter interval, roughly two to twelve weeks. The full soak, scrub, rinse, daylight test, and dry from Steps 2 to 4. The chart further down sets the starting number by cooking style, and the planner tunes it to your own week.
Quarterly. The complete routine: filters, the housing degreased properly, the reachable fan blade faces wiped with the breaker off, and a ducted hood’s damper checked for free movement. Add the light lenses, because hood lamps sit directly in the grease stream and haze over long before a bulb fails, which people read as a dim kitchen rather than as a maintenance item; wipe them with the power off and the lamps cold, and treat a bulb change itself as a manual question, since some hoods make it a user swap and others do not. This is the clock that catches the things a filter soak alone never touches.
Annually. Look at the exterior cap from safe ground level, confirm the hood is still tight to its mounting and that its release springs and latches still hold, and check the filter frames for warping or a bent mesh that no longer seats flush. Seating is the reason that check earns a minute: a filter that has been dented, bent, or refitted the wrong way round leaves a gap at the frame, air takes the gap because it is the path of least resistance, and the grease then bypasses the trap and lands on the housing and the blower instead. Replace any filter that no longer passes the daylight test after two soaks. Ductless hoods carry a sixth, overlapping clock here: the charcoal swap on the manufacturer’s own schedule.

The delivery mechanism matters as much as the intervals. A recurring calendar entry for the filter interval and a second one for the quarterly routine will outperform any amount of good intention, and the charcoal swap deserves its own entry with the model number written into the note, because that is the detail that stops the reminder turning into a shopping expedition. The degreasing schedule planner will give you the two numbers to put in those reminders. Our appliance maintenance plan is where a hood’s clocks slot in beside everything else in the house that runs on a calendar.
Where the job stops, and the rules that never bend
It is worth being explicit about the boundary, because a range hood is an electrical appliance mounted over an open flame, and the line between homeowner work and technician work is not a matter of confidence. What you can reach and clean safely, with the breaker off, is a short and complete list: the metal grease filters, the charcoal filter on a ductless hood, the entire underside and the exterior of the canopy or chimney, the light lenses, the control panel with a barely damp cloth, the faces of the fan blades or blower wheel that are visible and reachable through the filter opening, and the damper flap where it is directly visible above the blower.
What is not homeowner work, regardless of how simple a video makes it look: removing the blower housing or pulling the fan wheel off its shaft, taking off any panel that exposes wiring, touching the motor, the wiring harness, the terminal block, or the control board, and reaching into ductwork inside a wall, a ceiling, or a roof. Those are not arbitrary limits. A blower wheel is balanced and secured in ways that are easy to disturb and hard to restore, wiring above a cooktop lives in a hot and greasy environment where damaged insulation is a genuine hazard, and duct interiors are not accessible without the right equipment.
The routing is equally simple. Anything mechanical or electrical behind the filter opening goes to a qualified appliance technician, who can pull the blower properly, test the motor and the switch, and put it back balanced. Anything inside the duct run goes to a duct or kitchen exhaust cleaning service, which has the access ports, brushes, and vacuum equipment the job actually needs. Neither call is an admission of defeat; both are cheaper than the alternatives, and the cleaning routine in these notes is what keeps them rare.
There is one useful middle position. If a hood is clean at every reachable point and still weak, do the diagnosis before you book anyone: confirm the filters pass the daylight test, the charcoal is fresh on a ductless hood, the damper swings free, and the exterior cap flap moves. Arriving at the call with those four already eliminated is what turns a vague service visit into a short one.
Five rules carry the safety weight inside that boundary, and none of them has an exception attached.
- The breaker is off before anything goes past the filter frames. Not the control panel, not the remote, not a promise that nobody will touch it. The fan must be electrically incapable of starting while your hand is near the blades, and the power stays off until everything is dry and reassembled.
- The cooktop is cold and covered. Every burner off, the surface cool to the back of a hand, and towels or paper over it. You will be reaching over it repeatedly with wet hands and slippery metal.
- Nothing electrical gets wet. No spray toward lamps, switches, the control panel, the motor, or any seam that liquid could run into. Cleaner goes onto the cloth, never onto the hood, and the cloth is wrung out rather than dripping.
- Never mix cleaning products. Combining chlorine bleach with an ammonia based cleaner produces chloramine gases, and combining bleach with an acidic cleaner releases chlorine gas; both are genuinely dangerous in an enclosed kitchen. Use one product at a time, rinse between them, and do not improvise mixtures because a stain is stubborn.
- Stop at damage or at the housing. Scorched or cracked insulation, a burning smell, a breaker that trips when the hood starts, water or grease that has reached wiring, a fan that hums without turning, or any repair that needs the blower housing or a wiring panel opened all end the session and start a call to a qualified appliance technician.
Two more sit alongside them. Strong alkaline products, including conventional oven cleaner, can corrode and darken aluminum, so as a general rule they have no place on aluminum mesh filters or trim; no product is safe on every finish by default, the manual is what settles it for your hood, and anything you do use is tested on a hidden patch before it meets a visible finish. And accumulated grease over open burners is a real fire consideration, which is an argument for keeping the routine rather than a reason for alarm about owning a hood: a thin hood is a safe hood.
Grease in the ductwork, and why that is not a cleaning job
Everything the filters miss ends up somewhere, and on a ducted hood some of it ends up lining the duct. That is normal and slow in a domestic kitchen with filters kept clean, and it is the reason the filter interval matters more than any other number on this page: the filters are the only thing standing between your cooking and the inside of a pipe you cannot reach. A duct run that has taken years of unfiltered grease is a genuinely different situation from a dirty hood, and it is not something a homeowner cleans from the kitchen end with a cloth on a stick.
The reasons are practical. Most residential duct runs turn corners, rise inside walls or between joists, and terminate at a cap on an outside wall or a roof, so the great majority of the run is simply not accessible without opening something. Pushing tools blindly up a duct can dislodge a damper, damage a joint, or drive debris further in. And grease that has hardened onto duct wall over years does not respond to the chemistry that works in a sink. A duct or kitchen exhaust cleaning service brings access, brushes, and containment; that is the correct call, and for most domestic kitchens it is a rare one.
The commercial style case deserves its own paragraph, because it is where this stops being a housekeeping question. Kitchen exhaust systems over commercial cooking equipment are typically governed by fire code, with periodic professional cleaning and documentation required rather than recommended, and the reason is straightforward: a grease lined duct above a high output burner is a fuel path. If you have a genuinely commercial style range in a home, a long or complex duct run, or you cook at commercial volumes, treat the duct as a scheduled professional item and ask your local fire authority or a certified kitchen exhaust cleaning contractor what actually applies to your setup. Requirements vary by jurisdiction and by installation, so the honest answer here is a pointer rather than a rule.
For the ordinary domestic case the takeaway is more encouraging: neglect is what creates duct jobs, and a hood maintained from the start rarely needs anything done to its duct beyond the exterior cap check. The same logic drives the dryer vent rotation, where a lint trap emptied every load is what keeps the duct behind it uneventful.
Can range hood filters go in the dishwasher?
The dishwasher question deserves its own straight answer because it is the shortcut everyone wants and the manual note everyone skips. The split runs on material. Stainless steel baffle filters, the rigid ridged panels in better and pro style hoods, are commonly listed as dishwasher safe and generally come out excellent on a normal cycle; for these, the dishwasher is a legitimate routine method, and the manual will usually say so outright. Aluminum mesh filters, the soft layered screens in most standard hoods, are the caution case: dishwasher detergents are chemically hard on aluminum and can permanently darken, dull, or white spot the metal, which is cosmetic rather than a failure but not something you can undo. Hand washing is the usual default for mesh and the manual is the only thing that settles it for your filters, and an owner who machine washes aluminum anyway should choose a gentle cycle, skip harsh detergent, and accept the risk knowingly.
Two practicalities apply either way. Run filters in the dishwasher alone, not alongside dinner plates, because the grease load they release has to go somewhere and the dishwasher’s own filter will be doing the receiving, a fact to remember at dishwasher cleaning time. And place them so spray reaches both faces without the frames blocking the arms.
Know also what the dishwasher cannot do. It does not touch a charcoal filter, which is never washed by any method. It does not rescue a years neglected filter in a single cycle, so rescue by hand first and maintain by machine after if your filters qualify. And it does not settle the question for your model, which only the manual does. When a label, a habit, and a manual disagree, the manual wins.
When to replace a filter instead of cleaning it
A metal grease filter is a consumable with a long life rather than a permanent fitting, and knowing when it has reached the end saves a lot of pointless scrubbing. The test is the same daylight check from Step 4, applied after the soak rather than before it. A filter that comes out of two proper soaks still showing matted, opaque patches has grease that has carbonized into the mesh, and no amount of further brushing will bring it back. That is a replacement, not a failure of technique.
The physical failures are easier to spot. A mesh filter with a dent through the middle, a bow that stops it seating flush, or a delaminated corner where the layers have separated is no longer trapping properly, because air will slip around and through the damaged section rather than taking the direction changes that fling droplets onto metal. A baffle filter with a split seam or a bent channel has the same problem in a different form. A frame with a broken tab or a failed spring latch is worth replacing too, because a filter that does not lock in place will rattle and eventually drop.
Buying is simple and the rule is a single one: replace by model number, not by tape measure. Hood filters vary in thickness and in the geometry of their tabs as well as in their outer dimensions, and a near fit that leaves a gap at the frame is worse than the tired filter you took out, because bypass air is unfiltered air heading straight for the blower. The manual carries the part reference, and the number is often printed on the filter frame itself, which is worth photographing while it is out. Our notes on how long appliances last put a hood’s own service life in context alongside the rest of the kitchen, since a filter reaching its end is a normal event and a hood reaching its end is a different conversation. These notes do not quote filter prices, because they vary by hood type and region and a made up figure would help nobody; the useful comparison is that a replacement filter is a minor cost against a service call for a grease loaded blower.
A worked example: a frying household’s hood revival
Run the routine through one illustrative kitchen to see the timing and the payoffs land together. Picture a family that cooks six nights a week with a lot of pan frying, under a standard recirculating hood whose aluminum mesh filters have gone about a year without attention: dinner smells last into the next morning, smoke from searing curls past the hood face, the fan drones, and there is a tacky film on the cabinet tops beside the chimney. That is every sign at once, so the full routine runs. Breaker off, cool cooktop toweled, sink filled hot with dish soap, and both mesh filters released into the water, where a slow half cup of baking soda foams hard against a year of grease.
While the soak works, twenty five minutes with a top up of hot water, the underside and canopy take a soapy cloth and a baking soda paste on the worst film, the switches get a barely damp wipe, and the reachable blower blade faces give up a surprising gray edge of caked grease to a cloth over a finger. The charcoal cartridges, sniff tested and frankly announcing themselves, twist off and the matching replacements twist on. The filters scrub with the dish brush along the mesh, take one ten minute second soak for a stubborn center patch, rinse hot, and pass the daylight test. Everything dries, refits, and the fan’s top speed sounds lower pitched and pulls a paper towel flat against the filter face.
Elapsed: a little over an hour, hands on around forty minutes, with consumables amounting to a few cents of soap and baking soda plus the charcoal cartridges. The schedule that follows it is the part that keeps the revival permanent. At six cooking nights a week of heavy frying, the planner puts this kitchen’s filter soak at about every three weeks, roughly seventeen soaks a year, with the charcoal swap at about every three months, the early end of the few months to a year range that heavy frying justifies, and the manual overriding that if it names its own interval. These numbers are an illustrative walkthrough rather than a measured test, and the same arithmetic in the degreasing schedule planner will produce different ones for a kitchen that boils more than it fries.
How often to clean a range hood
Frequency runs on one variable: how much aerosolized grease your cooking produces. Boiling and baking produce little; pan frying, searing, and wok cooking produce a lot, and the hood’s filters receive nearly all of it. The chart below turns that into illustrative starting intervals for the filter soak, the job whose timing matters most, and the other clocks key off it: underside wipe weekly, full housing and fan routine roughly quarterly, charcoal on the manufacturer’s schedule for ductless hoods.
Illustrative filter degrease interval by cooking style
Commonly used starting intervals between range hood filter soaks, in weeks, for a household cooking most nights. Bars scale with the weeks. Lighter cooking stretches every bar.
Intervals are illustrative starting points; the filter's own daylight test outranks the calendar. The underside wipe stays weekly and the full routine quarterly across all rows.
Calibrate the same way as any interval here: start at your row, then let evidence move it. The filter is its own gauge, so hold it to the light at the scheduled soak, and if it is barely hazed, stretch the interval a couple of weeks; if it is matted early, shrink it. Two asymmetries are worth respecting. Cleaning early is cheap, because a lightly greased filter soaks clean in fifteen minutes with no scrubbing, while cleaning late is expensive in exactly the ways this whole job exists to prevent: migrated grease on cabinets, embedded smells, and a blower working against a wall.
And the charcoal schedule, where one exists, never stretches on visual evidence, because saturation is invisible. It runs on the calendar and the sniff test instead. On the typical mixed cooking row, six weeks between soaks works out at about nine soaks a year, which is the number worth putting into a reminder rather than the vague sense that it is probably due. The degreasing schedule planner does this arithmetic from your cooking pattern; the reminder app does the rest.
What the routine costs to run
Two costs sit around this job and both are small, which is worth saying plainly rather than dressing up. The consumables are soap, baking soda, and cloths you already own, amounting to a few cents per soak, plus the charcoal filter on a ductless hood, which is priced by model and not quoted here because an invented figure would be worse than none.
The electricity is the more interesting one, because it is where an assumption usually goes wrong. Put the site’s standard illustrative figures on it. Take a hood fan drawing about 150 watts, which is 0.15 kilowatts, run for an hour a day across a 30 day month: that is 4.5 kilowatt hours, or roughly 72 cents a month at an illustrative 16 cents per kilowatt hour, which is somewhere under nine dollars across a year. Those are planning numbers rather than measurements; your hood’s own draw is on its rating plate and your rate is on your bill in cents per kilowatt hour. The method behind that arithmetic, kilowatts times hours times rate, is worked through properly in our appliance wattage and running cost reference.
Here is the part worth understanding. A blocked filter does not send that number climbing the way a blocked filter does on a heating or cooling appliance. A hood fan working against a restriction moves less air, and a fan moving less air is not drawing runaway power, so the cost of neglecting a hood does not show up on the electricity bill in any meaningful way. It shows up instead as grease on cabinets and paintwork, embedded smells, a blower wearing itself out unbalanced, and eventually a service call. That is a genuinely different failure mode from the one behind a dirty window air conditioner, where restricted airflow really does buy you extra compressor hours and a visible bill.
So the honest framing is that a clean hood saves you money in the way maintenance usually does, by deferring damage and repairs rather than by trimming a monthly line item. If the bill is what brought you here, the electric bill reduction notes put a range hood in its correct and modest place among the levers that actually move a household’s consumption.
How to slow the grease buildup
Prevention for a range hood means putting less grease into the air and catching more of what goes up, and a few habits do both. The biggest is using the hood properly, which most kitchens do not: switch it on before the pan gets hot, not when the smoke appears, run it at a speed matched to the cooking rather than the noise you will tolerate, and leave it running a few minutes after the burners go off to clear what is still rising. A hood that runs correctly loads its own filters instead of letting the kitchen do the filtering, which sounds like more cleaning but is precisely the trade you want: filters soak clean in a sink, ceilings do not.
On the pan side, lids and splatter screens over frying cut the aerosol at the source, back burners feed the hood’s strongest capture zone better than front ones, and moderating heat below the smoke point of your oil produces dramatically less airborne residue as well as better food. Keep the weekly underside wipe attached to the cooktop cleaning you already do, because thin films wipe in seconds and never age into paste. And in a ductless kitchen, crack a window during heavy frying to give heat and moisture an exit the charcoal cannot provide.
None of these habits adds real effort, and together they do the one thing a calendar cannot: they move a household down a row on the interval chart, because less aerosol reaching the hood is exactly what a longer interval represents. In an illustrative kitchen cooking five nights a week, that is the difference between the heavy frying row at three weeks and the mixed cooking row at six, which is roughly nine soaks a year instead of seventeen, and between a hood that protects the kitchen and a kitchen that protects the hood.
Maintaining a hood you have just inherited
Moving into a kitchen whose hood has an unknown history is its own small project, and it is worth doing once, properly, before you set any schedule at all. Start from the assumption that nothing has been done, because the two most common inherited faults are both invisible: a charcoal filter that has never been replaced in a ductless hood, and a grease filter that was washed once, refitted damp, and left. Neither shows up as an obvious fault; both show up as a kitchen that smells and a fan that seems weak for no reason.
Run the full eight step routine as a baseline, and add three checks while everything is out. Find out whether the hood is ducted or recirculating, which the manual settles and which the previous owner may have been wrong about, since the conversion between the two is a common retrofit. Look for a charcoal filter and note whether one is fitted at all, because an empty charcoal mount on a ductless hood is common and explains everything about the smell. And photograph the model number and the filter part reference from the frame while you have them in your hands, so the first replacement is a two minute order rather than an investigation.
Then set the clocks from your own cooking rather than from whatever the previous household did, since the whole point of the interval is that it tracks the grease you personally make. Run the first soak on a short interval, three or four weeks, and look at the filter honestly at that point: if it is barely hazed, stretch it; if it is matted, you have your answer about how the kitchen behaves. Two cycles of that and you have a real number instead of an inherited habit, which the degreasing schedule planner will hold for you.
Common mistakes when cleaning a range hood
The failure modes here are consistent enough to list, and skipping them is most of doing the job well.
- Cleaning the hood but never the filters, or vice versa. The filters are the trap and carry most of the load; the housing and fan carry the rest. Both layers, every full routine.
- Cold water and cold spray scrubbing. Kitchen grease releases with heat; without it, every method smears. The hottest tap water you can run is the cheapest product in the job.
- Working with the hood still live. Blades and fingers share this job’s only real hazard, and the breaker removes it. Power off before anything reaches past the filter frames.
- Oven cleaner or harsh alkalis on aluminum. Mesh filters and aluminum trim corrode and blacken permanently. Soap, soda, and heat achieve the same clean without the chemistry accident.
- Dishwashing aluminum mesh unaware. Stainless baffles usually tolerate the machine; aluminum can come out darkened for good. The manual’s word decides, and filters ride alone when they do go in.
- Washing a charcoal filter. Charcoal is a replacement part, and water finishes it off. Swap on schedule, by model number, seated with no bypass gap.
- Refitting damp or bent filters. Damp mesh pastes dust into instant grime, and a bowed filter leaves a bypass gap that sends unfiltered air straight at the blower.
- Going past the filter opening. Blower housings, wiring panels, and duct interiors are not cleaning territory. That is where the job stops and a technician’s starts.
- Treating it as a someday job. The hood re-greases at cooking speed. The recurring reminder, tuned by the planner, is the actual fix.
Nine avoidable errors, and every one of them is cheaper to skip than to commit; the routine itself is only soap, heat, and an hour.
Troubleshooting: harder range hood problems
The routine handles the standard case; these are the judgment calls that come up after it.
What if the filters will not come clean even after repeat soaks? Years carbonized grease can pass beyond soaking. Try the simmer pot escalation once more, but weigh the alternative honestly: replacement mesh and baffle filters restore airflow completely and reset the schedule with new metal, ordered by model number as the replacement section above describes. A filter is a consumable that lasts years with care, not an heirloom.
What if the hood is clean but still weak? Work outward: charcoal filter fresh and seated, filters flush with no bypass gap, blower blade faces clean as far as reachable, damper swinging free, exterior cap flap moving. If all pass, the motor may be tiring, or the hood was always undersized or mounted too high for the cooktop; both are equipment questions rather than cleaning ones, and the first is a technician’s call.
What if the fan is loud after cleaning? A little residual unbalance from partial blade cleaning is the usual cause, and a second, more thorough pass with the wheel turned fully around usually settles it. A metallic scrape, or a rattle that changes with speed, suggests the wheel is loose on its shaft or the motor bearings are worn. Both are service territory, and neither is fixed by taking the housing apart yourself.
What if grease drips from the hood between cleanings? The interval is too long for your cooking, full stop, and drips are the overflow signal. Halve the filter interval, add the weekly underside wipe, and check the filter frames are seated so grease is not bypassing the mesh and condensing on the housing instead.
What if the kitchen still smells with a clean ducted system? Check where the duct actually goes, since some installations terminate into a cabinet or an attic space rather than outside, and a blocked or grease glued exterior flap holds air in the run. Persistent odor with true outside venting and a clean hood usually means capture is the problem: run the fan earlier, longer, and on a higher speed while cooking. If the run itself is suspect, that is a duct cleaning service or an installer question, not a cloth on a stick.
What if the hood trips the breaker, hums, or smells electrical? Stop the session there. A hood that trips its breaker on start, hums without the fan turning, or produces any burning or electrical smell has a fault behind the filter opening, and that is a qualified appliance technician’s work rather than a cleaning problem. Leave the breaker off until it has been looked at.
Your range hood maintenance checklist
Save the list, run it by clock, and the hood stays the quiet workhorse instead of the greasy ceiling ornament.
- Every cook: hood on before the pan heats, speed matched to the cooking, run on for a few minutes after; lids and screens over frying.
- Weekly: wipe the underside and edges with a hot soapy cloth alongside the cooktop cleaning; barely damp cloth only on switches and panels.
- On your filter interval, two to twelve weeks by cooking style: breaker off, cooktop toweled, filters soaked in the hottest water with dish soap and a slow half cup of baking soda, scrubbed with the mesh, rinsed hot, daylight tested, dried, refitted flush.
- Quarterly: the full routine, housing degreased, reachable fan blade faces wiped with the breaker off, light lenses cleaned, damper checked on ducted hoods.
- Annually: exterior cap checked from safe ground level, filter frames checked for warping and seating, mounting checked for movement, worn filters replaced by model number.
- On the manufacturer’s schedule, ductless hoods: charcoal filter replaced by model number, seated fully, reminder reset; never washed.
- Always: breaker off before anything goes past the filter frames, no oven cleaner or harsh alkalis on aluminum, no abrasives on stainless, no mixing of products, nothing opened that has wiring behind it, and the manual consulted before any dishwasher pass.
Set the filter line’s interval with the degreasing schedule planner, pair the quarterly routine with the oven’s deep clean so the kitchen’s two grease jobs share one afternoon, and let the reminders carry it from there.
The bottom line
Range hood cleaning is an hour of mostly soak time that pays back across the whole kitchen: filters out and into the hottest tap water with dish soap and a slow half cup of baking soda, a scrub with the mesh and a rinse to the daylight test, the underside and housing degreased with the same chemistry on a cloth, the reachable fan blade faces wiped with the breaker off, a ducted hood’s damper checked, and a ductless hood’s charcoal filter replaced, never washed, on its own calendar. Range hood maintenance is what turns that hour into a routine rather than a rescue, and it runs on five clocks: every cook, weekly, your filter interval, quarterly, and annually. The grime arrives at cooking speed, so the schedule is the real product: about every six weeks between soaks for typical mixed cooking, about three with heavy frying, tuned by the filter’s own daylight test. Use the hood properly, early, at a matched speed, with a run on after cooking, and it loads its washable filters instead of your cabinets, which is the entire bargain: an hour with the sink now, or the whole kitchen later.
A note on scope: these notes describe a general routine for cleaning and maintaining typical household range hoods and are educational only, not professional advice; every interval, quantity, and figure here is an illustrative planning number rather than a measurement of any model, and your hood’s manual outranks anything written here, particularly on filter release, dishwasher tolerance, charcoal filter schedules, and what a user is permitted to touch. The firm points: cut power at the breaker before hands, cloths, or brushes go past the filter frames, work only over a cold cooktop, keep liquid away from lamps, wiring, and controls, keep strong alkalis off aluminum, and use one cleaning product at a time. Accumulated hood grease is a genuine fire consideration over open burners, which is a reason to keep the routine rather than a cause for alarm about owning a hood. Motors, wiring, blower housings, and control boards belong to a qualified appliance technician, ductwork inside walls, ceilings, or roofs belongs to a duct or kitchen exhaust cleaning service, and commercial style exhaust systems are governed by fire code requirements that your local fire authority, not a cleaning walkthrough, is the right source for.
Frequently asked questions
How do I clean a range hood?
Work top down through its three layers: the filters, the underside, and the airflow path. Switch the hood off and cut its breaker, slide or unclip the metal grease filters out, and sink them in the hottest tap water you can run with a generous squirt of dish soap and a slow half cup of baking soda, then let them soak fifteen to thirty minutes before scrubbing with a non-abrasive brush, rinsing, and drying. While they soak, wipe the hood's underside and housing with a warm soapy cloth, working the corners and the area around the fan intake where the film is thickest, and clean the visible fan blade faces gently with the power still off. A recirculating hood also gets its charcoal filter replaced on schedule, since charcoal cannot be washed. Refit everything dry. The whole job runs about an hour, most of it soak time.
How do I clean greasy range hood filters?
Heat, soap, and patience are the method: kitchen grease that laughs at a cold wipe releases readily in genuinely hot water with a degreasing dish soap. Fill the sink or a deep tray with the hottest water you can manage, add a good squirt of dish soap, and sprinkle in about half a cup of baking soda slowly, since it foams against the grease. Submerge the filters and let them soak fifteen to thirty minutes, topping up with hot water if it cools, then work over both faces with a dish brush or non-abrasive pad following the mesh direction, and rinse hot until the water sheets off clean. Badly neglected filters may need a second soak or a simmer pot treatment: a large pot of water with baking soda brought to a gentle simmer, filters lowered in for a few minutes each end. Dry fully before refitting so dust cannot paste onto damp mesh.
Can range hood filters go in the dishwasher?
Many can, and the manual settles it per model. Stainless steel baffle filters are commonly listed as dishwasher safe and come out well on a normal cycle. Aluminum mesh filters are the caution case: dishwasher detergent is aggressive toward aluminum and can permanently darken or dull the metal, which is a cosmetic change rather than a failure but not one you can undo, so aluminum filters are usually hand washed in hot soapy water, and an owner who machine washes them anyway should expect possible discoloration and use a gentle cycle without harsh detergent. Run filters through on their own rather than with a load of dishes, since the grease they shed has to go somewhere. And a dishwasher pass does nothing for a charcoal filter, which is never washed, only replaced. When the manual and a habit disagree, the manual wins.
How often should I clean a range hood filter?
Match the interval to how much aerosolized grease your cooking makes. A commonly used baseline is a filter degrease about every six weeks for a household that cooks most nights with a mix of methods, stretching toward twelve weeks for light cooking with little frying, and tightening to about three weeks for heavy frying or searing and about two for daily wok or deep frying. The filter itself is the best gauge: hold it up to the light, and a clean filter shows daylight through the mesh while a due one looks matted and drips in waiting. The hood's underside earns a quick wipe weekly when you clean the cooktop, a full clean of housing and fan is a quarterly job, and a recirculating hood's charcoal filter is replaced on the maker's schedule, commonly a few months to a year. Steam, lingering smells, and a hood that no longer catches smoke all mean the interval is too long.
What does range hood maintenance involve?
More than the clean, though the clean is most of it. Range hood maintenance runs on five clocks. Every cook, the hood goes on before the pan heats and runs on for a few minutes after. Weekly, the underside gets a soapy wipe alongside the cooktop. On your filter interval, roughly two to twelve weeks by cooking style, the metal filters get their soak, scrub, rinse, and daylight test. Quarterly, the housing is degreased, the reachable fan blade faces are wiped with the breaker off, and a ducted hood's damper is checked for free movement. Annually, the exterior cap is looked at from safe ground level, the filter frames and their seating are checked for warping, and worn out filters are replaced rather than soaked again. Ductless hoods add the charcoal filter swap on the manufacturer's own schedule. Motor, wiring, blower housing, and duct interiors are not on that list; they belong to a qualified technician.
When should I call a technician for a range hood?
Whenever the fix sits behind the filter opening. A metallic scrape, a rattle that changes with fan speed, a fan that hums without turning, a burning smell, scorch marks, a breaker that trips when the hood starts, controls that behave erratically, or water or grease that has reached the wiring all end the cleaning session and start a phone call to a qualified appliance technician. The same applies to anything requiring the blower housing to come apart or a panel with wiring behind it to come off, which is not homeowner work regardless of how reachable it looks. Ductwork inside a wall, ceiling, or roof is a separate trade: a duct or kitchen exhaust cleaning service has the access and equipment for it. Grease laden ductwork above a commercial style range is a fire code matter in most jurisdictions rather than a weekend job, so ask your local fire authority what applies before assuming it is optional.
What dissolves kitchen grease best?
For routine cleaning, hot water with a degreasing dish soap is genuinely the best first tool: dish soap exists precisely to break down cooking fats, and heat softens the grease so the surfactants can lift it. Baking soda adds gentle alkalinity and mild abrasion, which is why the hot water, soap, and baking soda soak is the standard filter treatment. For heavier film on housings, a kitchen degreaser applied to a cloth works quickly, and it belongs on a hidden test patch first, because strong alkalis can mark aluminum and some painted or coated finishes and no product is safe on every finish by default. What to avoid: abrasive powders and steel wool, which scratch stainless permanently, and conventional oven cleaner on aluminum filters or trim, which corrodes and blackens them; treat oven cleaner as a last resort anywhere on a hood and check the manual first. Never combine cleaning products, and finish stainless by wiping along the grain with a damp cloth and drying.
Do charcoal filters in a recirculating hood need replacing?
Yes, on a schedule, and this is the most missed maintenance task in kitchens with ductless hoods. A recirculating hood cannot send air outside, so after the metal filter catches grease, a charcoal or carbon filter adsorbs smoke and odor molecules before the air returns to the room. Charcoal works by filling up its microscopic pores, and once saturated it simply stops adsorbing: the hood still moves air, but smells pass straight through, which is why a ductless kitchen gradually starts holding onto cooking odors again. Charcoal cannot be washed or baked back to life in any way worth trusting; it is a replacement part. Manufacturers commonly suggest replacement somewhere between every few months and a year depending on cooking volume, so check your model's guidance, buy the matching filter by model number, and put the swap on a recurring reminder alongside the filter degrease.
Why is my range hood not sucking air well?
Run down the airflow path in order, because each stage can choke it. The most common cause is the simplest: grease matted metal filters, which block flow like a closed door and fix with a soak and scrub. Next is a saturated charcoal filter on a recirculating hood, which adds resistance and stops odor capture, and is replaced rather than cleaned. Behind those sit the fan blades or blower wheel, where caked grease unbalances the wheel, makes noise, and cuts the air it can move; wipe the faces you can reach with the breaker off and leave the rest to a technician. On a ducted hood, check the path you can see: a stuck or grease glued backdraft damper, or a blocked exterior flap, will strangle flow. If the hood is clean end to end and still weak, the motor may be tiring, or the hood was undersized or mounted too high for the cooktop in the first place, which is an equipment question rather than a cleaning one.