What's on this page
- Why cleaning your oven matters
- Signs your oven needs cleaning
- Before you start: what you need
- Step 1: Empty the oven and pull out the racks
- Step 2: Soak the racks in hot soapy water
- Step 3: Scrape and vacuum out the loose debris
- Step 4: Mix and spread a baking soda paste
- Step 5: Let the paste sit, ideally overnight
- Step 6: Wipe out the paste and finish with vinegar
- Step 7: Clean the oven door and glass
- Step 8: Scrub the racks, dry, and refit everything
- Should you use the self-clean cycle?
- What about oven cleaner sprays?
- A worked example: one overnight oven rescue
- How often to clean an oven
- How to keep an oven cleaner for longer
- Common mistakes when cleaning an oven
- Troubleshooting: harder oven problems
- Your oven cleaning checklist
- The bottom line
Short answer: Clean an oven by emptying it, soaking the racks in hot soapy water, spreading a baking soda paste over the interior, leaving it for several hours or overnight, wiping it out, and finishing with a diluted vinegar mist. Contact time beats scrubbing force on carbonized grime, and the method costs about a dollar. Keep paste off bare heating elements and the door gasket, and deep clean about every three months.
Learning how to clean an oven is the fix for the smoke on preheat, the acrid smell that creeps into everything you bake, and the brown-glazed door you can no longer see through, and the best method costs about a dollar in baking soda and does most of its work overnight while you sleep. The oven is the appliance people put off cleaning longest, partly because the grime looks welded on and partly because the harsh-spray alternative smells like it is dissolving more than the grease. Both instincts are half right: baked-on oven grime really is carbonized and will not wipe off, and lye-based sprays really are aggressive chemistry. The good news is that patience substitutes for harshness, because a simple paste given hours of contact time softens what no quick scrub can touch.
These notes give you a clear, step-by-step method for cleaning an oven: emptying it and soaking the racks, scraping the loose debris, spreading a baking soda paste and leaving it overnight, wiping out, finishing with vinegar, and restoring the door glass. We also cover the self-clean cycle honestly, when a spray cleaner makes sense and where it never does, how often to repeat the job, and the habits that keep the next clean small. The oven’s partner in kitchen grime is the hood above it, so pair this job with our walkthrough on how to clean a range hood, and see the eight-point appliance maintenance plan for how it fits the whole-home routine. Feed how often you cook and how splattery it gets into the cleaning-schedule planner as you read, and it will tell you how often the deep clean comes around.
Key takeaways
- Oven grime is baked-on and carbonized, so contact time beats scrubbing force: a baking soda paste left overnight softens what a quick scrub cannot.
- The core method is empty the oven, soak the racks in hot soapy water, paste the interior, wait hours or overnight, wipe out, and finish with a diluted vinegar mist.
- Keep paste and sprays off the bare heating elements and the door gasket, and never use chemical oven cleaner in a self-cleaning oven unless the manual allows it.
- The self-clean cycle works but stresses the oven with extreme heat and produces fumes, so wipe out debris first, ventilate well, and use it occasionally rather than routinely.
- Plan a deep clean about every three months for a typical cooking household, wipe spills once the oven cools, and clean the door glass monthly so buildup never gets ahead of you.
Why cleaning your oven matters
Before you clean anything, it helps to know what you are removing, because oven grime is not one substance and the parts of the job target different layers. Every roast and bake throws off aerosols of fat that condense on the walls and door as a sticky film, and every bubbling dish drops spills onto the oven floor. Heat then transforms both: with each preheat, the film and the spills bake harder, darken, and carbonize into the glassy brown-black glaze that a sponge slides straight over. Sugar spills from pies and casseroles burn fastest and smell worst. The stacked bar below shows an illustrative split of what builds up inside a neglected oven, and it explains why a wipe-down alone never gets an oven clean.
What builds up inside a neglected oven
An illustrative split of the grime that collects in a regularly used, rarely cleaned home oven. Segments sum to 100 percent. Your mix varies by cooking style.
Grease splatter on the walls and ceiling is the biggest slice and the hardest to reach, which is why the paste method matters. Floor spills carbonize fastest. The split is illustrative and shifts with what you cook.
That split is the strategy in one picture. The grease film and carbonized spills need chemistry plus time, which is the paste’s job. The door film needs the same treatment plus a careful scrape, because it is the layer you actually look through. The racks carry their grime out of the oven to soak in the sink, which is far easier than scrubbing them in place. None of this is cosmetic: buildup smokes on every preheat, flavors food with an acrid edge, sets off smoke alarms, and in a thick greasy layer on the oven floor it is a genuine fire risk under the broiler. A clean oven also lets you see food through the glass instead of opening the door and dumping heat.
Signs your oven needs cleaning
The oven announces that it is due in ways that are easy to rationalize away, so it is worth naming them. The clearest is smoke or a burnt smell during preheat before any food is in the oven: that is residue carbonizing a little further, and it will repeat every preheat until the residue is gone. Closely related is flavor transfer, when delicate bakes pick up an acrid, smoky note that has nothing to do with the recipe. If the smoke alarm goes off every time you roast, the oven is telling you the same thing louder.
Look, too. Door glass you can no longer see through means the film has built for months. A visibly crusted oven floor, brown lacquered walls, drips hanging from the ceiling of the cavity, and racks that grate in their runners instead of sliding are all past-due signs. So is finding flakes of black carbon on the oven floor or, worse, on food, which happens when buildup on the ceiling chars and drops. Any one of these means schedule the deep clean below; two or more mean do it this week, before the next preheat bakes everything one stage harder. Spot checks after each splattery cook are how you keep from ever reaching that point again.
Before you start: what you need
This is a beginner-level job with no special tools, and the one skill it requires is patience: the paste needs hours of contact time, so the best plan starts the night before. Plan on thirty to forty-five minutes of active work at the start, an overnight wait, and another thirty to forty-five minutes to wipe out, scrub racks, and finish the glass, with the oven cold and switched off throughout. If your oven has a pilotless gas or electric supply you can reach, there is no need to cut power for a hand clean; just keep everything cold and dry near the elements.
Gather the kit before you start so the job flows.
- Baking soda, about half a cup for the paste, plus more for the rack soak.
- White vinegar, diluted with equal parts water in a spray bottle, for the final wipe.
- Dish soap, for the rack soak and general degreasing.
- Rubber gloves, because the paste is drying on skin and the grime is greasy.
- A plastic scraper or old spatula, and an optional razor scraper for the glass only.
- Sponges, a scrub pad, and several cloths, plus old towels to protect a bathtub if you soak racks there.
- A vacuum with a crevice tool or a dustpan brush, for the loose debris.
- Your oven’s manual, to check the self-clean guidance and whether the door disassembles.
One check before you begin: if your oven is self-cleaning or steam-cleaning, confirm in the manual what chemical cleaners, if any, are allowed inside, because the interior coating on many models rules out conventional sprays. The baking soda method below is safe for ordinary enamel interiors and is the default these notes recommend. With the kit ready, start by emptying the oven.
Step 1: Empty the oven and pull out the racks
Start with a completely cold oven, and take everything out of it: the racks, any pizza stone or baking steel, the oven thermometer, foil, liners, and whatever sheet pan lives on the bottom shelf. You want a bare cavity, both so the paste can reach every surface and so nothing traps debris while you work. Slide each rack all the way out, noting which runner each came from if they differ, and carry them to wherever they will soak. This takes five minutes and shapes the whole job, because the racks are far easier to clean soaking flat in hot water than standing in the oven.
While the oven is empty, have a look with a flashlight and take stock, because what you see decides how much paste and patience the job needs. Note where the heavy deposits are: the floor under where you roast, the door glass, the side walls at splatter height, and the ceiling around the broil element. Check the door gasket, the woven or rubber seal around the cavity opening, for tears and grease, and note that it gets wiped gently and never scrubbed or pasted. Watch out for the hidden-floor design on some modern ovens, where the lower element sits beneath a solid floor panel: spills there sit on the panel, and the manual will say whether it lifts out for cleaning.
Step 2: Soak the racks in hot soapy water
The racks now start their soak, and the soak does almost all of the rack work for you. The classic spot is the bathtub: line it with old towels so the rack feet cannot scratch the finish, lay the racks flat, cover them with the hottest water the tap will run, and add a generous squirt of dish soap and about half a cup of baking soda, swirled to dissolve. A large utility sink or a plastic storage tote on the floor works the same way for households that would rather keep oven grime out of the bathtub. The point is total submersion in hot, soapy, slightly alkaline water for hours.
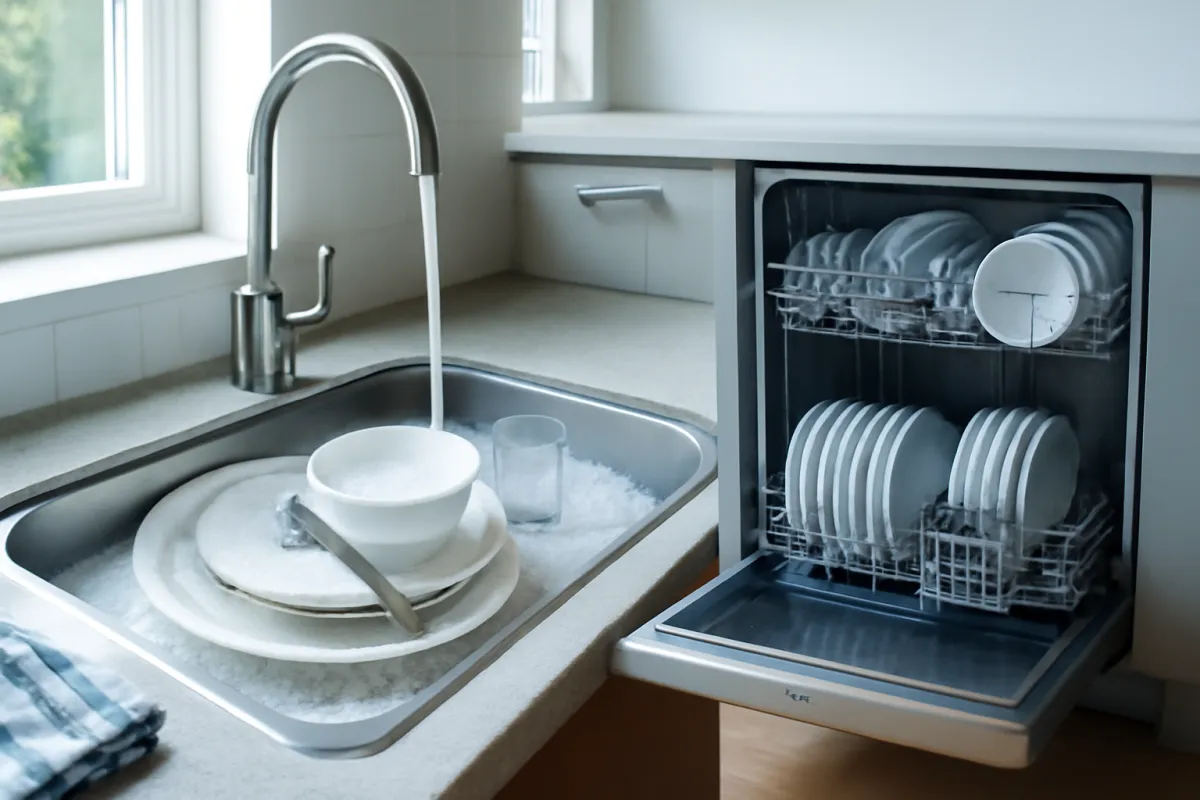
Leave them while the oven paste does its own work, ideally overnight, and the baked-on grime that felt like part of the metal softens to something a scrub pad removes. Turn the racks once if they are not fully submerged and top up with hot water when it cools, since warm water keeps the soap working. Watch out for two rack-specific mistakes: harsh oven cleaner sprays on shiny nickel-plated racks can dull and stain the plating, and soaking racks with wooden or painted handles ruins the wood. Plain hot water, soap, and baking soda risk nothing, which is why they are the default. The scrubbing comes in Step 8, after the soak has done the hard part.
Step 3: Scrape and vacuum out the loose debris
With the cavity bare, clear everything that is already loose before any paste goes on, because paste spent on crumbs is paste wasted. Use a plastic scraper or an old spatula to lift the brittle, charred flakes off the oven floor, working them into a pile, and run a dustpan brush or a vacuum crevice tool around the floor, the door frame, and the fold where the floor meets the walls. Burnt crumbs, carbon flakes, and the papery remains of old spills all come out dry far more easily than they come out wet, and removing them now means the paste can spend its contact time on the bonded grime underneath.
Be gentle and deliberate around two areas. The heating elements, the exposed bake element at the bottom and the broil element at the top on many electric ovens, should only ever be brushed lightly with a dry cloth, never scraped, soaked, or pasted, because the elements clean themselves by burning residue off in use and their coating does not like abrasion. Gas ovens hide the burner below the floor, but the same rule applies to any exposed igniter or port. Second, the door gasket: vacuum alongside it, but do not drag a scraper across it, since a torn gasket leaks heat and is an annoying part to replace. Two passes with scraper and vacuum leave you a surface ready for chemistry.
Step 4: Mix and spread a baking soda paste
Now the core of the method. In a bowl, stir roughly half a cup of baking soda with two to three tablespoons of water, adding the water a spoonful at a time until you have a spreadable paste about as thick as pancake batter; it should cling to a vertical wall without running. Baking soda works because it is mildly alkaline and mildly abrasive: given time, it breaks down grease and lifts carbonized deposits without harsh fumes, which is why it is safe for weekly use and for kitchens with kids, pets, and food nearby. Make more paste rather than less; a heavily soiled oven can take a full cup of baking soda.
Wearing gloves, spread the paste over the interior: the floor, the side walls, the ceiling if you can work overhead without dripping onto the broil element, and the inside of the door with its glass. Work it into the crusted patches with your fingers or a sponge, laying it thicker on the worst spots, and expect it to turn brown almost immediately as it starts lifting grime, which is the sign it is working. Watch out for the two no-go zones from Step 3: keep the paste off the bare heating elements and off the door gasket, and in a self-cleaning oven confirm the manual is happy with baking soda on the interior coating, which it almost always is. When every grimy surface wears a layer, stop and let time take over.
Step 5: Let the paste sit, ideally overnight
This step asks you to do nothing, and it is the most important step in the job. Close the oven door and leave the paste to work for at least three to four hours, and ideally overnight, a full twelve hours. Contact time is what separates the paste method from a wipe with a soapy sponge: the alkaline paste needs hours to penetrate and soften layers that months of heat have hardened, and every extra hour makes the next step easier. A lightly soiled oven may come clean after an afternoon; a neglected one earns the full night. The oven stays off the whole time, and dinner comes from the stovetop, the microwave, or a takeout menu.
There is a small amount of useful activity while you wait. Check the racks in their soak, turn them if needed, and top up the hot water. If the door glass carries a heavy film, confirm its paste layer has not slid off the vertical surface; re-daub any bare patches. Mix the vinegar spray for the morning: equal parts white vinegar and water in a spray bottle. Watch out for the shortcut temptation, because wiping the paste out after twenty minutes and concluding the method does not work is the single most common way this job fails. The chemistry is slow on purpose. Left overnight, the paste dries to a brown crust with the grime absorbed into it, ready to come out.
Step 6: Wipe out the paste and finish with vinegar
The next morning, the removal is satisfying and mostly mechanical. Wearing gloves, wipe the dried paste out with a damp cloth or sponge, rinsing the cloth often in a bowl of warm water, and the browned crust comes away carrying the softened grime with it. Where a deposit still resists, work it with the plastic scraper: the paste will have softened its bond, and patches that would have laughed at a sponge a day ago now lift in flakes. For any spot that truly will not move, apply fresh paste to that spot alone and give it another few hours rather than attacking it with force.
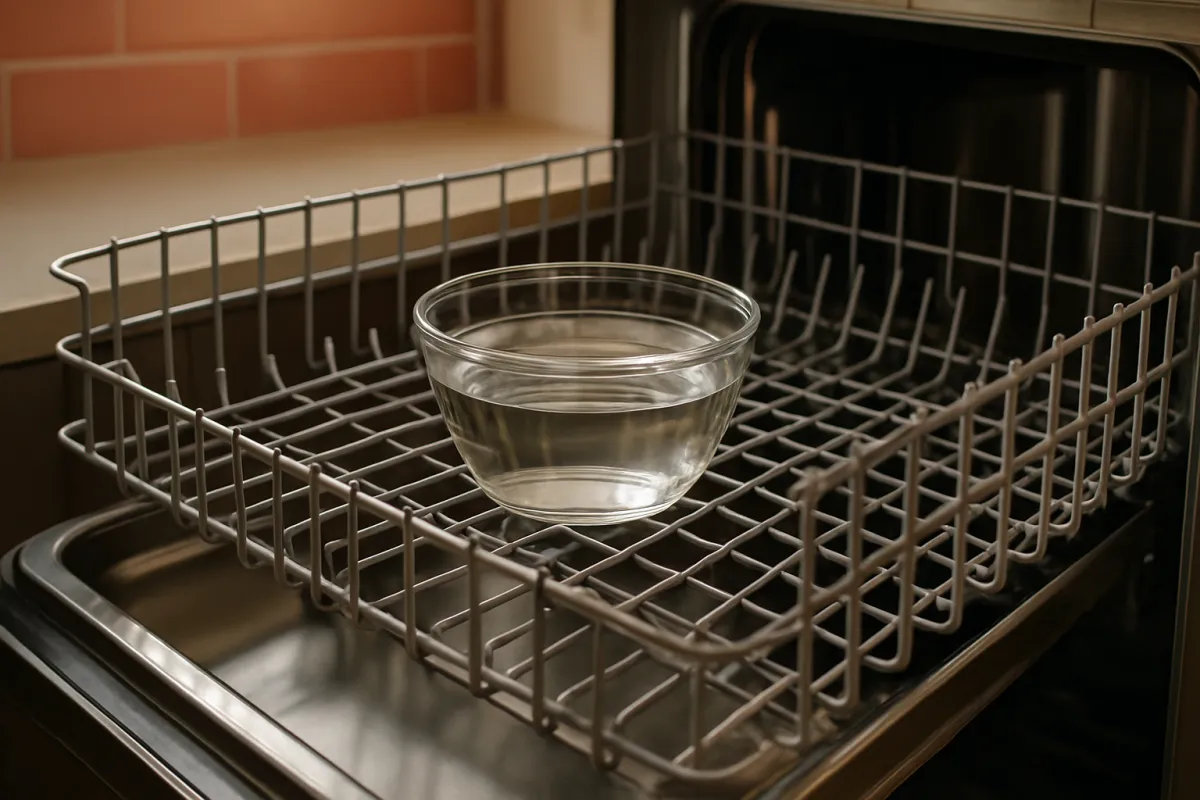
The finish is the vinegar. Mist the wiped surfaces with the half-and-half vinegar solution and you will see a gentle foam wherever baking soda residue remains; that reaction loosens the chalky film, and a final pass with a clean damp cloth leaves the enamel smooth and streak-free. Repeat the mist-and-wipe until a clean cloth stays clean. Watch out for flooding the cavity: a mist and a damp cloth are enough, and liquid pooling around a gas oven’s floor ports or an electric oven’s element mounts has no business there. Never spray vinegar into a hot oven or onto elements, and never combine vinegar with bleach or any commercial cleaner. When the interior passes the clean-cloth test, only the glass and racks remain.
Step 7: Clean the oven door and glass
The door deserves its own pass because it is the part you look at every day. Open it flat and treat the inside face like the rest of the oven: a layer of baking soda paste, fifteen to thirty minutes of contact time, then wipe, mist with vinegar, and buff dry. For the hard, lacquered spots that survive the paste, a razor scraper held at a shallow angle, kept flat to the glass and moved slowly, lifts baked deposits cleanly; this tool is for the glass only, never enamel or plastic, and gentle passes beat pressure. Wipe the door frame, the handle, and the control fascia with a soapy cloth, and clean the gasket by patting it gently with a damp cloth, never scrubbing. If the outer door is stainless steel, finish it along the grain with a dry buff, the streak-free routine our notes on cleaning stainless steel appliances walk through in full.
Haze between the panes is the door’s one hard problem, because the film sits inside the sealed sandwich where no cloth can reach. Two honest routes exist. Many doors have vent slots along the bottom or top edge that accept a slim tool, a yardstick or dowel, wrapped in a microfiber cloth and worked carefully between the panes. Other doors disassemble: typically two screws or clips release the inner panel so the glass lifts out for a proper wash. The manual or the manufacturer’s service sheet shows which design you have. If you open a door up, photograph every step, keep screws sorted, and set the glass on a towel. If neither route appeals, live with the haze; it is cosmetic, and a between-pane clean is a someday job, not a required one.
Step 8: Scrub the racks, dry, and refit everything
Return to the racks, whose overnight soak has done the heavy lifting. Drain the water, and scrub each rack with a scouring pad or stiff sponge: the softened grime strips off with modest effort, and an old toothbrush clears the corners and the welded joints where crud hides. Anything still stuck gets a direct rub with baking soda paste on the pad. Rinse the racks thoroughly, because dried soap smokes on the next preheat, and towel them dry. If the tub hosted the soak, the towels come up and the tub gets a quick rinse; grime rings wipe off easily since everything in the water was soap-softened.
Refit the racks into their runners and give the cavity a last look with the flashlight, checking that no paste hides in corners, no pooled liquid sits on the floor, and the elements are clean and dry. Some people run the empty oven at a moderate temperature for fifteen minutes to drive off damp and confirm no smoke; with ventilation on, that is a sensible final check. Then set the schedule while the effort is fresh: wipe spills once the oven cools after each splattery cook, glass about monthly, deep clean roughly quarterly. Put your own cooking pattern into the cleaning-schedule planner for an interval matched to your kitchen rather than a generic calendar.
Should you use the self-clean cycle?
The self-clean button deserves a straight answer, because it is both genuinely effective and genuinely stressful for the machine. A pyrolytic self-clean locks the door and drives the cavity far above cooking temperatures for two to six hours, burning residue into a fine white ash you sweep out afterward. It reaches every surface, including ones you cannot, and on a lightly soiled oven it works exactly as advertised. The costs are real, though: the extreme heat stresses the door lock, hinges, control electronics, and elements, and appliance technicians commonly report ovens arriving for repair shortly after a heavy self-clean session. The cycle also produces smoke and fumes proportional to the grime it is burning.
So the honest posture is: use it occasionally and set it up well, rather than treating it as the routine method. Wipe or scrape out loose debris and any pooled grease first, since less fuel means less smoke and less stress. Remove the racks unless the manual says they can stay, because most plain racks discolor and stiffen in the heat. Run the range hood, open windows, and keep pet birds well away from the kitchen for the whole cycle and airing-out, because birds are seriously sensitive to the fumes. Plan it for a day you can stay home while it runs. Steam-clean modes, where an oven offers one, are a gentler middle path: a short, lower-temperature cycle with water in the cavity floor that softens light soil for hand wiping. For routine cleaning, the paste method plus an occasional well-prepared self-clean covers everything.
What about oven cleaner sprays?
Conventional oven cleaner sprays are the fast, harsh option, and there are ovens where they make sense and ovens where they must not be used. The active chemistry is typically lye or a similar strong alkali, which dissolves carbonized grease in minutes instead of hours; that power is why the fumes demand ventilation, why gloves and long sleeves are not optional, and why the spray must never touch aluminum, the door gasket, the heating elements, or anything outside the enamel cavity. Used per the label in a cold oven, wiped out completely, the results are quick and dramatic on a heavily neglected oven that a paste would need multiple rounds to fix.
The hard restriction is the one many people miss: most self-cleaning and steam-cleaning ovens forbid chemical oven cleaners inside, because the sprays damage the special interior coating the pyrolytic cycle depends on. Check your manual before the can ever comes out; if the manual says no, the answer is no, everywhere inside the cavity. Even on ovens that allow sprays, the milder fume-free formulations are worth choosing, and the sensible division of labor is paste for routine cleans and a spray only for a one-time rescue of a badly neglected oven. Whatever you use, one product at a time, rinsed fully before the next: never layer a spray over vinegar or anything else, and never bleach anywhere in this job.
A worked example: one overnight oven rescue
Put the steps together on one illustrative weekend so you can see the rhythm. Picture a family oven that roasts twice a week and has not had a deep clean in about a year: smoke on every preheat, a floor crusted with black carbon, walls glazed brown at splatter height, door glass you can no longer see through, and racks that grate in their runners. That is a full-method oven, and the plan starts Saturday evening after dinner so the paste gets the whole night.
Saturday, about forty minutes of work: the racks come out and go into a towel-lined tub of hot water, dish soap, and half a cup of baking soda. The scraper and vacuum clear a surprising pile of carbon flakes from the floor. A full cup of baking soda mixed with water into paste goes onto the floor, walls, and door glass, laid thick over the worst patches, and the door closes on it at nine in the evening. Sunday morning, the paste has dried brown. Wiping takes half an hour with frequent cloth rinsing, the scraper lifts the floor’s stubborn patches, and the vinegar mist foams away the chalky streaks. The glass needs one careful razor pass for two lacquered drips. The racks scrub clean in fifteen minutes and go back in.
Total: under two hours of actual work bracketing one overnight wait, and less than a few dollars of baking soda and vinegar. These numbers are an illustrative walkthrough rather than a measured test of one oven, and a lighter oven needs less of everything. The value is the sequence: debris out dry, paste on early, patience overnight, and the finish in the morning, with the cleaning-schedule planner setting the date for the next, much smaller round.
How often to clean an oven
Frequency is where oven cleaning is won, because the same spill costs a damp cloth today and a scraper session in three months. The honest baseline for a household that cooks most days is a deep clean about every three months, and the interval flexes with how you cook: frequent roasting, broiling, and bubbling casseroles push it toward every month or two, while a light baking oven stretches honestly toward six months. The signs outrank the calendar: smoke on preheat, acrid smells, or visible crust mean the oven is due now regardless of the date. Between deep cleans, two small habits carry most of the load, and the chart below shows how the tasks group by interval.
Hands-on time by oven cleaning method
Illustrative active working time for each common method, excluding waits and unattended cycle time. Bars scale with the minutes. Your times vary with the oven's state.
The paste method costs the most hands-on time but the least risk and money; the self-clean cycle costs the least labor but adds hours of unattended runtime, fumes, and heat stress. Times are illustrative.
Read that chart with the waits included and the picture completes: the paste adds an overnight wait, the self-clean adds two to six unattended hours plus cool-down, and the spray adds ventilation time. The schedule that makes all of them smaller is the in-between work: wipe spills once the oven has cooled the same day they happen, give the door glass a five-minute paste-and-wipe about monthly, and shake the racks’ crumbs and wipe their runners when you see buildup. A household that keeps those habits finds the quarterly deep clean takes half the time, because it is cleaning film rather than archaeology. Set your own cooking pattern in the cleaning-schedule planner for an interval tuned to your kitchen.
How to keep an oven cleaner for longer
Prevention in an oven is mostly about intercepting spills before heat can process them, and a few habits do most of the work. Cover dishes that spit: a lid, a foil tent, or a splatter screen over an open roast cuts the aerosol grease that becomes wall film. Give bubbling bakes a bigger sheet pan on the rack below to catch drips before they hit the floor, especially fruit pies and lasagna, whose sugary spills carbonize fastest and smell worst. Leave a little headroom in baking dishes so they do not boil over in the first place. And roast in deeper pans than feel necessary, because shallow pans are where splatter starts.

Two prevention tools need honest caveats. Oven liners, the flexible mats sold to catch floor spills, work in some ovens and are forbidden in others: they must never sit on the floor of an oven with a hidden bottom element or directly over an exposed element, because trapped heat damages enamel and the liner itself, so check the manual and use a liner on the lowest rack instead where allowed. Foil on the oven floor carries the same trapped-heat problem and can fuse to enamel, so skip it. The final habit is the same-day wipe: once the oven is cool, a spill that just happened lifts with a damp soapy cloth in thirty seconds. Every preheat it survives converts it a stage closer to carbon, so the wipe today is the whole scraper session you skip later.
Common mistakes when cleaning an oven
Most oven-cleaning grief traces to a handful of avoidable moves rather than to the grime itself. These are the ones worth naming.
- Giving the paste twenty minutes and quitting. Contact time is the method. Hours minimum, overnight for a neglected oven; a rushed paste wipes out with the grime still bonded underneath.
- Scrubbing or spraying the heating elements. Bare elements are never pasted, sprayed, soaked, or scraped. They burn themselves clean in use; a dry cloth when cold is the most they need.
- Using chemical oven cleaner in a self-cleaning oven. Many manuals forbid it because the spray damages the pyrolytic coating. Check before the can comes out, and default to baking soda when unsure.
- Running a self-clean cycle on a filthy oven. The grime is fuel: heavy buildup means heavy smoke, worse fumes, and more heat stress. Wipe out debris and grease first, ventilate, and keep pet birds far away.
- Scrubbing the door gasket. A torn gasket leaks heat around the door. Pat it clean with a damp cloth and leave it alone otherwise.
- Flooding the cavity with liquid. Mists and damp cloths, not pools: liquid around element mounts and gas ports causes trouble the grime never would.
- Mixing products. One cleaner at a time, fully rinsed before any other. Vinegar meets baking soda by design here; nothing in this job ever meets bleach.
Clear those and the job is safe, cheap, and boring in the best way, which is exactly what an oven clean should be.
Troubleshooting: harder oven problems
The steps handle the standard clean, but a few situations need a judgment call, so here is how to think through the common ones.
What if the oven still smokes after a full clean? Look for fuel you missed: residue on the broil element burns off with a smoky first use or two, a spill may hide under a lift-out floor panel where the design has one, and grime on the fan of a convection oven circulates smell. Run the empty oven hot with ventilation for fifteen minutes; persistent smoke from a truly clean oven, especially with an electrical or plastic smell, means switch off and get it looked at.
What if a stain will not move even after two paste rounds? Some deposits are permanent etching in the enamel rather than sitting on it, especially where sugar burned in. Etching is cosmetic; stop scrubbing enamel that is already clean. A razor scraper remains an option on glass only.
What if the self-clean cycle ended and the door will not unlock? The lock releases only after the cavity cools, which takes an hour or more; give it time before assuming a fault. A lock that never releases after full cool-down is a known failure point and a service call.
What if the oven smells of vinegar or soap on the next use? Residue was left behind: wipe again with plain water and run the empty oven at a moderate temperature with the hood on until the smell clears. Rinsing racks and walls properly at the time prevents it.
Your oven cleaning checklist
Save this list and work it by interval. It keeps the smoke, the smells, and the scraper sessions from ever coming back.
- After each splattery cook: once the oven is cool, wipe fresh spills with a damp soapy cloth, and check the floor for drips.
- Monthly: paste-and-wipe the inside door glass, wipe the door frame and handle, and brush crumbs from the racks and runners.
- Quarterly, or per your planner interval: full deep clean, racks soaked overnight, cavity pasted overnight, vinegar finish, glass scraped if needed.
- Once or twice a year at most: a well-prepared self-clean cycle if you use one, on a pre-wiped oven with ventilation running and birds out of the kitchen.
- Always: keep paste, sprays, and scrapers off the elements and the gasket, check the manual before any chemical cleaner in a self-cleaning oven, and never mix cleaning products.
- Prevention: lids and splatter screens on spitting dishes, a sheet pan under bubbling bakes, no foil on the oven floor, and liners only where the manual allows.
Feed your cooking frequency and style into the cleaning-schedule planner to pin the deep-clean interval to your kitchen, then work the list one interval at a time.
The bottom line
Cleaning an oven is a patience job, not a strength job, and the method that wins costs about a dollar: empty the oven, soak the racks in hot soapy water, clear the loose debris dry, spread a baking soda paste everywhere but the elements and gasket, and give it the night. Morning brings a wipe-out, a vinegar mist to lift the chalky residue, a careful pass on the door glass, and a quick rack scrub, with under two hours of total hands-on work bracketing the wait. The self-clean cycle is a legitimate occasional tool on a pre-wiped, well-ventilated oven, spray cleaners are a rescue for ovens whose manuals allow them, and neither replaces the habits that keep the job small: same-day spill wipes, a monthly minute on the glass, and a deep clean on a rhythm matched to how you actually cook. Do that, and preheat smoke, acrid bakes, and the opaque door all stay gone.
A note on scope: these notes describe a general routine for cleaning a typical home oven and are educational rather than professional advice, with every time, interval, and figure an illustrative planning number rather than a measurement from any single appliance. Your oven’s manual outranks anything written here, especially on whether chemical cleaners are permitted inside a self-cleaning model, whether the floor panel or door disassembles, and how the self-clean cycle should be run. A few cautions are firm regardless of model: keep pastes, sprays, and tools off bare heating elements and the door gasket, ventilate well and keep pet birds away during any self-clean cycle, wear gloves with any spray cleaner, and never combine cleaning products, since mixes involving bleach release harmful gases. If an oven smokes or smells electrical when visibly clean, stop using it and have it inspected rather than cleaning harder.
Frequently asked questions
How do I clean an oven?
Start with a cold, empty oven: take out the racks and any thermometer or stone, and set the racks to soak in a tub or sink of hot water and dish soap. Scrape or vacuum out the loose crumbs and carbon flakes, then spread a paste of baking soda and water over the interior walls, floor, and door, avoiding the heating elements and the door gasket. Let the paste sit for at least a few hours and ideally overnight, then wipe it out with a damp cloth, spraying a little diluted vinegar to lift the last chalky residue. Scrub the soaked racks, clean the door glass with the same paste, dry everything, and refit the racks. The active work is under an hour; the paste and the rack soak do the rest of the job while you sleep.
How do I clean an oven with baking soda?
Mix roughly half a cup of baking soda with two to three tablespoons of water until it forms a spreadable paste about the thickness of pancake batter, adding water a spoonful at a time. Wearing gloves, spread it over the oven's interior surfaces, working it into the baked-on patches and keeping it off the bare heating elements and the rubber door gasket. The paste needs contact time to soften the carbonized grease, so leave it at least three to four hours and ideally overnight, during which it will turn brown as it lifts the grime. Wipe it out with a damp cloth, using a plastic scraper on stubborn patches, then mist the chalky streaks with equal parts vinegar and water and wipe again as it foams. It is slow chemistry rather than harsh chemistry, which is why it is safe for regular use.
Is the self-clean cycle safe to use?
Generally yes when you follow the manual, with real caveats worth knowing. A pyrolytic self-clean cycle locks the door and heats the oven far above cooking temperatures to burn residue into ash, and that extreme heat stresses components like the door lock, control board, and heating elements, which is why some technicians see failures shortly after heavy self-clean use. The cycle also produces smoke and fumes as the grime burns off, so wipe out loose debris and big spills first, run the range hood or open windows, and keep pet birds well away from the kitchen because they are especially sensitive to the fumes. Never leave heavy grease pooled on the oven floor before a cycle, and never use chemical oven cleaner in a self-cleaning oven unless the manual allows it. Used occasionally on a pre-wiped oven with good ventilation, it is a reasonable tool rather than something to fear.
Can I use oven cleaner spray in a self-cleaning oven?
Check your manual first, because many manufacturers say no. Self-cleaning ovens have a special interior coating that the pyrolytic cycle depends on, and the lye in conventional oven cleaner can damage that coating, after which the self-clean feature works poorly or the surface stains permanently. Some brands allow specific cleaners on the door glass only, and others forbid chemical cleaners anywhere inside. If your oven has the self-clean or steam-clean feature, the safe default is baking soda paste for hand cleaning and the built-in cycle for deep cleaning, reserving spray cleaners for ovens whose manuals explicitly permit them. When a manual does allow a spray, use it in a cold oven, ventilate well, wear gloves, and keep it off the elements, the gasket, and any aluminum.
How do I clean oven racks?
Racks clean far easier out of the oven than in it, and the whole method is a long hot soak. Lay them in a bathtub lined with old towels to protect the finish, or a large sink or storage tote, cover them with the hottest tap water you can run, and add a generous squirt of dish soap; a half cup of baking soda in the water helps with heavy buildup. Leave them to soak for several hours or overnight, and most of the baked-on grime softens enough to scrub off with a sponge, a scouring pad, or an old toothbrush at the joints. Rinse them well, dry them, and slide them back in. Avoid oven cleaner sprays on racks unless you can do it outdoors with gloves, and never soak racks with a shiny nickel finish in harsh chemicals that can dull the plating.
How do I clean the oven door glass, and what about grime between the panes?
The inside face of the glass cleans with the same baking soda paste as the rest of the oven: spread it on, leave it fifteen to thirty minutes, then wipe and buff. For hard baked-on spots, a razor scraper held at a shallow angle lifts the deposit without scratching, worked slowly on glass only. Streaks between the panes are a different job, because that haze sits inside the sealed door where no wipe can reach. Many doors have vent slots along the bottom edge that accept a thin tool wrapped in a microfiber cloth, and some doors disassemble with a few screws so the panes separate for cleaning; your manual or service sheet shows which. If the door has to come apart, photograph each step, keep the screws sorted, and treat it as a careful half-hour job rather than a quick wipe.
How often should I clean an oven?
A commonly used rhythm is a deep clean every three months or so for a household that cooks regularly, with spot cleaning in between doing most of the real work. Wipe fresh spills once the oven has cooled, because a same-day spill lifts with a damp cloth while the same spill baked through five more preheats becomes carbon that needs a paste and a scraper. Give the door glass a quick clean about monthly, since the film builds gradually and the glass is the part you see. Heavy roasters and frequent bakers of splattery dishes may need a deep clean closer to every month or two, while a light-use oven can honestly stretch toward six months. Smoke on preheat, persistent smells, or visible buildup mean it is due regardless of the calendar.
Why does my oven smoke when I preheat it?
The usual cause is residue burning off: grease film and food spills on the oven floor, walls, or elements smoke as they carbonize a little more with every preheat, and the smoke carries the acrid smell that flavors food and trips smoke alarms. A brand-new oven can also smoke harmlessly the first few uses as factory coatings cure, which the manual will mention. If the oven is clean and still smokes, check for a spill hidden under the oven floor panel where one exists, residue on the broil element at the top, or a forgotten liner or tray. Persistent smoke from a visibly clean oven, especially with a burning-plastic or electrical smell, is not a cleaning problem and is worth switching the oven off and having it looked at. For the common case, a deep clean ends the smoke.