What's on this page
- Why microwave cleaning is not just cosmetic
- What is actually stuck to the inside of your microwave
- Why steam does the work and scrubbing does not
- Before you start: what you need and how long it takes
- Step 1: Steam the cavity with water and an acid
- Step 2: Wipe the cavity in the right order, ceiling last
- Step 3: Clean the turntable and the roller ring
- Step 4: Clean the door, the seal and the inner lip
- Step 5: Clean the vents and filters on an over-the-range unit
- Step 6: Deodorize the cavity and set a cleaning cadence
- Vinegar, lemon or plain water: which acid to steam with
- The waveguide cover: the one part you never scrub
- What not to use inside a microwave
- Cleaning the outside: the door, the panel and a stainless front
- A worked example: a shared kitchen microwave brought back
- How often to clean a microwave
- How to keep it clean between deep cleans
- Common mistakes when cleaning a microwave
- Troubleshooting: smells, stains and marks that survive the steam
- Microwave safety rules that outrank any cleaning tip
- When cleaning is not the answer: repair or replace
- Your microwave cleaning checklist
- The bottom line
Learning how to clean a microwave properly comes down to one decision that most people get backwards: you do not scrub first, you steam first. The inside of a microwave is coated in the same thing every time, sauce and fat that were flash-heated onto a cold-ish wall and then baked a little harder by every session after that. Attacking that with a cloth and effort is the slow way to a mediocre result, and it is how coatings get scratched. Two cups of water with a splash of vinegar or a squeezed lemon, three to five minutes on full power, and five minutes of standing time do more than ten minutes of scrubbing, because condensation gets underneath the residue and lifts it off the wall for you.
These test notes lay out the whole job in six steps: the steam soak, the cavity wipe in the order that stops you working twice, the turntable and roller ring, the door and its often-missed inner lip, the vents and grease filter that an over-the-range unit hides underneath itself, and the odor and cadence work that keeps you from doing all of it again next week. If you are here because the unit is on its way out rather than merely dirty, our walkthrough on how to choose a microwave covers the buying side and this article does not repeat it. Feed your usage into the cleaning cadence planner as you read and it will set your own interval instead of a generic one.
Key takeaways
- Steam does the work: water plus vinegar or lemon, three to five minutes on full power, then five minutes standing with the door shut before a cloth goes anywhere near the walls.
- Wipe in order, sides and back first, then the floor, and the ceiling last with the driest cloth, so the only surface that can drip on finished work is the one you finish with.
- Never run the unit empty, never scrub the cavity or the waveguide cover with anything abrasive, and let a hot glass turntable cool on the counter before it meets water.
- An over-the-range unit has a washable metal grease filter and often a replaceable charcoal filter, which is the step most cleaning routines skip and the one with real consequences.
- A typical household lands near a six-week deep clean, roughly forty-five minutes for an over-the-range unit, with same-day wiping of spills doing most of the work between.
Why microwave cleaning is not just cosmetic
A microwave looks like the appliance where dirt matters least, since nothing burns and nothing touches your food directly. The reasons to keep it clean are more practical than that. Dried-on food inside a cavity absorbs energy that was meant for your meal, which means longer heating times and hot spots that scorch the residue further, and a badly caked interior genuinely takes longer to heat the same bowl. Splatter that has been re-cooked dozens of times can char, and charred residue in a cavity is a smoke and, in a bad case, a small fire risk when it finally gets hot enough.
The second reason is smell. A microwave is a sealed box that is warmed and then closed on its own humidity, which is close to ideal conditions for food residue to go stale and for that smell to transfer into the next thing you heat. Popcorn, fish, and anything with a strong sauce are the usual culprits, and once the residue is on the ceiling the smell arrives every time the unit warms up.
The third reason applies only to over-the-range units, and it is the one with a cost attached. That unit is also your ventilation, and a grease-loaded filter above a cooktop is both a performance problem and a fuel load, which is exactly the argument in our notes on cleaning a range hood.
What is actually stuck to the inside of your microwave
Almost everything inside a microwave is one of three deposits, and knowing which you are looking at tells you how much steam it needs. The first is fresh splatter, sauce or fat thrown onto the walls in the last day or two, still soft, and wiped off with a damp cloth in one pass. The second is baked film, the same splatter after it has been reheated a dozen times, now a hard amber or brown layer that has bonded to the coating. That layer is what the steam step exists for, and it is the one people try to scrub.
The third is mineral and moisture residue, the cloudy film left by steam from uncovered food and by any hard water you have heated. It shows up as haze on the inner door glass and a dull cast on the walls, and it is the deposit the acid in the steam bowl actually helps with, since plain water does very little to it.
The stacked bar below is an illustrative split of where all of that grime ends up in a regularly used, rarely cleaned unit. It is worth reading before you start, because it explains why so much of this walkthrough is about the cavity and why the door and vents matter more than the amount of visible mess suggests.
Where microwave grime actually sits
An illustrative split of the accumulated residue in a regularly used, rarely cleaned microwave. Segments sum to 100 percent. Your own mix shifts with how often you cover food and whether the unit vents a cooktop.
The vents and grease filter share applies to over-the-range units; on a countertop model that share redistributes across the cavity and door. The split is illustrative, not a measurement.
The practical takeaway is that more than half of what you are cleaning is on surfaces you can reach in the first two steps, and almost a fifth is on the door assembly that most routines give a single quick wipe.
Why steam does the work and scrubbing does not
Baked-on food is bonded to the cavity coating by dehydration. The sauce hit a surface, its water flashed away, and what remained welded itself into a hard film. Adding water back is what breaks that bond, and steam adds water in the one way that reaches every surface at once, including the ceiling, where a cloth cannot sit long enough to soak anything.
The mechanism is condensation, not heat. When you boil water inside a closed cavity, the vapor fills the box, hits every surface that is cooler than the vapor, and condenses into a film of hot water sitting directly on the residue. Five minutes of that rehydrates the film from underneath, which is why the standing time after the timer ends matters as much as the run time. Open the door immediately and the vapor leaves, taking the soak with it.
The acid is a helper rather than the main event. Vinegar and lemon juice are mild acids that cut the mineral haze and help lift greasy film, and they also leave the cavity smelling of something other than reheated dinner. Neither is a disinfectant claim worth making, and neither is doing anything dramatic to the baked layer that the water is not already doing. If you have neither, plain water and a longer stand still work.
The consequence for your effort is direct. On a properly steamed cavity a damp cloth removes the film in one or two passes with almost no pressure, which is also the only way to clean a microwave without eventually damaging the coating.
Before you start: what you need and how long it takes
None of this needs a specialist product. The full kit is a wide heatproof bowl or a large glass measuring jug, one to two cups of water, either two tablespoons of white vinegar or one lemon halved and squeezed with the rind dropped in, two or three microfiber cloths, a non-scratch sponge, a little dish soap, and a cotton swab or old toothbrush for the door seal and the turntable ring hubs. Baking soda is optional and useful for the one or two spots that survive.
Time and difficulty are modest. For a countertop unit budget about thirty-five minutes, most of it waiting. For an over-the-range unit add the filter work and budget about forty-five minutes. The difficulty is low throughout; the only parts that need care rather than effort are the ceiling, where the waveguide cover lives, and the vent work, which happens with the power off.
Before anything else, settle four things:
- Which type you own. Countertop, built-in, or over-the-range. Only the last has filters and vents to deal with in Step 5.
- Where the manual is. Manufacturer instructions outrank anything here, especially on turntable dishwasher tolerance, filter part numbers, and what the interior coating will accept.
- How you will kill the power for Step 5. Unplug a countertop unit, or cut the breaker for an over-the-range unit before your hands go near the vents.
- Whether the cavity is cool. Steam a cold cavity, not one that has just finished cooking, and never take a hot glass turntable to a cold sink.
The bar chart below breaks the forty-five minute version into its steps, which is a useful sanity check when you are deciding whether to do the whole routine or just Steps 1 and 2 tonight.
Illustrative minutes per step in a full microwave clean
A typical time split for the six steps on an over-the-range unit, totaling about forty-five minutes. Bars scale with the minutes. A countertop unit drops the vents and filters step and lands near thirty-five.
Step 1 is mostly waiting, which is why it is the longest bar and the least work. Times are illustrative planning numbers for a moderately dirty unit, not measurements of any model.
Step 1: Steam the cavity with water and an acid
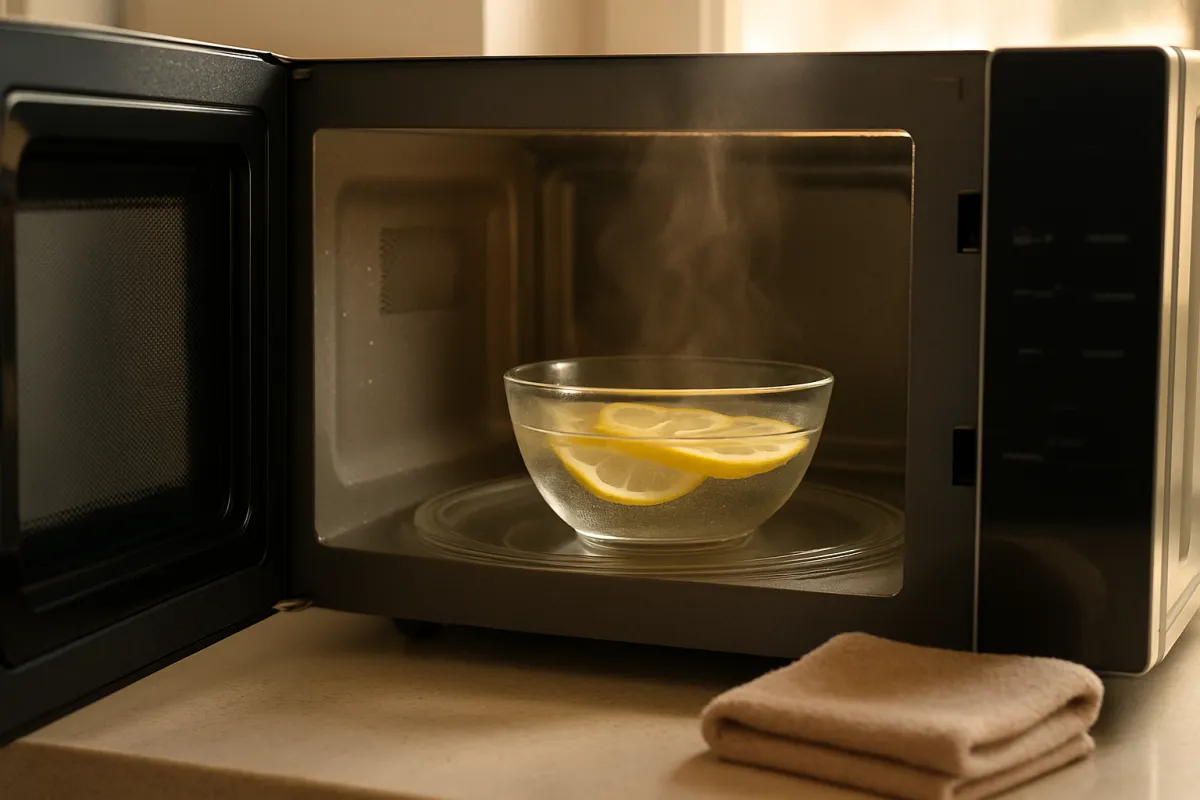
Fill a wide heatproof bowl or glass jug with one to two cups of water, filling it no more than halfway so a rolling boil has somewhere to go. Add two tablespoons of white vinegar, or halve a lemon, squeeze both halves into the water, and drop the rinds in. Set the bowl on the turntable, leave a wooden spoon or a chopstick resting in it if you have one, close the door, and run full power for three to five minutes. You are watching for the moment the cavity goes visibly steamy and the door glass fogs; that is the signal, not the timer.
Then do the part everybody skips: leave the door closed for another five minutes. During that stand the vapor condenses onto the walls, the ceiling, and the door, and hot water sits on the baked film long enough to rehydrate it. Opening the door at the beep vents the steam and wastes most of the soak.
The illustrative arithmetic is simple. Call it two minutes of setup, four minutes of run time, five minutes of standing, and a minute to get the bowl out safely, and Step 1 costs about twelve minutes of which nine are waiting.
Watch out: water heated in a smooth container can pass boiling point without visibly bubbling, then erupt when it is disturbed or when a utensil goes in. The standing period is your protection, and so is the acid, the wooden stick, and a bowl with a rough interior. Use oven mitts, lift the bowl straight out without swirling it, and keep your face away from the opening. Never run the unit empty or let the bowl boil dry, because with nothing to absorb the energy the unit is effectively cooking itself.
Step 2: Wipe the cavity in the right order, ceiling last
Take the bowl out and set it aside, still hot, then work while the cavity is warm and everything is soft. The order that saves you a second pass is sides first, then the back wall, then the floor and the turntable recess, and the ceiling last. The logic is gravity: drips from a cloth held overhead fall straight down onto the floor, not sideways onto the walls, so the ceiling is the only surface that can undo finished work, and finishing with it means the only thing you touch afterwards is a quick dry pass of the floor.
Use a damp microfiber cloth wrung out well, not a soaked one. Most of the film should lift with light pressure and no product. For anything that resists, do not press harder; wet it, wait another minute, and go again, or run a second short steam. A non-scratch sponge with a drop of dish soap handles a stubborn ring around the turntable recess.
The ceiling gets the driest cloth of the sequence and the gentlest hand, because that is where the waveguide cover sits: a thin panel, usually mica-colored or plastic, covering the opening the energy comes through. Wipe it flat and softly, never scrub it, never lever at its edges, and never soak it.
Watch out: no abrasive pads, steel wool, scrapers, oven cleaner, or bleach inside the cavity. The interior is a coated surface, and once you cut through the coating you have exposed metal that can corrode and eventually arc. A slower method is the only safe one here, and the same restraint applies to a stainless exterior, covered in our notes on cleaning stainless steel appliances.
Step 3: Clean the turntable and the roller ring
Lift the glass turntable plate out and lift out the roller ring underneath it, the plastic or metal carrier with small wheels that the plate spins on. Both come out without tools on almost every unit, and both are usually filthier than the walls, because everything that boils over lands there and then gets driven around under the plate.
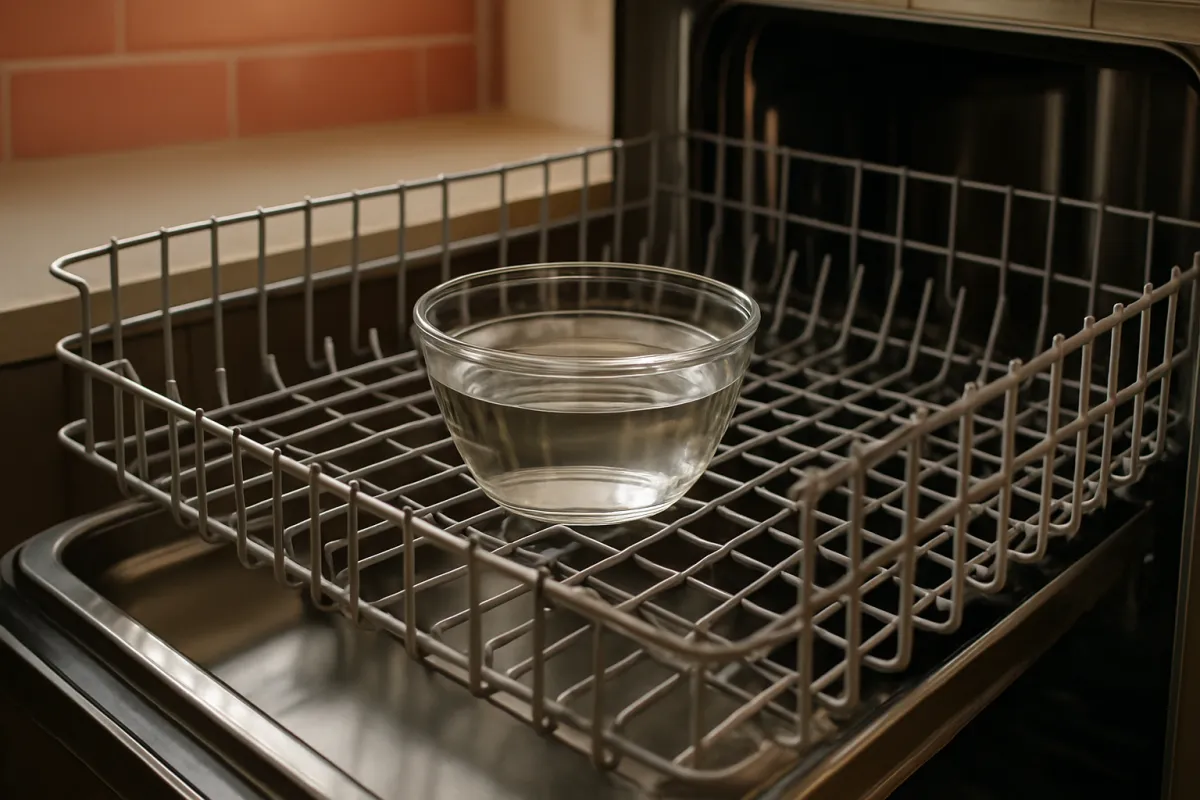
Let the plate cool on the counter first. This is the one place in the whole routine where impatience breaks something: glass that has been sitting in a hot cavity and then meets cold tap water can crack or shatter from the temperature difference. Give it a few minutes, then wash it in warm soapy water like any large dish. Most glass plates are dishwasher safe on the top rack, but the manual decides that and some are not.
The roller ring needs hands rather than a machine. Food and grease pack into the wheel hubs where a dishwasher spray never reaches, and a ring with a seized wheel drags, squeals, and stops the plate turning evenly. Work each wheel with a toothbrush or swab under warm soapy water until it spins freely, rinse, and dry fully. While both parts are out, wipe the recess they sat in, including the drive coupler in the center.
Watch out: dry everything completely before it goes back, and never run the unit with the plate or ring missing unless the manual says the model allows it, since the turntable is part of how the cavity heats evenly. A cracked plate is a replacement part, not a repairable one.
Step 4: Clean the door, the seal and the inner lip
The door is nearly a fifth of the grime and gets a fraction of the attention, largely because the part that collects most of it is not visible when the door is closed. Start with the inner glass or panel, which by now has had a full steam bath and wipes clean easily; the mesh screen behind it stays untouched beyond a light wipe on its outer face, because it is part of the containment, not a surface to work on.
Then open the door fully and look at the inner lip, the flat rim around the cavity opening and the matching frame on the door that meet when it closes. That rim is where boil-over and splatter run down and dry, and because it is hidden in normal use it can carry a solid crust while the rest of the cavity looks fine. Wipe it with a damp cloth, then work the corners and the groove with a cotton swab. Do the same along the door’s sealing surfaces and around the latch hooks, keeping moisture out of the latch openings themselves.
The illustrative payoff here is out of proportion to the five minutes it takes: a clean sealing surface closes properly, and residue built up on that rim is one of the most common sources of a smell that survives an otherwise thorough clean.
Watch out: a microwave door is a containment component. Never poke, scrape, or press anything into the mesh screen, never use a scouring pad on the door’s sealing surfaces, and if the door is bent, does not close squarely, has damaged hinges, or has a cracked or perforated screen, stop using the unit. That is a repair-or-replace decision for a qualified technician, not something a cleaning routine addresses.
Step 5: Clean the vents and filters on an over-the-range unit
If your microwave is mounted over a cooktop, it is also your ventilation, and this step is the reason it belongs in a cleaning routine at all. Almost every microwave cleaning method online stops at the cavity, which leaves the part with an actual cost and safety consequence untouched. Kill the power first: cut the breaker, or unplug the unit if the plug is reachable in the cabinet above.
Underneath the unit are one or two metal grease filters, held by a slide, a tab, or a small latch. Slide each out, note its orientation, and sink them in the hottest tap water your tap runs with a generous squirt of dish soap. Let them soak fifteen minutes, scrub gently along the mesh or baffles with a soft brush, rinse until the water sheets off clean, and dry them fully before they go back. They cost nothing to clean and they are washable indefinitely.
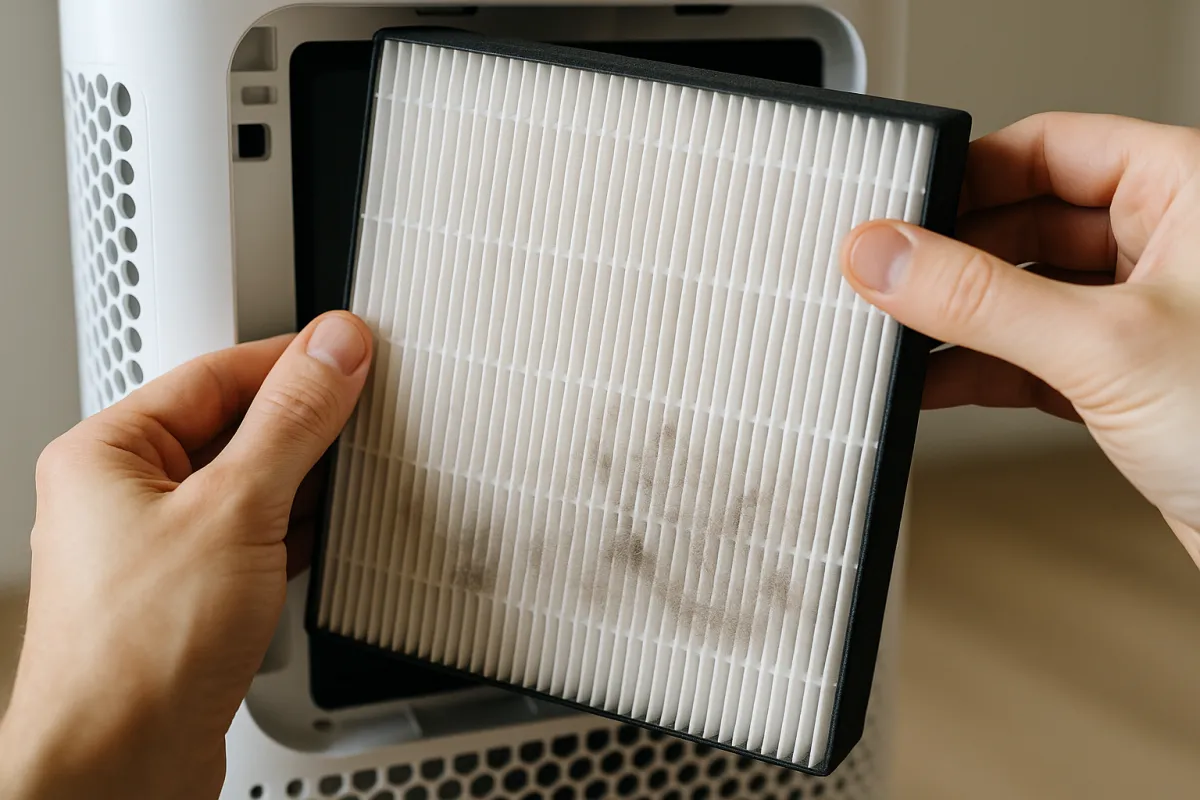
If the unit recirculates rather than ducting outside, it also has a charcoal filter, usually behind the vent grille at the top front or behind the upper panel. Charcoal cannot be washed. It adsorbs odor molecules until its pores fill and then simply stops working, so it is a replacement part, commonly on a six to twelve month schedule at an illustrative fifteen to forty dollars a filter. Match it by model number and seat it fully.
Watch out: power off before hands go near the vents, no exceptions. Wash grease filters by hand rather than assuming a dishwasher is safe, since aluminum mesh can darken, and never put oven cleaner or a strong alkali on aluminum.
Step 6: Deodorize the cavity and set a cleaning cadence
With the residue gone, the smell usually goes with it, and anything left is a leftover odor in the coating and the seal rather than a live source. Treat it in that order. Run one more short steam with lemon in the water, leave the door open for fifteen minutes so the cavity dries fully, and if a trace remains, leave an open bowl of baking soda inside overnight with the door closed. Both are slow and gentle rather than dramatic, which is the right register for a food cavity.
Then set the interval, because that is the part that decides how hard the next clean will be. A household using the unit a handful of times a day and usually covering food lands near six weeks between full routines. Rarely covering anything pulls it in toward a month or less, always covering pushes it out past two months, and a shared or office kitchen sits at the two-week end because nobody owns the mess. Wiping visible splatter the same day it happens is what keeps any of those intervals honest.
Refit everything dry: roller ring, turntable plate, grease filters in their recorded orientation, then restore power and run the fan and a short heat cycle to confirm normal operation.
Watch out: never leave the baking soda bowl inside and then run the unit on it, and check the cavity is empty before the next use. Set the reminder now rather than trusting memory, and put the grease filter on its own monthly line, since it loads from the cooktop rather than from the microwave. Our eight-point appliance maintenance plan has the wider rotation this slots into, and the cleaning cadence planner will size your own interval from your usage.
Vinegar, lemon or plain water: which acid to steam with
All three work because the steam is doing the heavy lifting, so the choice is about the margins. White vinegar is the strongest of the three on mineral haze, which makes it the pick when the door glass has gone cloudy or you live with hard water. It is also the cheapest by a wide margin. The cost is the smell, which is sharp for an hour and which some people mind more in a kitchen than the food smell they were removing.
Lemon is the pleasant option and genuinely effective. Halve one, squeeze both halves into the water, and drop the rinds in so the oils in the peel go into the steam too. It handles greasy film well and leaves the cavity smelling clean rather than smelling of vinegar, which is why it is the better choice when the microwave is used constantly and you cannot air the kitchen out.
Plain water is a perfectly respectable third option and is what you use when you have neither. Give it a longer run and a longer stand, and expect one extra wipe on the mineral haze it will not touch.
What not to steam: bleach, ammonia, oven cleaner, or any combination of products. Never mix cleaners, and keep harsh chemistry entirely out of a cavity your food sits in. If you want more than an acid, dish soap on the cloth after the steam is the correct escalation, and baking soda paste after that.
The waveguide cover: the one part you never scrub
Look at the cavity ceiling or the right-hand wall and you will usually find a small rectangular panel that does not match the rest of the interior, often a mottled tan or a plain plastic. That is the waveguide cover, and it sits over the opening through which energy enters the cavity. Its job is to keep food and steam out of that channel while letting energy pass, which makes it both essential and fragile.
Cleaning it is deliberately unambitious. Wipe it flat with a barely damp cloth and light pressure, and that is the whole procedure. Do not scrub it, do not use any abrasive, do not soak it, and do not lever at its edges or try to remove it for a better clean. Mica covers in particular soften and delaminate when they get wet enough and tear easily under a fingernail.
The reason to care is that a damaged cover stops doing its job. Splatter that gets past a torn cover collects in the waveguide channel, chars, and arcs, and arcing is what produces the flashes and popping people describe as a microwave sparking. A cover that is charred, torn, warped, or missing is a repair item, and using the unit in that state is not something to work around.
If yours is discolored but intact and flat, that is normal aging rather than damage. If you are unsure, that uncertainty is itself the answer: have it looked at rather than guessing, the same principle as the replacement thresholds in our notes on how long appliances last.
What not to use inside a microwave
The list of things to keep out of a microwave cavity is short and worth memorizing, because most of the damage this article is designed to prevent comes from a single enthusiastic cleaning session rather than from years of neglect.
- Abrasive pads, steel wool, and scrapers. They cut the interior coating, and exposed metal corrodes and eventually arcs. This includes the plastic scrapers people reach for on baked spots.
- Oven cleaner and strong alkalis. They are formulated for a self-cleaning oven’s enamel, not a microwave’s coating, and they leave residue in a cavity that heats food.
- Bleach, ammonia, and any mix of products. No cleaning benefit worth the risk, and mixing chlorine and ammonia products produces a genuinely dangerous gas.
- Soaking anything. Water pooling in the cavity floor, running into vent slots, or sitting on the waveguide cover causes more problems than it solves. Damp cloths, never wet ones.
- Sprays aimed into the cavity. Spray the cloth, not the appliance, so nothing gets into the vents, the door latch openings, or the control panel.
- Anything at all on the mesh screen or the interior electronics. The screen gets a light wipe on its outer face and nothing else.
The pattern behind all six is the same: this is a coated food cavity wrapped around electronics, so every method that works by force or by strong chemistry is the wrong method, and every method that works by time and moisture is the right one.
Cleaning the outside: the door, the panel and a stainless front
The exterior is roughly a tenth of the total grime but it is the tenth everyone sees, and it takes about two minutes once the inside is done. Wipe the door front, the handle, and the surrounding trim with a damp cloth and a drop of dish soap, working the handle underside where fingers actually go and where the film is thickest.
The control panel wants the least water of anything on the unit. Spray or dampen the cloth away from the microwave, wring it out until it is barely moist, and wipe the panel in one direction. Liquid running into a membrane panel’s edges is one of the more common self-inflicted faults on any appliance, and touch panels are no more forgiving than button ones.
A stainless front follows the grain and takes no abrasives, which is the whole method in our walkthrough on cleaning stainless steel appliances. Do not skip the top of a countertop unit, since it collects kitchen grease and dust that nobody sees until the unit is moved, and check the vent slots on the sides and back are clear rather than fuzzy with dust, because a blocked vent means a hotter unit.
On an over-the-range unit the underside around the vents and the light lenses is the exterior surface that gets dirtiest, and it responds to the same warm soapy cloth as the filters got, done with the power still off from Step 5.
A worked example: a shared kitchen microwave brought back
Take a small shared office kitchen with one countertop microwave used maybe fifteen times a day, food almost never covered, and no owner. Nothing has been cleaned in months. The ceiling is speckled, the floor has a brown ring around the turntable recess, the inner lip is crusted, and the whole thing smells of old soup.
The run takes about forty minutes rather than thirty-five, because a neglected unit needs two steams. Two cups of water and one halved lemon go in a wide bowl for five minutes on full power, then stand five minutes. The first wipe takes off perhaps eighty percent, and the remaining hard spots on the ceiling get a second four-minute steam and a further five-minute stand rather than a scrubbing. The second wipe takes them off with a non-scratch sponge and a drop of dish soap.
The turntable plate cools for five minutes on the counter, then washes in the sink; the roller ring takes a toothbrush at each wheel hub, where the drag was coming from. The inner lip takes a swab and about three minutes on its own, and it is where most of the smell was living. There are no filters, since this is a countertop unit, so Step 5 is skipped and the total lands near thirty-six minutes plus the extra steam.
The cadence that follows is the real output. At fifteen uses a day with nothing covered, this unit needs the routine every two weeks, which at roughly thirty-six minutes each is about fifteen hours a year if nobody changes anything, against about five hours a year at a six-week interval with food covered. Consumables are trivial either way, an illustrative forty cents of lemon or vinegar per clean, so the entire cost of neglect here is measured in time and smell.
How often to clean a microwave
There is no single correct interval, only a rate of accumulation set by three things: how many times a day the unit runs, whether food goes in covered, and how messy what you heat actually is. Covering food is by far the biggest lever, since a plate cover or a piece of kitchen towel stops the splatter at the source, and a household that covers everything can stretch a full routine past two months without the cavity looking neglected.
A useful set of illustrative starting points: a light user reheating drinks and the odd plate is fine at ten to twelve weeks; a typical household using it a handful of times a day and usually covering food sits near six weeks, which works out at about nine full routines a year; a heavy household cooking real meals uncovered wants three to four weeks; and a shared or office kitchen needs two.
Two things sit outside that schedule. Same-day wiping of visible splatter is not part of the interval, it is what makes the interval achievable, and it costs thirty seconds. And on an over-the-range unit the metal grease filter runs on its own monthly line regardless of how clean the cavity is, because it loads from the cooktop below rather than from the food inside.
Let the unit tune the number for you. Speckling visible on the ceiling, haze on the door glass, or a smell on opening means you were already overdue and the interval should come in. Feed your own usage into the cleaning cadence planner and it will do that arithmetic from your inputs.
How to keep it clean between deep cleans
Everything in this section is worth more than a better cleaning technique, because none of it is cleaning at all. The single highest-value habit is covering food, with a vented microwave cover, an upturned plate, or a piece of kitchen towel over the bowl. It converts nearly all the splatter that would have hit the walls into condensation on the cover, and it improves how evenly things heat as a side effect.
Second is heating in shorter bursts at lower power for anything with sauce. Most boil-overs and most of the violent splatter come from running soup or pasta sauce at full power until it erupts, and the same food at seventy percent power for a longer time behaves itself.
Third is a thirty-second wipe the same day something spills, while it is still soft. That is the difference between a damp cloth and a steam cycle, and it is the whole reason some kitchens never seem to need a deep clean.
Fourth is airing the cavity. Leaving the door open for a few minutes after heating something wet or strongly flavored lets the moisture out instead of leaving it to condense and go stale in a sealed box. Fifth, for over-the-range owners, is running the fan while you cook and for a few minutes after, which loads the washable filter instead of the cabinets, the same argument as in our notes on cleaning an oven and the hood above it.
Common mistakes when cleaning a microwave
- Scrubbing before steaming. The most common error and the most expensive one, because it turns a five-minute wait into a ten-minute fight and it is how coatings get scratched. Steam first, always.
- Opening the door at the beep. The stand is where the soak happens. Ending the cycle and immediately venting the cavity throws away most of the benefit of the step you just ran.
- Reaching straight in for the bowl. Superheated water can erupt when disturbed. Let it stand, use mitts, lift straight out, and keep your face clear of the opening.
- Taking a hot glass turntable to the sink. Thermal shock cracks glass. The plate cools on the counter first, every time, and a cracked plate is a purchase rather than a repair.
- Attacking the ceiling. The waveguide cover is up there, and it is the one interior part that a determined scrub genuinely destroys. Barely damp cloth, light pressure, no exceptions.
- Ignoring the inner lip and the door seal. Hidden when the door is shut, and the usual home of a smell that survives an otherwise complete clean.
- Forgetting the grease filter entirely. On an over-the-range unit this is the step with a real safety and airflow consequence, and it is the one nearly every cleaning routine omits.
Troubleshooting: smells, stains and marks that survive the steam
The smell came back within a day. Something was missed rather than something failing. The usual suspects, in order, are the inner door lip, the recess under the turntable and its roller ring hubs, and on an over-the-range unit a saturated grease or charcoal filter that is holding cooking odor and releasing it back into the room whenever the fan runs.
A brown stain will not lift. If the residue is gone and the color remains, you are likely looking at a stain in the coating rather than a deposit on it. Try a baking soda paste left on the spot for ten minutes and wiped away gently. If that fails, stop; the stain is cosmetic and the coating is worth more than the appearance.
Popcorn or fish smell in everything. Run lemon steam, air the cavity with the door open, then leave an open container of baking soda inside overnight. Repeat rather than escalating to stronger chemistry, which does not belong in a food cavity.
Sparking, flashes, or popping. Stop immediately and unplug. This is usually metal in the cavity, damaged coating with exposed metal, or a damaged waveguide cover, and none of those are a cleaning problem. Same answer for a burning or electrical smell.
The plate is not turning. Check the roller ring wheels are clean and spin freely, the plate is properly seated on the drive coupler, and nothing is jamming underneath. If all three are right and it still refuses, that is a drive motor or coupler fault.
The door does not close squarely. Stop using it. A door that has been dropped, bent, or has a damaged screen or hinge is a containment issue, and it is a technician’s decision, not a cleaning one.
Microwave safety rules that outrank any cleaning tip
Everything else in these test notes is a preference. This section is not, and every point here is a genuine hazard rather than an appliance-care nicety.
Never run the unit empty, and never let a container boil dry inside it. Without a load to absorb the energy, the unit is driving power back into itself, which damages it quickly and can be dangerous.
Superheated water is real. Water heated in a smooth container can pass its boiling point without visibly bubbling, then erupt when it is moved or when a utensil is put in. Allow standing time before you reach in, use a wide bowl with an acid in the water, leave a wooden stick in it, and wear mitts.
Never use abrasive pads, scrapers, or harsh chemistry on the interior or on the waveguide cover, and never remove the cover or operate the unit with it damaged, torn, or missing.
Cut the power before cleaning vents or filters on an over-the-range unit. Unplug it, or switch off its breaker, and confirm before your hands go up there.
A damaged door, hinge, latch, or sealing surface is a repair-or-replace matter rather than a cleaning one, because those parts are what keep the energy inside the box. The same goes for a cracked or perforated door screen. And never open the outer casing: a microwave contains a high-voltage capacitor that can hold a dangerous charge even after it is unplugged, which puts the inside of the case firmly out of bounds for owners.
When cleaning is not the answer: repair or replace
A cleaning routine fixes dirt. It does not fix a unit that has aged out, and knowing the difference saves you from cleaning something you should be replacing. Countertop microwaves are commonly cited as lasting somewhere around seven to ten years of ordinary household use, with over-the-range units often running longer because they are built in and used less as a primary cooker, though real lifespans vary enormously with use.
The signals that point away from cleaning are specific. Food that takes noticeably longer to heat than it did a year ago, in a cavity you have just cleaned, suggests a magnetron losing output. Arcing that continues after you have confirmed the cavity is clean and metal-free. A door that does not sit square, a damaged latch, or a screen with any perforation. A burning smell that is not food. Any of those is a stop-using-it item.
The economics are simple enough to run in your head. Set a repair quote against what a comparable replacement costs and against the years the unit plausibly has left, which is the same repair-or-replace arithmetic laid out in our notes on how long appliances last. A quote past roughly half the price of a comparable new unit on a microwave in the back half of its life rarely makes sense.
If replacement is the answer, buy on the mounting type, the capacity, and the venting you actually need rather than on features, which is exactly the sequence in our walkthrough on how to choose a microwave.
Your microwave cleaning checklist
- Every use: food covered, sauces heated at reduced power, door left open for a few minutes after anything wet or strongly flavored.
- Same day: any visible splatter or boil-over wiped while it is still soft, which takes thirty seconds and prevents the baked layer entirely.
- Every routine, Step 1: one to two cups of water plus two tablespoons of vinegar or one squeezed lemon, wide heatproof bowl half full, three to five minutes on full power, five minutes standing with the door closed, mitts on to remove.
- Step 2: sides, back, floor, ceiling last, damp cloth wrung out, no abrasives, second steam instead of harder scrubbing, waveguide cover wiped flat and gently.
- Step 3: turntable plate cooled on the counter before it meets water, washed in warm soapy water, roller ring hubs brushed until every wheel spins free, both dried fully.
- Step 4: inner door panel wiped, inner lip and door frame worked with a swab, latch openings kept dry, mesh screen untouched beyond a light outer wipe.
- Step 5, over-the-range only: power off at the breaker, metal grease filters soaked and scrubbed and dried, charcoal filter replaced by model number on its own schedule, never washed.
- Step 6: lemon steam or overnight baking soda for residual odor, everything refitted dry, power restored, fan and a short cycle tested.
- Monthly, over-the-range: grease filter washed regardless of how the cavity looks.
- Every routine, cadence: the interval set from your actual usage rather than from a generic number, near six weeks for a typical household and two for a shared kitchen.
- Always: never run it empty, never scrub the cavity or the cover, never take hot glass to cold water, never mix cleaners, and treat a damaged door or cover as a repair question.
The bottom line
Cleaning a microwave well is mostly a matter of letting condensation do the work you were about to do with your arm. Water plus vinegar or lemon, three to five minutes on full power, five minutes of standing with the door shut, and the baked film that looked permanent lifts with a damp cloth in two passes. From there it is order and patience: sides, back, floor, ceiling last with the driest cloth, the turntable plate cooled before it meets water, the roller ring hubs brushed free, and the door’s hidden inner lip given the swab that finds the smell everybody else leaves behind. On an over-the-range unit the job is not finished until the metal grease filter has been washed and the charcoal filter checked, because that unit is your ventilation and a loaded filter is both an airflow problem and a fuel load over the burners. Set the interval from your own usage, near six weeks for most households, cover your food, and wipe the spill the day it happens. Do those three and the six steps above stay a forty-five minute job rather than an afternoon.
A note from the bench: these test notes describe a general cleaning routine for typical household microwaves and are educational only, not professional advice; every interval, quantity, time, and dollar figure here is an illustrative planning number rather than a measurement of any particular model, and your manufacturer’s manual takes precedence over anything written here, especially on interior coatings, turntable dishwasher tolerance, filter part numbers, and what the unit permits an owner to touch. The safety points are not preferences: do not run a microwave empty, allow standing time before removing heated water because it can erupt when disturbed, keep abrasives and harsh chemistry away from the cavity and the waveguide cover, never remove that cover or run the unit with it damaged, cut the power before working near the vents of an over-the-range model, and treat a damaged door, latch, screen, or seal as a containment fault that a technician handles rather than something a clean can address. Never open the outer casing under any circumstances, since the high-voltage components inside can hold a charge long after the unit is unplugged.
Frequently asked questions
What is the fastest way to clean a microwave?
Let steam do the work before a cloth ever goes in. Put one to two cups of water in a wide heatproof bowl with a couple of tablespoons of white vinegar or the slices and juice of one lemon, run it on full power for three to five minutes until the cavity is visibly steamy, then leave the door shut for another five minutes so the condensation soaks into everything baked onto the walls. The softened residue wipes off with a damp cloth in a couple of passes instead of resisting a scrubbing session. Allow standing time before you reach for the bowl, because water heated in a smooth container can superheat and erupt when it is disturbed, and use oven mitts. Start to finish it is roughly twelve minutes of steaming and standing, and about eight minutes of wiping.
Should I clean a microwave with vinegar or lemon?
Either works, and the difference is mostly what you want the kitchen to smell like afterwards. Both are mild acids, and the acid helps loosen the mineral film and cooked-on food residue that plain water alone leaves behind, while the steam does most of the softening either way. White vinegar is cheaper and slightly more effective on hard water film on the door glass and cavity walls, but it leaves a sharp smell for an hour or so. A halved and squeezed lemon dropped into the water with its rind is gentler on the nose and leaves a cleaner-smelling cavity, which matters more in a kitchen where the microwave is used constantly. Plain water still works if you have neither, it just needs a longer stand and a little more wiping.
How do I get the smell out of a microwave?
Deal with the source first, because deodorizing over a residue only masks it. Run the steam step, wipe every interior surface including the ceiling and the inner door lip, wash the turntable, and on an over-the-range unit check the grease filter, since a saturated filter holds cooking odor and releases it back into the room. Then treat what is left: leave an open container of baking soda inside overnight with the door closed, or run a fresh bowl of water with lemon and let the cavity air out with the door open afterwards. A smell that returns within a day usually means something was missed, most often burned residue under the turntable ring or splatter tucked into the door seal. A persistent burned-plastic or electrical smell is not a cleaning problem and means stop using it and get it looked at.
Can I clean the inside of a microwave with a scouring pad?
No, and this is the one restriction worth taking seriously. The cavity is usually painted or coated metal, and abrasive pads, steel wool, and scrapers cut through that coating and expose bare metal that will corrode and eventually arc. The ceiling is worse, because that is where the waveguide cover sits, a thin mica or plastic panel that abrasives will shred. Use a soft cloth, a non-scratch sponge, and a longer steam soak instead of more force, and give stubborn spots a second steam rather than a harder scrub. If you have already scratched through to bare metal, or the waveguide cover is torn, charred, or missing, treat that as a repair question rather than a cleaning one.
Do I need to clean the filters on an over-the-range microwave?
Yes, and it is the step almost every microwave cleaning routine leaves out even though it is the one with a real cost and safety consequence. An over-the-range unit doubles as your range hood, so it has a metal grease filter underneath that traps aerosolized cooking fat, and a saturated filter chokes airflow, holds odor, and puts a load of grease fuel directly above the burners. That filter slides or unclips out and washes in the hottest tap water with dish soap, so it costs nothing but time. A recirculating model also has a charcoal filter that cannot be washed and is replaced on the manufacturer's schedule, commonly somewhere between every six and twelve months, at an illustrative fifteen to forty dollars. Unplug the unit or cut its breaker before working near the vents.
How often should you clean a microwave?
Wipe the obvious splatter the same day it happens, and run the full steam routine somewhere between every two and twelve weeks depending on how hard the unit works. A household using it a handful of times a day and usually covering food lands near a six-week interval; a shared or office kitchen where nobody covers anything and nobody owns the mess needs it closer to every two weeks. On an over-the-range unit the metal grease filter wants washing about monthly regardless of how clean the cavity looks, because it is collecting from the cooktop, not from the microwave. The honest test is your own eyes and nose: visible speckling on the ceiling or a smell when you open the door means you are already overdue.
Can I put the microwave turntable in the dishwasher?
Most glass turntable plates are dishwasher safe on the top rack, but check the manual, because some plates and most plastic roller rings are not. The rule that matters more is thermal shock: a glass plate that has just come out of a hot cavity must cool on the counter before it meets cold water or a cold dishwasher rack, because the temperature difference can crack or shatter it. Wash the roller ring separately by hand, since food and grease collect in the wheel hubs where a dishwasher spray never reaches, and dry both fully before refitting. Never run the microwave with the plate or ring missing unless the manual specifically allows it, because the turntable is part of how the unit heats evenly.
Is it safe to run the microwave with just water inside to clean it?
Yes, and that is exactly what the steam step is, but two cautions apply. Never run the unit empty or with a container that has boiled dry, because with no load to absorb the energy the magnetron is left driving power back into itself, which is how a microwave damages itself in minutes. And do not use a very smooth container with plain water for a long run, because water can heat past boiling without visibly bubbling and then erupt violently when the bowl is moved or a spoon goes in. A wide bowl, an acid such as vinegar or lemon in the water, a wooden stick left in it, and a standing period before you reach in all remove that risk.