What's on this page
- Why crawl spaces need a dehumidifier: moisture, mold, and rot
- How to size a crawl space dehumidifier: the short answer
- How crawl space dehumidifiers are sized: pints per day
- Crawl space size to pint capacity: the sizing table
- Reading the dampness level under your house
- Why crawl spaces read damper than their square footage
- Encapsulation: sealing the crawl space first
- When to encapsulate before you buy
- Low-profile units built for tight crawl spaces
- The drain pump: getting water out from below grade
- Ducting a crawl space dehumidifier
- Low-temperature operation and defrost
- Placement: where to put the unit under the house
- Features that matter in a crawl space unit
- Crawl space vs whole-house dehumidifier
- What a crawl space dehumidifier costs to run
- Running cost by hours per day
- Encapsulated vs vented: what it does to the bill
- Setting the humidity target under the house
- Maintenance in a space you rarely enter
- A worked example: one 1,500 sq ft vented crawl space
- Crawl space dehumidifier buying checklist
- The bottom line
Short answer: Size a crawl space dehumidifier by combining the floor area with how damp the space reads, then round up to the next real capacity, starting from the wetter end because open ground feeds moisture upward. Choose a low-profile unit with a built-in drain pump to lift water out to grade and low-temperature operation with automatic defrost. Sealing the ground with a vapor barrier lets a smaller unit run far fewer hours.
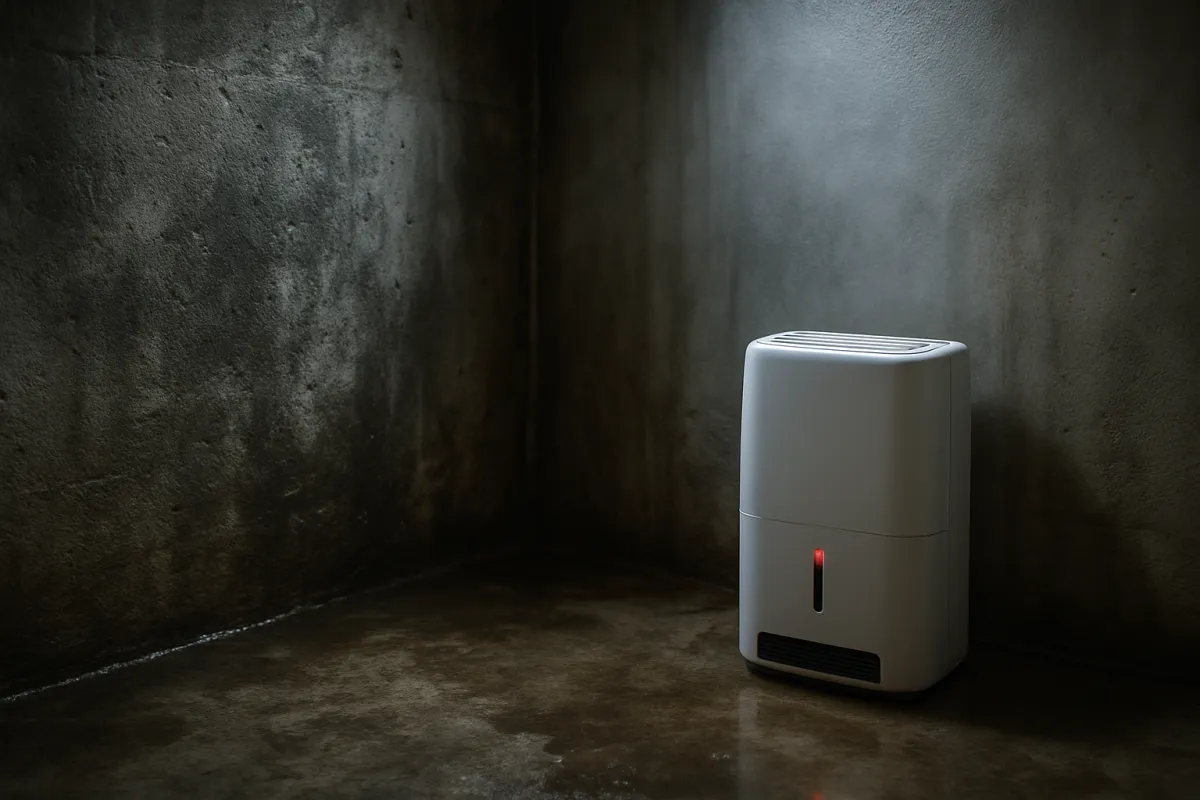
A dehumidifier for crawl space moisture is a different machine from the one you would set in a bedroom, and buying the wrong kind is the quiet way a moisture problem under your house never quite goes away. The space is short, cool, dark, and usually sits below the nearest drain, so a tall portable unit with a bucket is the wrong tool before you even reach the question of size. Get the machine right, though, and it holds the air under your floor below the band where mold and rot start, for a running cost that is mostly a seasonal line on the electricity bill.
This breakdown does two jobs for a crawl space specifically. First, it sizes the unit: how pints-per-day capacity works when the moisture source is the open ground, how square footage and dampness combine into a number, and how sealing the space with encapsulation changes that number. Second, it covers the features a crawl space actually demands, the drain pump, low-profile body, ducting, and low-temperature operation, then the running cost and the encapsulate-first decision. For the general sizing math on any room, our breakdown of what size dehumidifier you need and what it costs to run does the deep arithmetic, and our seven-step walkthrough on how to choose a dehumidifier covers the decision around any unit. You can size your own crawl space and price the running cost as you read with the cost-per-use calculator.
Key takeaways
- A crawl space needs dehumidification because the open ground feeds moisture upward, and damp wood is where mold and structural rot begin.
- Size from the wetter end of the range: a crawl space reads damper than its square footage alone suggests, so it needs more capacity than the same floor area in a finished room.
- Encapsulation is the highest-value step. Sealing the ground with a vapor barrier lets you buy a smaller unit that runs far fewer hours to hold its target.
- The features that matter are a low-profile body, a built-in drain pump to lift water out to grade, and low-temperature operation with automatic defrost.
- Running cost is watts times hours times your rate. A crawl space unit runs long hours in humid months, so efficiency and a sealed space are the levers that shrink the bill.
Why crawl spaces need a dehumidifier: moisture, mold, and rot
A crawl space is the part of a house most exposed to raw ground moisture and least watched by the people who live above it. In a vented crawl space the open earth below is a continuous source of water vapor, and humid outdoor air drawn in through the vents adds more. That moisture has nowhere useful to go, so it settles into the wood framing, the subfloor, and the insulation directly under your living space.
The problem is not the dampness itself but what it feeds. Wood that stays damp for long stretches is where mold takes hold, and sustained moisture is the precondition for the fungal decay that structural people call rot. Because the crawl space sits under the floor, the joists and beams doing the load-bearing are exactly the wood most at risk. A musty smell drifting up into the house, cupping floorboards, and higher indoor humidity in summer often trace back to a crawl space nobody has looked at in years.
A dehumidifier addresses the air side of that problem by holding the crawl space humidity below the band where mold and decay start. It does not replace fixing an active leak or drainage fault, which we come back to, but for the ambient dampness that a crawl space generates on its own, steadily removing moisture from the air is the core job.
How to size a crawl space dehumidifier: the short answer
Size a crawl space dehumidifier by combining the floor area of the space with how damp it reads, then round up to the next real capacity you can buy. Those two inputs do most of the work, the same as for any room, but a crawl space starts from a wetter baseline because the ground is an active moisture source rather than a dry finished floor.
The quick version: a vented crawl space around 1,000 square feet that reads very damp commonly points to a unit near the high thirties of pints per day, and a larger or wetter space climbs from there. Seal that same space with a vapor barrier and you can often drop to a meaningfully smaller unit, because you have cut off the supply of new moisture. Those are illustrative starting points, not guarantees, and the maker’s own crawl space chart is always worth checking before you commit.
The rest of this report turns that short answer into a method: how the pint rating works, how to read the dampness honestly, what encapsulation does to the number, and which features the space actually requires. The calculator up top runs the same arithmetic with your exact square footage and condition, so you can watch the pint figure and the running cost move together.
How crawl space dehumidifiers are sized: pints per day
Capacity is measured in pints per day, the amount of water the machine can pull from the air in 24 hours under a standard test condition. The word that matters is “can.” A 50-pint unit does not remove 50 pints from your crawl space every day. It means that under the test’s fixed temperature and humidity, that is how much it could extract. What you actually collect depends on how wet the crawl space air is, which is why the rating is a comparison tool rather than a forecast.
For a crawl space this distinction cuts both ways. A vented, open-ground crawl space in a humid August can hand a unit a great deal of water, so you want real headroom in the rating. A sealed, encapsulated crawl space presents far less moisture, so the same rating now represents a large safety margin and the unit spends most of its time cycled off. The machine did not change; the demand did.
Note also that crawl space units are frequently rated under commercial or manufacturer-specific test conditions rather than the residential AHAM room standard, so a crawl space unit’s pint number is not always directly comparable to a portable’s. Read the pint figure as headroom for the space, confirm which test produced it, and size from the wetter, more conservative reading when you are unsure.
Crawl space size to pint capacity: the sizing table
Here is the shape of a crawl space sizing table, expressed as illustrative figures rather than any one brand’s chart. Read down for your crawl space area, across for how damp it reads, and the cell is a rough pint-per-day target for a vented space. Round up to the next real capacity on the shelf, and if you have encapsulated the space, expect to drop roughly a third below these numbers.
| Crawl space size | Damp (vented) | Very damp | Wet / standing moisture |
|---|---|---|---|
| 500 sq ft | 20 pints | 25 pints | 31 pints |
| 1,000 sq ft | 30 pints | 38 pints | 47 pints |
| 1,500 sq ft | 40 pints | 50 pints | 62 pints |
| 2,000 sq ft | 50 pints | 63 pints | 78 pints |
Two things stand out. First, these numbers sit higher than a finished-room chart at the same square footage, because a crawl space starts wetter and the ground keeps resupplying moisture a finished floor does not. Second, moving across a row, from damp to wet, adds real capacity, so an honest read of the dampness band matters as much as the area.
Recommended pints by crawl space size, at very damp
Illustrative capacity for a vented crawl space that reads very damp. Bars scale with the pint figure.
Capacity roughly doubles from a small crawl space to a large one at the same dampness. Feed your own square footage into the calculator to see where you land.
Use the table to get into the right range, then let the maker’s crawl space chart and your read of the space fine-tune it. The calculator does the same arithmetic with your exact area and dampness, including the drop for a sealed space, so you do not have to interpolate between rows.
Reading the dampness level under your house
Dampness is half the sizing equation, so it is worth pinning down rather than guessing, and a crawl space gives you clear signs if you look. The bands below each have telltale marks you can read on a single visit with a flashlight.
Damp (vented). The space smells earthy or musty in humid weather and the ground feels cool and slightly moist, but there is no visible water. This is the mildest common state of an open, vented crawl space in summer.
Very damp. The musty smell is present most of the time, wood surfaces feel cool and clammy, and you may see faint condensation on ducts, pipes, or the vapor barrier if one is present. Many crawl spaces actually sit here, and it is easy to underestimate from inside the house.
Wet or standing moisture. You can see it: beads on cool surfaces, damp or dark patches on the soil, condensation dripping from ductwork, maybe pooled water after rain. At this point you are likely also looking at a drainage or leak source, not just ambient humidity.
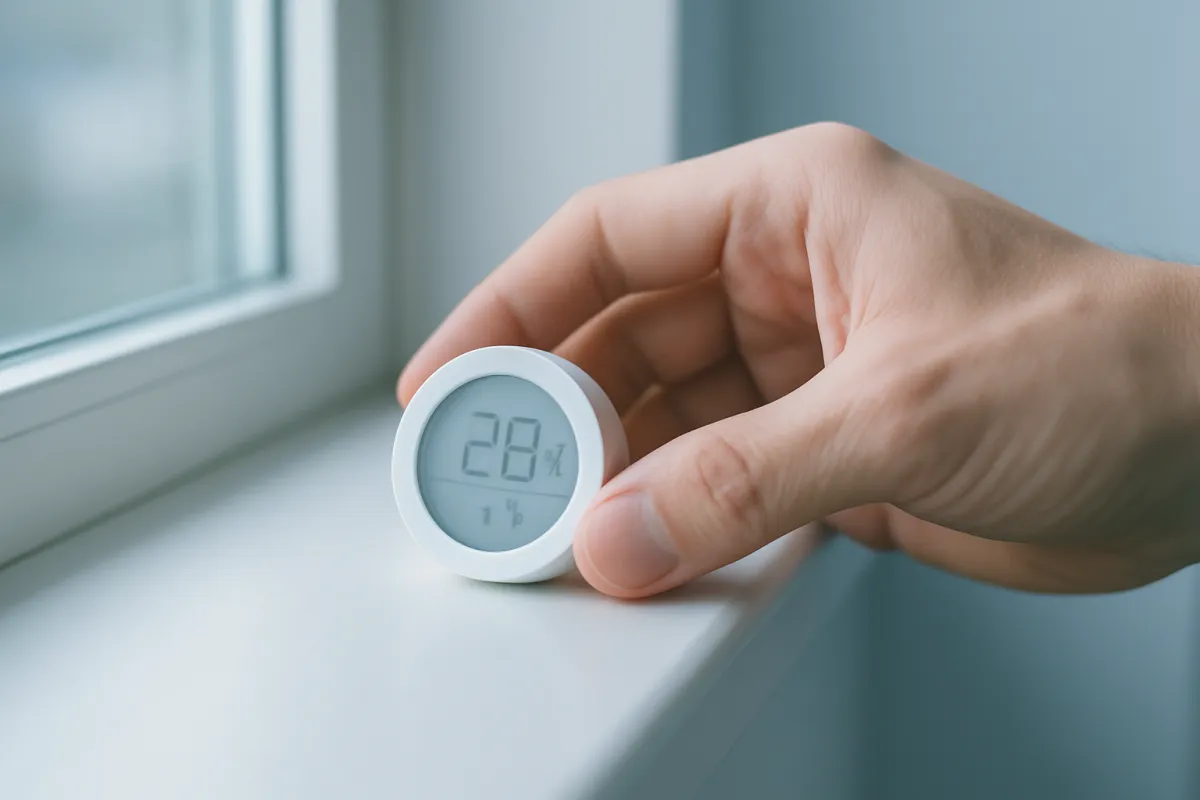
Be honest with the band you pick, and if you are between two, choose the wetter one. A cheap hygrometer left in the space for a few days settles the argument better than a single sniff, and undersizing because you flattered the space is the expensive mistake, since the unit then runs constantly trying to catch up.
Why crawl spaces read damper than their square footage
The reason a crawl space needs more capacity than the same floor area in a finished room comes down to where the moisture originates. In a living space the floor and walls are sealed, so the humidity you fight is mostly what people, cooking, and the outdoor air bring in. In a vented crawl space the single biggest source is the ground itself, bare or thinly covered soil that gives off water vapor continuously, day and night, regardless of the weather above.
On top of that ground moisture, a vented crawl space pulls in outdoor air through its wall vents. In humid months that incoming air is often wetter than the crawl space, so ventilation that was meant to dry the space can actually add moisture to it, a counterintuitive failure of the old vented-crawl-space approach. The cool surfaces under the house then condense that humidity, which is why you see beads on ducts and clammy wood.
The practical consequence is that a crawl space presents a dehumidifier with more water per square foot than a bedroom would, and it keeps presenting it because the source never switches off. That is why the sizing table sits higher, why headroom matters, and why sealing the space, the subject of the next two sections, changes the math so dramatically.
Encapsulation: sealing the crawl space first
Encapsulation is the step that changes everything about sizing and running cost, so it deserves to come before the hardware. To encapsulate a crawl space is to lay a heavy vapor barrier, a thick polyethylene sheet, across the entire ground and up the foundation walls, seal the seams, close off the outside vents, and effectively turn the crawl space into a sealed, conditioned zone rather than an open extension of the yard. The barrier stops the ground from resupplying moisture, and sealing the vents stops humid outdoor air from being drawn in.
Once the space is sealed, the dehumidifier is working on a fixed, limited volume of air instead of an endless supply of ground moisture. That is why an encapsulated crawl space can be held at target by a smaller unit running far fewer hours than a vented one of the same size would demand. Encapsulation and a dehumidifier are complementary: the barrier removes most of the moisture load, and the dehumidifier mops up the modest amount that remains and holds the humidity steady.
If you can only afford one step at a time, the vapor barrier is the higher-value move. A dehumidifier alone in a vented, open-ground crawl space is fighting a source it can never fully beat, which means long runtime and a stubborn bill. Seal the ground first, and the machine you then buy can be smaller and cheaper to run for the life of the space.
When to encapsulate before you buy
Not every crawl space needs full encapsulation before a dehumidifier earns its keep, so it helps to know where the line sits. The clearest case for sealing first is a vented crawl space with bare soil, a persistent musty smell, and humidity that a dehumidifier alone struggles to hold down without running most of the day. There, the ground is simply out-supplying any reasonable unit, and no amount of capacity fixes an uncontrolled source.
Encapsulation also makes sense when you see the wetter signs, condensation dripping from ducts, dark damp patches on the soil, or a vapor barrier that is torn, thin, or absent. In those cases the moisture load is high enough that a sealed barrier pays for itself in a smaller unit and a lower bill, and it protects the framing more reliably than drying alone.
Where you might reasonably run a dehumidifier without full encapsulation is a crawl space that already has a sound vapor barrier down, stays only moderately damp, and holds target without the unit grinding all day. Even then, sealing any remaining vents and patching the barrier improves the result. The honest rule: if the space is wet or the ground is open, seal it first; if it is already partly sealed and only mildly damp, a correctly sized unit can carry it. An active leak or drainage fault, of course, is a source problem to fix regardless of either step.
Low-profile units built for tight crawl spaces
The most obvious way a crawl space unit differs from a room portable is its shape. A standard portable dehumidifier is a tall, upright box designed to stand on a finished floor, and most crawl spaces do not have the headroom to accept one, or the access to wheel one in and out. Crawl space units are built low and flat, sized to slide under the floor joists and sit on the vapor barrier or on a small platform, so they fit the clearance a crawl space actually offers.
That low-profile design is not only about fitting through the hatch. A crawl space unit is usually meant to be installed once and left in place for years, drawing air and returning dry air within the sealed space, rather than moved from room to room. Many can be hung from the joists or suspended off the ground entirely, which keeps them clear of any water that reaches the barrier and improves air circulation under the floor.
Because these units are designed to run unattended in a place you rarely enter, they tend to favor rugged, set-and-forget construction over the fan-speed menus and mood lighting of a consumer portable. When you shop, confirm the unit’s physical dimensions against your crawl space clearance and hatch opening first, because the most capable machine is useless if it will not fit under your joists or through the access door.
The drain pump: getting water out from below grade
The single feature a crawl space most reliably demands is a built-in condensate pump, and the reason is geometry. A crawl space usually sits below the level of any drain, and gravity cannot carry water uphill, so a plain gravity hose, which works fine for a basement unit near a floor drain, has nowhere to send the water. A bucket is worse still, because emptying it means crawling under the house every day or two, which nobody sustains.
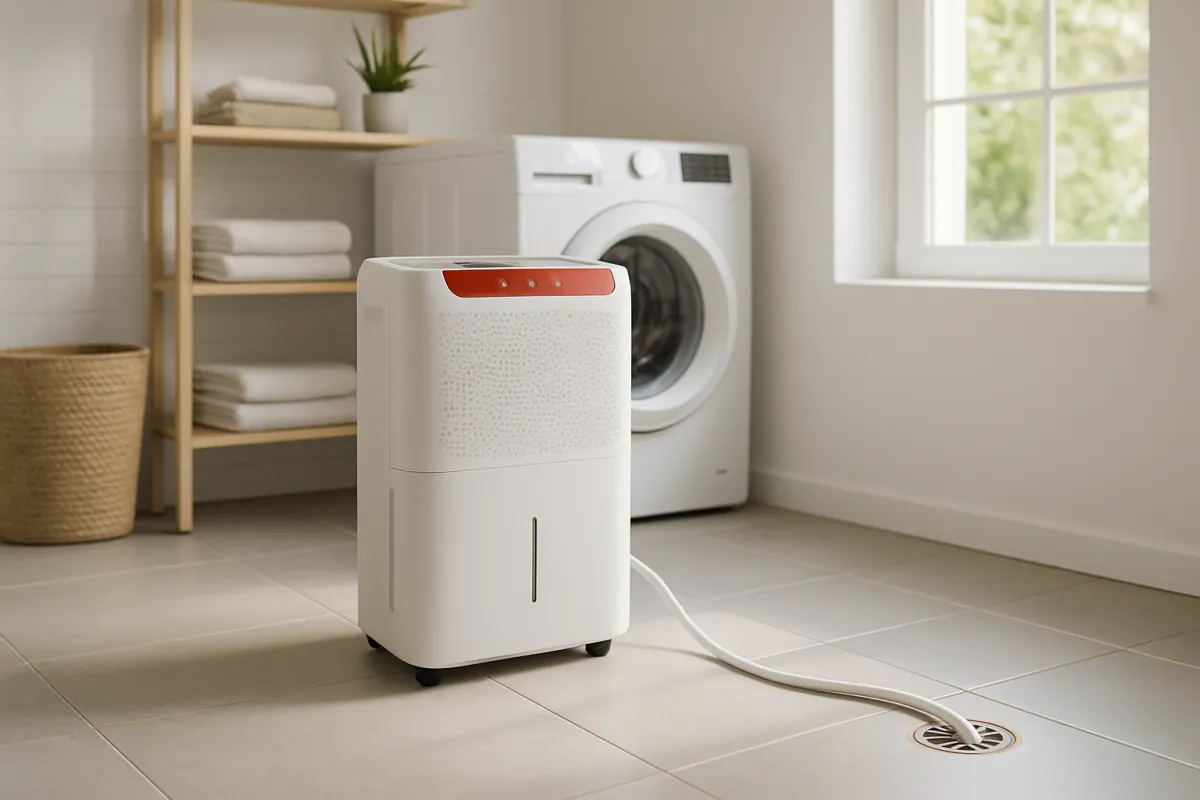
A built-in condensate pump solves this by pushing the collected water up and out through a hose, to a sump pit, a drain line, or simply out to daylight at grade. This is why units sold specifically for crawl spaces so often include the pump as standard: the space they are designed for almost always requires lift. The figure to check is the pump’s rated lift height, which must comfortably cover the vertical distance from the unit up to wherever the water needs to exit.
Plan the water’s route before you buy. Decide where it will go, a sump, an existing drain, or outside, measure the vertical rise and the horizontal run, and confirm the pump handles both with margin. Set up that continuous drainage from day one so the unit works unattended for months, which is the whole point of a machine in a space you do not visit. Getting the drainage wrong is how a correctly sized unit still fails to keep the crawl space dry.
Ducting a crawl space dehumidifier
Some crawl space setups add ducting, and it is worth knowing when that helps. A crawl space dehumidifier can often accept a short duct on its intake or discharge, which lets you draw air from, or deliver dry air to, a part of the space the unit is not sitting in. In a long or L-shaped crawl space, or one broken up by foundation walls into semi-separate bays, ducting the discharge to the far corner helps distribute dry air so one zone does not stay damp while the unit’s own corner runs dry.
Ducting also comes up when a single unit is asked to serve a large or awkward footprint. Rather than buying a second machine, you can sometimes duct one appropriately sized unit to reach both ends of the space. The tradeoff is that every foot of duct and every bend adds resistance the fan has to overcome, so ducting reduces effective airflow and, past a point, the unit’s real capacity. Keep runs short and bends few.
For a compact, open, rectangular crawl space, ducting is usually unnecessary; the unit’s own airflow circulates dry air well enough within a sealed volume. Reach for ducting when the geometry works against you, a divided or elongated space, and treat it as a distribution tool rather than a capacity upgrade. When in doubt, follow the maker’s guidance on maximum duct length for the specific unit, since exceeding it quietly undercuts the pint rating you paid for.
Low-temperature operation and defrost
A crawl space runs cooler than living space, and temperature is where a general-purpose dehumidifier quietly fails under a house. Most portable units are compressor machines that pull water by chilling a coil, and in cold air that coil frosts over. A unit not built for the cold then spends its energy running defrost cycles instead of removing water, so its effective capacity collapses in exactly the chilly conditions a crawl space presents in the shoulder seasons.
Purpose-built crawl space units address this two ways. They are rated to keep working down to lower ambient temperatures than a room portable, and they include an automatic defrost cycle that periodically clears the coil so the machine can resume drying rather than icing solid. The figure to check is the unit’s rated minimum operating temperature: it must cover the coldest conditions your crawl space actually reaches while you still need dehumidification.
If your crawl space stays genuinely cold for stretches, this is not an optional nicety. A compressor unit that stalls below its rated temperature is no better than no unit at all in the months it is defeated by the cold. In the coldest spaces, a desiccant-style unit, which absorbs moisture onto a drying material rather than condensing it on a cold coil, keeps working where a compressor struggles, at the cost of drawing more power for the same water removed. Match the technology to the temperature the space actually holds.
Placement: where to put the unit under the house
Where the unit sits under the house changes how well it dries the whole space. The instinct is to shove it into a corner near the access hatch, but a dehumidifier works by moving air through itself, so it dries the air around it fastest and the far corners slowest. In a compact, open crawl space a central location, with clear space around the intake and discharge so air can circulate freely, gives the most even result.
Keep the unit up off the ground where you can, on a platform, a couple of blocks, or suspended from the joists, so it stays clear of any water that reaches the barrier and pulls in air from a representative height rather than the dampest layer at the soil. Leave room around it; a unit jammed against a foundation wall or wedged behind ductwork cannot draw or discharge air properly, which strangles its effective capacity no matter how it is rated.
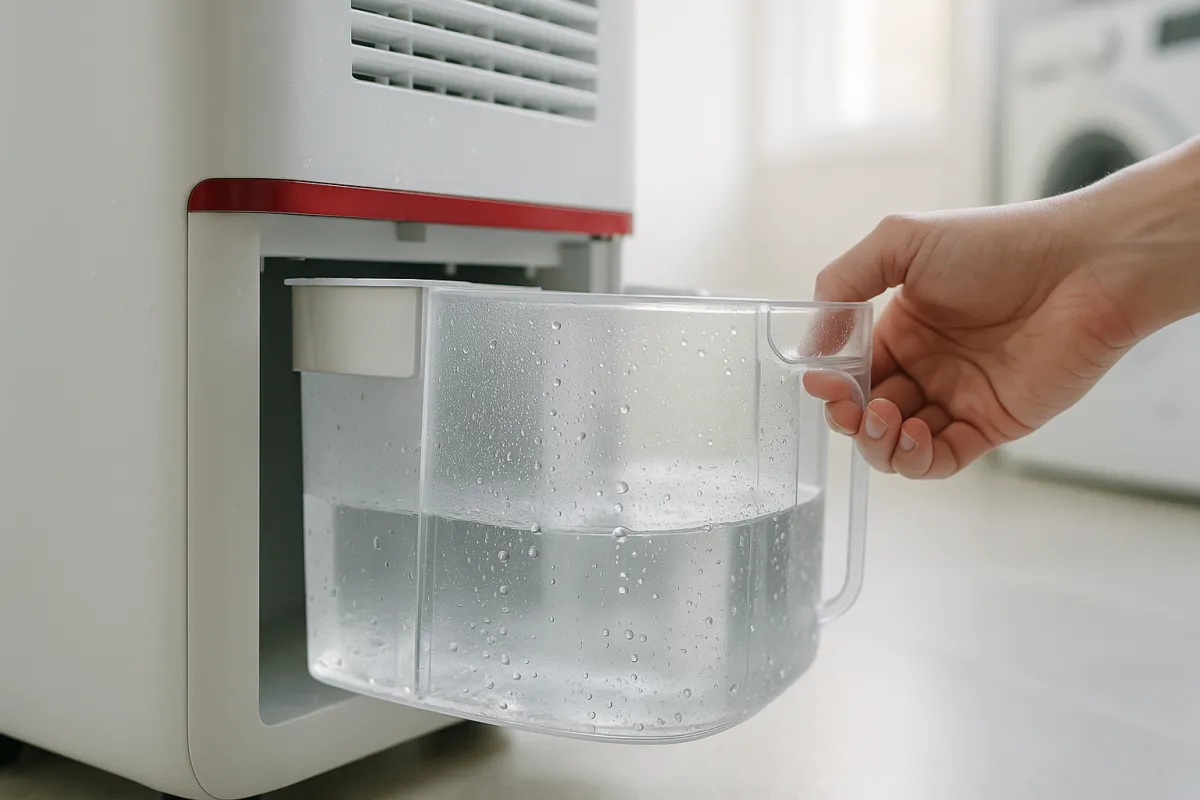
In a large or divided crawl space, place the unit where it can serve the most area, and use ducting or, if necessary, a second unit to reach a distant bay rather than trusting one corner machine to dry the whole footprint by osmosis. The goal is dry air reaching every part of the space, not just a dry patch around the machine.
Features that matter in a crawl space unit
Strip away the marketing and a short list of features actually changes how a crawl space unit performs and how little you have to think about it. These are the ones worth paying for.
A built-in condensate pump. For a below-grade space this is close to mandatory, because it is what carries water up and out when there is no gravity drain. Match the pump’s lift height to your vertical run.
Low-temperature operation with automatic defrost. This is what keeps the unit drying rather than icing up in a cool crawl space through the shoulder seasons. Check the rated minimum temperature against your space.
A low-profile body that fits your clearance. Confirm the physical dimensions against your joist height and hatch opening before anything else, since a unit that will not fit is a non-starter.
A fixed or built-in humidistat. This lets the machine cycle to a target and hold it unattended for months, which is both the whole operating model and the biggest lever on running cost.
What matters less than the box suggests in a crawl space: app dashboards, a menu of fan speeds, and cosmetic finish. You will rarely see the machine. Buy the capacity, the pump, the cold-weather rating, and the fit first, and treat everything else as a tie-breaker. For the broader feature discussion across any unit, our walkthrough on how to choose a dehumidifier works through the same short list room by room.
Crawl space vs whole-house dehumidifier
Two different machines can dry a crawl space, and the choice depends on where the moisture problem actually lives. A dedicated crawl space unit sits in the space it treats, tolerates the cold and the tight clearance, and pumps water out to grade directly. A whole-house dehumidifier is a larger unit tied into the home’s ductwork that conditions the air throughout the house, and it disappears into a mechanical space rather than the crawl space itself.
For a damp crawl space specifically, the dedicated unit down in the space is usually the more direct tool. It is positioned exactly where the moisture is, it is built for the temperature and the drainage the space imposes, and it does not depend on the HVAC system running to move air where it is needed. It also does not condition the whole house’s air just to dry the part under the floor.
A whole-house dehumidifier earns its place when humidity is a problem across multiple floors, not just the crawl space, and when the crawl space itself is already sealed and reasonably dry. In that situation a single ducted unit managing the entire home’s humidity can be more efficient than several separate machines. The deciding question is scope: one damp zone under the house points to the dedicated crawl space unit, while home-wide humidity in an already-sealed structure is where the whole-house system starts to make sense. Size any whole-house unit with a professional, since the calculation involves your ductwork as well as floor area.
What a crawl space dehumidifier costs to run
The running cost of a crawl space dehumidifier follows the same watts-times-hours-times-rate arithmetic as any appliance, and as with any dehumidifier the electricity is the dominant cost rather than a consumable. There is no filter you keep rebuying; there is a machine that draws real power for as many hours as the space demands.
Take a working figure of 500 watts while the compressor runs, a common draw for a mid-capacity crawl space unit, run it 12 hours a day, and it uses about 6 kilowatt-hours daily. At a typical rate near $0.16 per kilowatt-hour that is roughly $0.96 a day, or about $29 a month while it runs. Push it toward around-the-clock operation in a wet, unsealed crawl space through a humid stretch, and the monthly figure roughly doubles. These are illustrative numbers; your own wattage, runtime, and rate move them a good deal.
The lever that matters most here is runtime, and runtime is driven by whether the space is sealed. A vented, open-ground crawl space forces the unit to run long hours against a source it cannot beat, while an encapsulated space lets the same unit cycle off most of the day. That is the running-cost case for encapsulation stated in dollars. Our cost-per-use calculator will turn your own wattage, hours, and rate into a daily and annual figure, and our full dehumidifier size and cost breakdown works the same math for any room.
Running cost by hours per day
Because runtime is the lever, the monthly cost swings widely with how many hours the unit actually runs, which in a crawl space depends heavily on whether it is sealed. The table below holds the unit at a 500-watt draw and a typical $0.16 rate, and varies only the hours, to show how much the schedule matters. Figures are illustrative.
| Hours per day | Daily cost | Monthly cost |
|---|---|---|
| 4 hours | $0.32 | $10 |
| 8 hours | $0.64 | $19 |
| 12 hours | $0.96 | $29 |
| 24 hours | $1.92 | $58 |
The lesson is not to starve the space of the drying it needs; a wet, unsealed crawl space that genuinely needs long hours will not be helped by cutting them. The lesson is that the way to move down this table is to reduce the demand, by encapsulating the space so the unit reaches target and cycles off, rather than by underrunning a machine the space still needs.
This is why the same unit can cost dramatically different amounts in two crawl spaces of identical size. A sealed space might sit near the top rows of this table; a vented, open-ground space of the same footprint can live near the bottom. The machine never changed; the moisture load did.
Encapsulated vs vented: what it does to the bill
Put the encapsulation decision in cost terms and the case makes itself. A vented, open-ground crawl space forces a dehumidifier to run long hours against a moisture source that never switches off, so electricity dominates the yearly cost and the unit rarely rests. Sealing the space cuts the moisture load sharply, so the same unit reaches target and cycles off, and the electricity slice of the annual cost shrinks with it.
Where a year of crawl space dehumidifier ownership goes
Illustrative shares for a unit run seasonally in a crawl space. Electricity dominates, as with any dehumidifier.
Electricity is the fat slice, and its size is set mostly by runtime. Sealing the space is what shrinks the biggest number on this chart.
That split is the whole argument for sealing before you rely on the machine. Electricity is roughly seven-tenths of the annual cost in this illustrative breakdown, and electricity is set by runtime, and runtime is set by moisture load. Encapsulation attacks the largest slice at its source. The unit price and the modest upkeep, cleaning the intake and checking the drainage, are the small remainder.
Setting the humidity target under the house
A crawl space dehumidifier is only as useful as the target you set it to hold, and the goal under a house is a little different from a living space. A commonly cited target for a crawl space is around 50 to 55 percent relative humidity: low enough to discourage the mold and wood decay you are protecting against, without pointlessly over-drying a space nobody lives in. Below the band where wood stays damp long enough to support mold is the objective, not aridity for its own sake.
Set the built-in humidistat to a target in that range and let the unit cycle to maintain it, rather than running it flat out. In a freshly encapsulated crawl space the first pull-down can take a few days, because the wood and the trapped air release moisture gradually, and that is normal; the unit will settle into short maintenance cycles once the space is under control. Holding a target is far cheaper than chasing one, which is exactly why the humidistat is the feature that governs your bill.
A cheap remote hygrometer, or a unit that reports the crawl space humidity to a display you can read without crawling under the house, turns this from guesswork into a number you can trust. Check it across a few humid days after setup to confirm the space is actually holding target, then leave it to run. Our walkthrough on how to reduce humidity in your home covers the wider habits that keep whole-house humidity in the same healthy band.
Maintenance in a space you rarely enter
A crawl space unit is low-maintenance, but the fact that you rarely go down there makes the little upkeep it needs easy to forget, and neglect shows up as lost performance rather than a dramatic failure. Three things are worth a seasonal check, and none is expensive.
The intake filter, usually a simple washable mesh, catches dust before it reaches the coil. In a crawl space it can load with the fine soil dust the space carries, and a clogged filter chokes airflow so the machine works harder for less water. Rinse or replace it on a seasonal schedule. The coil itself should stay reasonably clean so it can transfer heat efficiently; wipe accessible dust off when you check the filter. And the drainage, the pump and the hose, deserves the closest attention, because a pump that has failed or a hose that has kinked or clogged means the unit collects water with nowhere to send it, and the space quietly goes damp again.
Because everything happens out of sight, the practical move is a calendar reminder to check the unit at the start and end of the humid season, plus a remote humidity readout so a rising number alerts you that something has stopped working. Our note on how to maintain your appliances makes the same case for the gear you cannot see: the cheapest repair is the one a five-minute check prevents.
A worked example: one 1,500 sq ft vented crawl space
Put it all together on a single realistic case. You have a 1,500 square foot vented crawl space with bare soil that reads very damp: musty most of the time, condensation on the ducts, no standing water. What do you buy, and what does it cost to run?
Sizing. From the area and the very-damp band, the illustrative table points to about a 50-pint unit for the space as it stands, vented. If you encapsulate first, laying a vapor barrier and sealing the vents, the required capacity drops meaningfully, often toward the low thirties, because you have cut off the ground as a moisture source. Either way you round up to the next real capacity and confirm against the maker’s crawl space chart.
Setup. Because it is below grade, you skip any bucket and rely on the built-in condensate pump to lift water out to a drain or to daylight, and you set the unit up off the barrier with clear space around it. You set the humidistat to hold about 52 percent.
Running cost. Say the unit averages 500 watts and, through the humid season, runs about 12 hours a day. That is roughly $0.96 a day, near $29 a month while it runs, and at that pace across a full year it works out around $350 a year in electricity. Seal the space first and the runtime falls sharply, pulling that annual figure well down. Our cost-per-use calculator lets you swap in your own square footage, rate, and hours to see your version of the number.
Crawl space dehumidifier buying checklist
Before you spend, run your candidate through these checks. Clear all five and the unit will fit the space, drain properly, and cost roughly what you expect.
- Size from area and dampness, from the wetter end. Use the table or the calculator, pick the honest dampness band, and if you are sealing the space, size for the sealed load rather than the vented one.
- Confirm the physical fit. Measure your joist clearance and hatch opening, and check the unit’s dimensions against both before anything else.
- Insist on a built-in pump with enough lift. Confirm the rated lift height covers the vertical run from the unit up to your chosen drainage point.
- Check the low-temperature rating and defrost. Make sure the rated minimum operating temperature covers the coldest conditions your crawl space reaches while you still need drying.
- Do the annual running-cost math, and weigh encapsulation. Run the wattage and honest hours through the cost-per-use calculator, and treat sealing the space as the biggest lever on that number rather than an afterthought.
Clear those and the decision rests on your space and your numbers rather than the packaging, which is the whole point of a breakdown.
The bottom line
A dehumidifier for a crawl space is a purpose-built tool, and the reasons trace straight back to the space: it is short, cool, and below the nearest drain, and its moisture comes from the open ground rather than the people upstairs. Size it from the wetter end of the range, because a crawl space reads damper than its square footage suggests, then buy the features the space actually demands, a low-profile body that fits, a built-in pump that lifts water out to grade, and low-temperature operation with defrost so it keeps working in the cold. Above all, weigh encapsulation first: sealing the ground with a vapor barrier is the single biggest lever on both the size of unit you need and the electricity it burns, because it cuts off the moisture at its source. Set a humidistat target near 50 to 55 percent, drain it continuously, and check it seasonally, and a machine that could have run all day chasing the ground instead holds the air under your floor exactly where mold and rot cannot start.
A note on scope: this breakdown is here to teach crawl space sizing and the running-cost arithmetic, not to sell you a particular machine or endorse a particular contractor. Every pint figure, wattage, temperature, and dollar amount above is an illustrative planning number drawn from typical ranges rather than measured on any one model, and real capacities, crawl space conditions, encapsulation costs, and electricity rates vary enough to move your result meaningfully. None of this is professional advice on structural moisture, mold remediation, foundation drainage, or electrical work. If you find standing water, active seepage, visible mold, or signs of wood decay in your crawl space, treat it as a source problem and bring in a qualified specialist before relying on any dehumidifier, and confirm a unit’s current rating, lift height, and low-temperature limits against the maker’s own figures before it goes under your house.
Frequently asked questions
What size dehumidifier do I need for a crawl space?
Size a crawl space dehumidifier from the wetter end of the range, because the ground under a house feeds moisture in a way a finished room does not. As an illustrative starting point, a 1,000 square foot vented crawl space that reads very damp often points to a unit near 38 to 40 pints per day, and a larger or wetter space climbs from there. Sealing the space first with encapsulation can cut the required capacity by roughly a third, since a vapor barrier stops the ground from resupplying humidity. Treat any single figure as a planning number, size up to the next real capacity on the shelf, and confirm it against the maker's own crawl space chart.
Do I need a special dehumidifier for a crawl space?
Usually yes, because the space is short, dark, and often below the level of any drain, which a standard room unit is not built for. A crawl space dehumidifier is typically a low-profile unit that slides under the joists, tolerates cool temperatures without icing up, and includes a built-in condensate pump to lift water out to grade. Many are meant to be set once and left to run unattended for months, so they favor a fixed humidistat and continuous drainage over a bucket you would have to crawl in to empty. A tall portable unit can work in a roomy crawl space with a floor drain, but the purpose-built units exist because most crawl spaces have neither the headroom nor the easy drainage.
Should I encapsulate the crawl space before adding a dehumidifier?
Encapsulation and a dehumidifier work best together, and sealing first usually lets you buy a smaller, cheaper-to-run unit. Encapsulation means laying a heavy vapor barrier across the ground and up the walls, sealing the vents, and closing the space off from the open earth that is the main moisture source. Once that barrier is down, the dehumidifier is drying a sealed volume of air rather than fighting the ground indefinitely, so it cycles far less. If the budget only stretches to one step at a time, the vapor barrier is the higher-value move, because a dehumidifier alone in a vented, open-ground crawl space runs long hours to chase moisture it can never fully win against.
Does a crawl space dehumidifier need a pump?
Almost always, because a crawl space usually sits below the nearest drain, and gravity cannot lift water uphill. A built-in condensate pump pushes the collected water up through a hose to a sump, a drain line, or daylight outside, which is exactly the lift a below-grade space demands. Units sold specifically for crawl spaces tend to include the pump for this reason, while a plain gravity hose only works in the rare crawl space that has a floor drain at or below the unit. Confirm the pump's lift height covers the vertical run to wherever the water needs to go before you buy.
What humidity level should a crawl space be kept at?
A commonly cited target for a crawl space is around 50 to 55 percent relative humidity, low enough to discourage mold and wood rot without over-drying. Wood begins to support mold and decay when it stays damp for long stretches, so the goal is to hold the air below the band where that happens rather than to make the space arid. Set the humidistat to a target in that range and let the unit cycle to maintain it, rather than running it flat out. In a freshly encapsulated space it may take a few days to pull the humidity down to target the first time, which is normal.
How much does it cost to run a crawl space dehumidifier?
Running cost is watts times hours times your electricity rate, and a crawl space unit often runs long hours through humid months. As an illustrative figure, a unit drawing around 500 watts run 12 hours a day uses about 6 kilowatt-hours daily, which at a typical rate near $0.16 per kilowatt-hour is roughly $0.96 a day, close to $29 a month while it runs. Across a humid season that can add up to a meaningful line on the bill. Encapsulating the space first is the single biggest way to shrink that number, because a sealed crawl space needs far fewer runtime hours to hold its target.
Can a crawl space dehumidifier work in cold temperatures?
Only if it is built to, which is why low-temperature operation is a feature to check rather than assume. A crawl space runs cooler than living space, and a compressor unit not designed for the cold will frost its coil and waste energy defrosting instead of drying. Purpose-built crawl space units are rated to keep working down to lower temperatures and include an automatic defrost cycle to clear the coil. If your crawl space stays genuinely cold, confirm the unit's rated minimum operating temperature covers your conditions, since a unit that stalls in the cold is no better than none at all in the months you may need it.
Is a crawl space dehumidifier better than a whole-house unit?
It depends on whether the moisture problem is confined to the crawl space or spread through the home. A dedicated crawl space unit sits in the space it treats, tolerates the cold and the tight clearance, and pumps water out to grade, which a ducted whole-house unit tied to the HVAC is not positioned to do as directly. A whole-house dehumidifier makes more sense when humidity is a problem across multiple floors and the crawl space is already sealed and dry. For a damp crawl space specifically, the purpose-built unit down in the space is usually the more direct and effective tool. Size a whole-house system with a professional, since it involves your ductwork as well as floor area.