
What's on this page
- What actually gets dirty inside a window air conditioner
- Before you start
- Step 1: Unplug the unit and open the front panel
- Step 2: Wash the filter and vacuum the front grille
- Step 3: Clean the evaporator fins without bending them
- Step 4: Clear the drain pan and the drain path
- Step 5: Kill the mold smell and dry the blower housing
- Step 6: Reassemble, restart, and run a drying cycle
- What you can reach without pulling the unit out of the window
- The rear condenser coil and when to stop
- How often to clean each part
- A worked example: a mid-season clean on a bedroom unit
- Common mistakes when cleaning a window air conditioner
- Troubleshooting: the smell comes back within a week
- Troubleshooting: water dripping into the room
- Troubleshooting: ice on the front coil after cleaning
- Troubleshooting: weak airflow that cleaning did not fix
- Troubleshooting: a rattle or new noise after reassembly
- What cleaning fixes and what it does not
- The electrical safety rules that never bend
- What a clean window unit is worth on the bill
- Your window air conditioner cleaning checklist
- The bottom line
A window air conditioner is the only appliance most people own that is deliberately kept wet on one side and open to the outdoors on the other. It drags room air through a filter, drops it below the dew point on a cold coil so the moisture condenses out, and lets that water run down a sloped channel and out through a hole in the back. Every one of those sentences also describes how it gets filthy. Dust mats into the filter, sticks to fins that are permanently damp, and turns into a film that grows. Within a season, the machine that was supposed to make the bedroom pleasant is the thing that announces itself the moment it starts.
These bench notes give a six-step method for how to clean a window air conditioner in place, without unmounting it from the window: unplug it and open the front panel, wash the filter and vacuum the grille, brush the evaporator fins, clear the drain pan and its drain path, deal with the mold smell at the source rather than at the surface, then dry everything, reassemble and run a proper test. Everything here uses things you already own. If you are choosing a unit rather than maintaining one, our window air conditioner buying walkthrough covers sizing, and for what the compressor hours cost you see our air conditioner running-cost report. Set your wattage, your running hours and your rate in the cleaning-schedule planner as you read and each section will price the job for your own unit.
Key takeaways
- Unplug the unit at the wall before you touch a single panel, and leave it unplugged for the whole job and the whole drying period. That rule is what makes the other five steps safe.
- Six steps: unplug and open the front, wash the filter and grille, brush the evaporator fins, clear the drain channel and weep hole, treat the mold at the fins and blower, then dry, reassemble and test.
- The smell does not live in the filter. It lives on the permanently damp evaporator fins, in the sloped drain channel and on the blower wheel, which is why washing the filter alone never fixes it.
- The sealed refrigerant circuit and the capacitor are not cleaning items. Anything involving refrigerant, the compressor, the wiring or a stored charge belongs to a qualified technician, full stop.
- Match intervals to running hours: filter about every two weeks at eight hours a day, a full deep clean near every twelve weeks, so roughly twice through a cooling season on the illustrative figures used here.
What actually gets dirty inside a window air conditioner
Before you open the front panel it helps to know what you are about to remove, because a window unit collects four or five distinct kinds of grime and each one answers to a different step. Knowing the mix is what explains why rinsing the filter never cures a musty machine, and why the parts you cannot see earn more attention than the parts you can. The stacked bar below shows an illustrative breakdown of the buildup inside a neglected bedroom unit after a full cooling season, so you can see where the trouble concentrates.
What builds up inside a window air conditioner
An illustrative split of the grime found in a neglected bedroom window unit after one cooling season. Segments sum to 100 percent. Your own mix shifts with room, pets and street dust.
Filter dust is the biggest single slice by volume, but the evaporator film and drain sludge together are where the smell comes from. The split is illustrative and shifts by home.
The shape of that split is the whole strategy in one picture. Filter dust is the largest share by bulk and the easiest to remove, which is why step two delivers the fastest improvement in airflow. But the two slices underneath it, the film on the fins and the sludge in the channel, are the ones your nose is reacting to, and neither of them is touched by a filter rinse. That is the single most common reason someone cleans a window unit, feels pleased, and smells the same thing again the following week. The blower wheel is a smaller slice that matters out of proportion to its size, because a wheel carrying a felt coat on its blades moves noticeably less air.
Carry one more framing into the steps. A window air conditioner has a wet half and a dry half, and they need opposite treatment. The filter, the front grille, the plastic bezel and the cabinet exterior are the wet half, and warm soapy water is right for all of them. The fan motor, the control board, the wiring harness, the capacitor and the compressor are the dry half, and the only things that should ever approach them are a soft brush, a vacuum nozzle and a barely damp cloth. The evaporator fin pack sits in between: it is designed to shed water into a drain, so it tolerates a purpose-made coil cleaner in a way a dehumidifier coil never does, but it sits directly above electrical parts, so the discipline still applies.
Before you start
This is a beginner job with one adult safety rule attached to it. Nothing in the six steps requires opening the sealed refrigeration circuit, discharging a capacitor, or removing the unit from the window. Budget about forty five minutes of hands-on work and around four hours start to finish, because the filter has to dry properly and the drying is the part people rush. The difficulty is low. The discipline is the hard part.
Gather a small kit first so you are not walking away mid-job with wet hands.
- A vacuum with a soft brush attachment and a crevice tool, for the filter, the grille, the fin pack and the drain channel. A clean paintbrush works as well as anything sold for the purpose.
- Warm water, a drop of dish soap, a cloth and a sponge, for the filter, the front panel and the cabinet. Add diluted white vinegar for the drain channel if it has a film.
- A few dry microfiber cloths and a towel, one for wiping and the rest to lay wet parts on while they dry flat.
- A flashlight, cotton buds and a length of stiff wire or a pipe cleaner, for actually seeing into the fin pack and for clearing a plugged weep hole from the inside.
- A screwdriver and your appliance manual, the first only if your bezel is screwed rather than clipped, the second because it is the authority on whether your filter is washable and what cleaners the maker allows.
Three ground rules keep the job safe and effective, and they never bend. First, the unit stays unplugged at the wall for the whole job and the whole drying period, because a power button leaves the board live. Second, nothing that is electrical gets wet: no spraying toward the motor, the wiring or the control panel, and no soaking anything that is still attached to the machine. Third, nothing goes back together damp, because a filter refitted slightly wet is the single most reliable way to recreate the smell you just spent an afternoon removing. With the kit ready and those three agreed, start at the plug.
Step 1: Unplug the unit and open the front panel
The first step is short and there is no version of this job that skips it. Pull the plug from the wall socket rather than switching the unit off at its own button or its remote. Behind a power switch, the control board is still energised and a fan can still turn under a stray command, and a window unit puts that board within a hand’s width of everything you are about to wash. If the cord carries a test and reset block, understand that the device protects against a ground fault in the cord; it is not an isolator and it does not replace pulling the plug.
With the cord out, lay a towel on the sill and along the wall under the unit, because the first thing that comes off a neglected front panel is a shower of dust. Open the front. Most window units use a hinged or lift-off plastic bezel across the whole face, held either by clips along the top edge or by two screws hidden under small covers at the bottom. Some models let you slide the filter out through a slot without removing the bezel at all, which is convenient for the two-week filter habit but not enough for a deep clean, because the fins and the channel behind it are what you have come for. Work slowly if the plastic feels brittle from a few seasons of sun.
Watch out for two things at this stage. First, do not pull the metal cabinet off the chassis or unbolt the unit from its window brackets as part of a routine clean. A window air conditioner is heavier than it looks, most of that weight is the compressor sitting at the back, and unmounting one on an upper floor is a two-person job with a real fall risk attached. Second, resist the urge to reach behind the fin pack with anything metal. The capacitor and the wiring harness live in there, and a capacitor can hold a charge after the unit is unplugged. Everything in these notes is reachable from the front with a brush, a vacuum and a cloth.
Step 2: Wash the filter and vacuum the front grille
The filter is the part that pays you back the most, because it is the airflow bottleneck for the entire machine and because it is the one thing you will realistically repeat every couple of weeks. On most window units it is a washable mesh or lightly pleated panel that clips into the back of the front bezel or slides into a slot immediately behind it. Take it out slowly and hold it flat, since a loaded filter drops a startling amount of dust the moment it changes angle. Carry it to a bin, tap the loose material off, then vacuum the dirty face with a brush attachment before any water touches it, because wetting a dry dust mat turns it into mud that is far harder to get back out of the mesh.
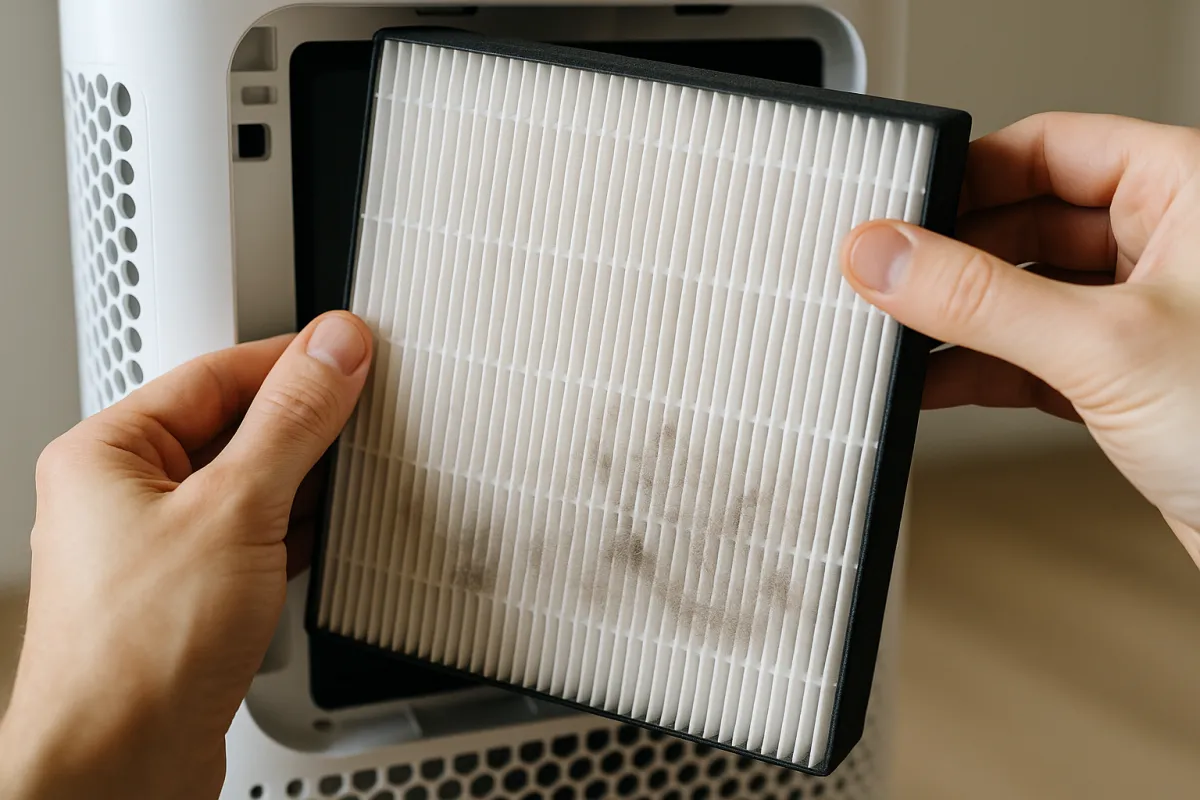
Once the loose dust is off, rinse a washable filter under lukewarm running water from the clean side toward the dirty side, so the water pushes the dust back out the way it came in rather than driving it deeper. A drop of dish soap and a very soft brush lift the greasy film that plain water leaves behind in a kitchen or a smoker’s room. Rinse until the water runs clear, shake the excess off, and lay the filter flat on a towel. Then wait. It needs to be bone dry before it goes back, which usually means a few hours, and there is no shortcut: a hair dryer or a heat gun can warp the frame so it no longer seats, and direct sun makes some mesh brittle.
While the filter dries, vacuum the front grille and the bezel you removed. The room-facing side of those louvres collects a felt of dust long before the filter does, and on a unit that sits behind a curtain it collects fibre too. Wash the bezel in the sink with warm soapy water if it is genuinely grimy, and dry it fully. Watch out for the assumption that every filter is washable: some units carry a thin disposable carbon or antimicrobial layer that is meant to be replaced rather than rinsed, and washing one of those ruins it while leaving it looking fine. Your manual settles that in one line. Feed your running hours into the cleaning-schedule planner to see how often this step is worth repeating for your unit.
Step 3: Clean the evaporator fins without bending them
With the filter out you are looking straight at the evaporator, the cold coil that does the actual dehumidifying, and this is the step where a careless minute does permanent damage. It is copper tubing threaded through hundreds of thin aluminium fins spaced a fraction of an inch apart, and those fins are the airflow path. They fold under almost no pressure and a bent section stays bent, permanently blocking the air you were trying to let through. Shine a flashlight across the face before you touch anything, so you can see which way the fins run, where the dust has matted, and whether any patch is already crushed from a previous clean or a knock in storage.
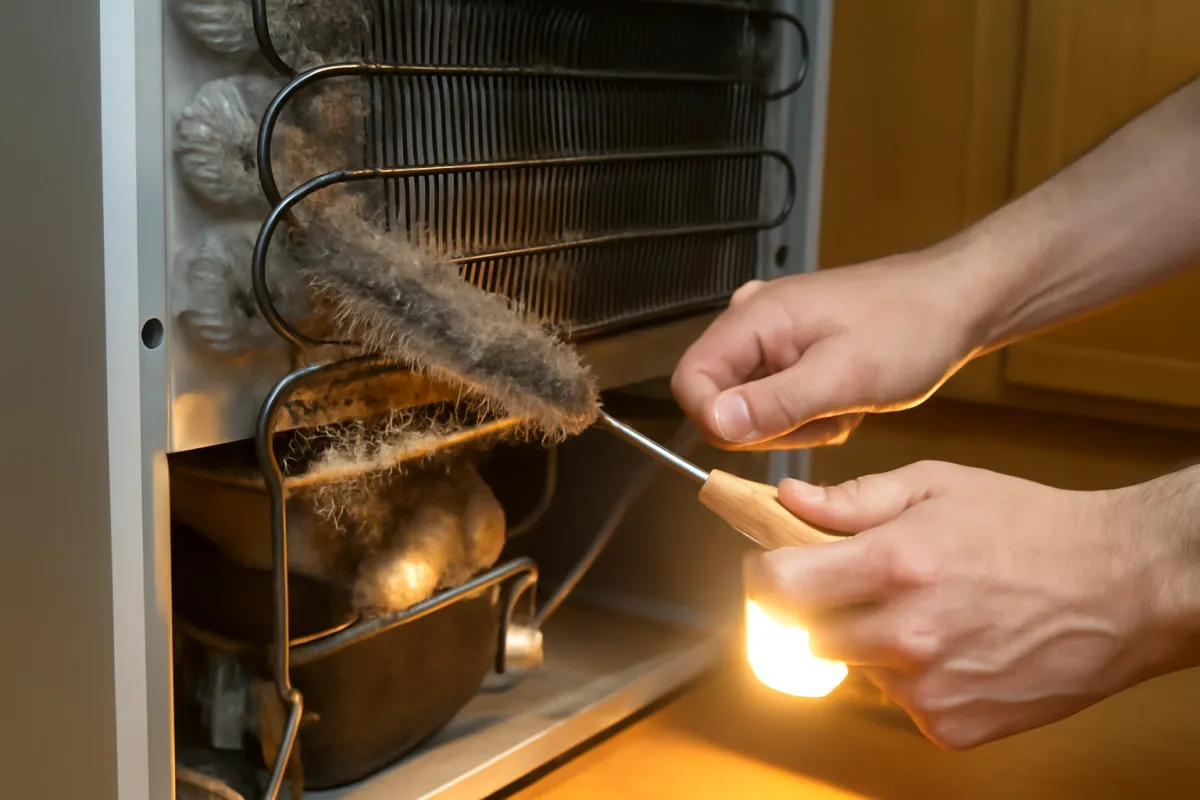
Clean dry first, and clean along the fins. Hold a vacuum brush attachment so the bristles run parallel to the fin direction, usually vertically on a window unit, and draw it down the face rather than scrubbing across it. A soft paintbrush reaches the gaps a nozzle cannot, flicking dust outward where the vacuum can collect it. Work in overlapping passes across the whole face, then re-check with the flashlight for the patches still reading dark. Ten minutes of patient dry work removes most of what a bedroom unit accumulates in a season.
The evaporator is the one coil where a liquid is sometimes appropriate, because unlike a dehumidifier coil it sits directly above a channel designed to carry water away. A no-rinse foaming cleaner sold specifically for indoor evaporator coils, applied lightly and left to work per its own label, will lift the greasy film that dry brushing leaves behind. Only reach for it if your manual permits it, keep the spray strictly on the fin face and away from the motor, the wiring and the control panel, and never substitute an oven, bathroom or general-purpose cleaner. Watch out for the three habits that ruin coils: compressed air at close range, which folds fins flat in a stripe you will never fully undo; a stiff brush or a screwdriver used to dig at a stubborn mat; and scrubbing across the fins instead of along them. A little embedded dust is always better than a bent fin.
Step 4: Clear the drain pan and the drain path
Under the evaporator is a sloped channel, sometimes a shallow moulded pan, that catches the condensate as it runs off the fins and carries it toward the back of the unit and out through a weep hole in the base. That path is short, permanently wet, and almost never inspected, which makes it the most reliable place in the machine for sludge to accumulate. When it blocks, the water has to go somewhere, and the somewhere is either over the front lip and onto your sill or into the insulation inside the cabinet where it sits and grows. A dripping window unit is usually a plumbing problem, not a refrigerant one.
Start by looking. With the bezel and filter off, shine the flashlight into the channel below the fin pack and follow it back with your eyes as far as the geometry allows. Some units expose the whole channel once the front comes off; others let you see only the front inch of it. Vacuum out the loose debris with a crevice tool, then wipe what you can reach with a cloth wrapped over a finger or a cotton bud, working the corners and the seam where the channel meets the fin pack. If a film is stubborn, a cloth dampened with diluted white vinegar handles it, wrung out so it is damp rather than dripping. Do not pour water down the channel to flush it: on many designs it drains into the outdoor half of the base pan, and on some it will simply overflow into the cabinet.
Then deal with the weep hole itself. It is a small opening at the rear of the base, and it plugs with a mix of lint, insect debris and mineral scale. From inside you can sometimes reach it with a pipe cleaner or a length of stiff wire fed gently along the channel; from outside, on a ground-floor window, you can clear it from the back where it is far more accessible. Push, do not drill, and stop if you feel real resistance rather than a soft plug. Watch out for one design detail that trips people: many window units are meant to sit with a slight downward pitch to the outside so water runs away from the room, and a unit installed dead level or tilted inward will drip inside no matter how clean the channel is. If your unit drips after a full clean, check the pitch before you suspect anything else. The household humidity notes cover why a damp room makes the whole drainage question busier.
Step 5: Kill the mold smell and dry the blower housing
This is the step that separates a clean window unit from one that merely looks clean. The smell people describe as musty, sour or like a wet basement is biological growth, and it grows where a surface stays wet for hours a day and never fully dries: the back face of the evaporator fins, the drain channel you just cleared, the foam insulation lining the air path, and the blower wheel that sits in the damp stream between them. None of those are the filter. That is precisely why rinsing the filter and reassembling produces a machine that smells the same by the weekend.

Work the sources in order. The fins get the treatment in step three, with a coil cleaner if your manual allows it, since that is what lifts the film rather than just the dust. The channel gets wiped and, if it has a slick feel, a diluted white vinegar wipe followed by a plain damp cloth. The blower wheel, a squirrel-cage cylinder with many small curved blades, is reachable on some models through the fin pack or from the side once the bezel is off, and a soft brush plus a vacuum works the blade faces one section at a time. On other models it is genuinely not reachable in place, and the honest answer is that the wheel is a removal job rather than an in-place one. Say so to yourself rather than forcing a tool into a gap.
Two rules bound the whole step. Never mix cleaners: bleach combined with an acid such as vinegar releases a harmful gas, so use one product, rinse or wipe, and stop. And never treat a smell as a reason to spray liquid deeper into the cabinet, because the electrical parts sit below and behind the air path. The habit that prevents the problem returning is a drying habit: run the unit on fan-only for ten or fifteen minutes after the compressor has been cooling, or use the built-in setting that does this automatically if your model has one, so the fins dry before the machine sits still overnight. Our indoor air quality notes put that in a wider context, and if the room itself smells damp the machine may not be the source at all.
Step 6: Reassemble, restart, and run a drying cycle
Do not start this step until everything is genuinely dry. Touch the filter in more than one place, check the corners of the bezel where water hides in the moulding, and look into the channel with the flashlight for standing droplets. A window unit reassembled damp is a window unit that smells within days, which means the four hours you spent are undone by four minutes of impatience. If the filter is not ready, leave the front open and come back later; nothing is harmed by the wait.
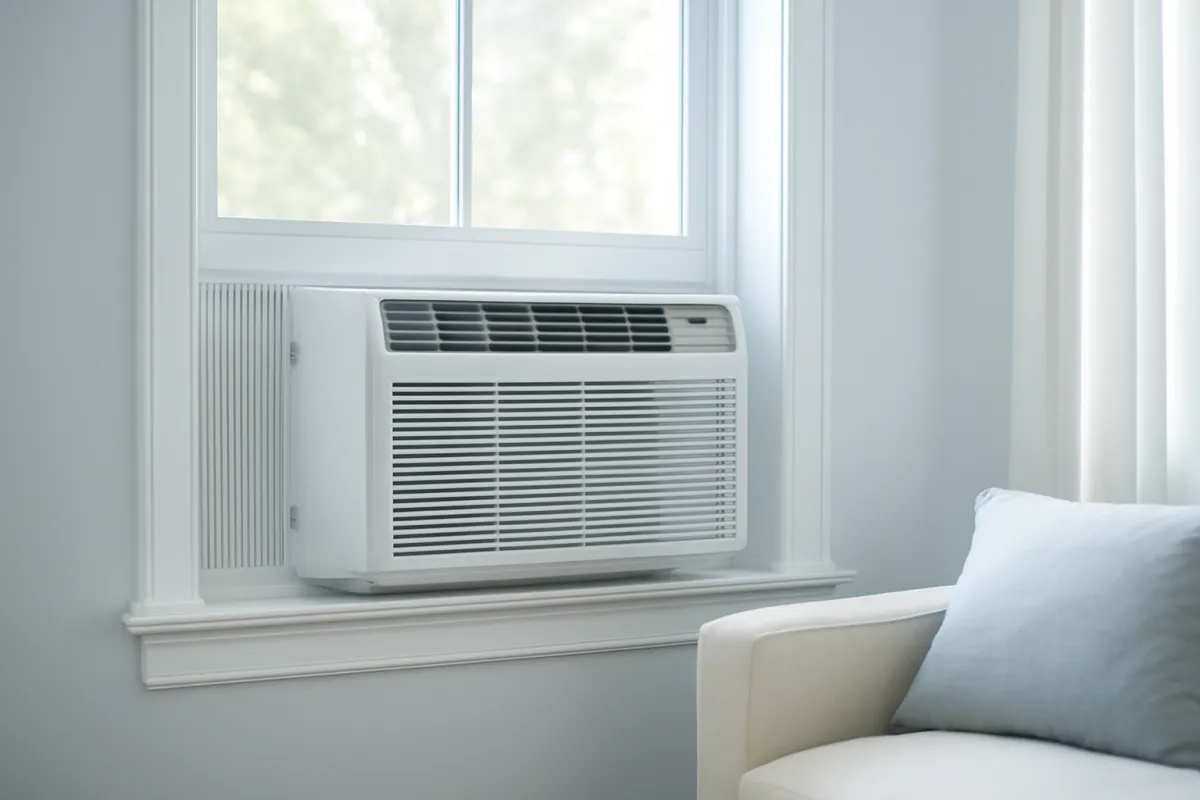
Refit in the reverse order: filter into its slot or clips, seated fully so no air can bypass it around the edge, then the bezel back onto its clips or screws, checking that it sits flush rather than proud at one corner. Wipe the cabinet and the sill. Only then plug the cord back into the wall socket. Set the unit to fan-only first and listen: the fan should spin up smoothly, without the scraping or rattling that says something is touching or a screw was left loose. Give it a minute, then switch to cooling and set the thermostat several degrees below the room temperature so the compressor is asked to start.
The function check has four things to confirm. The compressor engages after its short delay, which you hear as a change in the note rather than a bang. The air off the front turns properly cold within a few minutes. The airflow feels stronger than it did before you started, which is your reward for step two. And within the first hour, water appears outside at the weep hole or drips from the rear of the unit, which is the proof that step four worked. Then build the habit that keeps it clean: finish each cooling session with ten or fifteen minutes of fan-only so the fins dry. Enter your own wattage and hours in the cleaning-schedule planner and it will tell you when to do all six steps again.
What you can reach without pulling the unit out of the window
The premise of these notes is an in-place clean, so it is worth being explicit about where the line falls. From inside the room, with only the front bezel removed, you can reach the filter, the front grille, the whole indoor face of the evaporator fin pack, the front section of the drain channel, the plastic bezel and the cabinet exterior. On many models you can also reach some of the blower wheel and, with a wire fed carefully backward, the weep hole. Those parts hold the great majority of the dust and effectively all of the odor, which is why an in-place clean solves the problem that actually bothers people.
What you cannot properly reach is the rear condenser coil, the outdoor half of the base pan, the far side of the blower housing, and the back face of the evaporator. Dust on the rear condenser is a real efficiency issue over years, and debris in the outdoor base pan is a real drainage issue, but neither of them is what makes a bedroom smell in August. Deferring them to an annual job is a reasonable trade rather than a compromise.
There is also a middle option worth knowing. If your unit is on a ground-floor window with safe access from outside, you can clear leaves and grit from the outdoor half and rinse the rear fins gently from the back with a garden hose on a low setting, with the unit unplugged, spraying from the outside inward so the water pushes debris out the way it came rather than into the cabinet. Keep the water off the electrical box, and give the unit hours to dry before you plug it in. That gets you most of the annual job without ever taking the unit down.
The rear condenser coil and when to stop
The condenser is the outdoor coil, and its job is the mirror image of the evaporator’s: it dumps the heat the unit collected from your room. It is hot, dry and exposed to the weather, so it collects a different mix from the indoor side, mostly leaves, seeds, insect debris, road grit and cottonwood fluff. A blanketed condenser makes the compressor work against a higher head pressure, which shows up as longer running hours and a warmer room rather than as a smell. That is the case for cleaning it once a year, ideally at the start of a cooling season.
Doing it properly means either the outdoor hose approach described above or taking the unit out of the window and sliding the chassis from the cabinet on a bench. If you go the removal route, treat it as a planned project rather than an extension of a cleaning afternoon: two people, a stable surface, unplugged well beforehand, and never leaning out of an upper-floor window. Our appliance maintenance plan is the right place to slot an annual job like this alongside everything else in the house.
Then the stopping rules, which are not negotiable. The refrigerant circuit, meaning the tubing, the compressor and both coils as a pressurised system, is not a homeowner item. If a fin pack is punctured or the unit stops cooling while the fan still runs strongly, that is a sealed-system question for a licensed technician, because refrigerant handling requires certification and recovery equipment in most jurisdictions and venting it is unlawful in many. The run capacitor is the other hard stop: it can retain a charge after the unit is unplugged and is a genuine shock hazard, so it is not a part to inspect, discharge or swap during a clean. Damaged cord insulation, scorch marks, a burning smell, a breaker that trips on compressor start, or a unit that hums without the fan turning all end the cleaning session and start a phone call.
How often to clean each part
The six steps only pay off on a rhythm, and the right rhythm is set by running hours rather than by dates on a calendar. A unit that runs twenty hours a day through a heat wave in a room with a dog and a carpet pulls many times the air, and therefore many times the dust, of one that cycles for four hours in a spare room. The chart below scales an illustrative deep-clean interval to daily runtime at an average dust load, using the same arithmetic as the planner on this page.
Illustrative deep-clean interval by daily runtime
Weeks between full six-step cleans at an average dust load, scaled to how many hours a day the unit actually runs. Bars scale with the interval. Illustrative planning figures, not measurements.
A unit running around the clock needs a deep clean roughly six times as often as one running four hours a day. Pets, carpet and street dust shorten every figure further. Illustrative.
Translate that into three habits on different clocks. The filter is the frequent one: about every two weeks at eight hours a day, and closer to weekly in a dusty room, a home with shedding pets, or a unit whose window faces a busy road. The drying habit is daily and costs nothing: ten or fifteen minutes of fan-only at the end of a cooling session. The deep clean, meaning the fins, the channel, the weep hole, the blower and the cabinet, follows the chart above and lands near twelve weeks for a typical eight-hour-a-day bedroom unit, which works out to roughly twice through a cooling season.
Two fixed points sit outside that scale. Clean the unit fully at the end of the season before it is covered or stored, because a machine put away with a damp fin pack and a loaded filter spends months incubating exactly what you are trying to avoid. Clean it again before it comes back into service, because storage collects its own dust. If you use a cover through winter, use one that breathes rather than sealing moisture in against the cabinet. Set your own running hours and dust level in the cleaning-schedule planner to get intervals matched to your unit rather than to the illustrative eight-hour example used here.
A worked example: a mid-season clean on a bedroom unit
Put the six steps together on one illustrative afternoon. Picture a 900 watt window unit in a first-floor bedroom, running about eight hours a night through a hot July and August, in a home with a cat and a carpeted floor. It has not been cleaned since it went in. The symptoms are the standard set: a sour smell for the first few minutes after it starts, air that feels weaker than it did in June, a room that takes longer to come down to the setpoint, and a small damp patch on the sill. Nothing there says broken. Everything there says overdue.
On the schedule in these bench notes, eight hours a day at an average dust load puts a deep clean near every twelve weeks, so a unit untouched since installation in early June is roughly one interval overdue by late August. The session starts at the wall: cord out of the socket, towel on the sill, bezel unclipped and carried to the sink. The filter comes out grey rather than white and drops visible cat hair on the way. It gets tapped over a bin, vacuumed, rinsed from the clean side and laid flat on a towel, where it will stay for the rest of the afternoon.
With the filter out, the flashlight shows the evaporator fins wearing a felt of dust and hair across the lower third, worst where the airflow concentrates. Ten minutes of dry vertical brushing and vacuuming clears most of it. The channel underneath holds a dark sludge and smells like the room does, and it wipes out with a cloth over a fingertip plus a diluted vinegar pass on the corners. The weep hole takes a pipe cleaner and releases a soft plug of lint and grit. The blower blades visible through the fin pack get a brush; the far side does not, and that is noted as an end-of-season job rather than forced.
Three hours later the filter is dry. Everything goes back, the cord goes in last, and the function check runs. Fan-only sounds clean. On cooling, the compressor engages after its delay, the air off the front is properly cold within a few minutes and noticeably stronger than before, and water appears at the rear within the hour, which retires the sill patch as a drainage symptom. The sour first-minute smell is gone. On the illustrative arithmetic used across this site, at 900 watts and 16 cents a kilowatt-hour, eight hours a day for a 30-day month is about 216 kilowatt-hours or roughly 35 dollars. If the blockage had been forcing about a sixth more compressor time, that is close to 6 dollars a month the machine no longer has to spend. None of these figures are measured on any specific unit; the sequence is the transferable part.
Common mistakes when cleaning a window air conditioner
Nearly every problem people create while cleaning a window unit comes from a short list of habits. Each one has a consequence that outlives the clean.
- Cleaning it plugged in. Every step puts water, metal tools or both near a fan motor, a control board and a capacitor. Pull the plug at the wall, not the power button, and leave it out for the whole job and the whole drying period.
- Rinsing the filter and calling it done. The filter is the biggest slice by bulk but it is not where the smell lives. A machine that still smells after a filter wash has an evaporator and a drain channel that were never touched.
- Brushing across the fins instead of along them. Thin aluminium fins bend under almost no force, and a bent section permanently blocks the airflow you were trying to restore. Move parallel to the fins, always.
- Pouring water down the drain channel to flush it. On many designs that overflows into the cabinet insulation or straight onto the sill, which adds a damp problem instead of removing one. Vacuum and wipe it, then clear the weep hole.
- Using a general-purpose or bathroom cleaner on the coil. If a liquid touches the fin pack at all it should be a product labelled for evaporator coils, applied per its own label, with your manual’s permission.
- Reassembling while something is still damp. This is the most common reason the smell returns within a week. Wait for the filter, check the bezel corners, and look into the channel with a light before anything clips back together.
- Unmounting the unit on impulse. Most of the weight is the compressor at the back, and taking one out of an upper-floor window alone is a genuine fall and drop risk. Plan removals; never improvise them.
- Poking around behind the fin pack. The wiring harness and the capacitor live back there, and a capacitor can hold a charge with the unit unplugged. If you cannot reach it with a brush from the front, it is not part of this job.
Troubleshooting: the smell comes back within a week
A smell that survives a clean, or returns within days, almost always means something was missed or something never dried. Work the list in this order. First, the filter: was it genuinely bone dry when it went back, and is it seated so air passes through it rather than around the edge? Second, the evaporator: was it only vacuumed, when the film needed a coil cleaner to lift it? Dry brushing removes dust but not the greasy layer underneath, and that layer is what holds odor.
Third, the drain channel and the weep hole. Standing water anywhere in that path will regrow within days no matter how well the fins were cleaned, so confirm that water actually exits at the back within an hour of cooling. Fourth, the blower wheel, which is the part most often skipped because it is awkward, and which sits directly in the damp air stream. If the wheel is not reachable in place on your model, that is an honest reason to schedule an end-of-season removal rather than to keep repeating an in-place clean that cannot get there.
Fifth, the habit. A unit that runs cooling and then shuts off with wet fins is a unit that spends every night incubating. Ten or fifteen minutes of fan-only at the end of a session changes the environment rather than treating it. And sixth, the room. If the whole space smells damp, the machine may be reporting a household humidity problem rather than causing one, in which case the household humidity notes and our dehumidifier cleaning walkthrough are the more useful places to look next.
Troubleshooting: water dripping into the room
Inside dripping is a drainage question, not a refrigerant one, and it has three usual causes worth checking in order. The first is a blocked path: a channel full of sludge or a plugged weep hole backs condensate up until it spills over the front lip. That is step four, and it is by far the most common answer on a unit that has been in service a season or more without attention.
The second is pitch. Most window units are designed to sit with a slight downward slope toward the outside, so gravity carries condensate away from you. A unit installed dead level, or tilted inward because a support bracket sagged or a sash shim shifted, will drip inside with a perfectly clean drain path. Check it with a small level on the cabinet base and consult your own installation instructions for the intended slope, since the correct figure is a manufacturer specification rather than something to guess at.
The third is ice. A front coil that has iced over holds a surprising volume of water, and when the unit shuts off it all melts at once, faster than the channel can carry it away. If your dripping is intermittent and coincides with shutdowns, treat it as an icing problem and read the next section instead. One more possibility applies to units mounted where wind drives rain against the outdoor face: water entering around a poorly sealed side panel or an unsealed sash gap is an installation issue rather than a condensate one, and no amount of cleaning will change it.
Troubleshooting: ice on the front coil after cleaning
Ice on the indoor coil points at airflow or temperature first, and cleaning changes only one of those. If the frost started before the clean and is still there afterwards, check the obvious airflow items: is the filter actually seated, is the front grille pressed against a curtain or a stack of boxes, is the fan spinning freely and at full speed, and did anything get left in the air path during reassembly. A coil starved of warm room air drops below freezing and the condensate on it turns to frost, which then blocks more airflow, which makes it worse.
Then check the temperature side. Window units are designed to cool a warm room, and running one when the outdoor or indoor air is genuinely cool pushes the coil below freezing regardless of how clean it is. Many manuals give a minimum outdoor temperature for cooling operation, and that figure belongs to your model rather than to any general rule, so look it up rather than assuming. Running the unit on fan-only with the compressor off will melt existing ice in an hour or two, which is also the safe way to clear it: never chip at frost with a tool, because the fins and the tubing behind them puncture easily.
If the coil ices with a clean filter, unobstructed airflow, a healthy fan and warm room air, the remaining explanations sit on the sealed-system side, most often a low refrigerant charge from a leak. That is where cleaning stops and a licensed technician begins. There is no home fix, no top-up product worth buying, and no diagnostic you can safely run on a pressurised circuit with the tools in a cleaning kit.
Troubleshooting: weak airflow that cleaning did not fix
If the air still feels weak after a full six-step clean, work through what cleaning cannot reach. The blower wheel is the first candidate, because a wheel with grime packed into the curve of each blade loses a lot of its ability to move air, and on many models it cannot be properly cleaned in place. If you could only reach the front of it, weak airflow after a clean is the symptom that justifies an end-of-season removal.
The second candidate is the fan motor itself, which slows as it ages or if a bearing dries out. That usually comes with a change in sound, a hum that is deeper than it used to be, or a wheel that spins reluctantly by hand with the unit unplugged. Motor work is not cleaning work, and on a unit past its typical service window it is often the point where replacement is the more sensible spend; our note on how long appliances last is the right frame for that decision.
The third is not the machine at all. A front grille half covered by a curtain, a bed pushed against the unit, or a room with the door closed and no return path all reduce what you feel without anything being wrong inside the cabinet. Before you conclude the machine is tired, give it three feet of clear space in front, open the airflow path across the room, and try again. And check the mode: a unit left on a low fan setting or on an energy-saver mode that cycles the fan with the compressor produces exactly the intermittent weak airflow people report as a fault.
Troubleshooting: a rattle or new noise after reassembly
A noise that appeared during the clean was almost certainly created by the clean, which is good news because it is usually easy to undo. Unplug the unit before investigating anything. The most common cause is a bezel or filter that is not fully seated, so a corner vibrates against the cabinet at certain fan speeds. Press each clip home and check that the panel sits flush all the way round rather than proud at one edge.
The second is a fastener. A screw left out, left loose, or dropped inside the cabinet will announce itself immediately. Count what you removed against what you refitted, and if a screw is genuinely missing inside the machine, do not run it: a loose metal object in the air path can reach the fan. That is one of the few cleaning outcomes that justifies taking the unit down.
The third is contact. A fin pack bent slightly during brushing, a wire nudged into the fan path, or a piece of foam insulation that lifted and now touches the blower will all buzz or tick. Look with the flashlight before you assume the worst. A rhythmic scraping that follows fan speed is contact; a rattle that appears only when the compressor is running and stops when it cuts out is more likely a mounting or vibration issue, sometimes fixed by checking that the cabinet is firmly supported and the side panels are properly extended and secured.
What cleaning fixes and what it does not
It is worth being clear about the boundary, because cleaning gets blamed for failing at jobs it was never doing. Cleaning fixes airflow lost to dust, odor caused by growth on wet surfaces, dripping caused by a blocked drain path, and the slow creep of longer running hours that comes from a filter and a coil that have gradually closed up. Those are real and they are common, and they cover most of what people complain about in a second or third season unit.
Cleaning does not fix a failing compressor, a low refrigerant charge, a failed capacitor, a tired fan motor, a cracked cabinet seal, or a unit that was always too small for the room it is in. It does not make a unit quieter in any meaningful way beyond removing a rattle it created. And it does not improve a machine’s rated efficiency: it restores the performance the machine already had before it got dirty, which is a different and more modest claim than the ones you will see attached to cleaning products.
Sizing deserves a specific mention because it is so often mistaken for a maintenance problem. A unit that runs constantly and never satisfies the thermostat in a room that is too large for it will look exactly like a dirty unit from the sofa, and no amount of brushing changes that. If a full clean restores strong, cold airflow but the room still does not come down, the question has moved from maintenance to sizing, and our window air conditioner buying walkthrough covers how to think about that properly.
The electrical safety rules that never bend
Five rules carry all the safety weight in this job, and none of them has an exception attached.
- Unplug at the wall, every time. Not the power button, not the remote, not the test and reset block on the cord. The plug leaves the socket before the first panel comes off, and it stays out until everything is dry and reassembled.
- Nothing electrical gets wet. No spray toward the fan motor, the control board, the wiring harness or the capacitor. Liquids go on the fin face if the manual permits it, in the drain channel on a wrung-out cloth, and in the sink on parts you removed.
- The capacitor is not a cleaning item. It can hold a charge after the unit is unplugged. Do not probe it, discharge it or replace it as part of a clean, and do not reach behind the fin pack with a metal tool.
- The sealed refrigerant circuit is off limits. Tubing, compressor and both coils as a pressurised system belong to a licensed technician. Refrigerant handling requires certification and recovery equipment, venting it is unlawful in many places, and there is no home top-up worth buying.
- Stop at damage. Cracked or scorched cord insulation, a burning smell, a breaker that trips when the compressor starts, water inside the electrical box, or a unit that hums without the fan turning all end the cleaning session immediately.
One physical rule sits alongside them: never work on a mounted unit while leaning out of a window, and never take a unit down alone from an upper floor. The compressor puts most of the weight at the back, which is the end furthest from you when you reach for it.
What a clean window unit is worth on the bill
The honest framing is that cleaning removes a penalty rather than delivering a fixed saving, and the size of the penalty depends entirely on how blocked the machine was. The mechanism is simple: restricted airflow means the unit takes longer to bring the room to the setpoint, longer means more compressor hours, and compressor hours are what the meter charges you for. Nothing about a clean makes the machine inherently more efficient. It gets back what it had.
Put the site’s standard illustrative figures on it. A 900 watt window unit is 0.9 kilowatts. Run it eight hours a day for a 30-day month and that is about 216 kilowatt-hours, which at a typical 16 cents per kilowatt-hour comes to roughly 35 dollars for the month. If a matted filter and a felted coil force about a sixth more compressor time for the same comfort, that is roughly another 1.3 hours a day, or close to 6 dollars a month you are paying for dust. Across a four-month cooling season that is in the region of 24 dollars, for an afternoon of work you were going to do anyway to stop the smell.
Those numbers are illustrative planning figures rather than measurements. Your wattage is on the unit’s rating plate, your rate is on your electricity bill in cents per kilowatt-hour, and your hours are yours. Change any of the three and the arithmetic changes with it, which is what the cleaning-schedule planner is for. For the full method behind the calculation, our air conditioner running-cost report works through kilowatts times hours times rate in detail, and the appliance wattage reference has the comparison figures for everything else in the house. If the bill is the reason you are here, the electric bill reduction notes put a clean air conditioner in its proper place among larger levers.
Your window air conditioner cleaning checklist
Work this by interval rather than by season, and the machine stops surprising you.
- Every couple of weeks in season: slide the filter out, tap it, vacuum it, rinse it if it is washable, dry it flat and fully, and refit it seated properly. Vacuum the front grille while it dries.
- Every cooling session: finish with ten or fifteen minutes on fan-only so the evaporator fins dry before the unit sits still. This is the single cheapest habit in these notes.
- Every deep clean, roughly twice a season at eight hours a day: unplug, remove the bezel, brush the fins along their length, clean the drain channel, clear the weep hole, brush what you can reach of the blower, wash the bezel, dry everything, reassemble and run a full function check.
- Every deep clean, also confirm: water actually exits at the rear within an hour of cooling, the unit still sits with its intended slope to the outside, and the side panels and sash seals are intact.
- Once a year, at the start or end of the season: clear the outdoor half and the rear condenser fins, either by hosing gently from outside on a ground-floor window or as part of a planned two-person removal.
- At end of season: run a full deep clean, dry everything completely, and store or cover the unit only once it is bone dry, using a cover that breathes rather than one that seals moisture in.
- Always: unplug at the wall first, keep liquids away from the motor, the board, the wiring and the capacitor, use one cleaner at a time and never bleach with vinegar, and let everything dry before reassembly.
- Never: chip ice off the fins, pour water down the drain channel, probe the capacitor, open the refrigerant circuit, or take the unit down alone from an upper floor.
Set your running hours, wattage and rate in the cleaning-schedule planner to turn those intervals into dates and dollars that fit your own unit.
The bottom line
Cleaning a window air conditioner is a six-step, forty five minute job that almost nobody does, which is why almost every window unit smells by its second August. Unplug it at the wall and open the front, wash the filter and vacuum the grille to get your airflow back, brush the evaporator fins dry and along their length so you restore the coil instead of destroying it, clear the drain channel and the weep hole that decide whether the water leaves the building or your sill, treat the mold where it actually grows rather than where it is convenient, then dry everything properly, reassemble and run a real function check. Match the intervals to running hours rather than the calendar, add the ten-minute fan-only habit that stops the smell coming back, and keep the two rules that make the whole thing safe: nothing electrical gets wet, and anything involving refrigerant, wiring or the capacitor belongs to a qualified technician rather than to a cleaning afternoon.
From the bench: what you have just read describes a routine maintenance clean on a domestic window air conditioner and is offered for general education, not as a repair procedure or a promise of any particular outcome. Every wattage, rate, interval and dollar figure above is an illustrative planning number rather than a measurement of a specific unit, and your own model, room, climate and manufacturer instructions will change what is appropriate, so treat your appliance manual as the final word on washable parts, permitted cleaners, mounting slope and minimum operating temperature. Keep the unit unplugged at the wall throughout, keep every liquid away from the fan motor, the control board, the wiring and the capacitor, and use cleaning products one at a time, never combining bleach with vinegar or any other acid. Refrigerant, the sealed circuit, the compressor, the capacitor and anything showing heat or wiring damage belong to a qualified appliance or HVAC technician, and taking a mounted unit down is a planned two-person task rather than part of a cleaning afternoon.
Frequently asked questions
Can I clean a window air conditioner without taking it out of the window?
Most of the value is reachable from inside the room, yes. The front panel comes off, the filter slides out, the evaporator fins sit right behind it, the blower wheel is visible through the fin pack on many models, and on units with a removable front bezel the sloped indoor drain channel is reachable too. Those four parts hold the bulk of the dust and effectively all of the smell, so an in-place clean handles the problem people actually notice. What you cannot properly reach without unmounting is the rear condenser coil and the outdoor half of the base pan, which need either a seasonal removal or a hose from outside if the unit is on a ground-floor window. Treat unmounting as an annual job rather than a routine one, and never attempt it alone on an upper floor.
Do I have to unplug a window air conditioner before cleaning it?
Yes, and there is no exception to this one anywhere in these bench notes. Pull the cord out of the wall socket rather than pressing the power button, because the control board and the fan motor circuit stay live behind a power switch. A window unit is a fan, a compressor, a motor run capacitor and a control board packed inside a metal box, and every part of cleaning it puts water and metal tools near that equipment. Leave it unplugged for the entire job and for the whole drying period afterwards, and plug it back in only once every washed part is dry to the touch. If the cord has a test and reset block on it, that device is not a substitute for unplugging either.
How often should I clean a window air conditioner filter?
About every two weeks while the unit is running a normal eight-hour cooling day is a reasonable working rhythm, and closer to weekly in a room with pets, carpet, smokers or an open window onto a busy street. The right answer is set by running hours and dust load rather than by the calendar, which is why the planner on this page asks for both. At the illustrative eight hours a day used throughout these notes with an average dust load, the filter interval lands near thirteen days and the full deep clean near twelve weeks, so roughly twice in a cooling season. A unit that runs around the clock through a heat wave needs both intervals shortened sharply.
Why does my window air conditioner smell musty when it turns on?
That smell is almost always biological growth on a surface that stays wet, and in a window unit there are three usual sites: the evaporator fins behind the filter, the sloped drain channel underneath them, and the blower wheel that sits in the damp air path. The evaporator runs below the dew point every time the compressor is on, so it is wet for hours a day and dries out slowly, which is exactly the condition growth wants. A dirty filter makes it worse by feeding the fins a supply of organic dust to grow on. Cleaning the filter alone rarely fixes it, because the filter is not where the smell lives. The fix is the fins, the drain path and a dry-out habit after cooling, which is what steps three, four and five cover.
Can I spray coil cleaner into a window air conditioner?
A no-rinse foaming coil cleaner made for the indoor evaporator of an air conditioner is the one liquid many manufacturers do permit on the front fin pack, because that pack is designed to shed condensate into a drain channel and can therefore carry liquid away. That is different from a dehumidifier or a refrigerator, where liquid has nowhere to drain. Even so, the rules are strict: use a product labelled for evaporator coils rather than an oven or bathroom cleaner, keep the spray off the fan motor, the control board, the wiring and the capacitor, follow the drying time on the label, and check your own manual first, because it overrides any general advice. If you are unsure, dry brushing plus a rinsed filter gets you most of the way with none of the risk.
Why is my window air conditioner dripping water inside the room?
Inside dripping is nearly always a drainage problem rather than a refrigerant one, and it has three common causes. The first is a blocked drain path: the channel under the evaporator has filled with sludge or the weep hole at the back is plugged, so condensate backs up over the lip and runs into the room. The second is a unit mounted level or tilted the wrong way, since most window units are designed to sit with a slight downward pitch toward the outside so water runs away from you. The third is ice on the front coil that melts faster than the pan can drain when the unit shuts off. Clear the drain path first, check the pitch second, and treat persistent icing as a separate airflow question.
Does cleaning a window air conditioner lower what it costs to run?
It removes a penalty rather than delivering a fixed saving, which is the honest way to frame it. A matted filter and a dusty evaporator cut airflow, the unit takes longer to pull the room down to the setpoint, and the compressor therefore runs more hours for the same comfort. Running hours are what your meter charges for. On the illustrative figures used across this site, a 900 watt window unit at eight hours a day and 16 cents a kilowatt-hour costs about 35 dollars a month, and if a blockage forces roughly a sixth more compressor time that is close to another 6 dollars a month. The size of the effect depends entirely on how blocked the machine was, so treat any quoted percentage as a guess.
When should I stop and call a technician instead of cleaning?
Stop at anything sealed or electrical. The refrigerant circuit, meaning the copper tubing, the compressor and both coils as a pressurised system, is not a homeowner item at all: it is illegal in many places to vent refrigerant, and a leak needs licensed recovery and recharging equipment. The capacitor inside the cabinet can hold a charge after the unit is unplugged and is a genuine shock hazard, so it is not something to poke at, discharge or replace on a cleaning afternoon. Damaged cord insulation, scorch marks, a burning smell, a breaker that trips when the compressor starts, or a unit that hums without the fan turning all belong to a qualified appliance or HVAC technician. Cleaning is filters, fins, channels and surfaces, and it ends where the wiring begins.