What's on this page
- Why a clogged dryer vent is a fire hazard
- Signs your dryer vent is clogged
- Before you start
- Step 1: Unplug the dryer and pull it out
- Step 2: Disconnect the dryer from the vent duct
- Step 3: Clean the lint trap and its housing
- Step 4: Brush and vacuum the vent duct
- Step 5: Clean the exterior vent hood and flap
- Step 6: Reconnect, test, and set a schedule
- Tools: the dryer vent brush kit explained
- How often to clean a dryer vent
- Rigid vs foil vs vinyl duct: what matters
- How to clean a dryer vent, part by part
- A worked example: a full dryer vent clean
- Preventing lint buildup between cleans
- Common mistakes when cleaning a dryer vent
- Troubleshooting: harder dryer vent calls
- When to call a pro
- The bottom line
Short answer: Clean a dryer vent in six steps: unplug and pull out the dryer, disconnect the duct, clean the lint trap and its housing, brush and vacuum the duct, clear the exterior vent hood and flap, then reconnect and test. This is a safety task first, because lint is highly flammable and a restricted vent traps heat next to it. Clear the lint screen every load and clean the full vent about yearly.
Learning how to clean a dryer vent is the rare home maintenance job where the reason to do it is safety before anything else. A dryer works by blowing hot air through wet clothes and pushing that warm, moist, lint-carrying air out through a duct to the outside, but the lint screen never catches all of it, so a fine layer of highly flammable lint slowly coats the inside of that duct. As it builds, it does two dangerous things at once: it chokes the airflow that carries heat away, and it packs the vent with dry fuel sitting right next to a heat source. That is why a clogged dryer vent is one of the most widely cited causes of home clothes-dryer fires, and why this job matters more than a typical cleaning chore.
These notes give you a step-by-step method for cleaning a dryer vent properly, from safely unplugging the dryer to brushing the packed lint out of the duct, the lint-trap housing, and the exterior flap, so your dryer runs cooler, dries faster, and carries far less fire risk. Every step is something a confident homeowner can do with an inexpensive dryer vent brush kit and a vacuum. For the energy side of the same appliance, see our dryer running-cost report, and for how this fits your wider home routine, our eight-point appliance maintenance plan. Feed your vent run and loads per week into the cleaning-schedule planner as you read, and it will suggest how often to run each step.
Key takeaways
- A clogged dryer vent is a fire hazard first: lint is highly flammable, and a restricted vent traps heat right next to that fuel, which is why this is a safety task, not just a cleaning chore.
- The clearest warning signs are longer dry times, a dryer or laundry that feels very hot, a burning or musty smell, and lint around the trap or outside vent hood.
- The whole job is six steps: unplug and pull out the dryer, disconnect the duct, clean the lint trap and its housing, brush and vacuum the duct, clear the exterior vent hood and flap, then reconnect and test.
- Clear the lint screen after every load and run a full vent clean about yearly, more often for many loads, long or bendy runs, or lots of towels and bedding.
- Long or roof-vented runs are the point to call a professional, and a white vinyl or crushed foil duct should be replaced with smooth rigid metal because the duct itself can become part of the fire risk.
Why a clogged dryer vent is a fire hazard
Before you touch a brush, it helps to understand exactly why this job sits in a different category from wiping a shelf, because that reasoning is what turns a chore you skip into one you schedule. A dryer dries clothes by moving air, not just by heating it. Hot air picks up the moisture from wet laundry and carries it, along with a cloud of fine lint the screen never fully catches, out through the vent duct to the outside. When lint builds up along that duct and restricts the airflow, the moist hot air cannot escape, so heat backs up inside the machine and the duct, and both run hotter than the dryer was designed for. At the same time, the duct is now lined and sometimes packed with dry, flammable lint. Heat plus fuel plus poor airflow is the exact recipe a fire needs.
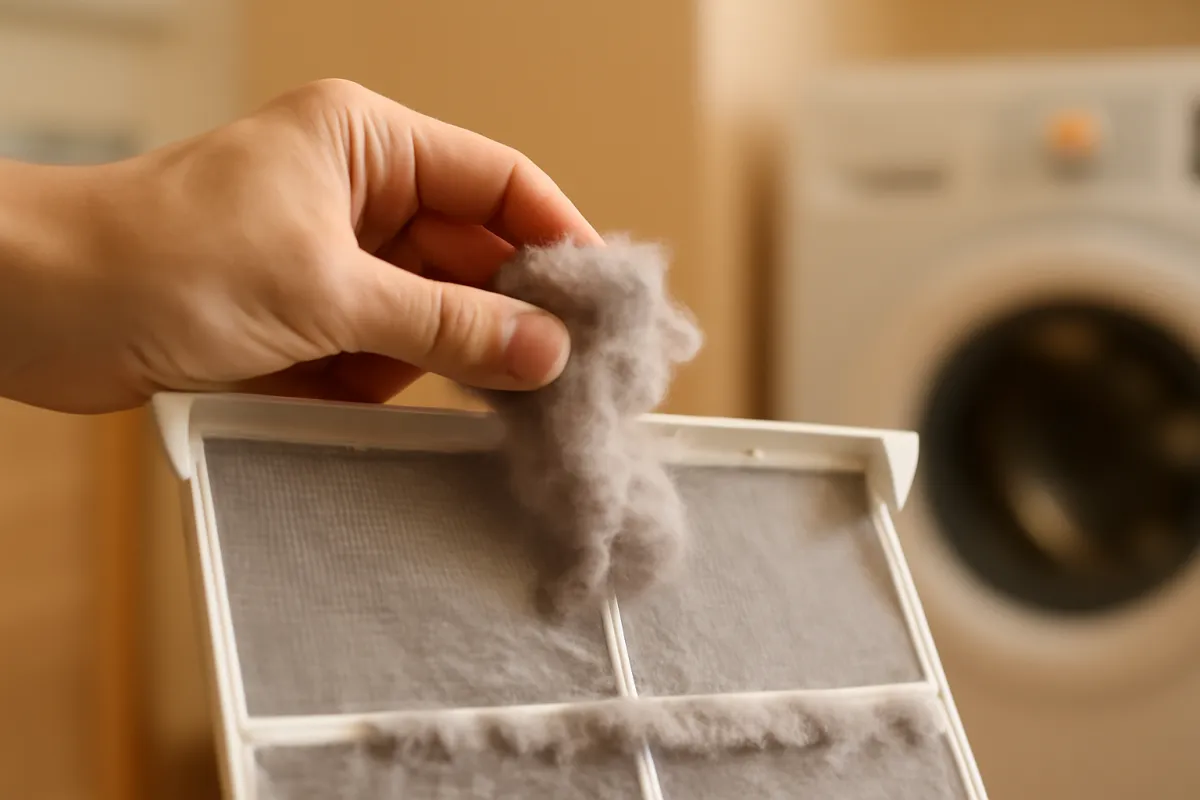
That is the whole reason the job matters more than its difficulty suggests. It is not hard to brush out a duct, but the consequence of never doing it is a real, well-documented fire risk, which is why clothes-dryer safety guidance treats vent cleaning as a routine maintenance item rather than an optional deep clean. The stacked bar below shows an illustrative breakdown of where the lint that causes the trouble actually collects along the dryer’s airflow path, because knowing that tells you where to spend your effort during the clean.
Where lint builds up in a dryer's airflow path
An illustrative split of where lint collects between the drum and the outside wall. Segments sum to 100 percent. Your mix varies by dryer, duct length, and how many bends the run has.
The lint trap and the duct just behind the dryer hold most of the buildup, which is why those two spots do most of the work. Bends and the exterior flap trap the rest. The split is illustrative and shifts by home.
The shape of that split is the strategy in one picture. The lint trap and its housing, plus the duct immediately behind the dryer, hold the majority of the buildup, which is why the every-load screen clearing and the main duct brush-through do most of the safety work. Transition hoses and elbows are the pinch points where lint snags on every bend, so a run with several turns needs more attention than a short straight one. The exterior hood and flap are the last stretch where matted lint collects and where a stuck flap chokes the whole system. The blower and drum seals are the small remainder that a routine clean does not usually reach. Keep that ranking in mind as you work the six steps, because it tells you where the fuel actually is.
Signs your dryer vent is clogged
You do not need a schedule to know a vent is overdue, because a clogging dryer announces itself in ways that are easy to read once you know them. The first and clearest sign is that clothes take longer to dry. A load that used to finish in one cycle now needs extra time or a second run, and that happens because a restricted vent traps the moist air the dryer is trying to push out, so the clothes stay damp. If you find yourself routinely running the dryer twice, the vent is the first thing to suspect. Longer dry times are also the sign that costs you money, because every extra minute is extra energy, which our dryer running-cost report breaks down in detail.
The other signs are physical. The dryer body, the door, and the clothes themselves feel unusually hot at the end of a cycle, because the trapped heat has nowhere to go. A musty or, more worryingly, a burning smell during drying is a serious warning that lint is overheating and demands you stop and inspect. You may see lint escaping around the lint-trap slot or building up on the outside vent hood, and the laundry room itself may feel humid or warm while the dryer runs. Finally, the exterior flap that should puff open when the dryer runs may barely move or stay shut. The chart below shows, in an illustrative way, how dry times tend to climb as a vent goes from clear to nearly blocked, which is why longer cycles are such a reliable early warning.
How dry times climb as a vent clogs
An illustrative dry time for one typical mixed load as the vent goes from clear to nearly blocked. Bars scale with the minutes shown. Your times vary by dryer, load, and vent run.
As the vent restricts, the same load takes steadily longer, which burns more energy and runs the dryer hotter. The minutes are illustrative and change with your dryer and load, but the direction is real.
That climbing curve is why a dryer that suddenly needs two cycles is telling you something. The extra time is not the dryer wearing out; it is usually the vent restricting the airflow that removes moisture. Because the same restriction that lengthens dry times also traps the heat behind the fire risk, the signs of a clogged vent and the reasons to clean it are the same thing seen from two angles. When you notice several of these signs together, treat the full clean below as due rather than optional.
Before you start
This is a hands-on job, but it is not a skilled one. Nothing in the six steps requires a tool you cannot buy cheaply or any repair knowledge, and the hardest part for most people is simply pulling the dryer far enough from the wall to work behind it. Plan on about an hour start to finish for a short, accessible vent, longer if your run is complex or you have not cleaned it in years. The difficulty is beginner to moderate: if you can move an appliance, loosen a clamp, and run a brush back and forth, you can do all of it. The one real variable is your vent run, because a short straight duct through a nearby wall is a simple DIY job while a long or roof-vented run is where you should consider a professional.
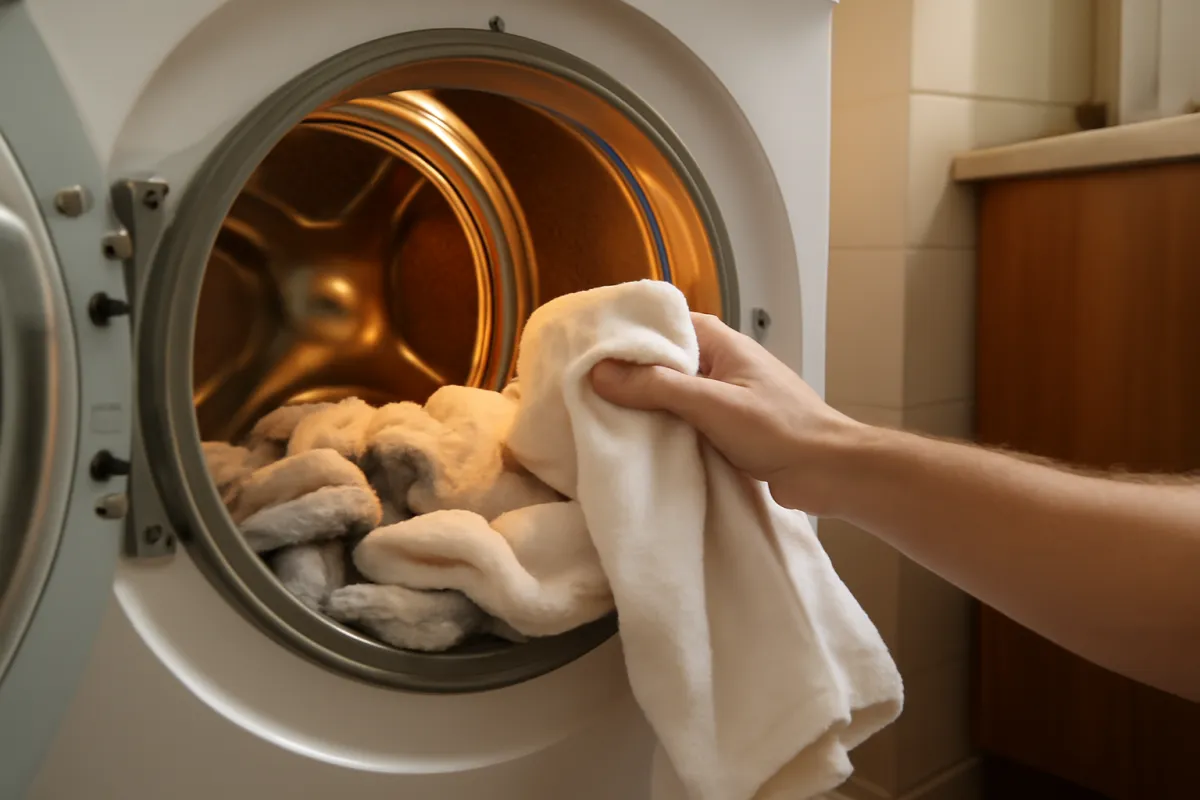
Gather a small kit before you begin so you are not stopping mid-job to hunt for something.
- A dryer vent brush kit, the round brush on flexible screw-together rods that reaches the length of the duct, ideally one with a drill adapter for stubborn buildup.
- A vacuum with a hose and crevice tool, to pull out the lint the brush loosens from the duct and the lint-trap housing.
- A screwdriver or nut driver, to loosen the clamp that holds the duct to the dryer and the wall.
- A flashlight, to see into the duct, the lint-trap slot, and the exterior hood.
- Foil tape and, if needed, a new metal duct, since joints should be taped and a white vinyl or crushed duct is worth replacing while you are back there.
Two ground rules keep the job safe. First, always disconnect the power before you work: unplug an electric dryer, and if you have a gas dryer, be extra careful moving it so you do not strain or damage the flexible gas line, and shut off the gas if you are at all unsure. Second, work with the dryer off and cool, never right after a cycle when the duct is hot. With your kit ready and the machine cool, start by making the whole job safe.
Step 1: Unplug the dryer and pull it out
The first step is the safety setup, and it is the step you never skip. Turn the dryer off and unplug it from the wall outlet, because you are about to work behind and around a machine that combines a heating element with, on many models, a 240-volt supply, and there is no reason to have power connected while your hands are in the works. If you have a gas dryer, this matters even more: unplug the electrical supply, and treat the flexible gas connector with care, because it is not meant to be stretched or kinked. If you are not confident about the gas line, shut off the gas supply valve behind the machine before you move it, or have a professional handle a gas dryer entirely.
With the power off, pull the dryer far enough from the wall to reach the duct connection behind it. Dryers are lighter than they look but awkward, so walk it out gently, alternating corners, and watch that you do not drag the duct or the gas line as you go. Give yourself enough room to stand or kneel behind the machine comfortably, because cramped access is the main reason people rush this job and do it badly. Take a moment now to look at how the duct connects and where the run goes, because that tells you what you are dealing with before anything comes apart. Watch out for the outlet cord and, on a gas model, the gas line as you position the dryer, so nothing is under tension. With the machine out and powered down, you can safely open up the connection.
Step 2: Disconnect the dryer from the vent duct
Now separate the dryer from the vent so you can clean the duct properly, because trying to brush a vent with the dryer still attached leaves the dirtiest section untouched. Behind the dryer you will find a short duct or flexible hose running from the dryer’s exhaust outlet to a fitting in the wall or floor. It is usually held by a clamp, a worm-gear band, or a spring clamp, sometimes with a couple of small screws. Loosen the clamp with your screwdriver or nut driver and gently work the duct off the dryer’s outlet and, if you can, off the wall fitting too, so you have access to both ends of the run.
Take a good look at what you have disconnected. This transition section, the flexible piece right behind the dryer, is where a lot of lint collects and where the worst duct materials live. If yours is thin white vinyl or a crushed, sagging foil accordion hose, this is the moment to plan on replacing it with smooth rigid or semi-rigid metal, which holds far less lint and does not pose the same fire risk. Watch out for screws poking into the duct interior: fasteners that protrude inside the duct snag lint and build a clog, which is why duct joints should be sealed with foil tape rather than screws. Set the transition piece aside to clean or replace, and you are ready to work through the system from the inside out, starting with the lint trap.
Step 3: Clean the lint trap and its housing
With the duct off, turn to the part you use most and clean the least deeply: the lint trap and the slot it lives in. You already pull the lint screen and clear it after every load, or you should, because that is the single habit that slows buildup the most. But the screen is only the visible part. Pull the screen out, and if it has a film on it from dryer sheets or fabric softener, wash it in warm soapy water with a soft brush and let it dry fully before it goes back, since a clogged screen restricts airflow even when it looks clean. The real hidden lint, though, is in the housing: the slot the screen slides into, which collects a surprising amount of packed lint below where the screen reaches.
Take your vacuum with the crevice tool, or a long narrow lint-trap brush, and clean out the housing as far down as you can reach. Shine your flashlight in first, and you will usually see a wall of grey lint well below the screen. Vacuum it, then run the brush down to loosen what the vacuum missed and vacuum again. This housing connects to the blower and the duct, so lint that packs here restricts the whole system from the very start of its path. Watch out for small objects that fall down the slot, coins, buttons, and bits of tissue, which collect there too. Clean this housing every few months, on the same rhythm as the deeper vent work, not just when you do the full annual clean. With the trap and housing clear, move to the section that holds the most fire risk.
Step 4: Brush and vacuum the vent duct
The duct brush-through is the heart of the whole job, because the duct running from the dryer to the outside wall is where the flammable lint packs in and where the airflow gets choked. This is what people mean when they talk about cleaning a dryer vent. Take your dryer vent brush kit and feed the round brush into the duct, adding rods as it goes deeper so it reaches the full length of the run. Push it in and pull it back with a twisting motion so the bristles sweep the walls, working the whole length from the wall opening and, where you can reach, from the dryer end too. For a long or stubborn run, fit the kit’s drill adapter and let a cordless drill spin the brush slowly, which clears packed lint a hand-turned brush cannot.

As the brush loosens the lint, it falls back down the duct, so follow up with the vacuum to pull it out from both ends. Alternate between brushing and vacuuming until the brush comes back clean and you can see clear duct walls with your flashlight. Do not forget the transition hose you set aside: clean it the same way, shaking and vacuuming it out, or replace it now if it is vinyl or damaged. Watch out for the temptation to skip the bends, because elbows are exactly where lint packs tightest, so work the brush carefully through each turn rather than forcing it straight through. If your run is long, roof-vented, or you cannot reach it safely, this is the step where hiring a professional makes sense, since they have longer rotary tools and can reach a rooftop termination you should not. For most short, accessible runs, though, a careful brush-and-vacuum leaves the duct genuinely clear.
Step 5: Clean the exterior vent hood and flap
The duct does not end at the wall, so the next step takes you outside to the vent hood, the last stretch of the run and a spot people forget entirely. On your outside wall, find the vent cover: usually a hood or box with a hinged flap or a set of louvers that open when the dryer pushes air out and close when it stops. This exterior termination is a favorite lint trap, because the air slows as it exits and drops its last load of lint right at the flap, where it mats into a dense plug that can choke the whole system even when the duct behind it is clean.
With the dryer still off, clear it out. If the cover comes off, remove it, and pull the matted lint out of the hood and the last length of duct by hand and with your brush. If it does not come off, open the flap and reach in as far as you can. Check that the flap or louvers move freely: a flap stuck open lets in cold air, rain, and pests, while one clogged shut or painted over chokes the airflow and undoes everything you did inside. Wipe the whole assembly clean and make sure the opening is clear. The best final check comes in the next step, when you run the dryer and confirm the flap puffs open with a strong stream of air. Watch out for pest nests here too, since birds and rodents like a warm vent, and a screen that blocks them can itself clog with lint and needs checking. With the outside clear, you can put everything back together.
Step 6: Reconnect, test, and set a schedule
The system is clean, so the last step reconnects it, confirms it works, and turns the whole thing into a rhythm you will keep. Reattach the transition duct, or your new metal one, to the dryer outlet and the wall fitting, seating it fully and securing the clamps. Seal the joints with foil tape rather than screws, because screw tips inside the duct snag lint and start the next clog. Keep the duct run as short and straight as your space allows, avoiding tight kinks and crushed sections, since every bend and pinch is a place lint will collect. Then ease the dryer back into place without crushing the duct or, on a gas model, straining the gas line, and plug it back in.
Now test your work. Turn the dryer on, ideally on an air-only or fluff setting with no heat, and go outside to confirm the exterior flap puffs open with a strong, warm stream of air. Weak or no airflow at the flap means something is still restricted, so recheck the connections and the exterior hood. Strong airflow means the whole run is clear. With the test passed, build the schedule, because a vent clean only protects you if it happens on a rhythm rather than once when something scares you. Make clearing the lint screen an after-every-load habit, the full duct brush-through a roughly yearly job, and the lint-trap housing and exterior flap a check every few months. Watch out for the classic failure, which is simply forgetting, so set a recurring reminder. Feed your vent run and loads into the cleaning-schedule planner to turn these intervals into a schedule sized to your home.
Tools: the dryer vent brush kit explained
The whole job hinges on one inexpensive tool, so it is worth understanding what a dryer vent brush kit actually is and how to pick one. At its core, a kit is a round nylon brush head sized to fit inside a standard four-inch dryer duct, mounted on a set of flexible rods that screw together end to end. You add rods as the brush travels deeper, so a kit with enough rods can reach the full length of a typical run, often twelve feet or more in total. The flexibility is the point: the rods bend around the elbows and turns that a rigid rod cannot, which is exactly where lint packs tightest. Most kits are cheap, which is part of why cleaning a short vent yourself costs a fraction of a professional visit.
The feature worth looking for is a drill adapter, a fitting on the end rod that lets you chuck the whole assembly into a cordless drill and spin the brush. Hand-twisting works for light buildup, but a slowly spinning brush clears packed lint and long runs far more effectively, so a kit with a drill attachment is the better buy for most homes. Beyond the brush, the only other tools are ones you likely own: a vacuum with a hose to remove the loosened lint, a screwdriver or nut driver for the clamps, a flashlight, and foil tape for resealing joints. A dust mask and gloves make the dusty parts more pleasant. That short, inexpensive list is the entire kit, which is why the routine clean is a genuinely accessible DIY job for an accessible vent. Match the brush length to your run, and if your duct is longer than the kit reaches, that is itself a sign the job may be better suited to a professional with longer tools.
How often to clean a dryer vent
The most common answer to how often you should clean a dryer vent is about once a year for a full brush-through, and that is a reasonable default for an average household, but the honest version has more nuance because the right interval depends on how hard you use the dryer and how the vent is built. The variable that moves it most is volume: a household that dries many loads a week pushes far more lint through the duct than one that dries a few, so a heavy-use home may need a full clean every six to nine months while a light user can stretch past a year. What you dry matters too, because towels, bedding, and fleece shed far more lint than shirts, so a home that dries a lot of heavy items reaches the buildup sooner.
The vent’s shape is the other factor. A short, straight run through a nearby wall clears the air quickly and collects lint slowly, while a long run with several bends, or one that travels up through a ceiling to a roof, both collects more lint and restricts airflow sooner, so it needs cleaning more often and is harder to reach. Regardless of the calendar interval, let the signs override the schedule: longer dry times, a hot dryer, or a burning smell mean the vent is due now no matter when you last cleaned it. And keep the every-load lint-screen habit separate from all of this, because it is the constant background task that slows how fast the duct fills between full cleans. Set your own run and loads in the cleaning-schedule planner to turn the yearly rule of thumb into an interval that fits your use.
Rigid vs foil vs vinyl duct: what matters
Not all dryer ducts are equal, and the material of yours affects both how often it clogs and how safe it is, so a full clean is the right moment to check what you have. The safest and best choice for the main run is smooth-wall rigid metal duct. Its smooth interior gives lint almost nothing to catch on, so it stays clearer longer, and metal does not sag, crush, or burn, so it does not become part of the fire risk. The trade-off is that rigid duct does not flex, so a short section of semi-rigid metal, which is corrugated but still metal, is commonly used for the transition right behind the dryer where a flexible connection is needed to slide the machine in and out.
The materials to be wary of are the flexible plastic and foil ones. Thin white vinyl accordion duct is widely discouraged for dryers because its ridged interior grabs lint aggressively and the plastic can sag, trap moisture, and even melt or burn, which is the worst case: the duct itself becomes fuel. Foil accordion duct is better than vinyl but still ridged and prone to crushing and sagging, which restricts airflow and collects lint at every low point. If you pull your dryer out and find it vented with white vinyl or a badly crushed foil hose, replacing it with rigid or semi-rigid metal is one of the highest-value safety upgrades you can make, and it makes every future clean easier because the smooth metal holds so much less lint. Keep whichever duct you use as short and straight as your layout allows, because length and bends are what turn any duct into a lint trap.
How to clean a dryer vent, part by part
The clearest way to hold the whole routine in your head is as a small set of parts, each with its own cleaning method and its own interval, matched to how fast it collects lint. The table below lays out each part of the dryer’s airflow path, how to clean it, and a starting frequency you can adjust for your own dryer and vent. Treat every interval as illustrative, because your load volume, what you dry, and the length and shape of your run all move it.
| Part | How to clean it | How often |
|---|---|---|
| Lint screen | Pull and clear the lint by hand; wash with soapy water if it has a film | After every load; wash monthly |
| Lint-trap housing | Vacuum the slot and run a long trap brush down below the screen | Every few months |
| Vent duct (dryer to wall) | Disconnect, brush through with a vent kit, vacuum the loosened lint from both ends | About yearly |
| Transition hose | Detach, shake out and vacuum, or replace if it is vinyl or crushed | About yearly; replace if damaged |
| Exterior vent hood and flap | Clear the matted lint by hand and brush; confirm the flap swings freely | About yearly, check every few months |
| Behind and under the dryer | Vacuum the settled lint and dust from the floor and machine back | Every few months |
The pattern in that table is the whole point: the lint screen is a constant every-load habit, the housing and exterior flap get a periodic check, and the full duct brush-through is the rare, deeper job that carries the most safety weight. If you remember only two lines, make them the after-every-load screen clearing and the yearly duct clean, because together they handle both the slow background buildup and the packed fuel that matters most. Set your run and loads in the cleaning-schedule planner to turn these starting intervals into a rhythm sized to your home.
A worked example: a full dryer vent clean
Put the six steps together on one illustrative afternoon so you can see how the routine flows. Picture a household with an electric front-load dryer in a ground-floor laundry room, vented through a short run of maybe six feet with one bend to the outside wall. They run about four loads a week, including a lot of towels, and they have never cleaned the vent in the three years they have owned the machine. Lately loads need a second cycle to dry, the dryer feels very hot at the end, and there is a faint musty smell, the classic signs that lint has built up and the vent is restricting airflow. This is a full catch-up clean that sweeps every step.
The work starts with safety. The dryer is switched off and unplugged, then walked out from the wall far enough to kneel behind it. The transition duct, which turns out to be a crushed foil accordion hose, is unclamped from both the dryer and the wall, and the household decides on the spot to replace it with semi-rigid metal. Next the lint trap: the screen is washed of a waxy fabric-softener film, and a flashlight down the housing reveals a wall of grey lint well below the screen, which the vacuum and a long brush clear out. Then the main event, the duct. The vent brush goes in on its rods, spun gently by a cordless drill, and comes back the first time loaded with matted lint; after several passes and repeated vacuuming from both ends, the duct walls show clear.
Outside, the exterior hood comes off to reveal a dense plug of lint packed against a flap that was barely opening, all pulled out by hand until the flap swings freely. The new metal transition duct goes on, joints sealed with foil tape, the dryer eases back into place, and it is plugged in. The test run on an air-only setting sends a strong warm stream out of the now freely flapping exterior vent, and the next real load dries in a single cycle again. None of these numbers are measured on any specific machine; they are an illustrative walkthrough, and your own dryer, loads, and run will differ. The value is the sequence: make it safe, clean from the trap outward through the duct to the exterior flap, then test and prevent.
Preventing lint buildup between cleans
Cleaning removes the buildup, but prevention is what stretches the interval between full cleans and keeps the fire risk low day to day, and on a dryer the prevention habits are cheap and quick. The single most effective one is clearing the lint screen after every single load. It takes seconds, it keeps the screen from restricting airflow, and it stops a large share of the lint that would otherwise pass into the duct. A dryer run with a clogged screen works harder, runs hotter, and sheds more lint downstream, so this one habit does more than any other to protect the whole system between cleans. Make it automatic, part of unloading, not an occasional task.
A few more habits help. Do not overload the dryer, because a packed drum restricts airflow and lengthens dry times, which stresses the machine and pushes more lint through. Wash the lint screen occasionally with soapy water if you use dryer sheets or liquid fabric softener, because they leave an invisible film that clogs the mesh even when it looks clear. Keep the area behind and under the dryer vacuumed, since settled lint there is both a mess and a fire risk near a heat source. Avoid the worst duct materials, replacing white vinyl or crushed foil with smooth metal so the duct collects less to begin with. And do not run the dryer overnight or when you are out of the house, a simple safety habit given that a dryer combines heat, a motor, and flammable lint. None of these cost anything, and together they mean the difference between a vent you clean on a comfortable yearly rhythm and one that clogs and overheats between cleans. Our eight-point appliance maintenance plan folds these habits in alongside the rest of your home.
Common mistakes when cleaning a dryer vent
Most dryer-vent trouble traces to a small number of avoidable habits rather than a hard job done wrong. These are the pitfalls that quietly keep a vent clogged or, in a couple of cases, create a real hazard.
- Only clearing the lint screen and never the duct. Emptying the screen is essential but it does not touch the duct behind the dryer, where the real fire fuel packs in. The screen catches most lint, not all, so the duct still needs a periodic brush-through.
- Skipping the exterior vent flap. A dense plug of lint packs at the outside hood and a stuck flap chokes the whole system, so a duct cleaned only from the inside can still be restricted at the very end.
- Using white vinyl or crushed foil duct. Ridged plastic and foil grab lint and can sag, crush, or even burn, turning the duct itself into part of the fire risk. Replace it with smooth rigid or semi-rigid metal.
- Fastening duct joints with screws. Screw tips protruding inside the duct snag lint and start the next clog. Seal joints with foil tape instead, so nothing inside the duct catches lint.
- Working on the dryer with the power connected. Leaving an electric dryer plugged in, or straining a gas line while moving the machine, is an unnecessary risk. Unplug first, and handle a gas connection with care or leave it to a pro.
- Ignoring the warning signs. Longer dry times, a very hot dryer, or a burning smell mean the vent is restricting airflow now. Treating those as normal instead of a prompt to clean is how a manageable clog becomes a hazard.
Clear these six and you have removed the causes behind almost every clogged-vent problem, at the cost of one careful clean and a couple of ongoing habits.
Troubleshooting: harder dryer vent calls
The six steps cover a routine, accessible clean, but some situations need a judgment call. Here is how to think through the common ones without guessing.
What if clothes still take too long to dry after a full clean? Recheck the airflow end to end. Confirm the lint screen and its housing are genuinely clear, that the transition duct is not kinked or crushed behind the machine, and that the exterior flap opens fully on a test run. If the whole vent is confirmed clear and loads still dry slowly, the problem may sit inside the dryer itself, in the blower, the heating element, or a sensor, which is a repair question rather than a vent-cleaning one.
What if I cannot reach the whole duct with my brush kit? A run longer than your kit reaches, or one with sharp turns the rods will not follow, is a sign the job may exceed a basic kit. You can buy longer rod sets, but if the duct travels far, rises through a ceiling, or ends on the roof, that is the point to bring in a professional with longer rotary tools rather than leaving a section uncleaned.
What if the exterior vent is on the roof or high on a wall? Do not climb onto a roof or work from a tall ladder to clean a vent unless you are genuinely equipped and comfortable to do so safely. A rooftop or high termination is the clearest case for a professional dryer-vent cleaning, because they have the tools to clear it from inside and the equipment to reach the exterior safely.
What if I have a gas dryer? The cleaning steps are the same, but the stakes of moving the machine are higher because of the flexible gas connector, which must not be stretched, kinked, or damaged. If you are not fully confident working around a gas line, shut off the gas supply before moving the dryer, or have a professional handle the whole job. A gas leak is not a risk worth taking to save a service call.
When to call a pro
Cleaning a dryer vent is a satisfying DIY job on the right vent, but it is worth being clear about where the DIY line sits, because forcing an out-of-reach or unsafe vent to be a homeowner job helps no one. Call a professional dryer-vent cleaning service when the run is long, has many bends, travels up through a ceiling, or terminates on the roof, because you cannot safely reach a rooftop vent and long runs need a rotary brush spun by a drill to clear fully. A pro also has the tools to confirm the duct is genuinely clear along its entire length, which a partial reach from one end cannot guarantee. If your brush kit simply does not reach the far end, that is the vent telling you it is a professional job.
There are a few other clear cases. A gas dryer is a reasonable job to hand off if you are not comfortable working around the flexible gas connector, since a damaged gas line is a serious hazard. If you have noticed a burning smell, scorching, or any sign of past overheating, having a professional inspect the whole system is prudent because there may be damage a cleaning alone will not address. And if you simply are not able to move the machine, work behind it, or reach the exterior vent safely, there is no shame in booking the service, which is inexpensive relative to the risk it manages. The honest rule is that a short, accessible, ground-floor vent is a fine DIY job, and a long, high, roof-vented, or gas-connected one is where a professional earns their fee.
The bottom line
Cleaning a dryer vent is not a hard job, but it is an important one, because it is the maintenance task where the reason to do it is fire safety before efficiency. A dryer pushes flammable lint through a duct on every load, and when that duct clogs it traps heat right next to the fuel while choking the airflow that dries your clothes. The fix is six steps: unplug and pull out the dryer, disconnect the duct, clean the lint trap and its housing, brush and vacuum the duct itself, clear the exterior hood and flap, then reconnect and test that a strong stream of air comes out the outside vent. Clear the lint screen after every load, run a full clean about yearly and sooner if the dry times climb, swap any vinyl or crushed duct for smooth metal, and hand off the long or roof-vented runs to a professional. Do that on a rhythm matched to how much you dry, and the dryer goes back to doing its job cooler, faster, and far more safely than a clogged one ever could.
A note on scope: these notes exist to hand you a repeatable, safety-first routine for cleaning a home dryer vent, not to promise any specific result, saving, or lifespan. Every interval, minute, and figure above is an illustrative planning number drawn from typical guidance rather than measured on one machine, and your own dryer, duct run, and load habits will change what and how often you should do each job, so treat your appliance manual and local codes as the authority. Nothing here is professional advice. A dryer combines heat, electricity, and flammable lint, so always disconnect power before working, handle a gas connection with real caution or leave it to a licensed professional, and if the vent is long, roof-mounted, or you notice scorching or a burning smell, stop and call a qualified dryer-vent or appliance professional rather than pressing on.
Frequently asked questions
How often should I clean my dryer vent?
A full brush-through of the duct is commonly cited as a once-a-year job for an average household, but the honest answer is that it depends on how much you dry and how your vent is built. Clear the lint screen after every single load, which is the habit that does the most to slow buildup. Then run a full vent clean roughly yearly, and more often, perhaps every six to nine months, if you dry many loads a week, have a long or bendy duct run, or dry a lot of heavy, linty items like towels and bedding. Any interval is a starting point, not a rule, so move the full clean sooner the moment you notice longer dry times, a hot dryer, or a burning smell, which are the signs the vent is restricting airflow.
What are the signs that a dryer vent is clogged?
The clearest early sign is that clothes take noticeably longer to dry, often needing two cycles where one used to be enough, because a restricted vent traps the moist air the dryer is trying to expel. Other signs are a dryer and laundry that feel unusually hot to the touch at the end of a cycle, a musty or burning smell during drying, visible lint around the lint trap slot or the outside vent hood, and an exterior flap that no longer opens fully when the dryer runs. You may also see more lint on your clothes and find the room getting humid or warm. Any one of these means the airflow is being choked, and since restricted airflow is both an efficiency problem and a fire risk, it is worth acting on rather than ignoring.
Can I clean a dryer vent myself or do I need a professional?
Most short, straight dryer vents that run through a nearby wall are a genuinely doable DIY job with an inexpensive dryer vent brush kit and a vacuum, and cleaning it yourself is the norm for a ground-floor laundry room. The task becomes a job for a professional when the run is long, has many bends, travels up through the ceiling, or terminates on the roof, because you cannot safely reach a rooftop vent and long runs need a rotary brush spun by a drill to clear fully. A pro also has the tools to confirm the duct is genuinely clear end to end. If you are unsure, uncomfortable working behind a gas appliance, or the vent is anywhere you cannot reach safely from the ground, hiring a professional dryer-vent cleaning is a reasonable and inexpensive call.
Why is a clogged dryer vent a fire hazard?
Lint is highly flammable, and a dryer works by blowing hot air through wet clothes and pushing the warm, moist, lint-carrying air out through the vent. When lint builds up and restricts that vent, two dangerous things happen at once: the trapped heat has nowhere to go, so the dryer and duct run hotter than designed, and the vent is now packed with dry, flammable fuel sitting right next to that heat. That combination is why clogged dryer vents are a widely cited cause of home clothes-dryer fires. Cleaning the vent removes the fuel and restores the airflow that carries heat away, which is the single most important reason the job matters more than a typical cleaning chore. It is a safety task first and an efficiency task second.
What tools do I need to clean a dryer vent?
The core tool is a dryer vent brush kit, an inexpensive set with a round brush head on flexible rods that screw together to reach the full length of the duct, often with an adapter that lets a cordless drill spin the brush for tougher buildup. You also want a vacuum with a hose and crevice tool to pull out the lint the brush loosens, a screwdriver or nut driver to loosen the duct clamp, and a flashlight to see inside the duct and the lint-trap housing. Foil tape is handy for resealing duct joints afterward, since duct joints should be taped rather than fastened with screws that snag lint inside. Work gloves and a dust mask are sensible because the job is dusty. None of this is expensive or specialized, which is part of why the routine clean is worth doing yourself.
Does a clogged dryer vent really make drying take longer and cost more?
Yes, and it is usually the first thing people notice. A dryer removes moisture by carrying it away in a stream of hot air, so when the vent is restricted, that moist air cannot escape and the clothes stay damp longer, forcing you to run extra time or a second cycle. Every extra minute of drying is extra energy, so a badly clogged vent quietly raises what the dryer costs to run while also wearing the machine harder. The figures vary widely by dryer, load, and how blocked the vent is, so treat any specific minute or dollar number as illustrative, but the direction is real and consistent: a clear vent dries faster and cheaper than a clogged one. Our running-cost report on the same appliance covers how dry time translates into energy cost.
How do I clean the outside dryer vent flap?
The exterior vent is the hood or flap on your outside wall, usually a plastic or metal cover with a louvered or flap-style damper that opens when the dryer pushes air out and closes when it stops. Over time lint packs into the flap and the last stretch of duct behind it, so clearing it is part of a full clean. With the dryer off, go outside, remove or open the cover if it comes off, and pull out the matted lint by hand and with a brush, then check that the flap or louvers swing freely and are not stuck open or clogged shut. A flap stuck open lets pests and cold air in, while one clogged shut chokes the airflow. Confirm it puffs open when someone runs the dryer on an air-only setting, which tells you the whole run is clear.
Is it safe to use a plastic or foil accordion dryer duct?
Thin white vinyl and, to a lesser degree, foil accordion-style ducts are widely discouraged for dryers because their ridged interior traps lint and the material can sag, crush, and in the case of vinyl even melt or burn, which turns the duct itself into part of the fire risk. The safer choice is smooth-wall rigid metal duct for the main run, with a short section of semi-rigid metal only where a flexible connection is unavoidable behind the machine. If your dryer is currently vented with white vinyl or a badly crushed foil hose, replacing it with rigid metal is one of the highest-value safety upgrades you can make, and it also makes future cleaning easier because the smooth interior holds far less lint. Keep the run as short and straight as your layout allows.