
What's on this page
- Why stainless steel smudges so easily
- Know your finish: true stainless, coated, and faux
- Before you start: what you need
- Step 1: Find the grain and check your finish
- Step 2: Clear the surface and dust it dry
- Step 3: Wash with warm water and dish soap, with the grain
- Step 4: Rinse and dry immediately, before streaks form
- Step 5: Lift grease and stuck-on spots with baking soda
- Step 6: Clear water spots and haze with diluted vinegar
- Step 7: Polish with a few drops of mineral oil and buff
- Step 8: Wipe handles, seals, and trim, and set a schedule
- Should you buy a dedicated stainless steel cleaner?
- What never to touch stainless steel with
- A worked example: one kitchen’s stainless reset
- How often to clean stainless steel appliances
- How to keep stainless steel cleaner for longer
- Common mistakes when cleaning stainless steel
- Troubleshooting: scratches, rust spots, and heat tint
- Your stainless steel cleaning checklist
- The bottom line
Short answer: Clean stainless steel appliances without streaks by wiping with warm water and a drop of dish soap on a microfiber cloth, always with the metal's grain, rinsing with a plain damp cloth, and drying immediately with a second cloth, because the dry buff is what prevents streaks. Baking soda paste handles stuck-on food, diluted vinegar clears water spots, and mineral oil restores sheen. Never use steel wool, scouring powder, bleach, or oven cleaner.
The best way to clean a stainless steel appliance is a method, not a product: warm water with a drop of dish soap, a microfiber cloth wiped in the direction of the metal’s grain, and a second, dry cloth used immediately afterward so the water never dries into the streaks you were trying to remove. That is nearly the whole secret, and it costs pennies. Yet stainless fronts are among the most complained-about surfaces in a kitchen, forever smudged, hazed, or streaky, mostly because the surface gets wiped across the grain with whatever spray is under the sink, then left to air-dry, which is a recipe for exactly the marks people blame on the metal.
These notes walk the whole job step by step: reading the grain and identifying your finish, the soapy wash, the two-cloth dry that ends streaks, baking soda for stuck-on spots, diluted vinegar for water marks, and the thin mineral oil polish that makes the next round of fingerprints easier to live with. The stainless fronts share a kitchen with the machines behind them, so pair this walkthrough with our notes on how to clean an oven and how to clean a range hood, and see the eight-point appliance maintenance plan for the wider routine. Feed your household and appliance count into the cleaning-schedule planner as you read and it will pin the wipe-down rhythm to your kitchen.
Key takeaways
- The core method is dish soap in warm water, wiped with the grain, rinsed with a plain damp cloth, and dried immediately with a second cloth: the dry buff is what prevents streaks.
- Every panel has a grain, the fine brushed lines in the metal, and wiping along it cleans the microscopic grooves while wiping across it leaves haze and risks scratches.
- Baking soda paste handles stuck-on food, diluted vinegar clears water spots and mineral haze, and a few drops of mineral oil buffed in restore the sheen on bare stainless.
- Never use steel wool, scouring powder, chlorine bleach, or oven cleaner on stainless fronts, and treat smudge-proof coated finishes to soap and water only, no oils or polishes.
- The whole kitchen takes roughly 30 to 45 minutes, and a smudge wipe every few days keeps the job that small: fresh film wipes off in seconds, old film needs the full routine.
Why stainless steel smudges so easily
Stainless steel earns its name from chemistry: the alloy carries chromium, which reacts with air to form an invisible protective oxide layer that heals itself when scratched and keeps the metal from rusting. That layer is why the material shrugs off decades of kitchen life, and also why the harshest cleaners are exactly wrong for it, since chlorides in bleach attack the layer itself. What the surface does not resist is oil. A brushed stainless front is a field of microscopic parallel grooves, and skin oil from every touch settles into them and spreads into the wide gray smudges that show up the moment the kitchen lights hit the door at an angle.
Fingerprints are only the loudest offender. Cooking loads the kitchen’s air with aerosol grease that condenses on every vertical surface as a thin film, the same film our walkthrough on how to clean a range hood fights at its source, and that film dulls a stainless panel evenly enough that owners often blame the finish rather than the buildup. Water contributes the rest: splashes and cleaning passes that air-dry leave mineral spots and streaks, especially in hard-water homes. The stacked bar below shows an illustrative split of what actually marks a stainless front, and it explains why a degreasing soap plus a drying cloth beats any single spray.
What actually marks a stainless steel front
An illustrative split of the marks that build on a kitchen's stainless appliance fronts between cleanings. Segments sum to 100 percent. Your mix varies with the household.
Oils dominate, which is why a mild degreaser like dish soap outperforms plain water and why the polish step slows the rebuild. The split is illustrative and shifts with cooking style and household traffic.
Read that chart and the method writes itself. Sixty percent of the problem is oil, so the cleaner must cut grease, which dish soap does mildly and safely. Nearly a fifth is dried water, so the routine must end dry, which is the second cloth’s whole job. The rest is loose soil that a first dry pass removes before anything gets wet. None of it calls for harsh chemistry, and the surface itself, thanks to that chromium layer, asks you to avoid harshness anyway.
Know your finish: true stainless, coated, and faux
Before the first wipe, spend a minute finding out which of three surfaces you actually own, because the right routine differs and the wrong one can do lasting cosmetic damage. Classic brushed stainless is bare metal with visible directional grain, cool to the touch, and it takes the full routine in these notes: soap, baking soda where needed, diluted vinegar for spots, and a mineral oil polish. It is the most forgiving of the three, since light haze and even fine scratches can often be improved.
Fingerprint-resistant or smudge-proof stainless, common on newer refrigerators and dishwashers, is real steel wearing a thin factory clear coat that keeps skin oil from spreading. The coating is the part you are cleaning, and it wants gentleness: warm water with a little dish soap on a soft cloth, a plain damp rinse, and a dry buff. Oils, polishes, vinegar, and abrasives can blotch, streak, or wear the coating, and a damaged coating cannot be repaired, only lived with. If prints barely show on your front and water beads oddly on it, assume it is coated and treat it that way; the owner’s manual settles the question.
The third surface is faux stainless, a plastic or laminate face printed with a metallic look, found on some budget appliances. It scratches far more easily than metal, and vinegar or oils can mar the printed surface. Soap, water, soft cloth, nothing else. A magnet is a rough sorting tool: it clings to most faux fronts’ steel backing the same way, so the better test is a close look at an edge or the manual’s care page. Two minutes of identification here decides how aggressive the rest of the routine is allowed to be.
Before you start: what you need
This is one of the gentlest jobs in the kitchen, beginner-level with nothing to disassemble, and the full version for a whole kitchen of appliances runs roughly 30 to 45 minutes. A single smudgy refrigerator front is a ten-minute task. Nothing needs to be unplugged for an exterior wipe, though the fronts should be cool: let the oven finish and cool before touching its door, and keep every cloth wrung out rather than dripping, since control panels and door electronics never want running water.
Gather the kit first so the job flows.
- Two or more microfiber cloths, at minimum one for washing and one kept completely dry for buffing. Old soft cotton works; paper towels shed lint and are the streak’s best friend.
- Dish soap, a few drops in a basin of warm water. This is the primary cleaner for every finish type.
- Baking soda, a spoonful, for a paste on stuck-on spots on bare stainless.
- White vinegar, diluted half and half with water, for water spots and haze on bare stainless only.
- Food-grade mineral oil, a few drops, for the final polish on bare stainless. Skip for coated and faux fronts.
- A soft brush or the vacuum’s brush attachment, for dusty tops, vents, and grille areas.
Check the manual’s care page for any front you suspect is coated or faux, and test vinegar or any new product on a hidden corner, low on a side panel or behind a handle, before using it in the middle of a door. With the basin mixed and the cloths sorted, start by reading the metal.
Step 1: Find the grain and check your finish
Stand at an angle to each appliance in good light and find the grain: the fine parallel brushing lines the factory left in the metal. On most refrigerator and dishwasher fronts the lines run horizontally, on range doors they vary, and handles and trim strips frequently run opposite to the panel behind them. Every wipe in this job travels along those lines, never across them and never in circles, because the grain is really a field of microscopic grooves: wiping along them pushes soil out, while wiping across them drags residue over the ridges and, with anything abrasive, cuts visible cross-scratches into the finish.
While you are looking, confirm the finish type from the previous section for each machine, because a kitchen frequently mixes them: a coated smudge-proof refrigerator next to a bare stainless range next to a faux-front microwave. A strip of painter’s tape with a letter on each machine sounds fussy but takes a minute and stops mid-job mistakes, like oiling a coated door. Note the trouble spots worth extra attention later: the halo of prints around the refrigerator handle, the drip lines under the dishwasher’s control strip, the film above the range. Watch out for one habit as you survey: resist the urge to test-wipe with whatever cloth is nearby, since a dry drag across a dusty panel is precisely how fine scratches happen. The reading done, clear the decks.
Step 2: Clear the surface and dust it dry
Take everything off and away from the fronts you are about to wash: the magnets, photos, and notes on the refrigerator, the towels hanging on the oven handle, anything leaning against the dishwasher. Grit hides under magnets and behind hanging towels, and a cloth sweeping over a trapped crumb scratches. With the surfaces bare, do a dry first pass with a clean, dry microfiber cloth, lightly, with the grain, to lift dust, lint, and loose crumbs. The point is to remove the abrasive particles before any wet wiping, so the soapy cloth that follows is cleaning film rather than pushing grit around.
Extend the dry pass to the places that collect the most dust and see the fewest cloths: the top of the refrigerator, the vent grilles at the toe-kick or rear, the gap between machines, and the trim around handles. The vacuum’s soft brush attachment makes short work of grilles and tops, and keeping those vents clear is the same airflow logic that runs through our eight-point appliance maintenance plan. Watch out for jewelry during all of this: a ring or watch dragged across a stainless front leaves the fine arc scratches that owners later blame on cleaners. Two minutes of dry work, and the fronts are ready for water.
Step 3: Wash with warm water and dish soap, with the grain
Mix the washing basin: warm water with a few drops of dish soap, enough to feel slightly slick, not enough to foam heavily, because excess soap is future residue and future streaks. Dip a microfiber cloth, wring it until it is damp rather than wet, and wash each panel in long, straight, overlapping strokes along the grain, top to bottom so drips land on unwashed surface. Dish soap is the hero of the whole method: it dissolves fingerprint oil and cooking film gently, it is safe on every finish type including coated and faux fronts, and it rinses clean. This one pass removes the majority of what has built since the last clean.
Refresh the cloth often, rinsing and wringing as it grays, since a loaded cloth relocates film instead of removing it. Work the busy zones deliberately: the handle areas hold the thickest fingerprint buildup and reward a few extra strokes, the panel above the range carries the heaviest grease film, and the lower third of the dishwasher door collects drips. Around control panels and displays, wring the cloth harder and wipe gently; damp is fine, dripping is not, because moisture finding its way behind a touch panel creates a repair out of a cleaning job. For fronts near the cooktop where the film feels sticky rather than dusty, a second soapy pass now saves scrubbing later. The wash matters, but the next step is where streak-free is decided.
Step 4: Rinse and dry immediately, before streaks form
Here is the step that separates a streak-free front from a hazy one, and it is the one most people skip. First rinse: wipe each washed panel with a second cloth wrung out in plain water, no soap, again with the grain, to lift the soap residue the wash left behind. Then, immediately, before the water can air-dry, buff the panel dry with a completely dry microfiber cloth in long strokes along the grain. Streaks are not a mystery substance: they are minerals from the tap water and traces of soap that were allowed to dry in place. Deny them the chance to dry and they never exist.
Work one appliance at a time through wash, rinse, and dry rather than washing the whole kitchen and returning, because a panel that air-dries while you are two machines away has already streaked. In a hard-water home this discipline matters double, since harder water carries more dissolved mineral to leave behind; if your kettle scales quickly, your stainless streaks quickly, and the drying cloth is your answer to both. Watch out for tired cloths: a damp buffing cloth stops buffing, so swap to a fresh dry one as soon as the drying pass starts dragging. Stand at an angle to the light and check each finished panel; what looks clean straight-on shows its misses at a low angle. Most fronts are done at this point, and the remaining steps handle what soap alone cannot.
Step 5: Lift grease and stuck-on spots with baking soda
Every kitchen has a few marks the soapy cloth slides over: the dried sauce drip on the dishwasher door, the burnt splash beside the oven handle, the sticky film strip where the range meets the counter. On bare stainless, the tool is a paste of baking soda and water, the same mild chemistry our notes on how to clean an oven lean on at full strength, used here at a dab. Mix a spoonful of baking soda with just enough water to form a soft paste, apply it to the spot with a fingertip or the corner of a cloth, and let it sit for a few minutes so the alkalinity can loosen the deposit.
Then work the spot gently along the grain with the soft cloth, never across it and never with a scouring pad, and the deposit should shear off without marking the finish, since baking soda’s abrasiveness is mild and the grain-wise stroke hides what little it does. Rinse the area with the plain damp cloth and buff dry as in Step 4, because paste residue dries chalky. Repeat rather than press: two gentle rounds beat one forceful one, and a spot that survives two rounds of paste has usually bonded hard enough to deserve patience over pressure, another few minutes of paste dwell time. Watch out for the finish boundaries: baking soda stays off coated smudge-proof fronts and faux stainless, where the factory surface is softer than the paste, and off any printed or painted logo badge. For those surfaces, longer soapy contact and patience are the whole toolbox.
Step 6: Clear water spots and haze with diluted vinegar
If a bare stainless panel still shows cloudy spots or a faint white haze after the wash and dry, you are looking at minerals, dried water spots and the accumulated ghost of past air-dryings, and minerals call for mild acid rather than more soap. Mix white vinegar half and half with water, dampen a cloth with the mix, and wipe the affected areas with the grain. The acid dissolves the mineral deposits on contact, and haze that resisted three soapy passes vanishes in one. This is the same descaling logic that cleans the coffee maker’s water path, applied to the outside of the machines instead of the inside.
Handle vinegar with the same finish discipline as everything else. Apply it to the cloth, never sprayed at the appliance, where mist finds displays, hinges, and door seals. Follow it with a plain damp rinse wipe and an immediate dry buff, since vinegar allowed to air-dry leaves its own faint marks. On coated fronts, test that hidden corner first and prefer skipping it entirely; on faux stainless, skip it, full stop. Keep it away from rubber door gaskets, which prefer soap, and never let vinegar share a job with bleach or chlorine cleaners, a combination that releases harmful gas. Used in its lane, the vinegar pass is what takes a front from clean to genuinely clear, and in hard-water kitchens it becomes a regular part of the rotation.
Step 7: Polish with a few drops of mineral oil and buff
The optional last touch on bare stainless is the polish, and it is less about shine than about the future: a molecule-thin film of oil evens out the finish’s sheen and makes the next week of fingerprints fainter and easier to wipe, because prints blend into an oiled surface instead of sitting on bare metal. The household tool is food-grade mineral oil. Put two or three drops on a dry cloth, not on the appliance, and wipe a thin, even coat over the panel with the grain. Then take your last clean dry cloth and buff until the front no longer feels or looks oily. The finished panel should look evenly satin, not greasy; if it smears under a fingertip, keep buffing.
Restraint is the technique. Excess oil is worse than none, since an oily front grabs dust and prints harder than bare metal, and the difference between a professional-looking finish and a smeary one is simply how thin the coat is and how long you buff. Olive and cooking oils get recommended in the same breath and do work for a day, but food oils can turn sticky and rancid on a warm kitchen panel, so mineral oil is the better habit; a purpose-made stainless polish does the same job with the same technique at a higher price. The boundaries repeat once more, because this is where the damage happens: no oil or polish on coated smudge-proof fronts, where it blotches the factory coating, and none on faux stainless. Those finishes are done at Step 4 by design.
Step 8: Wipe handles, seals, and trim, and set a schedule
Finish with the parts hands actually touch and cloths usually miss. Handles carry the heaviest oil load in the kitchen and often run their grain opposite the door, so give them their own soapy wipe, rinse, and dry along their own lines. Wipe the trim strips, the hinge covers, the toe-kick panels, and the top edges of doors where grease film settles. Then run a damp cloth along the rubber door seals of the refrigerator and dishwasher, soap only, no vinegar and no oil, and dry them, checking as you go for trapped crumbs; a seal that closes on grit ages early, which is a repair the wipe just prevented.
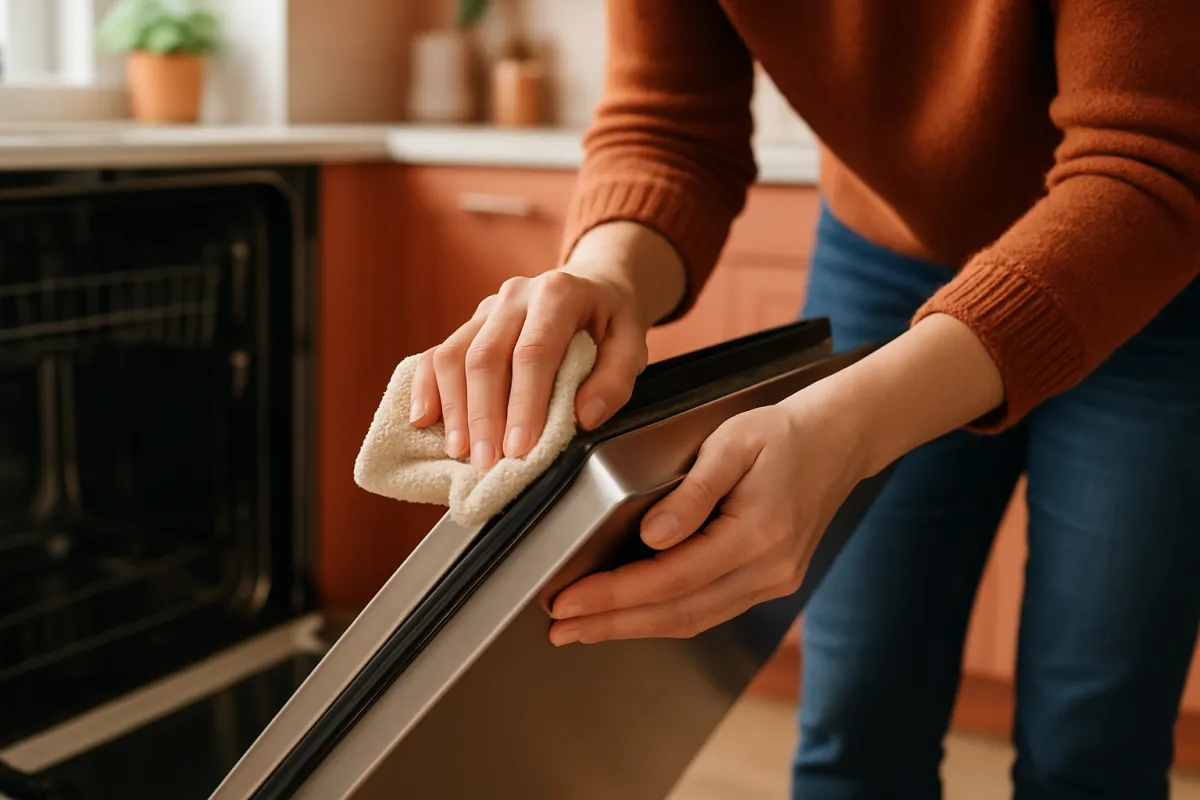
With the kitchen gleaming, set the schedule while the effort is fresh, because frequency is what keeps this job small. An illustrative rhythm for a busy household: a thirty-second smudge wipe of the refrigerator and dishwasher fronts every few days with a barely damp cloth, the full wash-rinse-dry of every stainless surface every week or two, the vinegar pass as haze appears, and the mineral oil polish somewhere between monthly and quarterly. A quiet kitchen stretches every interval; a house of enthusiastic cooks and small handprints shortens them. Feed your own household size, cooking pace, and appliance count into the cleaning-schedule planner and it will hand back intervals tuned to your kitchen instead of a generic calendar.
Should you buy a dedicated stainless steel cleaner?
The cleaning aisle sells sprays and wipes made specifically for stainless appliances, and the honest answer is that they work, they are convenient, and they are optional. A typical stainless spray is a mild solvent-and-oil formulation: it dissolves fingerprint oils and lays down a thin conditioning film in one pass, which is genuinely handy, essentially Steps 3 and 7 in a single can. The wipes are the same chemistry in single-use form. Against them, the homemade routine costs a few cents per session, handles every mark type including minerals, which many sprays do not, and carries no risk of the wrong product meeting the wrong finish, since you control each ingredient.
If you do buy one, buy and use it deliberately. Match it to your finish, because coated smudge-proof fronts want a cleaner explicitly labeled safe for them, and many conditioning sprays are not. Spray the cloth, not the appliance, for the same electronics-and-seals reason as vinegar. Expect it to replace the soap wash, not the drying discipline: a sprayed panel left to air-dry streaks like any other. And read the label for what is absent, since anything citing chlorine or bleach compounds stays away from stainless entirely. The verdict on scope: the spray is a fair convenience purchase for a kitchen of bare stainless, an unnecessary risk on coated fronts, and never a substitute for the two-cloth habit that actually decides how the kitchen looks.
What never to touch stainless steel with
The damage people do to stainless fronts almost always comes from a cleaning attempt, not from cooking, so the do-not list deserves its own section. Steel wool and wire brushes top it: they scratch the brushed finish permanently, and they leave behind microscopic particles of ordinary carbon steel embedded in the surface, which later bloom into rust freckles on a metal that cannot otherwise rust. Scouring powders and green abrasive pads scratch the same way, cutting cross-grain swirls that catch light and cannot be wiped away. Even the melamine eraser sponge, mild as it seems, is a fine abrasive and will dull a brushed or coated front.
Chemistry has its own list. Chlorine bleach and any cleaner listing chlorides attack the chromium oxide layer that makes stainless stainless, and prolonged or repeated contact can pit the metal itself, so bleach-based kitchen sprays never belong on these fronts, even wiped off quickly. Oven cleaner is formulated to dissolve baked carbon inside an enamel cavity and is far too aggressive for an exterior panel, where it can stain and streak the finish in one application. Strong acids beyond diluted vinegar, rust removers, and drain-cleaner splashes all do lasting cosmetic harm. The pattern is simple: this surface asks for the mildest tools in the house, and everything it truly needs, soap, baking soda, diluted vinegar, and mineral oil, likely sits in your pantry already. When a product’s label spends more words on warnings than directions, it is not for your appliance fronts.
A worked example: one kitchen’s stainless reset
Put the steps together on one illustrative kitchen so the rhythm is visible. Picture a family kitchen with four stainless surfaces: a bare brushed refrigerator wearing a month of handle prints, a range whose door carries grease film and one burnt drip, a dishwasher with drip lines and hard-water haze, and a range hood dulled by cooking film. Two people cook most nights, the tap water runs hard, and nothing has had more than a passing wipe since the season changed. That is a full-method kitchen, and the plan is one unhurried session.
Minute zero to five: the survey and the clearing. Grain runs horizontal on all three fronts but vertical on the fridge handles, the fridge is confirmed bare stainless by its manual, magnets come off, and a dry cloth and the vacuum brush clear dust from tops and toe-kicks. Minutes five to twenty-five: wash, rinse, dry, one appliance at a time, fridge first, hood last because it is greasiest. The film comes off the hood with two soapy passes. Minutes twenty-five to thirty-five: spot work, a baking soda dab lifts the range drip in two gentle rounds, and the half-and-half vinegar cloth clears the dishwasher’s haze on contact, each followed by rinse and dry. Minutes thirty-five to forty-five: three drops of mineral oil per front, buffed thin, and a soapy pass over handles, trim, and both door seals.
Total: about 45 minutes, most of a microfiber pack in the laundry, and a few cents of soap, soda, vinegar, and oil. These minutes are an illustrative walkthrough rather than a measured test of one kitchen, and a maintained kitchen repeats the whole exercise in half the time. The chart below shows roughly where the minutes went.
Hands-on minutes by appliance front
Illustrative active cleaning time per stainless surface in the worked example's full session. Bars scale with the minutes. Your times vary with buildup and size.
The refrigerator costs the most minutes because it has the most surface and the most touches; the dishwasher is quick once the haze chemistry is right. Times are illustrative.
How often to clean stainless steel appliances
Frequency is where this job is won, because the marks compound: a fingerprint film that is three days old dissolves in one soapy stroke, while the same film three months old has bonded with cooking grease into something that needs the full routine plus spot work. The illustrative baseline for a household that cooks regularly: smudge-wipe the high-touch fronts, usually the refrigerator and dishwasher, every few days with a barely damp cloth and a dry follow, run the complete wash-rinse-dry on every stainless surface every week or two, add the vinegar pass whenever haze appears, which in hard-water homes may be every round, and polish bare fronts with mineral oil monthly to quarterly.
Flex the intervals honestly around your kitchen. A single quiet cook can stretch the full wash toward monthly with nothing but a weekly smudge wipe between. A household of five with daily cooking and small hands lives at the short end of every interval, and the smudge wipe becomes a near-daily thirty seconds. The visible signals outrank any calendar: a front that reads dull under the kitchen lights, a handle halo of prints, or spots that survive a dry buff each mean that surface is due now. The cleaning-schedule planner turns your household size, cooking nights, and water hardness into specific intervals, and the practical trick is to anchor the full pass to something that already recurs, the same evening the kitchen gets its deep tidy, so the stainless never waits long enough to get hard.
How to keep stainless steel cleaner for longer
Prevention on stainless is about intercepting oil and water before they settle in, and a few small habits stretch every interval in the schedule. The biggest lever is the polish from Step 7: a bare front carrying its thin mineral oil film shows fingerprints fainter and releases them faster, so the thirty-second buff monthly buys weeks of better-looking doors. The second is handle discipline of the gentlest kind: opening the refrigerator by the handle rather than pushing the door face, a habit kids can actually learn, keeps the print halo from spreading across the panel, and a towel hung within reach means damp hands dry themselves before they reach for the door.
Water management does the rest. Wipe splashes near the dishwasher and sink when they happen, because every splash left to air-dry is a future mineral spot, and in hard-water homes consider keeping a dry microfiber cloth clipped inside the sink cabinet purely for that purpose. Run the range hood while cooking, since grease captured at the source, as our range hood walkthrough lays out, never lands on the surrounding fronts. Keep abrasives physically away from the kitchen’s cleaning caddy so a helpful guest cannot reach for the scouring pad, and park the bleach spray under a different sink entirely. None of these habits takes a minute, and together they turn the full routine from a rescue back into maintenance, which is the cheapest kind of cleaning there is.
Common mistakes when cleaning stainless steel
Most stainless damage and most stainless frustration trace to the same short list of avoidable moves. These are the ones worth naming.
- Wiping across the grain or in circles. The grooves run one way, and so should every cloth. Cross-grain wiping leaves haze, and cross-grain abrasion leaves permanent scratches.
- Letting panels air-dry. Streaks are dried minerals and soap, nothing more. The second, dry cloth used immediately is the entire streak-free secret, and skipping it undoes the wash.
- Using steel wool or scouring pads on a stubborn spot. They scratch permanently and can seed rust freckles from embedded particles. Baking soda paste and patience remove the same spot without a mark.
- Bleach anywhere near the fronts. Chlorides attack the protective layer that makes the metal stainless. If a disinfecting wipe lists chloride compounds, it does not belong on these doors.
- Oiling a smudge-proof coated front. The factory coating is the fingerprint solution; polish on top of it blotches. Coated and faux fronts end their routine at soap, rinse, and dry.
- Spraying product directly at the appliance. Mist finds displays, hinges, and seals. Everything, soap, vinegar, oil, or store spray, goes on the cloth first.
- Too much oil at the polish step. A greasy film grabs dust and prints worse than bare metal. Drops, not pours, and buff until the surface no longer feels oiled.
Avoid those seven and it is genuinely hard to hurt a stainless front, which is exactly how a cleaning routine should feel.
Troubleshooting: scratches, rust spots, and heat tint
The routine handles film and marks, but three problems sit outside it and deserve straight answers.
What if the front has fine scratches? On bare brushed stainless, very fine scratches sometimes soften visually with the routine itself, since cleaning and oiling even out how light hits the area. Deeper scratches can occasionally be blended by careful abrasion along the grain with a fine non-woven pad, but this is a genuine risk: it changes the sheen of the worked area, coated fronts cannot take it at all, and a mismatched patch can look worse than the scratch. Treat scratch repair as a last resort on a visible door, test somewhere hidden, and consider living with minor marks; brushed finishes hide them better than worry suggests.
What if rust spots appear on a stainless front? Small orange freckles are usually not the panel rusting but contamination sitting on it: particles from steel wool used nearby, or residue a chloride cleaner left behind. Rub the spot gently with baking soda paste along the grain, rinse, and dry, and most freckles lift. Spots that return in the same place suggest ongoing contact with a contaminating source worth finding. Widespread pitting, actual pinholes in the surface, points to chloride damage and is cosmetic history rather than something a cleaner reverses.
What if the panel shows rainbow or brown discoloration near the oven or cooktop? Heat tint is the oxide layer thickening where the metal runs hot, and it is common around oven vents and above burners. The vinegar cloth reduces mild tint; heavier discoloration is usually permanent and harmless. Reduce the heat reaching the panel, a hood run during cooking helps, and let the rest of the routine keep the area clean so the tint stays subtle.
Your stainless steel cleaning checklist
Save this list and run it by interval, letting the planner’s numbers set your own rhythm. It keeps every front bright and the full routine short.
- Every few days, high-touch fronts: thirty seconds with a barely damp cloth along the grain, then a dry buff. Refrigerator and dishwasher doors, plus handles.
- Every week or two, all stainless: the full pass, soapy wash with the grain, plain water rinse wipe, immediate dry buff, one appliance at a time.
- As haze or spots appear: half-and-half vinegar on a cloth for bare fronts, rinse, dry. Hard-water kitchens fold this into every full pass.
- Monthly to quarterly, bare fronts only: two or three drops of mineral oil, spread thin with the grain, buffed until not oily. Never on coated or faux finishes.
- Every pass: handles and trim along their own grain, a soap-only wipe of door seals, and a dry check at an angle to the light.
- Always: cloths and products applied to the cloth first, spot-tests in hidden corners for anything new, and no steel wool, scouring powder, bleach, or oven cleaner anywhere near the fronts.
Feed your household size, cooking nights, water hardness, and appliance count into the cleaning-schedule planner and pin these intervals to your actual kitchen, then work the list one interval at a time.
The bottom line
The best way to clean a stainless steel appliance is a five-minute discipline rather than a product: dust dry, wash with warm soapy water along the grain, rinse with a plain damp cloth, and dry immediately with a second cloth so streaks never get the chance to form. Baking soda paste handles the stuck-on spots, diluted vinegar dissolves the water marks and haze, and a few drops of mineral oil buffed thin keep a bare front satin and slower to smudge. Know your finish before the first wipe, since coated smudge-proof and faux fronts want soap and water only, and keep the four destroyers, steel wool, scouring powder, bleach, and oven cleaner, out of the kitchen’s cleaning caddy entirely. Repeat the small wipe every few days and the full pass every week or two, and the job stays a five-minute one forever, which is the whole trick: stainless steel does not ask for effort, it asks for gentleness on a schedule.
A note on scope: these notes describe a general routine for the stainless steel exteriors of typical home appliances and are educational rather than professional advice, with every interval, minute count, and split above an illustrative planning figure rather than a measurement from any single kitchen. Finishes differ more than they look: your appliance’s care page outranks anything written here, especially on fingerprint-resistant coatings, faux fronts, and which products a maker permits, so test anything new on a hidden corner first. A few cautions hold everywhere: keep liquids light around controls, displays, and seals, keep chlorine bleach, steel wool, scouring powders, and oven cleaner away from stainless surfaces entirely, and never mix vinegar or any cleaner with bleach, since chlorine mixes release harmful gases. Damage already done, deep scratches, pitting, or failing coatings, is a cosmetic repair question for the manufacturer, not something more cleaning fixes.
Frequently asked questions
What is the best way to clean a stainless steel appliance?
The best way to clean a stainless steel appliance is also the cheapest: warm water with a drop of dish soap on a microfiber cloth, wiped in the direction of the metal's grain, then rinsed with a clean damp cloth and dried immediately with a separate dry one so the water never gets the chance to dry into streaks. Dish soap dissolves the fingerprint oils and cooking film that cause most of the dullness, and the dry buff is what leaves the front actually streak-free. Stubborn stuck-on spots get a paste of baking soda and water worked gently with the grain, water spots get a wipe of diluted white vinegar, and a few drops of mineral oil buffed in afterward restore the even sheen. Dedicated stainless cleaners work too, but they mostly repeat the same chemistry at a higher price.
How do I clean stainless steel without leaving streaks?
Streaks are almost always residue that dried on the surface, minerals from the water or leftover soap, so the fix is technique rather than a special product. Wipe with the grain, go back over the front with a cloth wrung out in plain water to lift the soap, and then dry immediately with a separate clean, dry microfiber cloth instead of letting the panel air-dry. The drying pass is the step people skip and the one that matters most, because air-drying is precisely how the minerals get left behind. In a hard-water home the effect is stronger, so the final buff earns its keep even more, and an occasional wipe of diluted vinegar clears the haze that builds anyway.
Can I use vinegar on stainless steel appliances?
Diluted white vinegar, equal parts vinegar and water, is a commonly used and generally safe wipe for plain stainless steel, and it is the tool for water spots and mineral haze because the mild acid dissolves the deposits a soapy cloth slides over. Apply it to the cloth rather than spraying the appliance, wipe with the grain, then rinse with a plain damp cloth and dry, since vinegar left to dry can leave its own marks. Be more careful on fingerprint-resistant or coated fronts: test a hidden corner first, because coatings can react differently than bare metal. Keep vinegar away from the control electronics and door seals, and never combine it with bleach or any chlorine cleaner, a mix that releases harmful gas.
What should you never use on stainless steel?
Four things cause most of the permanent damage. Steel wool and wire brushes scratch the finish and can leave behind tiny particles of ordinary carbon steel that later show up as rust spots on a surface that cannot otherwise rust. Scouring powders and gritty pads scratch the brushed finish with swirl marks that no cleaner removes. Chlorine bleach and chloride-heavy cleaners attack the protective layer that makes stainless steel stainless, which can lead to pitting, so they have no place on these fronts even briefly. Oven cleaner is formulated for baked carbon inside an enamel cavity and is far too aggressive for a stainless exterior. When in doubt, stay with dish soap, baking soda, and diluted vinegar, which handle nearly everything without risk.
How do I get fingerprints off a stainless steel refrigerator?
Fingerprints are skin oil, so they need a degreaser rather than plain water, and the mildest one in the house is dish soap. Wipe the front with a microfiber cloth dampened in warm soapy water, working in the direction of the grain, then rinse with a plain damp cloth and buff dry. A few drops of mineral oil buffed in afterward leave a thin film that makes the next round of prints less visible and easier to wipe away. If your refrigerator has a smudge-proof or fingerprint-resistant finish, skip the oil entirely: those fronts carry a factory coating that only wants a soft cloth and mild soapy water, and polishes can blotch it.
Is mineral oil safe for polishing stainless steel, and what about olive oil?
A few drops of food-grade mineral oil on a dry cloth is the commonly used household polish for bare stainless steel: wiped thinly with the grain and buffed until the front no longer feels oily, it evens out the sheen and slows the next generation of fingerprints. The amount matters more than the brand, since excess oil grabs dust and shows every touch. Olive oil gets suggested for the same job and does work for a day or two, but as a food oil it can turn sticky and rancid on a warm kitchen surface, so mineral oil is the better habit. On coated fingerprint-resistant finishes, skip oils and polishes altogether and stay with mild soap and water, per the finish's whole design.
How do I find the grain on a stainless steel appliance?
Look at the panel in good light and you will see fine parallel brushing lines running one direction, usually horizontally across refrigerator and dishwasher fronts, though handles and trim pieces often run the other way. That direction is the grain, and it exists because the factory finish is brushed rather than mirror-polished. Wiping along those lines pushes soil out of the microscopic grooves; wiping across them drags residue over the ridges and leaves more behind, and any abrasive used across the grain scratches visibly. Each panel gets read separately, since a door and its handle may not agree, and two extra seconds of looking saves the crosshatched haze that comes from wiping in circles.
How often should stainless steel appliances be cleaned?
An illustrative rhythm for a busy kitchen: a quick smudge wipe of the busiest fronts, usually the refrigerator and the dishwasher, every few days, a full soap-wash-and-dry of every stainless surface every week or two, and a light mineral oil polish somewhere between monthly and quarterly depending on how much the finish gets touched. Households with kids and daily cooking sit at the short end of each interval; a lightly used kitchen honestly stretches toward the long end. The signal to act early is visible: a front that looks dull under the kitchen lights or shows a constellation of prints is due regardless of the calendar. Frequency is the real secret, because film that is days old wipes off in seconds.