What's on this page
- Where indoor air pollution comes from
- Before you start
- Step 1: Control the source to reduce pollutants
- Step 2: Ventilate with fresh air
- Step 3: Upgrade your HVAC filter (MERV)
- Step 4: Run an air purifier (HEPA and CADR)
- Step 5: Manage humidity to limit mold and dust mites
- Step 6: Reduce VOCs from products and finishes
- Step 7: Add greenery and maintain a low-dust routine
- Step 8: Monitor with an air-quality sensor
- A worked example: cleaning up a stuffy bedroom
- Common mistakes that keep indoor air poor
- Troubleshooting: when the air still feels off
- Your indoor-air-quality checklist
- The bottom line
Short answer: Improve indoor air quality by controlling the source first, cutting cooking smoke, dust, harsh sprays, and tracked-in grime before you filter anything. Ventilate with exhaust fans and cross-breezes when the outdoor air is cleaner, keeping windows shut on wildfire-smoke or high-pollen days. Then filter in two layers, a mid-to-high MERV filter on the heating and cooling system plus a true HEPA purifier sized by CADR, and hold humidity around 30 to 50 percent.
Indoor air is easy to ignore because you cannot see it, and most homes are stuffier and dustier than they feel. The air inside a closed house is a running balance between the pollutants you add, cooking smoke, dust, pet dander, the off-gassing of furniture and cleaners, moisture that feeds mold, and whatever drifts in from outside, and the air you flush back out. Both sides of that balance are things you can measure and change, one at a time, in a sensible order, without turning your home into a laboratory or spending a fortune on gadgets.
These notes give you that order as eight concrete ways to improve indoor air quality, starting with the cheapest and most effective move, stopping the pollution at its source, and working up through ventilation, filtration, and a right-sized purifier to the sensor that tells you whether any of it worked. Each step comes with an illustrative figure so you can see roughly where it ranks, a plain description of how to do it, and a caveat so you do not chase a fix that is not there. Because clean air, humidity, and appliance running cost are tangled together, we point you to our sibling reports along the way, including our walkthrough on how to choose an air purifier for sizing the machine and our notes on reducing humidity in your home for the mold side. Feed your own room size into the sizing planner as you read and watch the airflow target move.
Key takeaways
- Source control comes first: the cheapest, most effective way to clean indoor air is to stop adding the pollutant, cooking smoke, dust, harsh sprays, tracked-in grime, before you filter anything.
- Ventilate when the outdoor air is cleaner: exhaust fans and cross-breezes flush the everyday buildup, but keep windows shut on wildfire-smoke or high-pollen days.
- Filtration is two layers: a mid-to-high MERV filter on your heating and cooling system, plus a true HEPA purifier sized to the room by its CADR.
- Hold humidity around 30 to 50 percent to starve mold and dust mites, and keep a low-dust cleaning routine so settled particles do not get stirred back up.
- The one mistake to avoid: buying a purifier and calling it done while a gas stove, a damp basement, or a scented-spray habit keeps refilling the room. Fix the source first.
Where indoor air pollution comes from
Before you clean anything, look at where the pollution comes from, because the shape of the problem decides the order of your work. Indoor air quality is a running total of everything that adds pollutants to the air minus everything that removes them. The exact mix depends on your home, your heating and cooking, your climate, and your daily habits, but a common illustrative picture of where a home’s indoor air pollution originates looks roughly like the breakdown below, expressed as shares of the total load.
Where indoor air pollution comes from
Illustrative shares of a home's indoor air pollution load. Segments sum to 100 percent. Your mix varies by home, heating, and habits.
Combustion and everyday particles are the fat slices, but VOCs and damp quietly refill a room you just aired out.
The lesson of the chart is the whole strategy in one picture. Combustion and cooking, the smoke and fumes from a gas stove, candles, or a fireplace, and everyday particles, the dust, dander, and pollen that settle and get stirred back up, are the two largest slices, and they are the ones source control and ventilation are built to handle. VOCs, the gases that off-gas from paints, new furniture, and cleaning products, are the sneaky middle slice: invisible, easy to ignore, and refilled every time you spray or unwrap something new. Damp-driven mold and outdoor air rounding out the picture are the slices that a purifier alone cannot touch. The steps that follow walk across this picture, controlling sources first, then ventilating, then filtering, then holding humidity and watching the result. Your own home may weight these differently, especially with a gas stove or a damp basement, so treat the shares as a map rather than a measurement.
Before you start
This is a measure-and-tune project, not a renovation, and most of the early moves cost little or nothing. You can complete the source-control and ventilation moves in an afternoon, then let the durable fixes, a better filter, a purifier, humidity control, follow over days and weeks. Gather a couple of things before you begin so every judgment you make is based on your own home rather than a guess.
- A sense of the problem. Which room feels stuffiest, when it feels worst, whether there is cooking or smoke odor, visible dust, condensation, or a musty smell, and whether the trouble tracks with cooking, cleaning, pets, the seasons, or shut windows.
- An optional air-quality monitor or hygrometer. An inexpensive monitor that reads fine particulate and humidity turns a vague stuffiness into a number you can watch respond to each change. A basic hygrometer alone covers the humidity piece cheaply.
A phone, a little attention, and optionally a monitor are all the equipment the first steps require. The paid steps, a better filter, a purifier, a dehumidifier, are optional and can wait until you have removed the obvious sources and tried the free fixes. Difficulty is low throughout: nothing here asks you to open a wall or touch wiring, and anything that would, such as a suspected combustion or carbon-monoxide problem, serious mold, or a gas appliance issue, is explicitly handed off to a professional. With the problem room in mind, start where the cleanest air is cheapest: at the source.
Step 1: Control the source to reduce pollutants
The cheapest and most effective way to clean indoor air is to stop putting the pollution into it, which is why source control comes first and outranks every filter and purifier that follows. A filter can only catch what is already airborne; source control keeps it from becoming airborne at all, and it usually costs nothing. Because combustion, cooking, and everyday particles are the two fattest slices of the chart, the biggest wins hide in ordinary habits rather than in any device.
Start with the obvious emitters. Cooking, especially frying and anything on a gas burner, releases fine particles and combustion gases, so always run the range hood or a nearby exhaust fan while you cook, and prefer a hood that vents outside rather than one that recirculates. Cut back on candles, incense, and wood-fire use, which are direct sources of fine particulate. Adopt a no-shoes-indoors habit and use doormats, since a surprising amount of dust, pollen, and grime is tracked in on the soles of shoes. Keep pets groomed and their bedding washed to cut dander, and choose unscented or low-emission cleaning products so you are not spraying VOCs into the very air you are trying to clean. As an illustration, in a stuffy bedroom carrying an elevated particle reading, disciplined source control alone might account for the largest single share of the cleanup, an illustrative contribution rather than a measured one.
Watch out for the sources you cannot see or smell. Combustion appliances that are not venting properly are both an air-quality and a safety concern, so make sure any gas appliance is correctly vented and keep a working carbon-monoxide detector. Fragrance is not the same as clean air; a scented spray masks odor while adding VOCs, so reaching for it makes the reading worse even as the room smells better. Fix the source rather than covering it, and if you suspect a combustion or carbon-monoxide problem, treat that as a job for a professional, not a filter.
Step 2: Ventilate with fresh air
Once you have stopped adding what you can, the next cheapest move is to flush what is already there, which is exactly what ventilation does, and it directly targets the everyday buildup of cooking fumes, VOCs, and general stuffiness. The principle is simple: stale indoor air, loaded with whatever has accumulated in a closed home, is swapped for cleaner outdoor air, either by mechanical fans that push it out or by opening the house when the outdoor air is cleaner than the indoor air. Because a modern, well-sealed home holds pollutants in rather than letting them escape, deliberate ventilation is often the difference between fresh and stuffy.
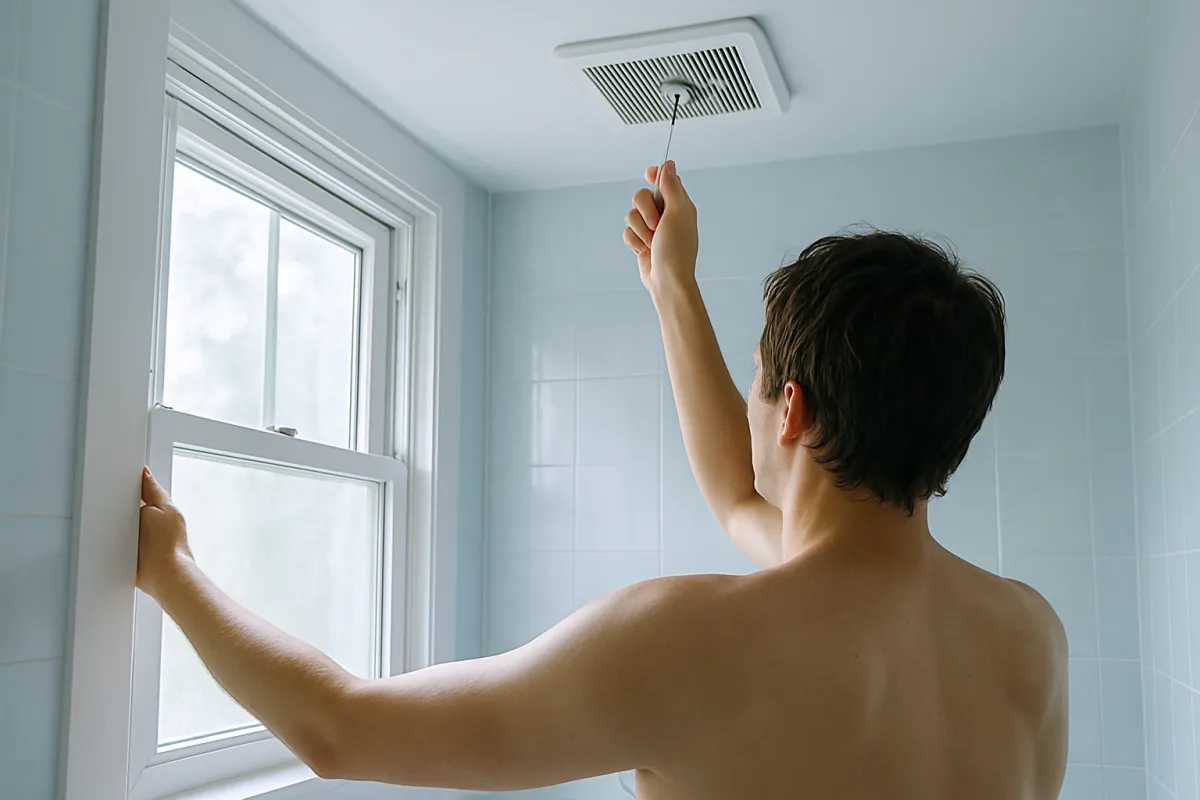
Start with the exhaust fans you already own. Run the kitchen range hood while cooking and for a while after, and run the bathroom fan during and after showers to clear both moisture and the particles that come with it. Beyond spot ventilation, air out the whole house on a good-air day: open windows on opposite sides for a cross-breeze and let the cleaner outdoor air sweep through, which flushes accumulated VOCs and stuffiness quickly. Even a short, vigorous airing once a day makes a noticeable difference in a closed home. As an illustration, in our stuffy-bedroom example, disciplined ventilation might account for a meaningful share of the improvement, an illustrative contribution alongside the other steps.
Watch out for the one rule that makes or breaks this step: ventilation only helps when the outdoor air is cleaner than the indoor air. On a wildfire-smoke day, during a high-pollen stretch, or in heavy traffic pollution, opening the windows pulls the problem inside, so keep them shut and lean on filtration instead. Check local air-quality conditions before you open up on a questionable day. Also confirm your kitchen and bathroom fans actually vent outside rather than into an attic or crawlspace, because a fan that dumps air back into the structure just moves the problem, and in a humid climate remember that fresh outdoor air can carry moisture in.
Step 3: Upgrade your HVAC filter (MERV)
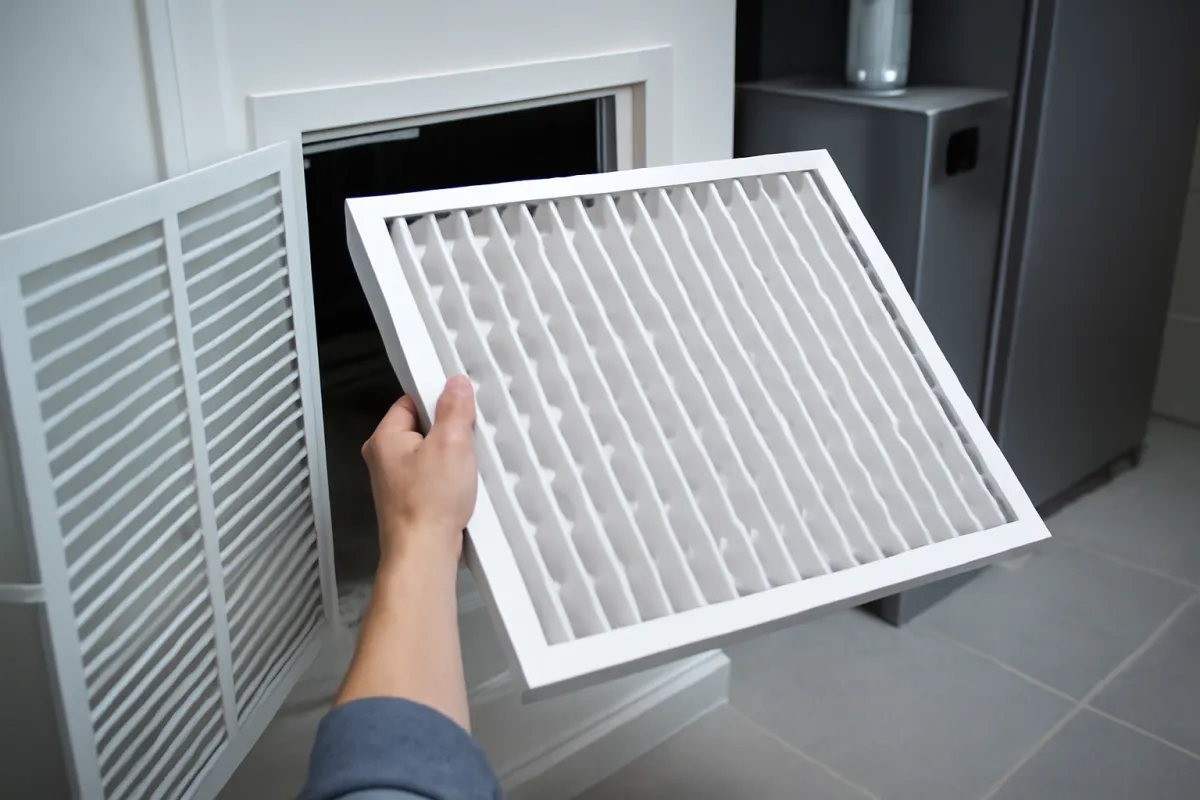
Your heating and cooling system already moves the air in your home, so the filter it runs through is a whole-house air cleaner you may be underusing. MERV, the Minimum Efficiency Reporting Value, rates how well that filter captures particles, and a higher number means finer particles caught. The cheap fiberglass panels that come standard, often around MERV 4, mostly exist to protect the equipment and catch only the largest particles; stepping up to a pleated filter in the mid-to-high residential range captures far more of the fine particulate that affects the air you breathe.
The chart below shows how illustrative relative fine-particle capture climbs with the MERV rating, with a true HEPA purifier included at the top as a reference point for how much further a standalone unit reaches.
Illustrative fine-particle capture by filter grade
Relative effectiveness at capturing fine airborne particles, illustrative and general, not a measured efficiency for any specific filter. Bars scale with the value.
Higher MERV catches finer particles, but a denser filter is harder to pull air through, so match the grade to what your system can handle.
To upgrade, find your system’s filter slot, note the size printed on the frame, and buy a pleated replacement in a MERV level your system supports, commonly cited around MERV 11 to 13 for general home air quality. Mark the install date and change it on schedule, since a clogged filter both stops cleaning and chokes airflow. For the wider routine this fits into, our walkthrough on maintaining your appliances covers the heating and cooling filter alongside the rest of the house.
Watch out for the airflow trap, which is the reason more MERV is not automatically better. A denser, higher-MERV filter is harder to pull air through, and forcing a filter rated higher than your system was designed for can restrict airflow, strain the blower, and actually reduce how much air gets cleaned. Check what your system supports before jumping to the densest filter on the shelf, and if you are unsure, ask an HVAC professional what MERV level is safe for your equipment. A filter only cleans while the system’s fan is running, so a whole-house filter and a standalone purifier complement rather than replace each other.
Step 4: Run an air purifier (HEPA and CADR)
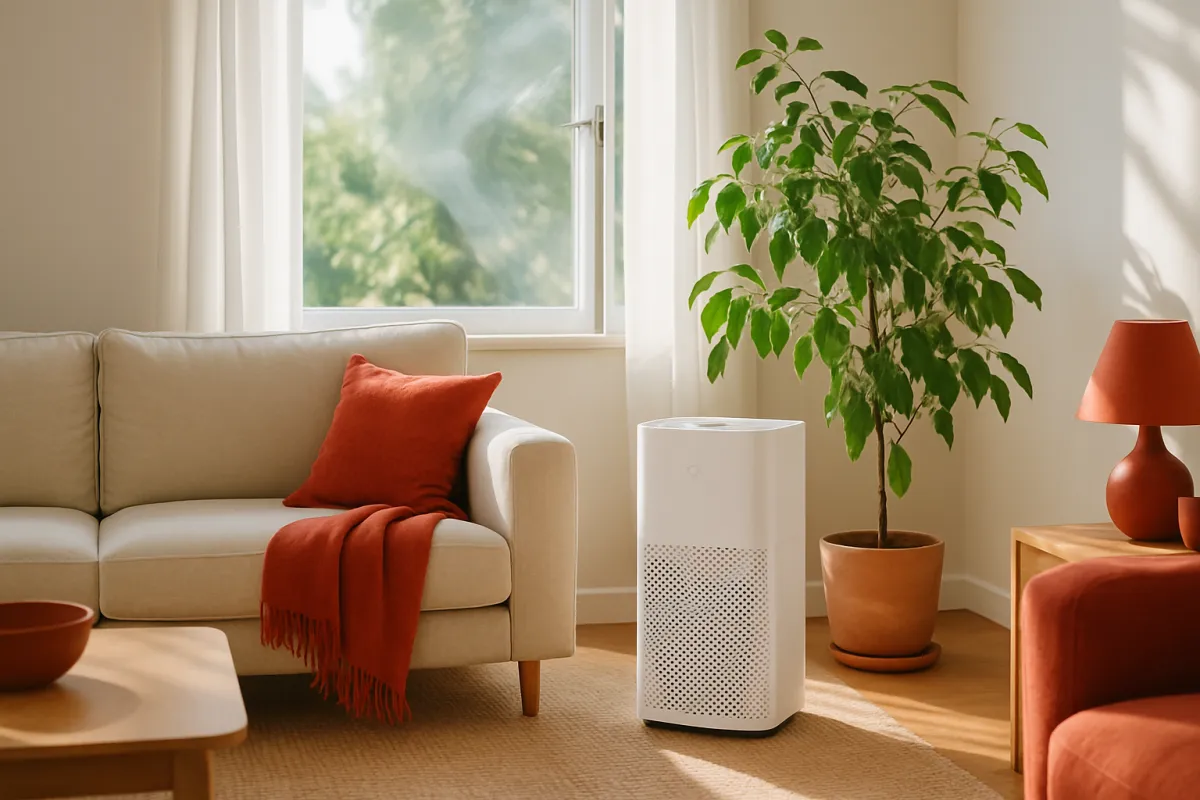
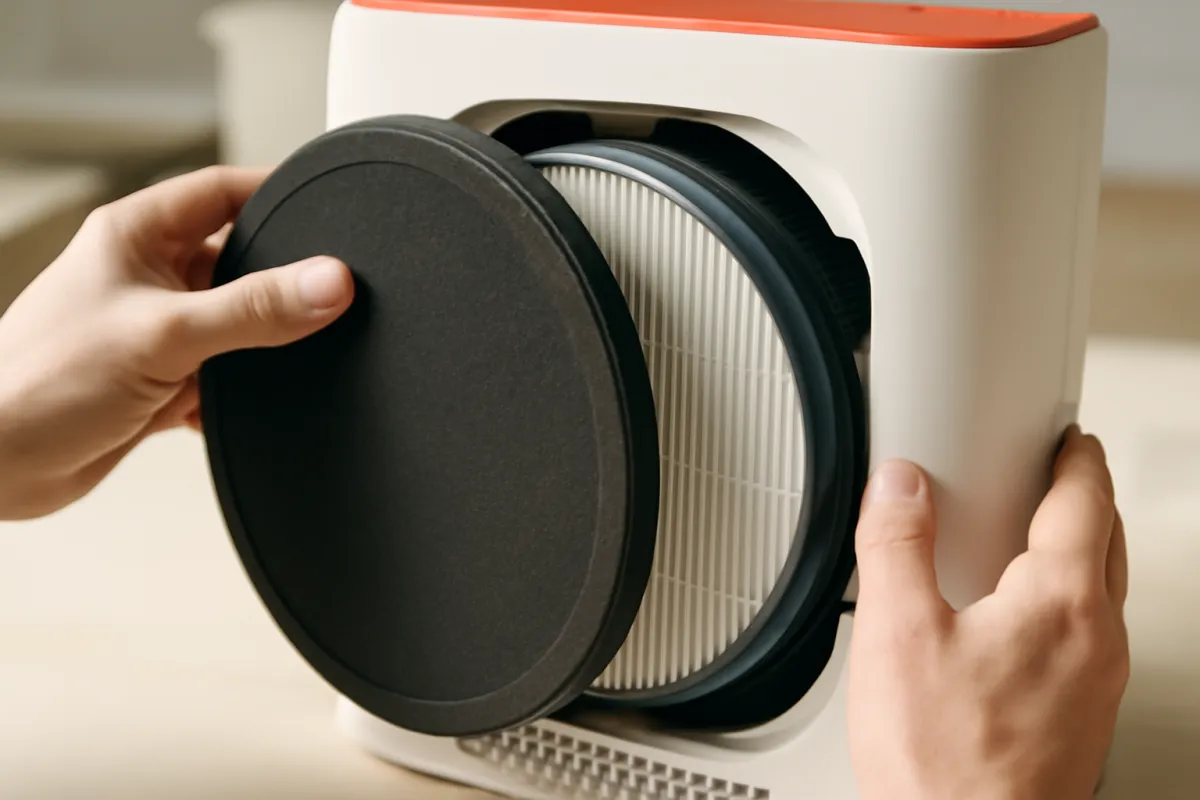
For the room where you spend the most time, a standalone air purifier with a true HEPA filter is the most effective single device for pulling particles out of the air, and it works whether or not the heating and cooling system is running. A true HEPA filter is a defined standard that traps the vast majority of fine particles, including the hardest size to catch, so it covers dust, pollen, pet dander, mold spores, and the fine particulate in smoke. Unlike the whole-house filter, a portable unit lets you concentrate cleaning power on one room, which is why a bedroom or a home office is the classic place to put one.
The whole game here is sizing, and the number that predicts real-world results is CADR, the Clean Air Delivery Rate, which combines the filter and the fan into one figure: how much clean air the machine actually delivers per minute. The airflow you need scales with the room’s volume and how many times per hour you want the air cleaned, so a bigger room or a higher air-change target calls for a higher CADR. As a consistent illustration, a small bedroom of roughly 180 square feet with a standard eight foot ceiling holds about 1,440 cubic feet of air, and cleaning it about five times an hour points to a CADR near 120 cubic feet per minute, which is the example we carry through the worked scenario. Feed your own room size and ceiling height into the sizing planner to see your own airflow target, and for the full method our guide on how to choose an air purifier works the sizing, the filter grade, and the running cost in detail. You can also weigh a unit’s electricity draw with the cost-per-use calculator.
Watch out for the sizing and marketing traps. Size up rather than down, because a unit whose CADR barely matches the room runs on high to keep pace, which is loud and burns through filters, while the same machine in a smaller room runs quiet on a low setting. Confirm the box says true HEPA rather than HEPA-type, and avoid ozone generators outright, since ozone is a lung irritant that health authorities warn against using in occupied spaces. Remember that a HEPA purifier does nothing about gases and odors unless it carries a real carbon stage, and nothing about the source, so it is one tool in the set, not the whole answer. For deciding whether you even need one, our note on whether air purifiers are worth it covers the case.
Step 5: Manage humidity to limit mold and dust mites
Air quality is not only about particles and gases; it is also about moisture, because damp air is what lets mold grow and dust mites thrive, and both degrade the air you breathe. Indoor air sustained above roughly 60 percent relative humidity gives mold the damp surfaces it needs and gives dust mites the conditions they like, which is why holding the room in a commonly cited 30 to 50 percent comfort range is one of the quieter but more important air-quality moves. Too dry has its own downsides, so the goal is the comfortable middle band rather than the lowest possible number.
Start by measuring with a hygrometer, the small, inexpensive meter that reads relative humidity, and place it in the room that feels muggy or musty. If the reading runs high, the levers are the same ones that clean air in general: ventilation to flush moist air when the outdoor air is drier, exhaust fans during showers and cooking, and a right-sized dehumidifier for a persistently damp space like a basement. Your air conditioner also dehumidifies as it cools, so running it on a muggy day helps on both fronts. As an illustration, in a home where a damp room is feeding a musty smell, bringing the humidity back into range is what stops the mold that was quietly worsening the air. For the full method, our walkthrough on reducing humidity in your home works the sizing and the sources step by step, and our air conditioner running-cost report covers the cooling that dries as it runs.
Watch out for treating humidity and air quality as separate problems, when they are two views of the same room. A purifier will pull mold spores out of the air, but it does nothing about the damp surface growing the mold, so a musty room needs the moisture fixed, not just the air filtered. Persistent condensation on windows, a musty smell that will not clear, or visible mold all point to humidity that is too high for the space. Some people are sensitive to mold, and this is general information rather than health or building advice, so a large or recurring mold problem is a reason to bring in a qualified professional rather than to keep filtering the air around it.
Step 6: Reduce VOCs from products and finishes
VOCs, volatile organic compounds, are the invisible middle slice of the chart: gases that off-gas from paints, adhesives, new furniture and flooring, air fresheners, and many cleaning products. A HEPA filter does not catch them because they are gases rather than particles, which is why they need their own step built around reducing what you bring in and ventilating what off-gasses. Because VOCs are easy to ignore, they are the pollutant people most often filter around without ever addressing.
Start at the point of purchase and use. Choose low-VOC or no-VOC paints and finishes when you decorate, and when something new arrives with a strong chemical smell, a mattress, a piece of pressed-wood furniture, a rug, let it air out in a ventilated space or by an open window while it off-gasses most heavily in its first days and weeks. Swap heavily fragranced cleaners, sprays, and plug-in scents for unscented or simpler products, since fragrance is itself a VOC source, and store paints, solvents, and glues sealed and out of living spaces, ideally in a garage or shed rather than a closet. Ventilate hard during and after any painting, gluing, or strong-smelling project. As an illustration, in a freshly redecorated room, patient ventilation and low-VOC choices are what bring the invisible slice down, since no particle filter will touch it.
Watch out for the fragrance-equals-clean trap, the same one from source control, because it bites hardest with VOCs. A scented spray or a plug-in makes a room smell fresh while adding the very gases you are trying to reduce, so masking odor and cleaning air are opposite moves. If a room has a persistent chemical or new-furniture smell, the answer is time and ventilation, not more fragrance. A carbon filter, distinct from the HEPA stage, can help with some odors and gases, but it saturates and needs replacing, and it is no substitute for cutting the source and airing the room out.
Step 7: Add greenery and maintain a low-dust routine
With the big levers pulled, two smaller habits keep a room’s air from sliding back, and one common belief deserves a caveat. The maintain half of this step is a low-dust cleaning routine, and it does real work: dust, dander, and pollen settle onto surfaces and get stirred back into the air every time someone walks through, so removing them at the surface keeps them from becoming airborne again. Damp-dust rather than dry-dust so you lift particles instead of scattering them, vacuum regularly, ideally with a vacuum that has a good filter, and wash bedding and soft furnishings that trap allergens.
The add half is greenery, and here the honest framing matters. Houseplants are a pleasant addition to a room, but the number needed to meaningfully clean a real, ventilated space’s air is far larger than most homes have, because the popular idea that a few plants scrub the air comes from sealed-chamber experiments that do not scale to a living room. Plants also add a little moisture, and overwatered soil can grow mold, so a room already fighting damp does not need a jungle. As an illustration, in our stuffy-bedroom example, the cleaning routine contributes a steady, ongoing share of the improvement while the plants contribute little to the measurable air quality and a lot to how the room feels. Enjoy greenery for that, and lean on the earlier steps for the actual cleaning.
Watch out for leaning on plants as an air-cleaning strategy while the real levers go untouched, which is effort spent on the shortest bar while the long ones run unchecked. If a room is genuinely stuffy or dusty, the cleaning routine, the ventilation, and the filter do the work; the plants are decoration that happens to be alive. Avoid overwatering, keep the soil surface from staying wet, and thin plants out of a room you are actively trying to keep dry. Use both habits as the finishing touch on a room already brought most of the way there by source control, ventilation, and filtration.
Step 8: Monitor with an air-quality sensor
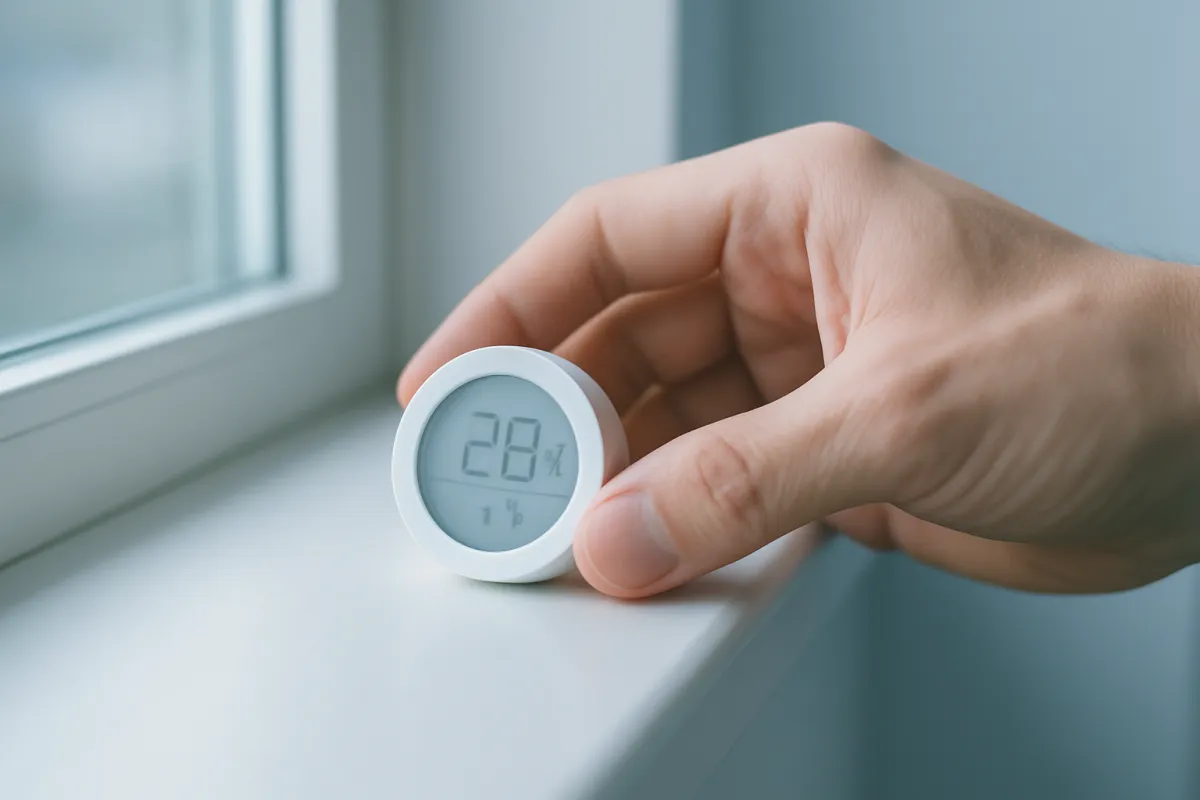
Everything upstream is easier to trust when you can see it working, which is what an air-quality monitor gives you: a number that responds to each change instead of a guess. The common consumer versions read fine particulate, often labeled PM2.5, and many also show humidity and temperature, with some adding VOCs or carbon dioxide as a proxy for how stuffy and under-ventilated a room is. Placing one in your problem room turns the whole project from a hunch into a feedback loop, where you can watch cooking spike the reading, a purifier pull it down, and an open window flush it out.
Place the monitor at roughly breathing height, away from a direct source like the stove or a window, so it reads the room rather than a hot spot, and give it time to settle. Watch how the number responds to everyday events: it should climb while you fry or light a candle, fall when the purifier runs or you cross-ventilate, and sit lower in a well-managed room. Use those responses to tune the earlier steps, running the purifier a notch higher when cooking, airing out when the reading and the outdoor air both allow. As an illustration, in the stuffy-bedroom example, watching the reading drop as the purifier and ventilation take hold is what confirms the plan is working rather than just feeling like it is. A basic hygrometer alone covers the humidity piece cheaply if that is your main concern.
Watch out for reading too much into a single number. One reading is a snapshot, not the whole story, since the air is cleanest just after you ventilate and dirtiest during cooking or a dusty chore, so watch the trend across a day before you judge. These consumer devices are useful for direction rather than laboratory precision, so treat a rising or falling trend as the signal, not the exact figure. And a monitor measures, it does not clean, so the reading only improves when you act on the earlier steps. If a monitor or your senses point to a serious concern, significant mold, a combustion or carbon-monoxide issue, or persistent symptoms, that is a reason to bring in a professional.
A worked example: cleaning up a stuffy bedroom
Put the steps together on one illustrative room so the numbers connect. The space is a 180 square foot bedroom with a standard eight foot ceiling, which holds about 1,440 cubic feet of air. It feels stuffy, dust builds up quickly, and an air-quality monitor shows an elevated fine-particle reading, especially in the evening. The goal is noticeably cleaner, fresher air, reached by stacking several tactics rather than leaning on any single one. The figures below are illustrative contributions, not measured results, and your own room will split differently.
Source control (Step 1). A no-shoes habit, unscented products, washed bedding, and keeping candles out of the room is the largest single lever, contributing an illustrative 35 percent of the improvement, precisely because it stops the pollution before it becomes airborne, and it costs nothing.
Ventilation (Step 2). A daily cross-breeze on good-air days and running the bathroom fan flushes the everyday buildup, contributing an illustrative 20 percent.
A right-sized HEPA purifier (Step 4). Matched to the room’s volume for about five air changes an hour, near a 120 cubic feet per minute CADR, the purifier handles the airborne particles the other steps miss, contributing an illustrative 25 percent.
Humidity control (Step 5). Keeping the room in the 30 to 50 percent range so dust mites in the bedding have less to feed on contributes an illustrative 10 percent.
Cleaning routine and filter (Steps 3 and 7). A better heating and cooling filter and a damp-dusting, vacuuming routine contribute an illustrative 10 percent and keep settled particles from being stirred back up.
Add them and the illustrative improvement is a room that reads and feels markedly cleaner, with source control doing the most work but the purifier and ventilation together matching it. The chart below shows how that improvement splits by tactic.
Illustrative air-quality improvement by tactic
How an illustrative cleanup of a stuffy bedroom splits across the steps. Bars scale with each tactic's share. Illustrative, not measured.
Source control is the long bar, but the purifier and ventilation together match it. No single tactic does the whole job.
The shape of the split is the whole lesson repeated: source control is the workhorse because free habits stop the pollution at the source, but the purifier and ventilation together contribute as much, and humidity and cleaning keep the room from sliding back. A room with a gas stove, a damp problem, or heavy outdoor pollution would see its own split lean differently. Swap your own room size and ceiling height into the sizing planner to see your own version of the purifier target, in your own numbers.
Common mistakes that keep indoor air poor
Most stuffy rooms stay that way not for lack of effort but because the effort lands in the wrong place. These are the pitfalls that quietly cancel out otherwise good intentions.
- Buying a purifier and stopping there. A purifier handles airborne particles in the room it sits in, but it does nothing about a gas stove venting poorly, a damp basement, or a scented-spray habit that keeps refilling the air. Fix the source first, then let the purifier hold the room.
- Masking odor with fragrance. A scented spray or plug-in makes a room smell clean while adding VOCs, so it makes the air worse even as it smells better. Remove the source of the smell and ventilate instead of covering it.
- Over-filtering the heating and cooling system. Jamming in a filter rated higher than the system supports restricts airflow and strains the blower, cleaning less air, not more. Match the MERV to what your equipment can handle and change it on schedule.
- Ventilating on a bad-air day. Opening windows during wildfire smoke, high pollen, or heavy traffic pollution pulls the problem inside. Ventilate when the outdoor air is cleaner, and keep the house shut and filtering when it is not.
- Ignoring humidity. Filtering the air while a damp room grows mold treats the symptom and skips the cause. Hold the room in the 30 to 50 percent range so mold and dust mites have less to work with.
- Undersizing the purifier. A unit whose CADR is too low for the room runs flat out and never keeps up. Size up rather than down using the room’s volume and your air-change target.
Clear these and your effort flows to the moves that actually clean the air, which is the difference between a room that feels fresh and one that stays stubbornly stuffy.
Troubleshooting: when the air still feels off
The eight steps cover the common case, but homes differ. Here are the edge cases and what to do when the standard advice does not fit.
What if the air still feels stuffy after all this? Stuffiness that survives a purifier usually points to under-ventilation or a source still running. Confirm the room actually gets fresh air, a cracked window, a running fan, an open door, since a purifier recirculates and filters but does not bring in outside air. Then hunt for a source you have not addressed: a gas appliance, a hobby with solvents, or a pet area. A monitor’s carbon-dioxide-style stuffiness reading, if your device has one, is a direct clue that the room needs more fresh air.
What if I have a gas stove? A gas stove is a direct combustion source indoors, so the single most important habit is to run a range hood that vents outside every time you cook, even for a quick task, and to open a nearby window if the hood only recirculates. Keep a working carbon-monoxide detector, and if you ever suspect a combustion or carbon-monoxide problem, treat it as a safety issue for a professional rather than an air-quality tweak.
What if outdoor air quality is bad where I live? When the outdoor air is the problem, wildfire smoke, heavy pollen, or urban pollution, invert the ventilation advice: keep windows shut, seal obvious gaps, and lean on filtration, a good heating and cooling filter plus a right-sized HEPA purifier, to clean the air you have. Check local air-quality conditions and only ventilate during the cleaner stretches. On the worst days, one well-sealed room with a purifier running can serve as a cleaner-air retreat.
What if someone in the home has ongoing symptoms? Persistent symptoms you suspect are tied to the air are beyond what a checklist should decide. Do the general air-quality steps, but treat ongoing health concerns, and any significant mold, combustion, or carbon-monoxide finding, as a reason to bring in a qualified medical or building professional. This article is general information, not health advice, and some people are more sensitive to indoor pollutants than others.
Your indoor-air-quality checklist
Work this list top to bottom, which is also cheapest-first then most-durable. Clear it and you have given a stuffy room its best chance of holding fresh and clean.
- Control the source. Run the range hood, adopt no-shoes-indoors, cut candles and incense, groom pets, and choose unscented, low-emission products.
- Ventilate with fresh air. Run exhaust fans while cooking and showering, and cross-ventilate on a good-air day when the outdoor air is cleaner than the indoor air.
- Upgrade the heating and cooling filter. Fit a pleated filter in a MERV level your system supports, and change it on schedule so it keeps cleaning.
- Run a right-sized HEPA purifier. Size it to the room’s volume and your air-change target using CADR, confirm true HEPA, and avoid ozone generators.
- Manage humidity. Keep the room around 30 to 50 percent with a hygrometer, exhaust fans, and a right-sized dehumidifier for damp spaces.
- Reduce VOCs. Choose low-VOC finishes, air out new furnishings, store solvents sealed and out of living spaces, and skip fragranced sprays.
- Add greenery and keep a low-dust routine. Damp-dust, vacuum, and wash soft furnishings, and enjoy plants as an extra rather than a cleaner.
- Monitor the result. Place an air-quality monitor at breathing height, watch the trend, and act on the earlier steps when it climbs.
Save the list, work one line at a time, and re-check the monitor after a few days to see the effect land.
The bottom line
Indoor air quality is not something the house simply hands you; it is a balance you can measure and shift. Start where the clean air is cheapest, at the source, by cutting the cooking smoke, dust, and sprays you add, then flush what remains with ventilation when the outdoor air is cleaner. Filter in two layers, a mid-to-high MERV filter on the heating and cooling system and a right-sized true HEPA purifier in the room you use most, and hold humidity in the 30 to 50 percent range so mold and dust mites have less to work with. Reduce the invisible VOCs by choosing low-emission products and airing out new things, keep a low-dust cleaning routine, and let an air-quality monitor tell you whether it all worked. On an illustrative stuffy bedroom, stacking those tactics leaves the room reading and feeling markedly cleaner, with source control doing the most work but the purifier and ventilation together matching it, and no single move doing the whole job. The biggest mistake is buying a device and ignoring the source, so fix the gas stove venting, the damp room, or the scented-spray habit before you count on any filter. Do the steps in that order, keep every judgment tied to your own room and your own monitor, and stuffy air stops feeling like the house and starts behaving like something you control.
A note on scope: these notes exist to hand you a working order for improving indoor air quality, not to promise any specific result. Every share, percentage, airflow figure, and MERV comparison above is an illustrative planning figure drawn from typical ranges and general concepts rather than measured on one home or one product, and your own home, heating, climate, and habits will move the result enough to matter, so read your own room with a monitor before you count on any change. Nothing here is professional health, medical, HVAC, or building advice. Indoor air can involve combustion gases, carbon monoxide, mold, and pollutants that some people are more sensitive to than others, so keep a working carbon-monoxide detector, follow your equipment’s own filter guidance, and bring in a qualified medical, remediation, or HVAC professional for any persistent symptoms, any significant mold, or any combustion or gas-appliance concern before you rely on the figures in this article.
Frequently asked questions
How can I improve indoor air quality naturally?
The most natural and lowest cost move is to control the source and ventilate. Cut the pollutants you add at home, cooking smoke, harsh cleaners, candles, tracked-in dust, and shoes worn indoors, then bring in fresh air whenever the outdoor air is cleaner than the indoor air by running exhaust fans and opening windows. Keeping humidity in a commonly cited 30 to 50 percent range starves mold and dust mites without any device at all. A regular low-dust cleaning routine, damp dusting and vacuuming, removes settled particles before they get stirred back into the air. These free habits do most of the work before you ever buy a filter or a purifier.
What is the best way to improve air quality in a bedroom?
A bedroom is where people spend the most continuous hours, so it rewards a focused effort. Start by removing sources, unscented laundry and bedding washed regularly, no shoes, and a break from sprays and plug-in scents, then keep the door and a window able to move air. A right-sized air purifier with a true HEPA filter is the single most effective device for a bedroom because the room is small enough to clean quickly and quiet enough to notice the fan. Hold humidity in the comfortable range so dust mites in the mattress and bedding have less to feed on. For sizing a purifier to the room, our note on how to choose an air purifier works the numbers in detail.
Do air purifiers actually improve indoor air quality?
A properly sized purifier with a true HEPA filter does remove airborne particles, dust, pollen, pet dander, mold spores, and the fine particulate in smoke, from the air that passes through it. The catch is that it only cleans the air it can actually move, so the unit has to match the room. That match is measured by CADR, the Clean Air Delivery Rate, which combines the filter and the fan into one airflow figure, and a unit whose CADR is too low for the space runs flat out and never quite keeps up. A purifier also does nothing about gases and odors unless it carries a real carbon stage, and nothing about the source that keeps resupplying the pollutant. Treat it as one tool that handles particles well, not a substitute for controlling the source and ventilating.
What MERV rating is best for home air quality?
MERV, the Minimum Efficiency Reporting Value, rates how well a heating and cooling filter captures particles, and a higher number means finer particles caught. For general home air quality, a mid-to-high residential filter, often cited around MERV 11 to 13, captures noticeably more fine particulate than the cheap MERV 4 fiberglass panels that mostly protect the equipment. The important caveat is airflow: a denser filter is harder to pull air through, and pushing a filter rated higher than your system was designed for can restrict airflow and strain the blower. Check what your system supports before jumping to the densest filter on the shelf, and change the filter on schedule so it does not clog. When in doubt about your specific system, ask an HVAC professional what MERV level it can handle.
Does opening windows improve indoor air quality?
Opening windows helps when the outdoor air is cleaner than the indoor air, which is often the case for everyday indoor pollutants like cooking fumes, VOCs, and stuffiness that build up in a closed home. Cross-ventilating, opening windows on opposite sides for a breeze, flushes stale indoor air and dilutes whatever has accumulated. The exception is when the outdoor air is worse: during wildfire smoke, high pollen counts, or heavy traffic pollution, opening up pulls the problem inside, so it is better to keep windows shut and run a purifier. Humid outdoor air is its own trade-off, since it can raise indoor moisture. Use ventilation as a tool when the outside air helps, and check local air-quality conditions before you open up on a bad-air day.
Can houseplants clean indoor air?
Houseplants are a pleasant addition, but the honest answer is that the number of plants needed to meaningfully clean a real room's air is far larger than most homes have. The often-repeated idea that a few plants scrub the air comes from sealed-chamber experiments that do not scale to a ventilated living space. Plants also add a little moisture and, if overwatered, can grow mold in the soil, so a room already fighting damp does not need a jungle. Enjoy plants for how they look and feel, and lean on source control, ventilation, filtration, and humidity control for the actual air cleaning. Treat greenery as a minor, welcome extra rather than the main tool.
How do I measure indoor air quality at home?
An inexpensive indoor air-quality monitor gives you a number to work with instead of a guess. The common consumer versions read fine particulate, often labeled PM2.5, and many also show humidity, temperature, and sometimes VOCs or carbon dioxide as a proxy for how stuffy and under-ventilated a room is. Place the monitor at breathing height, away from a direct source like the stove, and watch how the reading responds to cooking, cleaning, running a purifier, or opening a window. A hygrometer alone covers the humidity piece cheaply if that is your main concern. Treat any single reading as a snapshot and watch the trend over a day, since these consumer devices are useful for direction rather than laboratory precision.
What are the signs of poor indoor air quality?
Common signals include stuffiness and stale air in a closed room, lingering cooking or smoke odors, visible dust building up quickly on surfaces, condensation on windows, and any musty smell that points to dampness or mold. A room that feels better the moment you open a window is telling you it is under-ventilated. Because some effects are subtle, an air-quality monitor helps confirm what your senses suggest. This article is general information rather than health advice, so if anyone in the home has persistent symptoms you suspect are tied to the air, or if you find significant mold or a combustion or carbon-monoxide concern, treat that as a reason to bring in a qualified professional rather than to self-diagnose.