What's on this page
- What a refrigerator has to do besides keep food cold
- Before you start: what to measure and what to know
- Step 1: Measure the opening, then measure the path to it
- Step 2: Size the capacity to your household, not the showroom
- Step 3: Pick the configuration and count what it costs in usable space
- Step 4: Decide counter depth or standard depth
- Step 5: Settle the ice and water question before you buy
- Step 6: Read the energy label as a ten year running cost
- Step 7: Check noise, shelving and the reliability trade
- Door swings, handles and hinge clearance in detail
- What usable capacity really means inside the box
- Shelving, drawers and the tray test
- Freezer type: frost free, manual defrost and what each costs you
- Temperature control, air flow and dual evaporators
- Where the electronics help and where they add failure points
- A worked example: choosing for a three person household
- Common mistakes when choosing a refrigerator
- Troubleshooting the decision when it will not resolve
- Choosing for a rental, a garage or a very small kitchen
- Reading a refrigerator spec sheet without getting lost
- Delivery day, installation and the first 48 hours
- Your refrigerator choosing checklist
- The bottom line
A refrigerator is the only appliance in the house that never switches off, and it is the one most people choose in an afternoon. It gets picked on finish and door style in a showroom where every model looks enormous and empty, and then it comes home to a kitchen with a fixed opening, a doorway it has to pass through, a wall the door will hit, and a household that shops in a particular way. None of that is on a spec sheet. All of it decides whether you like the appliance, and you find out in the first week and then live with it for a decade.
These test notes give you a seven-step method for how to choose a refrigerator, ordered so that each step closes off decisions the next one would otherwise leave open. The first step is measurement, and not the measurement most people take. It is the opening, the swing, the hinge clearance, the handle projection and the route the appliance has to travel to reach the kitchen at all. For what one costs to run once it is in place, see our refrigerator running cost notes, and for how long you should expect it to last, our refrigerator lifespan report. Set your household size, the configuration and your energy label figure in the refrigerator sizing planner as you read, and it will size the decision to your kitchen rather than to the showroom.
Key takeaways
- Measure the opening and the path to it in the same session. Doorways, turns, handrails and the clearance the manual wants at the back are what actually eliminate models, not capacity.
- Advertised cubic feet describe an empty cabinet. The usable share varies by configuration, and a side-by-side or counter-depth model can give up a meaningful slice of it before you load anything.
- The configuration fork is about reach and width, not looks: top freezer, bottom freezer, side-by-side and French door each buy you something and charge you something specific.
- Read the yellow label as a ten year cost. An illustrative 550 kilowatt-hours a year at 16 cents is about 88 dollars a year and roughly 880 dollars across a decade of running.
- Ice and water through the door costs interior volume, a plumbing connection, a filter schedule and a common failure point. Buy it because you use it, not because it is there.
What a refrigerator has to do besides keep food cold
Every model on the floor keeps food cold. That part of the job has been solved for a long time, and it is why the specification sheet is such a poor guide to whether you will be happy. The differences that decide satisfaction are physical and behavioural: whether the door opens fully in the space it is given, whether the shelf swallows the tray you actually use, whether you bend or reach for the compartment you open twenty times a day, and whether the appliance is quiet enough for a kitchen that is open to the living room.
The chart below is an illustrative split of where refrigerator regret comes from in practice. It is a shape rather than a measurement, drawn from the kinds of complaints that show up after installation rather than during shopping, and it explains why these test notes spend their first two steps on a tape measure.
Where refrigerator regret actually comes from
An illustrative split of post-purchase complaints. Segments sum to 100 percent. It is a shape to plan against, not a survey result.
Roughly half the shape is physical fit and configuration, which are both settled with a tape measure and an honest look at how you load. Illustrative proportions, not measured data.
Read that shape and the shopping order rewrites itself. If a third of the trouble is fit and access, measurement is not step five, it is step one. If another quarter is configuration, then the top freezer versus French door question deserves more thought than the finish does. If capacity problems are almost always shortfalls, then sizing wants a margin rather than a precise answer. And if ice, water and electronics account for the last quarter between them, the features you add are exactly the features you should be able to justify. That is the whole argument of these test notes in one chart.
Before you start: what to measure and what to know
This is a shopping decision, so the preparation is measurement and honesty rather than tools. Half an hour with a tape measure changes which models are even available to you, and it prevents the two expensive outcomes: an appliance that does not physically fit, and an appliance that fits but blocks a drawer, a door or a walkway forever.
Gather these before you open a single product page.
- The opening, measured three ways. Width, height and depth, taken at more than one point, because kitchen openings are rarely as square as they look. Take the smallest number in each direction.
- The clearance the manual wants. Refrigerators need free air at the back, the top and often the sides so the condenser can shed heat. The figures vary by model and they are not decorative.
- The depth including the door and handle. Published depth often excludes both. A handle that projects past the counter edge is a handle that catches sleeves.
- The swing arc of each door, drawn on the floor if necessary, and what it hits: a wall, a counter return, an island, a dishwasher door, a drawer bank.
- The hinge clearance. Most refrigerator doors must swing well past ninety degrees before the interior drawers will pull out. A door that opens only to ninety degrees against a wall is a door whose crisper stays shut.
- The whole delivery path. Truck to kitchen: the narrowest doorway, the tightest turn, the stair width, the handrail, the lowest overhead point.
- How your household actually shops, honestly. Once a fortnight with a full load is a different appliance from three small trips a week.
- Your electricity rate, from a real bill, so the energy step means something. Our notes on lowering an electric bill cover where to find it.
Two ground rules before you start. The installation manual for any model you are seriously considering is downloadable before you buy, and it contains the clearance, levelling and door-removal information the product page leaves out. And write every measurement down rather than carrying it in your head, because the numbers that matter here are within an inch of each other and the showroom is a bad place to try to remember them.
Step 1: Measure the opening, then measure the path to it
Everything downstream depends on this, and it is the step that quietly eliminates most of the market for you, which is what makes the rest quick.
Start with the opening. Width, height and depth, each taken at the top, middle and bottom of the space, and keep the smallest figure of the three. Kitchen cabinetry settles, floors slope, and a cabinet run that measures thirty six inches at the top can measure less at the floor where the appliance actually sits. Then add the clearances the manual asks for at the back, the top and the sides. A refrigerator moves heat out of the cabinet and into the room, and it does that through a condenser that needs air. Squeeze it into a tight alcove and the appliance runs longer, works harder, costs more to run and lives a shorter life, which our maintenance notes cover in more detail.

Now the height, which catches people out more than width does. Measure to the underside of any cabinet above the space, and remember that the appliance has to be tilted or walked into position, which needs a little more height than its finished dimension suggests. Levelling feet give you some adjustment upward and almost none downward. If a wall cabinet sits low over the opening, the height of the space is a hard ceiling and it can rule out an entire size class.
Then the path. This is the measurement almost nobody takes and the one that produces the worst delivery days. Walk the route a crew would walk, from where a truck can park to where the appliance will stand, and record the narrowest point on it: the front door, an interior doorway, a turn at the bottom of a stair, a handrail that projects, a low soffit. Compare those numbers against the crated dimensions rather than the finished ones, because the appliance arrives boxed. Many refrigerators pass through a narrower opening once their doors come off, and door removal is normal work for a delivery crew, but it takes time, sometimes involves disconnecting a water line, and is not equally simple on every model. Ask the retailer before delivery day.
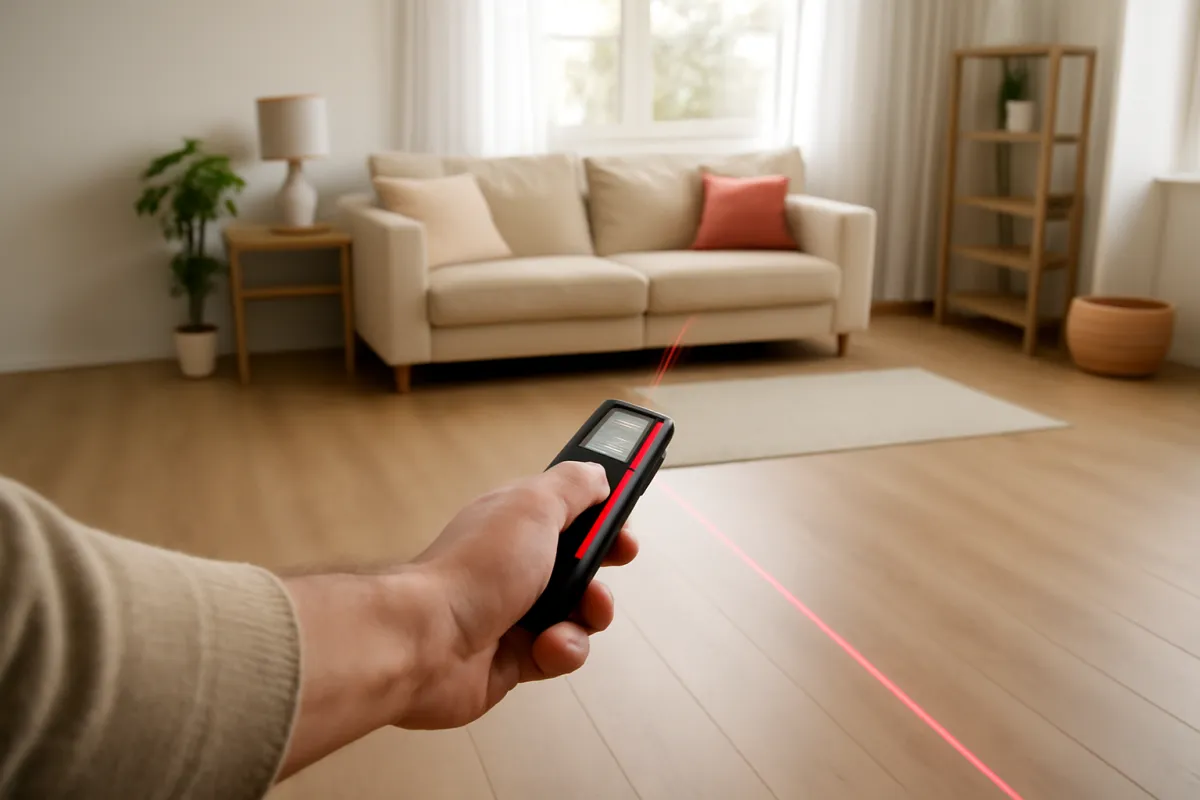
Finally the swing. Stand where the appliance will live and open an imaginary door in each direction. Watch for a wall that stops the door short, a counter return that catches the handle, an island that blocks the path, a dishwasher or oven door that would collide when both are open. Then check the hinge clearance specifically, because a door that opens to ninety degrees looks fine and is not. Interior drawers and bins slide out past the door line, so the door usually has to travel well beyond square before a crisper will open. If your opening is beside a wall, this single detail can decide the configuration, since narrow French doors need far less swing arc than one wide full-height door does.
Step 2: Size the capacity to your household, not the showroom
Showrooms make every refrigerator look too big, because they are empty, brightly lit and standing in a room the size of a warehouse. Sizing from that impression is how people end up a size class short. Sizing from a rule instead gives a starting point you can correct.
The workable planning rule is roughly fourteen cubic feet of advertised capacity for the first person in the household and about four more for each additional person. That puts a single person near fourteen, a couple near eighteen, a household of three near twenty two, and a household of five near thirty. Treat it as a starting figure rather than an answer, because it is a rule about people and refrigerators are loaded by habits.
Then correct for how you actually live. Shopping once a fortnight, batch cooking, keeping drinks cold for a family, storing leftovers rather than discarding them, and hosting regularly all push the number up. Shopping every few days, eating out often, having a chest freezer in the garage, or living somewhere with a market on the corner all push it down. Our freezer running cost notes are worth reading if a second freezer is already part of the plan, since it changes how much frozen space the kitchen appliance needs to carry.
One more correction, and it is the one this article keeps returning to: the advertised figure is the volume of the empty cabinet measured to its walls, which is not the volume you can load. Shelves, drawers, door bins, the ice maker assembly and the simple fact that food comes in boxes all take a share. Add margin deliberately rather than sizing to the exact rule number, and then use the next step to see how much of that advertised figure the configuration you want will actually give back. Set your household size in the refrigerator sizing planner and it will do both corrections for you.
Step 3: Pick the configuration and count what it costs in usable space
Four layouts dominate, and choosing between them is a question about how you load and how you reach rather than about how they look.
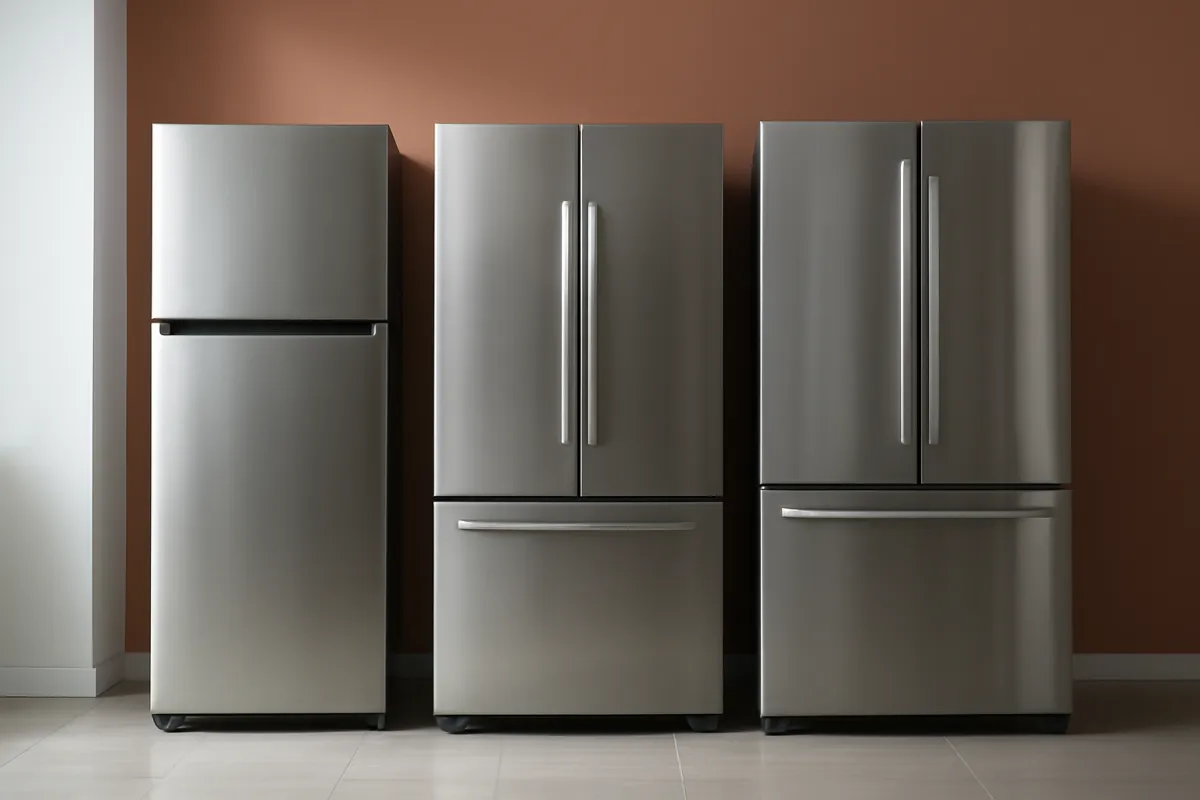
Top freezer puts the freezer compartment above the fresh-food section. It is the simplest layout, usually the least expensive, and it gives back the highest share of its advertised volume because there is little structure inside stealing space. Both compartments are full cabinet width, so wide items fit easily. The compromise is reach: the fresh food you open constantly is low, and the freezer you open occasionally is at eye level, which is exactly backwards for most households.
Bottom freezer swaps that, putting fresh food at eye level and the freezer in a drawer or a door below. Daily reach improves a lot. The cost is that frozen food ends up in a deep bin you look down into and dig through, which is fine with a basket system and irritating without one.
Side-by-side splits the cabinet vertically into two full-height columns, freezer on one side and fresh food on the other. Everything in both compartments is reachable without bending or stretching much, which makes it the friendliest layout for anyone with limited mobility, and it gives generous frozen capacity at eye level. The price is width. Each column is narrow, so a sheet pan, a large platter, a wide box or a birthday cake becomes a problem, and the doors are tall and narrow, which suits tight aisles.
French door combines a wide fresh-food section behind two narrow doors with a freezer drawer below. It gives you the full cabinet width where you need it most and door swings narrow enough for a constrained wall, which is why it has become the default in new kitchens. It also has the most doors, hinges, gaskets and, usually, the most electronics, and it costs the most of the four.
Now the part the showroom does not tell you. The usable share of advertised capacity is not the same across these layouts, because internal structure, wall thickness, the ice maker and the number of compartment divisions all differ. The chart below applies illustrative usable-share bands to a single advertised figure of 22 cubic feet, so the layouts are compared like for like.
Usable volume from 22 advertised cubic feet, by configuration
Illustrative usable-share bands applied to the same advertised capacity. Bars scale with usable cubic feet. Real models vary; the ordering is the point, not the decimals.
Bands used here: about 88 percent for top freezer, 84 for bottom freezer, 80 for French door, 74 for side by side and 70 for counter-depth French door. Illustrative planning figures rather than measurements of any model.
The gap between the top and bottom of that chart is roughly four cubic feet from the same headline number, which is a size class. That is the single most useful thing to carry into a showroom, because it means two appliances wearing the same capacity badge are not offering the same amount of room, and the one that looks more impressive is often the one offering less.
Step 4: Decide counter depth or standard depth
Depth is where the cubic feet live, which makes this a direct trade between how the kitchen works and how much the appliance holds.
A standard-depth refrigerator is deeper than a standard base cabinet, so it projects into the room by a noticeable amount once the doors and handles are counted. In a large kitchen that projection is invisible. In a galley kitchen, a narrow walkway or a run opposite an island, it is the difference between two people passing and one person turning sideways, and it is the thing you bump into with an armful of shopping every day for a decade.
A counter-depth model is built shallower so the doors sit roughly flush with the front of a standard counter run. It reads as built in, it clears the walkway, and it usually costs more rather than less. What it charges you is interior volume, and that charge is real: in the same cabinet width, a counter-depth model commonly gives up a meaningful slice of capacity against a standard-depth one, which is why it sits at the bottom of the chart above.
The honest way to decide is to measure the walkway rather than to argue about looks. Stand where the appliance will go, measure from the face of the opposite cabinet or island to the front edge of the counter, and then subtract the projection a standard-depth model would add. If the number you are left with is a comfortable path for two people, standard depth is free volume and you should take it. If it is tight, counter depth is buying you something you will feel daily, and the volume you give up is the price of that. A third option worth knowing about is a shallower standard-depth model or a wider cabinet at a lower height, since going wider recovers volume that going shallower took away.
Step 5: Settle the ice and water question before you buy
This is a small feature with a long list of consequences, and it is worth deciding deliberately rather than by default.
Through the door means an ice and water dispenser in the door face. It is convenient, it is the reason many people choose one appliance over another, and it takes a real bite out of the fresh-food space behind it because the ice bin, the chute and the mechanism all live inside the door or the upper compartment. It also puts a water path in the door, which is the part that moves most, and it is consistently among the more failure-prone assemblies in a refrigerator.
Internal ice maker puts an automatic ice maker inside the freezer instead. You keep the door space and the door bins, you lose the ability to fill a glass without opening anything, and there is less mechanism in a moving part.
Trays and a bin cost nothing, take no volume from the design, never fail, and require you to remember to refill them, which is the entire argument against them.
Then the plumbing. Any automatic ice maker, in the door or inside, needs a water supply line, a shut-off valve you can actually reach, and somewhere sensible for that line to run. Not every kitchen has one where the refrigerator stands. Adding one is a plumbing job rather than an accessory, and it is exactly the kind of surprise that turns delivery day into a rescheduled delivery day. Check for an existing valve behind the appliance before you commit to the feature, and if the line already exists, look at its condition, because an old saddle valve or a brittle plastic line is a leak waiting for a quiet moment.
Filters are the ongoing cost. A dispensing model uses a replaceable water filter on a schedule, and that cartridge is a recurring purchase for as long as you own the appliance. It is not a large number in any one year, but it is a number, and it belongs in the comparison alongside the energy figure rather than being discovered later. If filtered drinking water is the actual goal rather than the ice, our notes on a whole house water filter and an under-sink or shower filter approach explain how the same job gets done without putting the mechanism inside an appliance door.
Step 6: Read the energy label as a ten year running cost
A refrigerator is the appliance that never stops, so its energy figure compounds in a way that a microwave’s never will. The number to use is the annual kilowatt-hour figure on the yellow label, not any wattage on the nameplate, because the appliance cycles and the nameplate describes an instant rather than a year.

Understand what that figure is and is not. It comes from a standard test procedure, run under controlled conditions, which is what makes it useful: two labels can be compared against each other honestly. It is not a prediction for your kitchen. Your actual consumption shifts with how often the doors open, how warm the room is, how full the cabinet is, whether the condenser coils are clean, and whether the appliance has the air clearance it asked for. Treat the label as a ranking tool and your own bill as the measurement.
Turning it into money is one multiplication and then a second one people skip. Annual kilowatt-hours times your rate in dollars gives a yearly cost. Multiply by the years you expect to own it and you get the number that should actually influence the purchase. On an illustrative 550 kilowatt-hours a year at an illustrative 16 cents, that is about 88 dollars a year, close to 7 dollars and 33 cents a month, and roughly 880 dollars across ten years of running. Against that, a model that uses 100 kilowatt-hours a year less is worth about 160 dollars over the same decade at the same rate, which tells you how much of a price premium efficiency can justify and, just as usefully, how much it cannot.
Two honest cautions. Efficiency programmes, rebates and labelling rules change and vary by region, so check the current terms with the programme itself or your utility rather than trusting a figure printed in an article. And a larger appliance generally uses more energy than a smaller one of the same efficiency class, so the size decision and the energy decision are connected rather than separate. Our energy-efficient appliance notes and the wattage and running-cost reference cover how to compare across categories.
Step 7: Check noise, shelving and the reliability trade
The last step is the collection of small things that decide whether you like the appliance, and they are the ones a specification comparison handles worst.
Noise matters more than it used to, because kitchens are increasingly open to living space. A refrigerator makes several different sounds: the compressor, the condenser and evaporator fans, the defrost cycle, and, if fitted, an ice maker dropping a harvest into a bin at unpredictable hours. Manufacturers publish a sound rating for many models, and comparing those ratings is more reliable than listening in a showroom, where the ambient noise floor is high and half the units on the floor are not running. If the kitchen opens onto a sitting or sleeping area, ask specifically about the ice maker harvest noise, because it is the loudest intermittent sound the appliance makes.
Shelving is where usable volume becomes real. Look for a shelf that will take the tray, dish or platter you actually use, and take one to the showroom if you can. Check whether shelves are adjustable in small increments or only in a few fixed positions, whether any of them slide or fold to make room for something tall, and whether the door bins are deep enough for the containers you buy. Full-width shelves swallow wide items; split shelves are more flexible for tall ones. A spill-containment lip on a glass shelf is the difference between a wipe and an afternoon, which our refrigerator cleaning notes go into.
The reliability trade is the last judgement. Every extra system is another thing that can fail: the through-door ice and water assembly, a second evaporator, a touchscreen, connected software, an internal camera. The useful question is not how many features a model has but which of them you will use weekly, and whether a failure of that feature stops the appliance from cooling or only stops the feature. Prefer the second. Prefer mechanically simple over software-dependent, because software support has to last as long as the compressor does. And read the warranty for what it says about the sealed system separately from everything else, since that is the expensive repair.
Door swings, handles and hinge clearance in detail
This deserves its own section because it produces more permanent regret than any other detail and it is completely avoidable.
Refrigerator doors are handed. A single full-height door hinges on one side, and on many models that side can be reversed during installation, though not on all of them and not always without a kit. French doors and side-by-side models sidestep handedness because they open outward from the centre, which is one of the quiet reasons they suit tight kitchens.
The clearance that matters is not the ninety degree swing, it is the swing beyond it. Interior drawers, crispers and bins slide forward past the plane of the cabinet face, so the door must be out of that path before they will open. If a wall, a tall cabinet or a door casing stops your refrigerator door at square, the crisper stays in the appliance. The fix at the design stage is cheap: shift the appliance a few inches away from the wall, add a filler panel, or choose a configuration with narrower doors. The fix afterwards is cabinetry.
Handles deserve a look too. A projecting bar handle adds to the effective depth, catches sleeves and bag straps in a narrow walkway, and is the part small children hang from. A recessed or integrated handle removes all of that and is slightly less comfortable to pull. Neither is right; the walkway width decides it. And whatever the finish, check how it cleans, because a fingerprint-prone surface in a busy kitchen is a chore rather than a look, which is why our stainless steel cleaning notes exist at all.
What usable capacity really means inside the box
Advertised capacity is measured as the volume of the empty compartment. It is an honest number for what it describes, and it describes something you will never experience, because you do not store air.
What takes the difference is straightforward once you list it. Shelves and their supports occupy volume and, more importantly, divide the space into slabs whose heights you cannot always change. Drawers have walls and rails. Door bins project inward. An ice maker assembly claims a corner. Airflow ducts and the evaporator cover take a slice at the back. And then food itself is packaged in rectangles that do not tessellate, so a shelf that is full still has gaps.
The practical consequence is that two appliances badged at the same capacity can differ noticeably in what they hold, and the chart in step three is the shape of that difference. It is why the sizing rule in step two is a starting point with margin rather than a target to hit precisely, and why a household that shops in bulk should size up rather than sideways.
There is one more consideration that cuts the other way. A refrigerator that is close to full runs slightly more efficiently than an empty one, because the mass inside holds cold and the compartment recovers faster when the door closes. That is not a reason to buy a smaller appliance than you need, but it is a fair argument against buying two size classes more than you need on the theory that bigger is safer. Set the configuration and your advertised capacity in the refrigerator sizing planner and it will show the usable figure against what your household needs.
Shelving, drawers and the tray test
Take something with you. The single most useful showroom technique is bringing the item you struggle to store, whether that is a sheet pan, a tall bottle, a wide platter or a stock pot, and finding out which appliances swallow it.
Look at shelf material and adjustability first. Glass shelves clean better than wire and contain spills; wire shelves let air move more freely and weigh less. What matters more is how many positions each shelf has and whether the increments are fine or coarse. A shelf that moves in one inch steps lets you build the space around what you store. A shelf with three fixed positions decides for you.
Then look for the flexibility features that are genuinely useful rather than decorative: a shelf that slides back or folds in half to clear a tall item, a full-width drawer for platters and packages, a temperature-selectable drawer if you store meat and deli items regularly, and door bins deep enough for a large container rather than only for condiments. Check that the top door bin clears the shelf below it when the door closes, which sounds absurd until you meet a model where it does not.
For the freezer, the question is organisation rather than volume. A deep bottom bin with nothing in it becomes an archaeological site within a month. Baskets, dividers and a shallow upper tray are what make frozen food findable, and findable frozen food is the difference between using it and rediscovering it. Side-by-side freezers win here by default because everything is on a shelf at eye height.
Freezer type: frost free, manual defrost and what each costs you
Almost every full-size refrigerator sold for a kitchen is frost free, and it is worth knowing what that means because it explains several of the appliance’s behaviours.
A frost-free freezer runs a heater on a schedule to melt the frost that would otherwise build on the evaporator, and drains the meltwater to a pan near the compressor where it evaporates. The benefit is obvious: you never defrost it. The costs are that the defrost cycle uses energy, that the cycling causes small temperature swings which can contribute to freezer burn on poorly wrapped food, and that the defrost system itself is a component with its own failure mode. When a refrigerator stops cooling properly, the defrost system is one of the usual suspects, which our notes on a refrigerator that is not cooling cover.
Manual defrost is rare in kitchen refrigerators and common in chest freezers. It uses less energy for the same volume, holds a steadier temperature, and requires you to empty and defrost it periodically. If a second freezer is in the plan, that trade is worth understanding before you decide how much frozen capacity the kitchen appliance needs to carry.
Two other freezer details worth checking. Whether the freezer has its own evaporator and fan, separate from the fresh-food section, which affects how independently the two compartments hold temperature and how much moisture migrates between them. And whether there is a fast-freeze or power-freeze setting, which drops the compartment temperature ahead of a large load, and which is genuinely useful if you batch cook and merely a button if you do not.
Temperature control, air flow and dual evaporators
Cold air is the appliance’s only tool, and how it moves that air is what separates models that hold a steady temperature from ones that do not.
Most refrigerators cool with a single evaporator in or near the freezer and then move some of that cold air into the fresh-food section through a damper. It works, it is simple, and it has one side effect: the fresh-food section receives freezer air, which is very dry, so humidity in the fresh section tends to be lower and produce dries out faster. Crisper drawers with humidity sliders exist to fight exactly this by restricting airflow into the drawer.
Dual evaporator systems give each compartment its own evaporator, so the two are cooled independently. The claimed benefits are better humidity in the fresh section, less odour transfer between compartments, and steadier temperatures in both. It also means more components. Whether it is worth paying for depends on whether you store a lot of fresh produce and whether the odour transfer question matters to you, and both of those are honest personal answers rather than specification ones.
Whatever the system, the controls are worth looking at. Prefer a control that sets an actual temperature over one that sets a number from one to seven with no units, because the first tells you where you are and the second tells you nothing. Check whether the display is inside the compartment or on the door face, and if it is on the door face, whether it can be dimmed or locked, since a bright panel in an open-plan room at night is a genuine annoyance. And if the appliance has a door-ajar alarm, that is a small feature that repeatedly saves food.
Where the electronics help and where they add failure points
Modern refrigerators contain far more electronics than they used to, and the honest position is that some of it helps a lot and some of it is a maintenance liability wearing a screen.
The parts that generally earn their place are the ones that make the core job better or safer: variable-speed or inverter compressors that run at a lower speed for longer instead of cycling hard, which usually means less noise and better temperature stability; electronic temperature control with a real readout; a door-ajar alarm; and a filter-status indicator that tells you when a replacement is genuinely due. All of these serve the thing the appliance exists to do.
The parts that deserve more scrutiny are the ones that add a system rather than improve one. A large touchscreen is a display, a computer and a network client bolted to a food cabinet, and it has to keep working for as long as the compressor does. Connected features depend on the manufacturer continuing to support an app and a service for a decade, which is a promise nobody can make credibly. Internal cameras are useful exactly as often as you remember they exist.
Ask three questions about any electronic feature. Will I use it weekly? If it fails, does the appliance stop cooling or does only the feature stop? And is there a mechanical or manual way to do the same thing? A feature that passes all three is worth having. One that fails the second question is a reason to walk away, because a refrigerator that will not cool because a screen failed is a design you do not want in your kitchen for ten years.
A worked example: choosing for a three person household
A household of three in a kitchen with a fixed thirty six inch opening, a wall on the left of that opening, and a walkway between the appliance run and an island. They shop weekly, cook most nights, and the kitchen is open to the sitting room. Every figure below is illustrative.
Step 1, measurement. The opening measures thirty six inches at the top and a shade under it at the floor, so the smaller number is the one they use. The manual for the models they like wants clearance at the back and the top, which the alcove has. The wall on the left kills a single left-hinged full-height door, because it would stop at square and the crispers would never open. The delivery path has one turn at the bottom of the hall that measures thirty two inches, so they confirm with the retailer that door removal is available.
Step 2, capacity. The rule gives fourteen plus four plus four, which is twenty two cubic feet of advertised capacity. They shop weekly rather than daily and cook most nights, so they take that as a floor rather than a target.
Step 3, configuration. The wall on the left rules toward narrow doors. Side-by-side would solve the swing but the narrow fresh-food column defeats the sheet pan they use twice a week. They choose a French door layout at twenty two cubic feet advertised, which at the illustrative 80 percent band gives about 17.6 usable cubic feet. Their household needs about 18.7 usable cubic feet by the same reasoning, so they are running about 1.1 cubic feet short and know it going in.
Step 4, depth. The walkway to the island is comfortable, so standard depth stays. Counter depth would have cost them another slice of the volume they are already short on, and it would have bought them clearance they do not need.
Step 5, ice and water. There is no existing water line behind the appliance. Adding one is a plumbing job, and a through-door dispenser would take more of the fresh-food volume they cannot spare. They choose no automatic ice maker and use trays with a bin, and revisit it if the plumbing is ever opened up for another reason.
Step 6, energy. The label on their shortlisted model reads an illustrative 550 kilowatt-hours a year. At their rate of 16 cents that is about 88 dollars a year, about 7 dollars and 33 cents a month, and roughly 880 dollars across ten years. A model 100 kilowatt-hours a year better would save about 160 dollars over the decade, which sets the ceiling on what an efficiency premium is worth to them.
Step 7, the small things. The kitchen is open to the sitting room, so they compare published sound ratings and, having chosen no automatic ice maker, remove the loudest intermittent noise from the appliance entirely. They take a sheet pan to the showroom and confirm it lies flat on the main shelf. They skip the touchscreen model on the grounds that they will not use it weekly.
The decision. A standard-depth French door at twenty two cubic feet, no dispenser, adjustable glass shelving, a published sound rating they checked, and a known 1.1 cubic foot shortfall against the ideal that they manage by shopping slightly more often. Nothing about it is perfect, which is what an honest appliance decision looks like.
Common mistakes when choosing a refrigerator
Measuring the opening and not the route. The most expensive error available, because it is discovered by two people and a truck at your front door.
Ignoring hinge clearance. A door that opens to ninety degrees against a wall is a door whose drawers do not open. This is permanent unless you move the appliance or the cabinetry.
Trusting the advertised capacity. Two models badged identically can differ by a size class in what they hold, and the chart above is why.
Buying the finish and the door style first. They are the easiest things to compare and the least consequential, which is exactly why showrooms lead with them.
Sizing from the showroom impression. Empty appliances under bright light look enormous. Yours will be full within a week.
Forgetting the clearance the manual asks for. An appliance squeezed into a tight alcove runs longer, costs more and lives shorter. The clearance figures are engineering, not suggestion.
Adding the dispenser by default. It costs interior volume, a plumbing connection, a filter schedule and a common failure point. Add it because you use it.
Skipping the ten year multiplication on the energy figure. A yearly number looks trivial. A decade of it does not, and it is the correct basis for deciding what efficiency is worth paying for.
Comparing noise in a showroom. The ambient noise floor is high and half the floor models are not running. Compare published sound ratings instead.
Letting a sale decide the model. Timing chooses among a shortlist. It should never build one. Our seasonal deal notes cover how to read a reduction.
Troubleshooting the decision when it will not resolve
What if nothing fits the opening? Then the opening is the decision, and the honest options are a smaller size class, a cabinetry alteration, or moving the appliance to a different wall. Before accepting a much smaller appliance, check whether removing a filler panel, trimming a scribe or relocating a wall cabinet buys the inch that changes the class. An inch of opening is often several cubic feet of appliance.
What if the household disagrees about configuration? Weight the answer toward whoever loads and unloads most often, and toward anyone who finds bending or reaching difficult. Side-by-side and bottom freezer are the two layouts that most change daily physical effort, in opposite directions, so the disagreement is usually about bodies rather than taste.
What if I want counter depth and cannot lose the volume? Go wider rather than shallower if the opening allows it, since width recovers what depth took. If it does not allow it, the remaining option is a standard-depth model with a slimmer profile, and the honest last resort is deciding which of the two constraints you actually care about, because you cannot have both.
What if there is no water line and I want ice? Use an internal ice maker only if a line can be added sensibly, and otherwise use trays and a bin. Do not let a retailer install a dispensing model on a saddle valve tapped into a convenient pipe without understanding what that connection is, since the failure mode is a slow leak behind a heavy appliance.
What if the old one has died and I need one now? Buy the sensible like-for-like replacement that fits the opening you already have, and resist the urge to change size class or configuration under time pressure, because those are the changes that involve cabinetry, plumbing and delivery problems. If the old appliance is merely faulty rather than dead, our notes on a refrigerator that is not cooling may buy you the week you need to choose properly.
What if I cannot tell whether a model is reliable? You often cannot, and pretending otherwise is worse than admitting it. What you can do is reduce exposure: fewer added systems, a warranty that treats the sealed system explicitly, a manufacturer with parts availability you can verify, and a preference for mechanical simplicity over software dependence.
Choosing for a rental, a garage or a very small kitchen
In a rental, the appliance is often not yours to choose, and where it is, the constraint is the next kitchen as much as this one. Favour a standard width and a common size class over anything unusual, because an appliance that fits everywhere is worth more to you than one that fits here perfectly. Avoid anything that needs plumbing you would have to install in a property you do not own.
In a garage or an outbuilding, ambient temperature is the whole problem. Refrigerators are designed to work within a room-temperature range, and a garage that gets very cold in winter or very hot in summer sits outside it. In cold conditions the thermostat in the fresh-food section may stop calling for cooling, which means the compressor stops running, which means the freezer compartment warms up, and food thaws in a room that feels freezing. Some models are rated for garage use and some accept a kit to handle this; check the manual for the ambient temperature range before assuming any appliance will cope. In heat, the appliance simply works harder, uses more energy and shortens its life.
In a very small kitchen, the size classes below full-size are worth taking seriously rather than treating as a compromise. An apartment-size refrigerator in a narrower width, or a counter-depth model in a smaller class, can be the difference between a kitchen that works and one that does not. Our dorm appliance notes cover the compact end, where the rules of the building often matter more than the specification.
In a second kitchen or a bar area, ask whether a refrigerator is the right appliance at all. An undercounter unit or a dedicated drinks appliance may serve the actual purpose better than a small version of a full-size design.
Reading a refrigerator spec sheet without getting lost
Specification sheets are long, and about eight lines on them decide the purchase. Read these and skim the rest.
Overall dimensions, and whether they include the doors and handles. Depth is frequently quoted two ways, and the difference between them is what projects into your walkway.
Required clearances at the back, the top and the sides, which come from the installation manual rather than the marketing sheet.
Door swing width, meaning how far the appliance and its open door occupy in total, and the minimum swing angle needed to remove the drawers. This is the line that answers the wall question.
Total capacity, split into fresh food and freezer, since the split matters as much as the total for a household that leans one way.
Interior shelf dimensions if published, which are what the tray test measures directly.
Annual energy consumption in kilowatt-hours, from the yellow label, which is the only comparable energy figure on the floor.
Sound rating, if published, which is more reliable than a showroom listen.
Water connection requirement and filter part, if the model dispenses, including whether the filter is a proprietary cartridge.
Warranty terms, with the sealed system called out separately, since that is the repair whose cost decides whether a fault is worth fixing at all.
Delivery day, installation and the first 48 hours
The purchase is not finished when you pay, and a few details on the day protect the decision you just made.
Confirm the services in writing before delivery: whether the crew will remove doors if the path requires it, whether they will connect a water line or only place the appliance, whether they will haul the old one away, and what happens if it does not fit. Those four answers are where a low headline price often quietly reappears.
Clear the path yourself before they arrive, measure the final position once more, and know where the water shut-off is if a line is being connected. If the appliance has been transported on its side, which happens more than manufacturers would like, ask how long it should stand upright before being switched on, and follow the manual rather than a rule of thumb.
Once it is in place, level it. Refrigerator doors rely on being slightly tilted back to close under their own weight, and an appliance that is out of level is an appliance whose door stands open occasionally, which is a food safety issue and an energy one. Check the door seals close cleanly all the way round.
Then give it time. A new refrigerator takes hours rather than minutes to come down to temperature, and loading it full of warm food immediately is how people conclude a new appliance is faulty on day one. Let it run empty until it holds temperature, then load it. Put a thermometer inside for the first week rather than trusting the display, and watch the floor around it, because a slow leak from a new water connection announces itself early if anyone is looking.
Your refrigerator choosing checklist
Work it in order. The first four items eliminate most of the market for you, which is what makes the rest quick.
- Opening measured at top, middle and floor, smallest number kept, plus the clearance the manual requires at the back, top and sides.
- Delivery path measured end to end, narrowest point recorded, against crated dimensions, with door removal confirmed if needed.
- Door swing and hinge clearance checked against the wall, the counter return and the island, including the angle needed to pull the drawers out.
- Capacity floor set from household size and shopping habits, with margin, using the refrigerator sizing planner.
- Configuration chosen on reach and width rather than looks, with the usable-share difference understood.
- Depth decided by measuring the walkway rather than by argument.
- Ice and water settled, including whether a water line exists, what the filter costs to keep buying, and what the assembly takes from the interior.
- Energy label photographed and multiplied out to a ten year figure at your own rate.
- Sound rating compared on paper, with the ice maker harvest noise asked about specifically.
- Tray test done in person with the item you actually struggle to store.
- Features audited against the weekly-use question and the does-it-stop-cooling question.
- Delivery terms confirmed in writing: door removal, water connection, haul-away, and what happens if it will not fit.
The bottom line
Choosing a refrigerator is a measuring job that most people treat as a shopping job, which is why so many kitchens contain an appliance that looked right in a showroom and has been slightly wrong every day since. Measure the opening at three heights and keep the smallest number, then measure the route from the truck to the kitchen, because that is the constraint nobody checks and the one that ruins delivery day. Size from household and shopping habits with margin, then remember that the advertised cubic feet describe an empty box: the same twenty two on the badge can mean anything from roughly 19.4 usable down to about 15.4 depending on the configuration and the depth you choose. Pick the layout on how you load and reach rather than on how the doors look, and check the hinge clearance specifically, because a door stopped at square by a wall is a crisper that never opens. Decide the dispenser deliberately, since it costs volume, plumbing, filters and a failure point. Multiply the energy label out to ten years, which on an illustrative 550 kilowatt-hours at 16 cents is about 880 dollars, and let that set what efficiency is worth paying for. Then take a sheet pan to the showroom, compare sound ratings on paper, and buy the appliance with the fewest systems you will not use. Get those right and the finish, which is the thing you will be shown first, becomes exactly what it should be, which is the last thing you decide.
A note from the bench: these test notes set out a general method for choosing a home refrigerator and are educational rather than professional electrical, plumbing, building or appliance-service advice. Every capacity, usable-share percentage, kilowatt-hour figure and dollar amount above is an illustrative planning number chosen to make the arithmetic followable, not a measurement of any particular model, and the usable-share bands in the chart are a way of showing the ordering between layouts rather than a specification any manufacturer publishes. The installation manual for the specific appliance you are considering outranks everything written here, particularly on required clearances, ambient temperature range, levelling, door removal and water connection. Energy labelling rules, efficiency programmes and any rebates attached to them differ by region and change over time, so confirm the current terms with the programme or your utility rather than with an article. Water connections and any electrical alteration belong with someone qualified if you are not confident doing them, and a leak, a burning smell, a tripping circuit or a cabinet that will not hold temperature means stop using the appliance and get it looked at.
Frequently asked questions
What size refrigerator do I need?
Start from household size and then correct for how you shop, because the two together decide it and neither does alone. A workable planning rule is roughly fourteen cubic feet of advertised capacity for the first person and about four more for each additional person, so a household of three lands near twenty two cubic feet and a household of five nearer thirty. Then adjust honestly. A household that shops once a fortnight, batch cooks, or keeps a lot of drinks and leftovers needs more than the rule suggests, and a household that shops every few days and eats out often needs less. The important correction is that advertised capacity is the volume of the empty cabinet, not what you can load, so treat the rule as a shelf-space target rather than a promise. Set your household size and the configuration you are considering in the sizing planner on this site and it will convert the advertised figure into a usable one.
Counter depth or standard depth: which should I buy?
Counter depth buys you a kitchen that looks and walks better, and it charges you interior volume for it. A counter-depth cabinet is built shallower so the doors sit roughly flush with the front edge of a standard counter run, which removes the block of appliance that otherwise projects into the room. In a galley kitchen or a tight walkway that projection is the difference between passing someone and turning sideways, and removing it is worth real money. The cost is that depth is where the cubic feet live, so a counter-depth model in the same cabinet width commonly gives up a noticeable slice of interior volume against a standard-depth one, and it usually costs more rather than less. Choose counter depth when circulation space or sightlines are the binding constraint. Choose standard depth when interior volume is.
Which refrigerator configuration is the best?
There is no best one, only a best fit for how you load and reach. A top freezer gives the highest usable share of its advertised volume and the lowest price, and it puts the fresh food at a good height while the freezer sits above eye level. A bottom freezer moves the fresh food up to where you use it and sends the freezer to a drawer you bend for. A side-by-side gives you two tall narrow columns, which suits a household that keeps a lot of frozen food and needs everything reachable without bending, but the narrow fresh-food column defeats wide items such as a party platter or a sheet pan. A French door gives a wide fresh-food space at eye level with narrow doors that need less swing clearance, at a higher price and with more parts. Match it to the widest thing you store and the reach that is hardest for you.
Do I need a refrigerator with an ice maker and water dispenser?
Only if you will use it often enough to accept what it costs you, and that cost is not mostly money. An in-door ice and water system takes interior volume from the fresh-food space, adds a water line and a shut-off valve to the installation, adds a filter you must buy and change on a schedule, and adds one of the more failure-prone assemblies in the appliance. It also puts a component near the door where leaks are noticed late. If your household gets through ice constantly, it earns all of that. If ice is occasional, an internal ice maker in the freezer keeps the door space, and trays with a dedicated bin cost nothing at all and never fail. There is also a plumbing question that is easy to miss until delivery day, since not every kitchen has a supply line where the refrigerator stands, and adding one is a plumbing job rather than an accessory.
How much electricity does a refrigerator use?
Use the annual kilowatt-hour figure on the yellow energy label rather than any wattage on the nameplate, because a refrigerator cycles rather than running continuously and the nameplate tells you almost nothing about a year of that cycling. The label figure comes from a standard test, so it is a comparison tool between models rather than a prediction for your kitchen, and your own use will differ with door openings, room temperature, how full the cabinet is and where it stands. To turn the label into money, multiply the annual kilowatt-hours by your electricity rate in dollars, then multiply by the years you expect to own it. That last multiplication is the one people skip, and it is where a small yearly difference becomes a number worth caring about. Our notes on the running cost of a refrigerator work the arithmetic in more detail.
How do I know a refrigerator will fit through my door?
Measure the narrowest point on the whole route, not just the kitchen opening, and do it before you shortlist anything. Walk the path a delivery crew would walk, from the truck to the final position, and write down the narrowest doorway, the tightest turn, the stair width, any handrail, and the height of the lowest thing overhead. Then compare against the appliance's crated dimensions rather than its finished ones, because it arrives boxed. Most refrigerators can pass a door narrower than the cabinet itself once the doors are removed, which is a standard part of a delivery crew's toolkit, but that removal takes time, sometimes involves the water line, and is not always possible on every model. Ask before delivery day rather than discovering it in a hallway, and measure the final opening including the clearance the manual requires at the back and sides.
Are refrigerators with more features less reliable?
More electronics means more that can fail, and that is a fair general principle rather than a reason to avoid every feature. Each added system, meaning a through-door ice and water assembly, a second evaporator, a touchscreen, connected software, an internal camera, is another component with its own failure mode and its own replacement part. The honest way to weigh it is not to count features but to ask which ones you will use weekly, because a feature you use daily earns its risk and one you demonstrated once in a showroom does not. Two practical notes. Ask whether a failed convenience feature stops the appliance from cooling or only stops that feature, since the second is far less serious. And prefer features that are mechanically simple over ones that depend on software the manufacturer has to keep supporting for a decade.
Should I buy a refrigerator on a holiday sale?
Timing can help, but it should never decide the model, because the constraints that matter here are physical and they do not move for a discount. Work the measuring, capacity and configuration steps first and arrive at a shortlist of models that genuinely fit the opening, the path and the household. Then let price and timing choose among that shortlist. Buying the discounted model that does not fit is the most expensive outcome available, since a refrigerator that is wrong stays wrong for a decade and returning a large appliance after installation is rarely simple. Our notes on seasonal appliance deals cover how to tell a real reduction from a reset sticker. One extra caution on sale purchases: confirm the delivery, haul-away and door-removal terms in writing, because those services are where a low headline price often quietly reappears.