
What's on this page
- Why is my refrigerator not cooling? Read the symptom pattern first
- Fridge warm but freezer cold: the airflow and defrost signature
- Both compartments warm: what that pattern means
- Before you touch anything: three checks and a thermometer
- The safety part: power, capacitors and the sealed system rule
- The order to check things in, and why it saves money
- Cause one: power, the outlet and the breaker
- Cause two: settings, dials and the showroom mode nobody knows about
- Cause three: door seals, and whether the door is actually closing
- Cause four: overpacking and blocked vents
- Cause five: condenser coils and the dust that insulates them
- Cause six: the condenser fan
- Cause seven: the evaporator fan
- Cause eight: the defrost system and the frost slab
- The manual defrost test that settles it
- Cause nine: thermistors, the cold control and the main board
- Cause ten: the sealed system and the compressor
- Where refrigerator cooling faults actually come from
- The room around the fridge: heat, clearance and a cold garage
- The food safety decision: time, temperature and no smell test
- Which repairs are genuinely DIY
- Repair or replace: the honest math
- A worked example: one warm fridge, four suspects
- Prevention: the habits that keep a fridge cold
- When to call a pro, and what to tell them
- The bottom line
A refrigerator that stops cooling rarely announces it politely. The light comes on, the fan hums, the display glows, and everything about the machine says it is working, right up to the moment you pick up the milk and it is the temperature of the room. That gap between a machine that is clearly running and a machine that is clearly not cooling is what makes this fault so confusing, and it is also the reason people jump straight to the worst and most expensive conclusion, which is usually wrong.
These test notes work the fault the way it should actually be worked. First by reading the symptom pattern, because whether the freezer is still cold changes the entire search, and then from the cheapest suspect upward: power and settings, door seals and packing, condenser coils and fans, the evaporator fan, the defrost system, and only at the end the sealed system where the money stops being small. Our refrigerator cleaning walkthrough covers the maintenance half of this, our refrigerator lifespan report sets the age context for the repair decision, and our refrigerator running-cost teardown prices the machine once it is healthy again.
Key takeaways
- The symptom pattern is the diagnostic key. A warm fridge with a cold freezer points at airflow and the defrost system, not the compressor. Both compartments warm points at power, settings, the sealed system, or the compressor itself.
- Most household refrigerators make all their cold in one place and blow it where it is needed, which is why a delivery fault looks exactly like a cooling failure to the person holding the warm milk.
- Unplug the machine before touching coils, fans, or anything behind a rear panel. A capacitor in the compressor circuit can hold a charge after the power is off.
- Refrigerant work is not a home job in any version of this fault, because handling refrigerant is regulated, certified work almost everywhere.
- Food safety is decided by time and temperature, never by smell. Perishables held above a safe temperature for an extended period get discarded, and your national or local food safety authority is the reference to confirm.
Why is my refrigerator not cooling? Read the symptom pattern first
Before you clean anything, unplug anything, or price anything, spend two minutes establishing which of two very different faults you actually have, because the answer redirects everything that follows.
Open both doors and feel. Is the freezer still holding hard frozen food, or has the ice cream gone soft? Is the fresh food compartment merely cool, or is it at room temperature? Put a thermometer in a glass of water in the fridge and another between frozen packages if you have two, and read them after a few hours rather than immediately. The commonly cited targets are around 37 to 40 degrees Fahrenheit for the fresh food compartment and around 0 degrees for the freezer.
Those readings sort the fault into one of two families. A cold freezer with a warm fridge means the machine is still making cold and failing to move it, which is an airflow or defrost problem. Both compartments warm means the machine is not making cold at all, which is a power, control, or refrigeration problem. Almost every wasted repair dollar in this category comes from skipping that split.
Fridge warm but freezer cold: the airflow and defrost signature
This is the most common version of the complaint and by a wide margin the most misdiagnosed, so it earns the first full section.
Most household refrigerators are single evaporator machines. There is one cold-making coil, and it sits behind a panel in the freezer compartment. A fan blows air across that coil, some of the resulting cold air stays in the freezer, and the rest is ducted up or across into the fresh food compartment through vents, usually past an adjustable damper that meters how much gets through. Two separate boxes, one source of cold, and a delivery system in between.
That architecture explains the symptom precisely. If the freezer is still cold, the compressor is running, the refrigerant loop is intact, and the evaporator coil is making cold exactly as designed. The only thing failing is delivery. So the suspects are the fan that moves the air, the vents that carry it, the damper that meters it, and anything physically blocking the coil, which in practice means frost.
That last one is where the defrost system comes in, and it is the reason this pattern has a reputation. Every refrigerator accumulates frost on the evaporator coil as humid air condenses and freezes on it. A defrost system periodically warms the coil to melt that frost away, and it does so on a schedule you never see. When the defrost system stops working, frost keeps accumulating until it fills the space between the coil fins and becomes a solid slab. The coil is still cold. The fan is still trying. But air cannot pass through a block of ice, so the fresh food compartment stops receiving cold air while the freezer, sitting right next to the coil, stays reasonably cold for a while longer.
The practical value of understanding this is that it removes the compressor from your worry list. A warm fridge with a cold freezer is almost never a compressor fault, and the repairs at the top of its suspect list are among the cheapest in the category.
Both compartments warm: what that pattern means
When neither side is cold, the machine is not making cold, and the suspect list changes completely. It also gets shorter, and it starts with things that cost nothing.
The cheap end first, because it is genuinely common. The machine may not be receiving power, through a tripped breaker, a dead outlet, a switched outlet somebody switched, or a plug that has worked loose behind the unit. The temperature controls may have been knocked to their warmest position, which happens more often than people admit in a compartment where things get shoved around. Or the machine may be in a showroom or demo mode, a real feature on many current models that keeps the lights and the display working while cooling is disabled, and which can be entered accidentally by a button combination.
The expensive end sits at the other extreme. The compressor may be running but not compressing, its start components may have failed so it cannot start at all, or the sealed system may have lost refrigerant or developed a restriction. Those are the jobs where the quote starts to rival the machine.
In between sits the middle band: a condenser fan that has stopped so the machine overheats and cuts out, coils so insulated with dust that the system cannot reject heat, a failed thermistor or cold control telling the board the cabinet is already cold enough, or a control board that has stopped commanding the compressor. All of those are real, all are repairable, and none of them justify buying a new refrigerator before they are ruled out.
Before you touch anything: three checks and a thermometer
Three actions come before any diagnosis, and doing them in this order saves both time and a wasted call-out fee.
Confirm the machine actually has power. Not by looking at the interior light, which on some designs runs on a circuit that survives faults elsewhere, but by listening. A refrigerator that is powered makes noise: a low compressor hum, a fan, the occasional click of a relay. Silence with a lit interior is a genuine finding worth chasing. Check the breaker panel, plug a lamp into the same outlet, and make sure the plug is fully seated.
Read the temperature rather than judging it. A cheap fridge thermometer, or two, is the single most useful tool in this whole subject. Put one in a glass of water on a middle shelf and one between packages in the freezer, close the doors, and leave them for several hours. Water buffers the reading against door openings, so it tells you what the food is experiencing rather than what the air did in the last thirty seconds.
Note the timeline. Did this happen overnight or over a week? Did anyone move the fridge, clean behind it, load it heavily, or lose power recently? Sudden total failure and gradual decline point at different causes, and a machine that stopped cooling the day after a power cut or a deep clean is telling you something specific.
The safety part: power, capacitors and the sealed system rule
Read this section even if you skip the rest, because these are the three ways this particular job hurts people.
Unplug the machine, do not just switch it off. Before you remove a rear access panel, brush condenser coils, reach toward a fan blade, or touch anything behind the freezer wall, pull the plug from the wall. A refrigerator’s control board runs on its own schedule and can start a compressor or a fan without warning, including on a machine that has been silent for ten minutes. If the outlet is behind the unit and awkward to reach, switch the circuit off at the breaker panel as well, and tell the household you have done it, because the classic accident is somebody restoring power while your hand is inside the cabinet.
A capacitor in the compressor circuit can hold a charge after the power is off. This is the part people do not expect from a kitchen appliance. Start and run capacitors store energy and do not necessarily discharge the moment the plug comes out, so the compartment at the back of the machine that houses the compressor, the start relay and the overload protector is not a place to poke around casually. If you are not confident about identifying and safely discharging a capacitor, treat that whole compartment as off limits and hand it to a technician. Nothing in the do-it-yourself part of this report requires you to go in there.
Never attempt sealed system work. The compressor, the condenser, the capillary or expansion device, the evaporator and the refrigerant inside them form a closed circuit that is not user serviceable in any meaningful sense. Recovering, repairing and recharging that circuit is regulated, certified work in most places, it requires recovery equipment and vacuum pumps rather than hand tools, and venting refrigerant is both an environmental problem and, in many jurisdictions, an offence. There is no partial version of this job. If the diagnosis is a leak, a restriction or a dead compressor, the decision in front of you is which qualified technician to call or whether to replace the machine, and that is the whole decision.
Two smaller cautions round it out. Refrigerators are heavy and top-loaded, so ease them out on cardboard rather than dragging or tilting them, and be aware that a machine laid on its side needs to stand upright for several hours before being powered again. And when you pull one forward, watch the water line if it has an ice maker or dispenser, because tearing that fitting out turns a cooling fault into a flood.
The order to check things in, and why it saves money
The reason a checking order matters is that the causes of this fault are wildly unequal in both frequency and price, and the two run in roughly opposite directions. The most common causes are free or nearly free. The rarest one costs more than most machines are worth.
The order these test notes use is: power and settings, door seals and closure, packing and vents, condenser coils, condenser fan, evaporator fan, defrost system, sensors and control board, then the sealed system and compressor. Each step is cheaper and more likely than the one after it, and every step up to the fans can be worked with a flashlight, a brush and an hour.
That cheapest-first order is the same one our dishwasher drainage report uses on a different machine, and it works for the same reason: the frequent causes and the expensive causes sit at opposite ends of the list.
There is one shortcut worth applying immediately when it fits. If the machine stopped cooling within days of being moved, cleaned behind, restocked heavily for a holiday, or plugged into a different outlet, start with whatever changed. Recent disturbance is the strongest single clue in this category, and it turns an evening of diagnosis into a five minute check.
The symptom split from the opening sections layers on top of that order. A cold freezer with a warm fridge lets you skip most of the power and sealed system suspects and go straight to vents, evaporator fan and defrost. Both compartments warm lets you skip the airflow suspects and concentrate on power, settings, coils, the condenser fan and, at the end, the refrigeration circuit itself.
Cause one: power, the outlet and the breaker
This is the check people are embarrassed to make and the one that resolves a real share of these calls, so make it properly and move on.
A refrigerator draws power around the clock, which means it is the appliance most likely to be affected by something small and quiet: a breaker that tripped during a storm and was never noticed because the kitchen lights are on a different circuit, an outlet on a wall switch that somebody flipped, a plug that walked out of the socket when the machine was pushed back after cleaning, or a damaged extension lead, which a refrigerator should not be running on at all.
Work it in order. Look at the interior light, but do not trust it on its own. Listen for the compressor and fans. Plug a lamp or a phone charger into the same outlet and confirm the outlet is live. Check the breaker panel and reset anything that has tripped, and if a breaker trips again immediately, stop and call an electrician rather than resetting it repeatedly. Pull the machine forward far enough to see the plug and push it home firmly.
One extra check belongs here. If the machine is on a circuit with a ground fault or arc fault device, those trip for reasons an ordinary breaker does not, and a refrigerator that keeps tripping one is telling you about an electrical fault inside the machine. That is a service call, not a reset.
Cause two: settings, dials and the showroom mode nobody knows about
Settings are the second free check, and they include one failure mode that is genuinely obscure and produces this exact symptom with no other clue at all.
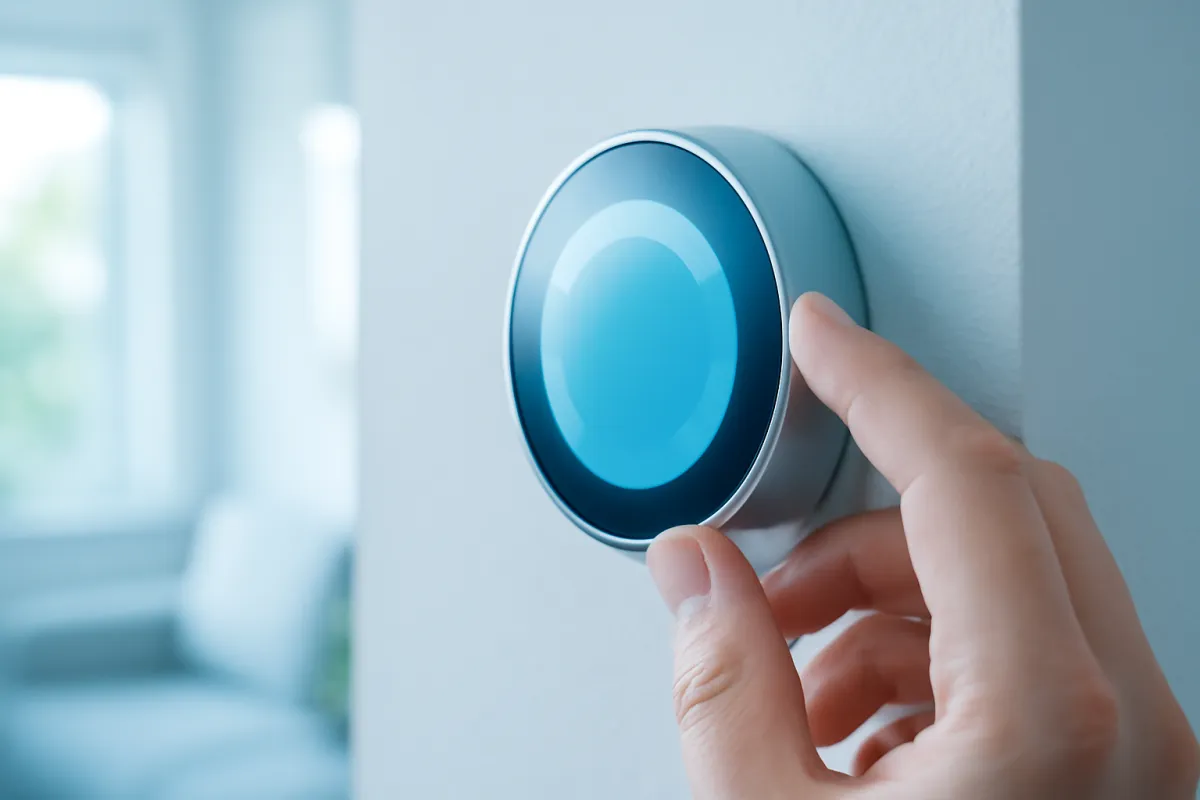
Start with the obvious. Find the temperature controls, which may be a dial inside the fresh food compartment, a slider, or a digital panel on the door, and read what they currently say. A dial knocked to its warmest setting by a tall bottle, or a digital panel nudged during a clean, is a completely normal cause of a warm fridge. Set the fresh food compartment to the commonly cited 37 to 40 degree range and the freezer near 0, then leave it a day before judging.
Then the obscure one. Many current refrigerators have a showroom, demo or display mode, intended for retail floors, which keeps the interior lights, the display, and often the dispenser working while cooling is switched off entirely. It exists so that a shop can light up a wall of machines without running compressors all day. It is usually entered by holding a specific combination of panel buttons, which means a curious child, a cleaning cloth, or a power interruption can put a home machine into it. The tell is a fridge that looks entirely alive, responds to every button, and never gets cold, sometimes with a small indicator on the display that means nothing to the owner. The manual for the machine states the button combination that exits it, and manufacturers publish those manuals for free, so this is a five minute check with a zero dollar fix.
Two related settings deserve a look while you are there. Some models have separate fresh food and freezer controls that interact, so setting the freezer very warm can starve the fridge side. And an ice maker or fast-cool feature left on can change how the machine allocates airflow. None of that costs anything to correct.
Cause three: door seals, and whether the door is actually closing
A refrigerator does not fight the room’s heat so much as it fights the heat that gets in, and the door is the largest hole in an otherwise insulated box.
Check closure first, because it is more often the problem than the gasket itself. Does the door swing shut on its own when released, or does it hang open a fraction? Is a shelf item, a tall bottle, a container edge, or a drawer standing proud enough to hold the door off its seal? Is the machine level, since a fridge tipped forward will not self-close and a fridge tipped backward may bind? Is anything trapped in the hinge line? A door standing open a few millimetres all night is enough to warm a compartment and run the compressor continuously trying to fix it.
Then check the gasket. Run a finger along the flexible seal around the door and feel for cracks, hardened sections, tears at the corners, and places where it has been pushed out of its channel. Clean it, because a gasket glued shut with syrup or sticky with grime seals badly and tears when the door is pulled. Warm soapy water and a cloth is all it needs, and our refrigerator cleaning walkthrough covers the method in full.
The classic test is the paper test. Close the door on a sheet of paper so half of it sticks out, then pull. If it slides out with almost no resistance, the seal at that point is not gripping. Repeat every few inches around all four sides and around each door, and mark the weak spots with tape. A gasket that fails the test in one small area can sometimes be persuaded back into place or softened with a warm cloth. A gasket that fails it everywhere is a replacement part, illustratively in the low hundreds fitted and considerably less if you fit it yourself.
Cause four: overpacking and blocked vents
This one is free to fix, invisible until you look for it, and disproportionately common after a big shop or a holiday.
The vents that carry cold air from the freezer side into the fresh food compartment are usually small rectangular openings at the back or top of the fridge section, and there are matching return openings lower down. A refrigerator works by circulating air, not by radiating cold from its walls, so those openings have to stay clear. A cereal box, a pizza box laid flat, a stacked wall of takeaway containers, or a shopping delivery pushed straight to the back can seal them completely. The result is a compartment with a cold patch near the vent and a warm zone everywhere else, which reads to the owner as a fridge that has stopped working.
Overpacking a freezer causes the same problem in a different way, by preventing air from reaching the evaporator and returning to it. A freezer packed solid against its back wall can also press frost and packaging against the coil panel, which contributes to the frost problem covered further down.
The fix is to unload, look for the vents, and rebuild the load with a finger’s width of air around the openings and a gap along the back wall. Avoid lining shelves with foil or plastic sheeting, which blocks airflow in the same way as a box does. And resist the instinct to keep the fridge crammed for efficiency: a reasonably full fridge holds cold well, but a stuffed one circulates nothing.

Cause five: condenser coils and the dust that insulates them
If the fridge runs constantly and cools poorly, and especially if both compartments are warm, this is the first check that costs anything more than attention, and it costs a brush.
The refrigeration cycle only works if the heat pulled out of the cabinet can be dumped somewhere, and the condenser coils are where that happens. They sit either on the back of the machine as a black grid or, on most current designs, underneath behind a removable grille at the bottom front. Their job is to shed heat into the room air, and they do it through a very large surface area of thin fins.
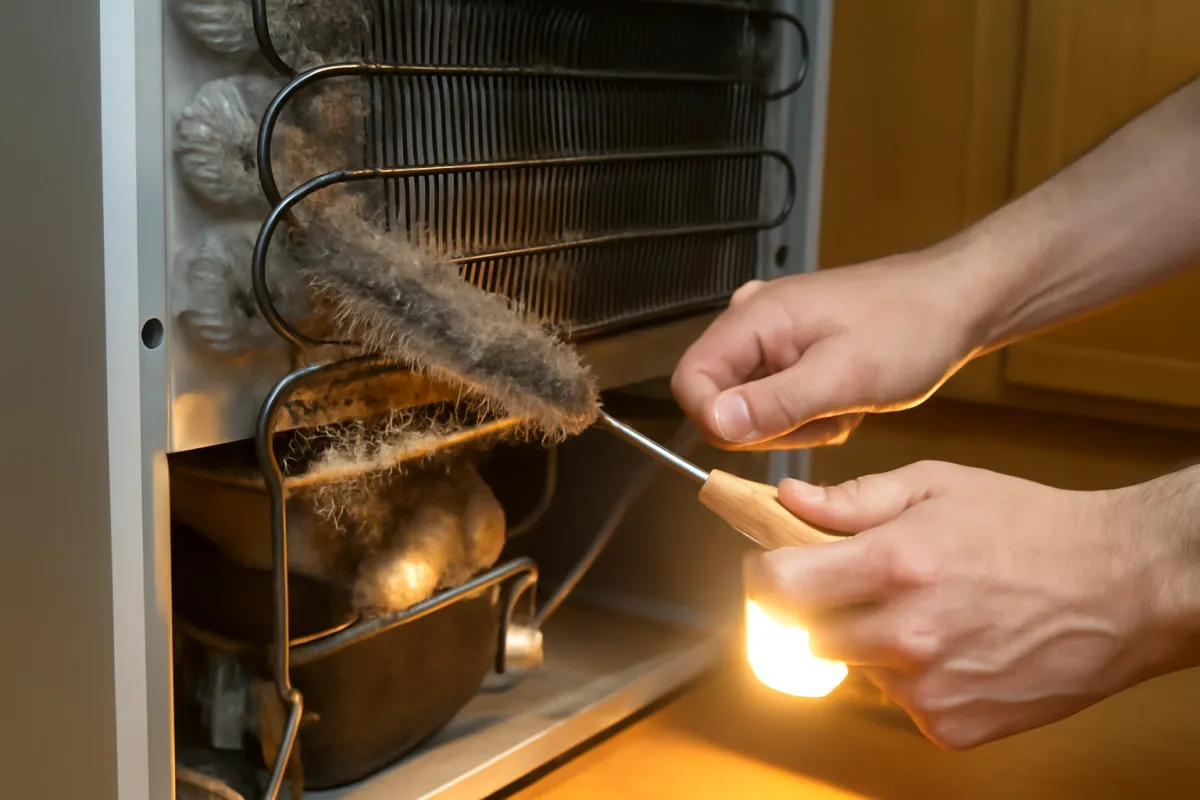
Dust defeats that surface area with startling efficiency. A blanket of dust, pet hair and kitchen grease acts as insulation on precisely the part of the machine that needs to be uninsulated. The compressor keeps running because the cabinet never reaches its target, the machine gets hotter, and its efficiency falls further. Households with pets, carpet near the kitchen, or a machine on an open floor plan accumulate this fastest.
Cleaning them is genuinely simple. Unplug the machine. Find the coils, either behind the bottom grille, which usually unclips, or on the back, which means pulling the unit forward. Use a coil brush, a long flexible bristle brush made for the job, and work it gently through the fins, then vacuum up what falls. Do not bend the fins, do not use water, and do not skip the floor underneath, which is where the dust returns from. Twice a year is the commonly recommended rhythm, and once a year is enough in a clean, pet-free home.
Cause six: the condenser fan
On machines with the coils underneath, a fan pulls room air across the coils and over the compressor, and when that fan stops the machine cooks itself.
The symptom is distinctive once you know it. The refrigerator cools poorly or intermittently, the compressor compartment is noticeably hot, and the machine may run for a long stretch, cut out abruptly, and then restart some minutes later. That pattern is the compressor’s overload protector doing its job: it senses the compressor getting too hot and shuts it down to protect it, then lets it restart once it has cooled. Owners often describe this as a fridge that works some of the time.
Checking it means unplugging the machine, removing the rear lower access panel, and looking. A condenser fan blade that is jammed with dust, a cardboard scrap, or a fallen object will not turn freely by hand. A motor with failed bearings often turns roughly or noisily. A fan that spins freely by hand but never runs when the machine is powered is either not being commanded or has a failed winding, and that distinction is a technician’s call.
Clearing a jammed blade or cleaning a filthy fan housing is a household job. Replacing the motor is a moderate one, illustratively around 200 dollars fitted and less as a part, and it is well worth doing on a machine with years left, because a fan failure left alone is a slow way to kill a compressor.
Cause seven: the evaporator fan
This is the delivery fault behind the classic warm fridge with a cold freezer, and it has the easiest test in this whole report.
The evaporator fan sits behind the panel at the back of the freezer compartment and blows air across the cold coil, sending some of it into the fresh food section. When it fails, the coil keeps making cold, the freezer stays cold by proximity, and the fridge gets no delivery at all.
The test takes ten seconds. Open the freezer door and hold in the door switch, which is the small plunger or magnetic switch on the door frame that tells the machine the door is shut. On most designs the evaporator fan runs when that switch is depressed. If you hear a fan spin up, the motor is alive. If you hear nothing at all, or if you hear a grinding, ticking, or squealing noise that stops when you release the switch, you have found something. Repeat with the fridge door for the fresh food side on machines that have a separate fan there.
Three outcomes follow. Silence points at a failed fan motor, a failed door switch, or a control board not commanding the fan. Noise points at bearings on their way out or a blade catching frost. And a fan that runs normally while the fridge stays warm points you at the vents, the damper, or the frost slab in the next section. An evaporator fan motor is illustratively around 200 dollars fitted, and it is a well-documented repair on most designs, though it does mean removing a rear freezer panel with the machine unplugged.
Cause eight: the defrost system and the frost slab
This is the single most likely cause of a warm fridge with a cold freezer, and understanding the mechanism is what makes the diagnosis obvious.
Air carries moisture. Every time a door opens, humid room air enters, and that moisture eventually condenses on the coldest surface in the machine, which is the evaporator coil. Left alone, the coil would ice up within days. So every refrigerator has a defrost system: a heater element around or beneath the coil, a defrost thermostat or bimetal that limits how warm things get, and a timer or control board that decides when to run a defrost cycle. The heater runs briefly, frost melts, the water runs down a drain into a pan near the compressor and evaporates, and the machine goes back to cooling.
When any of those three parts fails, the cycle stops happening and frost accumulates without limit. Over a week or two, the space between the coil fins fills, then the coil becomes a solid block, then the fan is pushing air at a wall of ice. Cold stops reaching the fresh food compartment first, because it is furthest from the source. The freezer follows more slowly. Owners often notice the fan getting louder as it strains, or hear it hitting frost, before they notice the temperature.
The visual confirmation is direct. Empty the freezer, remove the rear panel with the machine unplugged, and look at the coil. A healthy coil has a light, even fuzz of frost with visible gaps between the fins. A failed defrost system produces a smooth white slab with no gaps at all, often with ice extending onto the fan housing.
Which of the three parts failed is a technician’s diagnosis, since it usually needs electrical testing. As illustrative figures, a defrost heater or thermostat commonly lands near 250 dollars fitted, while a control board is nearer 400, and the difference matters when you weigh it against the machine’s age.
The manual defrost test that settles it
Before paying anyone, there is a test that both confirms the defrost diagnosis and temporarily restores the machine, and it costs nothing but a day.
Empty the refrigerator and freezer completely, moving food to a cooler with ice packs or to a neighbour’s machine. Unplug the unit. Prop both doors open. Put towels down at the base and inside the freezer, because a fully frosted coil holds a surprising amount of water. Then leave it for a day, or overnight at minimum, and let everything melt at room temperature.
Do not accelerate it with a hair dryer, a heat gun, a hot pan or a sharp implement. Heat guns melt plastic liners and can damage the coil, and anything sharp used to chip ice off an evaporator can puncture the tubing, which converts a 250 dollar repair into a sealed system failure and effectively ends the machine.
When everything has melted and been dried out, plug the machine back in, close it up, and let it run empty for several hours with a thermometer inside before reloading. Then watch the calendar. If cooling returns fully and stays normal, you have proven the fault was frost. If it degrades again in the same way after a week or two, the defrost system is confirmed as not clearing frost on schedule, and that is exactly the information a technician needs. If cooling does not return at all after a full defrost, the fault is elsewhere and the next sections apply.
Cause nine: thermistors, the cold control and the main board
When airflow, coils, fans and defrost all check out, the remaining household-level suspects are the parts that decide when to cool rather than the parts that do the cooling.
Older machines use a mechanical cold control, a thermostat with a sensing bulb, that switches the compressor directly. Current machines use thermistors, small temperature sensors placed in each compartment and sometimes at the evaporator, that report to a main control board which then decides what to run and for how long. Either way, the failure mode is the same in effect: the machine believes the cabinet is already cold enough, so it does not call for cooling.
The clue is a machine that is silent when it should be running. If the compressor never starts, never hums, and the compartment is warm, and you have already confirmed the machine has power, then something in the command chain is not asking for cooling. A machine that runs constantly can also point here, with a sensor reading warmer than reality so the board never stops.
Sensors are inexpensive parts and the diagnosis is a resistance measurement, which puts it in technician territory rather than guesswork territory. Boards are the expensive end of this branch, illustratively near 400 dollars, which on a machine past year ten is often enough on its own to tip the decision toward replacement. Resist the common temptation to buy a board on suspicion. It is the most expensive part in the list of things that can be swapped, and swapping it blind is how people spend replacement money on a repair that does not fix anything.
Cause ten: the sealed system and the compressor
This is the bottom of the list because it is both the rarest cause and the one that usually ends the conversation about repair.
The sealed system is the closed refrigerant circuit: compressor, condenser, metering device, evaporator and the tubing joining them. Three things go wrong with it. Refrigerant escapes through a corroded or damaged section, so the machine runs continuously and cools weakly or not at all. The metering path develops a restriction, producing similar symptoms with different pressures. Or the compressor itself fails, either mechanically or electrically, and stops moving refrigerant.
The clues, taken together rather than individually: both compartments warm, a compressor that hums and clicks off after a few seconds repeatedly, a compressor that runs continuously with no cooling, frost patterning on only part of the evaporator, or an unusually hot compressor with clean coils and a working fan. None of these is definitive from the outside, which is the point. Diagnosing a sealed system fault requires gauges, and gauges mean a technician.
The cost picture is what makes this the replacement trigger. Sealed system work involves recovering refrigerant, repairing or replacing components, evacuating the system and recharging it, which is labor-heavy specialised work with regulated materials. Illustratively it starts high and frequently lands within sight of a new machine, and it arrives on units that are usually old enough that other components are queued behind it. Weigh it against the refrigerator lifespan report and the arithmetic tends to answer itself.
Where refrigerator cooling faults actually come from
Pulling the whole list together shows the pattern this category always shows: the cheap causes are common and the expensive ones are rare. The split below is illustrative, drawn from the shape of complaints this fault produces rather than from any formal survey, and it is meant to set your search order rather than to be a statistic.
Where a refrigerator cooling fault usually starts
Illustrative share of not-cooling complaints by cause. Bars scale to the largest slice.
Around nine in ten of these faults sit outside the refrigerant circuit entirely, in airflow, heat rejection, a door, a fan or a setting. Only the last slice routinely ends a refrigerator.
The practical reading of that chart is the search order these test notes already follow. Read the symptom pattern, then work the free checks, then the brush-and-flashlight checks, then the fans and defrost parts, and treat the sealed system as the diagnosis of last resort rather than the first fear. Someone who works the list top to bottom resolves a large share of these without buying a part at all, and knows exactly what to tell a technician when they do not.
The room around the fridge: heat, clearance and a cold garage
The environment a refrigerator lives in decides how hard it has to work, and two placement problems produce cooling complaints that have nothing wrong with the machine.
The first is heat and clearance. A refrigerator rejects heat into the room, so it needs air around the coils. Pushed hard against a wall, boxed into a cabinet with no top or rear gap, sitting next to an oven or a dishwasher that vents steam, or standing in direct sun through a window, it fights its own exhaust. Manufacturers state minimum clearances, typically an inch or two at the back and sides and more above, and those figures are in the manual for the specific model. A machine that cools fine in winter and struggles every August is usually telling you about its surroundings rather than its components.
The second is the opposite problem and it surprises people. A refrigerator in an unheated garage, shed or porch can stop cooling in cold weather. On a single thermostat design, the fresh food compartment’s sensor sees a cold room, decides no cooling is needed, and stops running the compressor, which means the freezer stops being fed cold as well and slowly thaws. Garage-rated models handle this deliberately. Ordinary kitchen models are not designed for it, and our refrigerator lifespan report covers why garage placement shortens machines in the other direction too.
The food safety decision: time, temperature and no smell test
While you are diagnosing, somebody has to decide what happens to the food, and this decision is made on time and temperature rather than on judgement.
The rule to work from is that perishable food held above a safe refrigeration temperature for an extended period should be discarded. The commonly cited threshold is around 40 degrees Fahrenheit, with roughly two hours as the limit above it, and any overnight or all-day failure is far past that. Meat, poultry, fish, eggs, dairy, cooked leftovers, cut fruit and anything containing them are the categories that matter most. Because this guidance is issued and periodically updated by public health authorities, confirm the current rule with your national or local food safety authority rather than treating any article, this one included, as the source of record.
The part worth stating plainly is that you cannot smell or look your way to safety. The organisms that cause foodborne illness do not reliably announce themselves through odour, colour, or texture, so food that seems fine can still make someone ill, and tasting to check is the worst possible test. When an item is in doubt, it goes out.
The freezer gives you more room. A full, unopened freezer holds safe temperatures substantially longer than a half empty one, because the frozen mass itself acts as a cold reservoir, which is why keeping the door shut during an outage matters more than anything else you can do. Food that still contains ice crystals can generally be refrozen, with some loss of quality. Food that has thawed completely and sat warm follows the same discard rule as everything else. Write down when the failure started, because that timestamp is what the decision rests on.
Which repairs are genuinely DIY
The honest split between what a household can do and what needs a trade matters more than enthusiasm does, because the wrong call in either direction costs money.
Genuinely do-it-yourself, no special skill. Checking the outlet, the plug and the breaker. Reading and correcting the temperature settings. Exiting a showroom or demo mode using the manual. Cleaning the condenser coils. Clearing blocked vents and unpacking an overstuffed compartment. Cleaning and testing door gaskets with the paper test. Levelling the machine so the doors self-close. Pulling the unit out for clearance. Running a full manual defrost. That list covers most of the chart above and needs a screwdriver, a coil brush, a flashlight and a thermometer.
Do-it-yourself with patience and research. Replacing a door gasket. Replacing a condenser fan or evaporator fan motor. Replacing a defrost heater or thermostat on a model with straightforward panel access. These mean unplugging the machine, removing panels, photographing every connector before you undo it, and ordering the correct part for the specific model. Watch a walkthrough for the exact layout in front of you before committing.
Not do-it-yourself for most households. Anything requiring electrical testing to distinguish between a sensor, a heater and a board. Anything inside the compressor compartment, because of the capacitor. Any machine that trips a breaker, smells hot, or shows scorching.
Not a repair at all. Sealed system work. That is licensed, equipped work, and the only household decision attached to it is repair or replace.
Repair or replace: the honest math
When a cooling fault needs a paid repair, the decision uses the same two tests we apply to every appliance on the bench.
The first is the 50 percent test: if the repair quote exceeds roughly half the price of a comparable new machine, replacement usually wins. The second is age weighting, because the commonly cited planning window for a full size refrigerator is about 10 to 15 years, so the same repair buys most of a decade at year three and a year or two at year twelve.
Run an illustrative case. A refrigerator that would cost about 1,200 dollars to replace stops cooling on the fridge side at year eight, and after the free checks come back clean the quote is 250 dollars for a defrost heater. That is about 21 percent of a replacement, comfortably under the line, on a machine with several typical years left. Repair is the clear answer. Change one variable: the same machine at year twelve, diagnosed with a refrigerant leak in the sealed system, quoted at four figures. Both tests now point the same way, and so does the queue of other parts that are equally old.
Ten years of one refrigerator, with one mid-life cooling repair
Illustrative split of total spend: a $1,200 machine, about $800 of electricity across ten years at $80 a year, and one $250 defrost repair. Segments sum to 100 percent.
A refrigerator costs more to buy than to run, near $80 a year for a typical modern unit, which is why a mid-priced repair that adds years usually beats replacing the machine early.
That balance is the quiet argument for repairing refrigerators readily when the failure is mechanical or electrical rather than refrigerant. The purchase is the biggest slice, the electricity is real but modest at the figures in our refrigerator running-cost teardown, and a 250 dollar repair that adds four or five years is cheap against a 1,200 dollar replacement. The exception is the sealed system, which is expensive enough relative to the machine to flip the answer on its own. Put your own machine price, quote and expected remaining years into our cost-per-use calculator and the comparison stops being a feeling.
A worked example: one warm fridge, four suspects
Run one illustrative scenario end to end, because this is the shape these problems actually arrive in.
A household notices the milk is not properly cold on a Tuesday. By Thursday the fresh food compartment is barely cool, but the ice cream in the freezer is still hard. The machine is eight years old, a bottom freezer model, and nobody has moved it or cleaned behind it in years. The symptom split says airflow or defrost, not the compressor, which removes the expensive fear immediately.
Suspect one, settings and door. Both controls read normally. The door self-closes and the paper test grips all the way around. Fifteen minutes, nothing found, and two suspects removed for free.
Suspect two, vents and packing. The upper rear vents in the fridge section are half covered by a cereal box and a stack of containers pushed to the back wall. That is corrected, and the machine is given a day. It improves slightly and is still too warm, so the vents were a contributing factor rather than the cause.
Suspect three, evaporator fan. The freezer door switch is held in. Nothing spins, but there is a faint ticking that stops when the switch is released. That is a real finding and points at either a failed fan or a blade catching something.
Suspect four, the coil. With the machine unplugged and the freezer emptied, the rear panel comes off and the evaporator is a smooth white slab of ice with the fan blade frozen against its housing. That is the defrost diagnosis, confirmed visually rather than guessed.
The household runs a full manual defrost over a weekend, the machine cools normally for eleven days, and then the fridge side warms again. That repeat is the confirmation, and a technician replaces a defrost heater and thermostat for an illustrative 250 dollars. Against a comparable new machine near 1,200 dollars, on a unit with several typical years left, both tests say repair. Total cost of the diagnosis itself: one weekend and no parts.
Prevention: the habits that keep a fridge cold
Most of the causes above are preventable, and the prevention is cheap enough to be worth stating as a routine rather than as advice.
Clean the condenser coils twice a year, or annually in a clean, pet-free home. This is the single highest-value maintenance task on the machine, it takes under an hour, and it addresses the largest of the non-defrost causes on the chart. Put it on the same calendar as smoke alarm batteries so it actually happens.
Check the gaskets when you clean the interior. Wipe them, look for cracks and hardened corners, and run the paper test occasionally. A gasket caught early is a cleaning job rather than a part.
Give the machine air. Confirm the clearance behind and above it after any move, and keep the top clear of stacked storage that traps heat.
Do not pack the vents. Leave a gap along the back wall and around the openings when you unload the shopping, and check the vents after any big restock.
Keep the door discipline sensible. Fewer long openings, no propping the door while cooking, and let hot food cool before it goes in, since a hot pan makes the compressor run for an hour to undo one minute of convenience.
Watch the drain. A clogged defrost drain shows as water under the crisper drawers or ice in the bottom of the freezer, and it is an early warning about the defrost system in general. Our appliance maintenance routine sets these into a schedule across every machine in the house, and our appliance lifespan reference shows what that maintenance buys in years.
When to call a pro, and what to tell them
Knowing when to stop is part of doing this well, and there are five clear stopping points.
Call a technician when the diagnosis needs electrical testing to separate a sensor from a heater from a board. Call one when the fault is in the compressor compartment, because of the capacitor. Call one immediately for anything involving a burning smell, scorch marks, a repeatedly tripping breaker, or visible damage to wiring. Call one when the evidence points at the sealed system, since that is regulated work. And call one when you have worked the whole free list, found nothing, and would rather buy an hour of expertise than another weekend of guessing.
What you tell them changes what the visit costs. Arrive at the call with the symptom split, meaning the actual thermometer readings in both compartments; the timeline, meaning when it started and what changed just before; what you have already ruled out, meaning settings, door, vents, coils and the fan test; and the model number from the plate inside the compartment or behind the crisper. A technician who is handed that arrives with the likely parts on the van instead of scheduling a second visit.
Expect a diagnostic fee, illustratively somewhere around 80 to 150 dollars, and ask whether it is credited against the repair if you proceed. Ask for the quote to separate parts from labor, ask whether the part is still available for the model, and on any machine near or past year ten, ask the technician directly what else they would expect to fail next. That last answer is often the one that decides repair or replace. If the verdict is a sealed system fault on an older unit, the productive call is to a retailer instead, and the price and expected years of the replacement belong in our cost-per-use calculator before you commit.
The bottom line
Why is my refrigerator not cooling has a better answer than the warm milk suggests, and finding it starts with one observation rather than one tool. If the freezer is still cold and the fridge is not, the machine is making cold and failing to deliver it, which points at vents, the evaporator fan, and above all the defrost system whose failure builds a frost slab across the coil. If both compartments are warm, the machine is not making cold, which points at power, a setting, a showroom mode nobody knew existed, heat rejection at the coils and condenser fan, or, at the far end, the sealed system. Getting that split right removes the expensive fear from most of these cases in the first five minutes.
Then work outward from the cheapest suspect: power and settings, the door and its seal, the vents and the packing, the coils and the condenser fan, the evaporator fan, the defrost system, the sensors and the board, and only then the compressor. Handle the safety part properly, because it is the only place a wrong move costs more than a repair bill. Unplug before touching coils, fans or anything behind a panel, leave the compressor compartment alone unless you know how to handle a capacitor that still holds a charge, and never attempt sealed system work. Decide the food question on time and temperature with your food safety authority as the reference, never on smell. And let the arithmetic close it out: a defrost or fan repair on a machine with years left is usually worth doing, a quote above half the price of a comparable new refrigerator is a replacement signal, and a sealed system fault past year ten is generally the end of the road. Brush the coils twice a year and most of this report will never apply to you.
These test notes are general information about how refrigerators fail, not professional repair, electrical, or food safety advice. Every price, share, and lifespan quoted here is an illustrative planning figure rather than a quote or a measured statistic, and your model, your kitchen, your electricity rate and local labor charges will move all of them. Disconnect the machine from the outlet before opening any panel, treat the compressor compartment as live until you know otherwise because a capacitor can retain a charge, and leave the refrigerant circuit entirely to a certified technician. Decisions about whether food is safe to eat belong with your national or local food safety authority, whose current guidance overrides anything written here, and where the manufacturer’s manual for your model contradicts a general principle in this report, the manual wins.
Frequently asked questions
Why is my fridge not cooling but the freezer is still cold?
That split is the single most useful clue this fault ever gives you, because most household refrigerators make all their cold in one place, the evaporator coil behind the freezer wall, and then blow some of it into the fresh food compartment. A cold freezer proves the compressor, the refrigerant loop and the coil are all still working. A warm fridge alongside it means the cold is being made but not delivered, which points at the evaporator fan, a stuck air damper, blocked vents, or a defrost system that has let frost build into a slab across the coil. Almost none of that is a compressor problem, which is the expensive fear. Check the vents and listen for the fan before assuming anything worse.
Why is my refrigerator running constantly but not cooling?
A refrigerator that runs without getting cold is usually failing to reject heat rather than failing to make cold. The compressor squeezes refrigerant and the condenser coils dump that heat into the room, so anything that stops the coils from shedding heat, a dust blanket, a dead condenser fan, a wall pressed against the back, a hot enclosed cabinet, makes the machine run longer and longer for less and less result. A door that is not sealing or a fridge packed so tightly that air cannot circulate produces the same picture. Clean the coils, confirm the fan spins, give the machine clearance, and check the gaskets before considering anything that needs a technician.
How can I tell whether the defrost system is the problem?
The signature is a fridge that goes warm while the freezer stays cold, usually developing over several days rather than overnight, often with the sound of the fan being unusually loud or absent. Empty the freezer and look at the back wall, and if the panel is cold to the touch or you can see frost banked around its edges, that is worth pursuing. The confirming test is a full manual defrost: unplug the machine, leave both doors open with towels down for a day or so, then plug it back in. If cooling returns normally and then fails again in the same way a week or two later, the defrost heater, the defrost thermostat, the timer or the control board is not clearing frost on schedule.
Is the food still safe if the refrigerator was warm overnight?
Handle this by time and temperature, never by smell or appearance, because the organisms that cause foodborne illness do not reliably change how food looks or smells. The commonly cited rule is that perishable items held above roughly 40 degrees Fahrenheit for more than about two hours should be discarded, and an overnight failure is far longer than that. A freezer helps you here: a full, unopened freezer holds safe temperatures considerably longer than a half empty one, and food still containing ice crystals can generally be refrozen. Because guidance is set by public health authorities and can be updated, confirm the current rule with your national or local food safety authority rather than relying on any article, and when a specific item is in doubt, throw it out.
Can I fix a refrigerator that is not cooling myself?
A large share of these faults are within reach of a household with a screwdriver, a coil brush and an afternoon. Checking the outlet and breaker, exiting a showroom or demo mode, correcting a temperature setting, cleaning the condenser coils, clearing blocked vents, unpacking a stuffed compartment, replacing a door gasket and running a manual defrost are all genuinely do-it-yourself jobs. Fan motors and defrost components sit one step up and are doable with patience, the right part number and the power disconnected. Anything involving the refrigerant circuit is not a home job at all, because handling refrigerant is regulated, certified work in most places and the tools are not household tools.
How much does it cost to fix a refrigerator that is not cooling?
Treat every figure here as an illustrative planning range rather than a quote, since parts, access and local labor rates move them a long way. A diagnostic visit commonly runs somewhere around 80 to 150 dollars and is often credited against the repair. A door gasket or a condenser fan motor tends to land in the low hundreds, an evaporator fan motor similarly, and a defrost heater or thermostat around 250 dollars fitted. A main control board is commonly quoted near 400 dollars. Sealed system work, meaning a refrigerant leak or a failed compressor, starts high and frequently approaches the price of a new machine, which is why it is the classic replacement trigger.
How long should a refrigerator take to get cold again after a fix?
Longer than most people expect, which causes a lot of premature panic and a lot of unnecessary second call-outs. A refrigerator that has been fully warmed through, defrosted or newly installed needs roughly a day to pull the cabinet, the shelving and the food down to a stable temperature, and opening the doors repeatedly to check resets the clock a little each time. Put a thermometer inside, close the doors, and read it after several hours rather than watching it. If it is heading in the right direction at hour six and stable near the target the next morning, the repair worked.
Is it worth repairing a refrigerator that has stopped cooling?
Use two tests together. The first is the 50 percent rule: if a quote exceeds roughly half the price of a comparable new machine, replacement usually wins. The second is age, because the commonly cited planning window for a full size refrigerator is about 10 to 15 years, so the same repair buys most of a decade at year three and a year or two at year twelve. A 250 dollar defrost repair on an eight-year-old machine is straightforward value against an illustrative 1,200 dollar replacement. A sealed system quote on a machine past year ten almost always points the other way, and that is before you count the risk of the next failure.