
What's on this page
- What builds up inside a refrigerator
- Signs your refrigerator is due for a clean
- Before you start: what you need and how long it takes
- Step 1: Empty the refrigerator and triage the food
- Step 2: Pull out the shelves, drawers, and door bins
- Step 3: Wash the shelves and drawers in the sink
- Step 4: Wipe the interior surfaces and the door gasket
- Step 5: Clear the drain hole and empty the drip pan
- Step 6: Unplug and clean the condenser coils
- Step 7: Reload, deodorize, and set a cleaning schedule
- Cleaning the water and ice system
- What not to use on a refrigerator interior
- Odour control that actually works
- How often to clean a refrigerator
- Why clean coils show up in your running cost
- A worked example: one Saturday morning refrigerator reset
- Common mistakes when cleaning a refrigerator
- Troubleshooting: harder refrigerator cleaning calls
- Your refrigerator cleaning checklist
- The bottom line
A refrigerator is the only appliance in the house that runs every hour of every day for a decade or more, and it is the one we clean least. Nothing inside it ever gets hot enough to sterilise, nothing rinses it, and the door opens dozens of times a day, so it quietly accumulates a very specific set of problems: sticky rings where a jar leaked, produce liquid pooled under the crisper drawers, a grey film in the folds of the door gasket, a plugged drain hole with water backing up behind it, and a blanket of dust on the coils at the back that the appliance depends on to shed heat. None of that announces itself. It shows up later as a smell you cannot locate, a puddle you cannot explain, and a compressor that runs longer than it should.
These test notes give you a seven-step method for how to clean a refrigerator properly, covering the parts most cleaning routines skip: the gasket, the drain hole, the drip pan, the coils, and the water and ice system. Every step uses ordinary kitchen supplies, and the whole job runs about two hours with most of that spent waiting on parts to dry. For what the appliance costs to keep running, see our refrigerator running-cost report, and for how long you should expect it to last, our refrigerator lifespan report. Set your electricity rate and household size in the cleaning-schedule planner as you read, and it will size the intervals to your home.
Key takeaways
- The whole job is seven steps: empty and triage the food, pull the shelves and bins, wash them in the sink, wipe the interior and the gasket, clear the drain hole and drip pan, unplug and clean the condenser coils, then reload, deodorize, and set a schedule.
- Let cold glass shelves warm to room temperature before they meet warm water, because thermal shock can crack tempered glass in your hands.
- The drain hole and the drip pan are the two places a stubborn smell hides, and almost every quick clean skips both.
- Unplug the refrigerator before you touch the coils or move it, and never mix cleaning products, since bleach with ammonia or with an acid releases harmful gases.
- Deep clean about every three to four months, wipe weekly, and clean the coils about yearly, or twice a year with shedding pets.
What builds up inside a refrigerator
Before you start scrubbing, it helps to know what you are actually removing, because a refrigerator collects several different kinds of mess and each one needs a different move. A dried juice ring wants soaking time. A dusty coil wants a vacuum and a brush. A gasket wants fingers in the folds. Nothing in that list is solved by wiping the shelves harder, which is why so many refrigerator cleans leave the smell behind. The stacked bar below shows an illustrative breakdown of where the trouble concentrates in a neglected home refrigerator, so you can see why the steps are ordered the way they are.
Where the mess is in a neglected refrigerator
An illustrative split of the grime that builds up in a home refrigerator that has not been deep cleaned in a year. Segments sum to 100 percent. Your mix varies by household.
Spills and residue are the biggest visible slice, but coil dust is the largest slice you cannot see from the front, and the drain and pan are the smallest slice that causes the most complaints. Splits are illustrative and shift by home.
The shape of that split explains the whole method. Spills and dried residue are the largest slice and the easiest to reach, which is why steps one through four handle them and why most people stop there. Coil and vent dust is the second largest slice and it is entirely invisible from the front of the appliance, sitting at the back or behind a bottom grille, which is why it goes untouched for years. The gasket slice is small in volume but large in consequence, because a dirty or deformed gasket lets warm air in and makes the compressor work harder. And the smallest slice on the chart, the drain and pan sludge, is the one behind the majority of “my fridge smells and I cannot find why” complaints. Keep that ranking in mind as you work, because it tells you where the payoff is.
Signs your refrigerator is due for a clean
A refrigerator rarely tells you politely that it needs attention. It gives you symptoms, and reading them correctly saves you from cleaning the wrong thing. The most common signal is a smell that greets you when you open the door and that does not go away after you throw out the obvious culprit. That pattern almost always means liquid has escaped somewhere out of sight: under a drawer, into the drain channel, or into a gasket fold. A second signal is condensation or a thin sheen of water on the interior back wall or under the crisper drawers, which points at a blocked defrost drain rather than a temperature problem.
Sticky shelves are the third signal, and they are worth acting on quickly because dried sugar syrup bonds to glass and plastic far harder after a week than it does on day one. A fourth is produce that turns faster than it used to, which often traces back to a crisper drawer whose humidity slider is buried under debris or whose seal is fouled. And the fifth, which almost nobody connects to cleaning, is a refrigerator that seems to run constantly or feels hot at the back or sides. That can be a failing component, but it is very often a condenser blanketed in dust and a gasket that no longer seals, both of which are cleaning jobs rather than repair jobs.
There is also a simple test for the gasket that costs nothing. Close the door on a slip of paper or a banknote and pull. If it slides out with almost no resistance, the gasket is either dirty, compressed, or torn at that point, and cleaning it is the first thing to try before assuming it needs replacing. Run that test at three or four spots around the door, because gaskets rarely fail evenly. If your unit is showing several of these signals at once, it is not necessarily failing, it is overdue. For how these symptoms relate to actual replacement decisions, see our refrigerator lifespan report.
Before you start: what you need and how long it takes
This is a beginner-level job with one genuine hazard, which is the electrical work at the back, and one genuine way to break something expensive, which is thermal shock on cold glass. Neither is hard to avoid. Plan on about two hours from start to finish for a full deep clean including the coils, of which maybe seventy minutes is hands-on and the rest is parts drying. If you are only doing the interior and skipping the coils and drip pan, you can be done in about ninety minutes. Pick a morning when the refrigerator is relatively empty, ideally the day before a grocery run, because less food to move is less work and less risk.
Gather the kit before you open the door, so you are not hunting for a cloth with a counter full of cold food.
- A cooler with ice packs, or a second refrigerator, to hold the perishables while you work. This is the item people skip and regret.
- Warm water, dish soap, and baking soda, which between them handle almost everything inside a refrigerator without touching a specialist product.
- Two or three microfiber cloths and a soft sponge, plus a soft brush or old toothbrush for gasket folds and drawer runners.
- A vacuum with a crevice tool and a long flexible coil brush, for the condenser. A narrow brush is what reaches between the fins.
- A turkey baster or squeeze bottle and a soft flexible tool, such as a pipe cleaner, for flushing the drain hole.
- Your appliance manual, or the model number to look it up, since it tells you where the drain, the pan, and the coils are on your specific unit and which cleaners are permitted on your interior.
Two ground rules. First, unplug the refrigerator before you touch anything at the back or underneath, and do not plug it back in until the coil area is dry and the grille is refitted. Second, never combine cleaning products in the cabinet or anywhere else: bleach mixed with ammonia or with an acid such as vinegar releases harmful gases, so if you use any product beyond soapy water, use it alone and ventilate. With the kit assembled, start with the part that decides how long the rest takes.
Step 1: Empty the refrigerator and triage the food
The first step is not cleaning, it is clearing, and doing it deliberately is what turns a four-hour ordeal into a two-hour job. Take everything out, shelf by shelf, and move it straight into the cooler with ice packs rather than onto the counter. Working shelf by shelf rather than grabbing armfuls keeps you organised and gives you a natural moment to look at each item. Anything visibly spoiled, leaking, furred, or long past a date goes directly into the bin, not back into the cooler. Anything in an unlabelled container you cannot confidently identify goes with it, because the point of this step is to stop carrying the problem forward.
Use the emptying as an inventory. Most households discover two or three duplicate condiments, a jar of something bought for one recipe eighteen months ago, and a drawer of produce that turned quietly at the back. Consolidating those is half of why the refrigerator looks better afterward. Group what you are keeping in the cooler by where it will go back, so reloading later is a two-minute job instead of another round of decisions.
Watch out for the food safety part, because this is the one place in the job where haste has real consequences. Perishable food that has been held above a safe refrigerator temperature for an extended period should be discarded rather than tasted or risked, and food safety authorities publish the current temperature and time thresholds if you want a specific number to work to. Do not judge by smell alone. If the cooler is not cold or the job is running long, put the perishables back in the refrigerator temporarily and clean in two halves rather than leaving them out. An illustrative rule that works in practice: if you cannot keep it properly cold, do not start.
Step 2: Pull out the shelves, drawers, and door bins
With the cabinet empty, take out every removable part. Shelves usually lift slightly and then pull forward off their supports, drawers often need a tilt at the end of their travel or a squeeze on a release tab, and door bins commonly slide upward out of their rails rather than pulling straight out. If anything resists, stop and check the manual rather than forcing it, because plastic rails and glass shelf frames both break at exactly the moment you decide to be firm about it. Take a photo on your phone before you start pulling things, so reassembly is not a puzzle later.
This is also the point at which the single most expensive mistake in the whole job becomes possible, so it is worth being blunt about it. Glass shelves in a refrigerator have been sitting at close to freezing for months. Warm or hot water hitting cold tempered glass can cause thermal shock and crack or shatter it, sometimes while you are holding it. Lay the glass shelves flat on a towel on the counter and leave them for fifteen to twenty minutes to come up toward room temperature before any water touches them. Use that waiting time to do the interior wipe in step four, and the delay costs you nothing.
Sort what you have removed into two piles: parts that go in the sink and parts that get wiped in place. Glass shelves, plastic drawers, and door bins go to the sink. Anything with a metal frame that traps water, anything with electronics, and any shelf your manual says is not dishwasher or immersion safe stays out of the water and gets a damp cloth instead. Check the drawer runners and the shelf supports while everything is out, because dried spills collect exactly there and they are impossible to reach when the parts are in.
Watch out for one detail that costs people an afternoon: a small number of shelf and drawer designs are handed or keyed to a specific slot, and putting them back one position off means a drawer that binds or a door that will not close. The phone photo solves this entirely.
Step 3: Wash the shelves and drawers in the sink
Once the glass has warmed, fill a sink with warm, not hot, water and a squirt of dish soap. Warm is deliberate: it is enough to soften dried spills without pushing the thermal shock risk, and it is comfortable to keep your hands in for the ten minutes this takes. Wash the plastic drawers and bins first, since they are the least fragile and they let you get into a rhythm. A soft sponge handles most of it; a soft brush or old toothbrush gets into the corner radii, the underside lips, and the runner channels where sticky residue concentrates and where a sponge simply skates over the top.
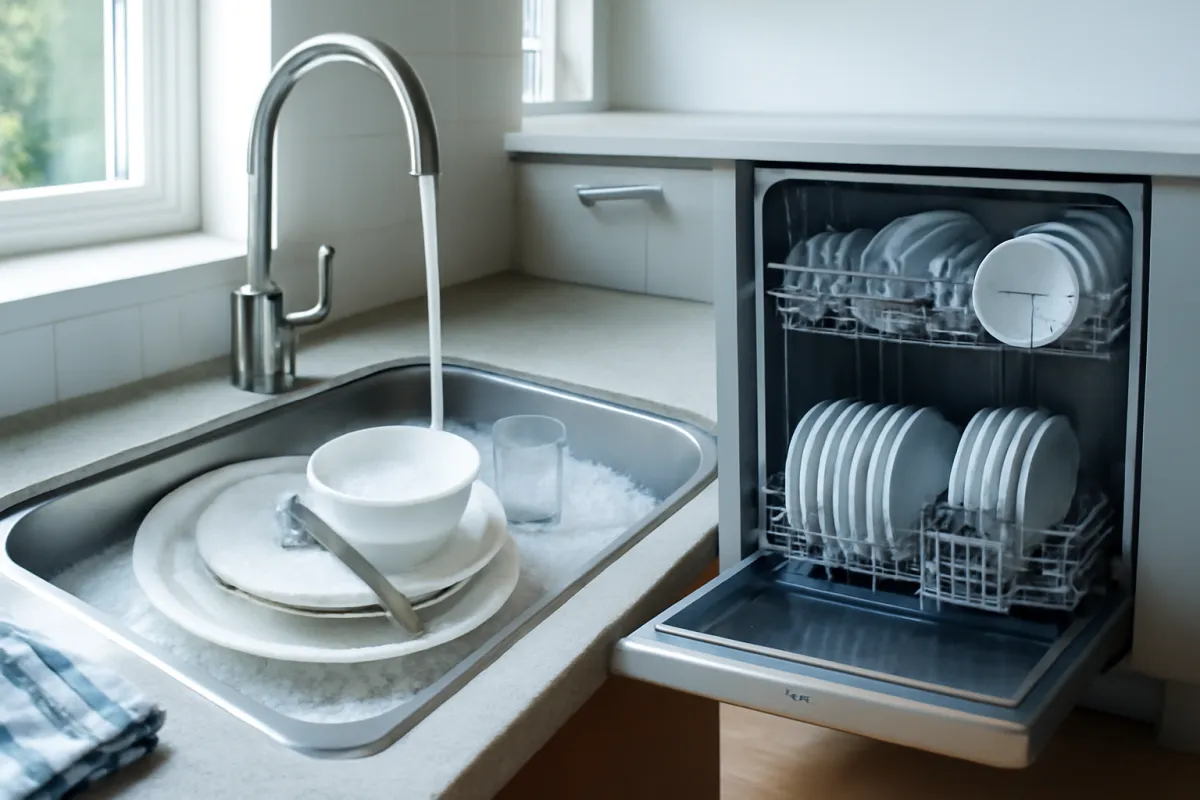
For dried-on spills that will not lift, do not reach for an abrasive pad. Lay a warm, wet cloth over the spot and leave it for ten minutes, then try again, and repeat if needed. Soaking beats scrubbing on refrigerator plastics every time, because scouring pads leave micro-scratches that then trap residue and stain faster than the smooth surface ever did, which is how a shelf goes permanently cloudy. For anything genuinely stubborn, a paste of baking soda and a little water applied with a soft cloth gives you mild abrasion without the scratching. Rinse everything in clean water afterward so no soap film is left to transfer to food.
Drying is not optional and it is where most people lose time. Put every washed part on a towel and dry it thoroughly, then leave it another ten minutes in open air. Any water left in a drawer channel or under a shelf frame goes straight back into the cold cabinet, where it becomes condensation, then frost, then a fresh smell. Do not put wet parts back.
Watch out for the dishwasher shortcut. Some refrigerator parts survive a top-rack cycle and some warp permanently in the heat, and the manual is the only reliable authority on which is which for your unit. Glass shelves with plastic or metal trim are the usual casualties. If you are unsure, wash by hand; it takes ten minutes and you cannot unwarp a shelf. For a related routine on a machine that does tolerate heat, see our dishwasher cleaning notes.
Step 4: Wipe the interior surfaces and the door gasket
With the parts soaking or drying, turn to the fixed interior, which is the liner, the walls, the ceiling, the back panel, and the shelf supports. Mix a mild solution: warm water with a little dish soap, or roughly a tablespoon of baking soda per litre of warm water, which is the classic refrigerator interior cleaner because it deodorises as it cleans without leaving a scent that transfers to food. Wipe from the top down so drips fall onto surfaces you have not done yet, and work into the corners and the moulded channels where the liner meets the shelf supports, because that is where liquid collects and sits.
The one place to be genuinely careful is what you put on those surfaces. Refrigerator liners are typically plastic, and abrasive cleaners, solvents, strong bleach solutions, and ammonia-based cleaners can dull, craze, or crack them. Check your appliance manual before using any solvent, bleach, or specialist cleaner on interior plastics, because the manual is the authority on your particular materials and using the wrong thing is not reversible. And whatever you decide to use, use one product on its own: never mix cleaning chemicals, because bleach combined with ammonia or with an acid such as vinegar releases harmful gases in an enclosed kitchen.
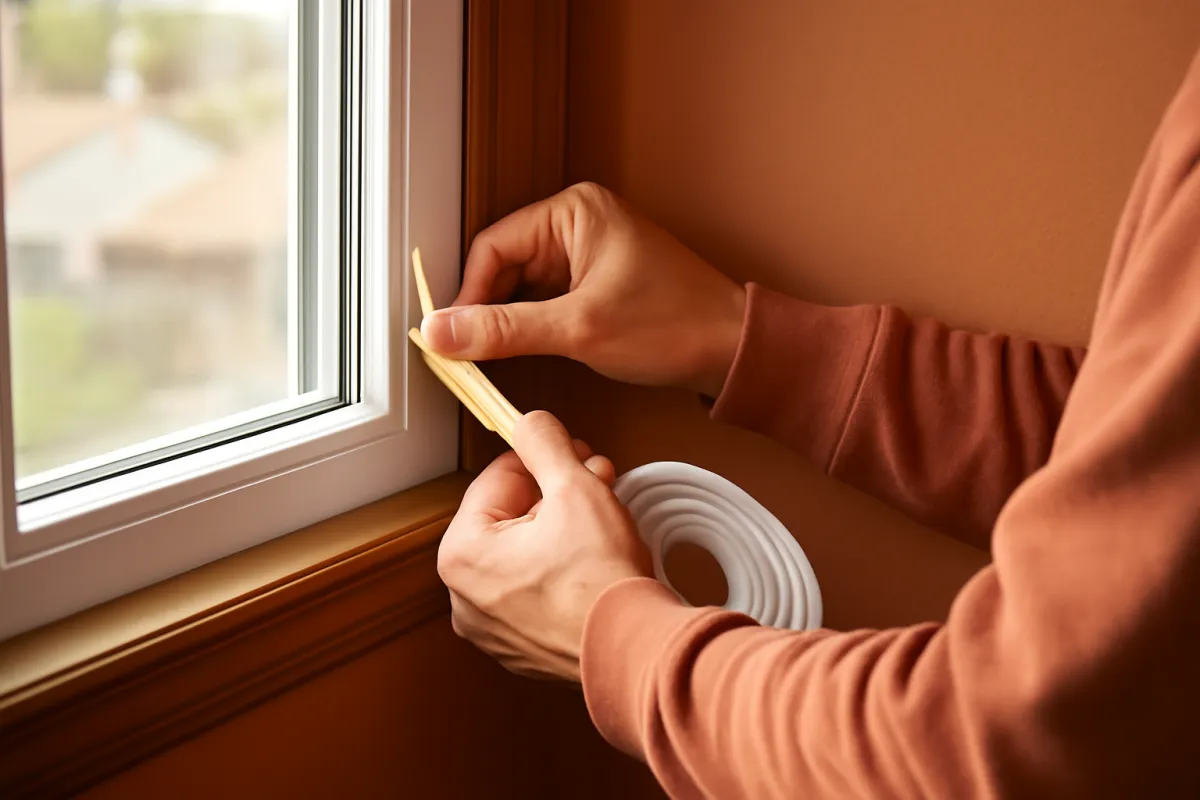
Then the gasket, which is the part almost every refrigerator clean skips. The rubber or vinyl seal around the door has folds and a channel that trap crumbs, sticky drips, and a grey film, and that grime is what stops the seal contacting the cabinet cleanly. Peel the folds back gently with your fingers and run a soft cloth dipped in warm soapy water through the channel all the way round, using a toothbrush on any mold spotting. Dry it thoroughly afterward. Do not stretch or pull hard on the gasket, and do not use petroleum products or harsh solvents on it, because both can degrade the material. Re-run the paper test after cleaning: if the paper still slides out freely at a spot, the seal itself is worn there rather than dirty, which is a small part replacement rather than a cleaning job.
Step 5: Clear the drain hole and empty the drip pan
This is the step that solves the smells nothing else touches, and it is the step that is missing from most refrigerator cleaning routines. Every frost-free refrigerator builds frost on its evaporator and melts it off on a cycle. That meltwater has to go somewhere, so it runs down the interior back wall into a small drain hole, through a tube, and into a shallow pan underneath the appliance where the heat from the compressor evaporates it. Food debris, mould, and ice all plug that drain, and when they do the water backs up into the cabinet, which is why you find a puddle under the crisper drawers.
Find the drain first. On most units it is a small opening low on the rear interior wall of the fresh food compartment, often under a lip or behind a shallow trough, and your manual will show its exact position. Pull the crisper drawers fully out to see it. Clear any visible debris, then flush it with warm water from a turkey baster or squeeze bottle. If it does not run away, work a soft flexible tool such as a pipe cleaner gently into the opening to break the plug, then flush again. Do not force a rigid wire or a metal skewer in hard, because there are refrigerant lines and components in that area and puncturing one turns a cleaning job into a replacement.
The drip pan is the other half of the same system. It sits underneath the unit, usually accessible by removing a snap-off grille at the base or from behind, and it collects everything the drain carries down, which over years means a shallow layer of sludge that smells exactly as bad as it sounds. Unplug the refrigerator first. Slide the pan out if your model allows, empty it, wash it in warm soapy water, dry it, and slide it back. Some units have a fixed pan that cannot be removed, in which case wipe out what you can reach with a cloth on a flexible handle and leave the rest alone rather than dismantling anything.
Watch out for the assumption that a puddle means a broken refrigerator. Nine times in ten it is this drain, and clearing it costs ten minutes. If you clear the drain and the water comes back, or ice keeps reforming at the same point, that is a defrost system issue rather than a cleaning one and it is worth a technician’s eyes.
Step 6: Unplug and clean the condenser coils
The coils are the part of a refrigerator that most affects what it costs to run, and the part virtually nobody cleans. The condenser is a grid or serpentine of tubing and fins that dumps the heat the appliance has pulled out of the cabinet into your kitchen. Depending on the unit, it sits on the back panel, or behind a removable grille at the bottom front, or in a compartment at the base reached from behind. When that grid is blanketed in dust, lint, and pet hair, it cannot shed heat efficiently, so the compressor runs longer cycles to reach the same interior temperature, and it runs hotter while doing it.
Start by unplugging the refrigerator at the wall. This is not a formality: you are about to put a brush and a vacuum nozzle near electrical components and a fan, and the fan on many models cycles on without warning. Once it is unplugged, remove the base grille if your unit has one, which usually snaps or unclips, or roll the refrigerator forward carefully if the coils are on the back. Roll it straight out on its wheels rather than walking it side to side, and take the water line into account if the unit is plumbed, because a taut line is easy to kink or pull.
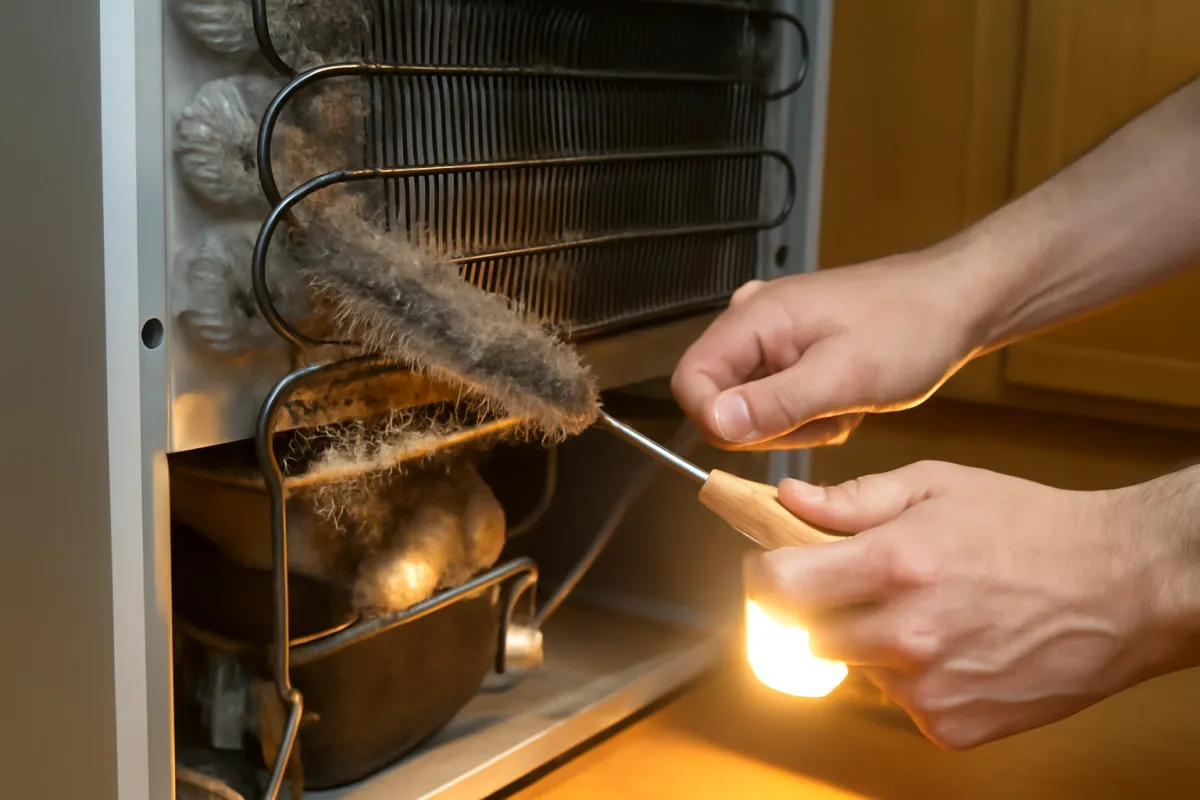
Brush before you vacuum. A long flexible coil brush pushed between the fins loosens the packed dust that a vacuum nozzle alone will just skim over, and then a crevice tool picks the loosened material up. Work in one direction along the fins rather than across them, since fins bend easily and bent fins restrict airflow, which is the opposite of what you came to do. Clear the fan grille and the floor of the compartment while you are in there, since that is where the heaviest lint settles. When you are finished, refit the grille, push the unit back, check the water line is not kinked, and only then plug it back in.
Watch out for how often you need to do this. About once a year suits a typical household. Shedding pets, carpet nearby, or a unit in a dusty utility space push that to about every six months. For how coil condition connects to the number on your bill, see our refrigerator running-cost report, and set your rate in the cleaning-schedule planner to see an illustrative figure for your own inputs.
Step 7: Reload, deodorize, and set a cleaning schedule
Refit the dry shelves, drawers, and bins in the positions your phone photo recorded, checking that each one seats properly and that the drawers run freely. Then reload the food deliberately rather than by grabbing handfuls out of the cooler, because how you put it back determines how dirty the cabinet gets before the next clean. Raw meat and anything that can leak goes on the lowest shelf, in a sealed container or on a tray, so nothing can drip onto food below. Liquids get lids. Produce goes in the crisper drawers rather than loose on shelves. Leftovers go in clear containers at eye level where you will actually see them before they turn.
Leave the door alone for a while and let the temperature recover before you judge anything. A refrigerator that has stood open for an hour needs time to pull back down, and this is a bad moment to start adjusting the thermostat. If your unit has a temperature display, check it a few hours later rather than a few minutes later. If it has an internal thermometer, put it back in and watch it over the day.
For odour, the honest answer is that removing the source is the fix and everything else is maintenance. An open container of baking soda on a shelf will absorb some ambient odour and is worth having, but it will not overcome an active source in the drain or the pan, which is why it is step seven and not step one. Replace it every couple of months, because used baking soda has no capacity left. Activated charcoal works on the same principle and lasts longer. Avoid scented sprays inside the cabinet: fragrance transfers into butter, milk, and anything else with fat in it, and you end up tasting your air freshener.
Then set the schedule, because the seven steps only pay off on a rhythm. Attach the weekly wipe to a day you already do chores, put the quarterly deep clean on a calendar tied to season changes so it never drifts, and set an annual reminder for the coils. Feed your household size and rate into the cleaning-schedule planner for a starting set of intervals.
Cleaning the water and ice system
If your refrigerator dispenses water or makes ice, that system needs its own attention and it is not covered by anything in the seven steps above. Start with the water filter, which is the single highest-value item. Most manufacturers specify a replacement interval measured in months or in gallons, and your manual or the indicator light on the unit is the authority on yours. A filter left in past its interval stops being a filter and starts being a place where sediment sits in your drinking water path. Note the date you changed it somewhere you will find again, because the indicator lights on many units are timers rather than measurements.
The ice bin is the part people are most surprised by. Ice absorbs odours from the freezer compartment, so a bin of old cubes in a refrigerator that has had a smell problem holds that smell and hands it to every drink. Empty the bin completely, wash it in warm soapy water, dry it thoroughly, and discard the first batch of ice the machine makes afterward. Do this whenever you deep clean, and immediately after resolving any odour issue, because there is no point cleaning the cabinet and leaving the smell in the ice.
The dispenser nozzle and the drip tray on the door collect a surprising amount: mineral scale from the water, and a slimy film where spilled milk or juice has run down from a glass. Wipe the nozzle with a soft cloth and clean the tray properly, since the tray is often removable and almost never removed. If your dispenser has a grille over the tray, lift it out and wash it too. For hard-water scale on the nozzle, a soft cloth and patience beat any tool that could scratch the finish.
Watch out for one thing when the refrigerator has been unplugged or the water shut off: run several glasses of water through the dispenser afterward to flush the line, and discard the first ice batch. Water that has sat still in a warm line is not water you want in a drink.
What not to use on a refrigerator interior
The list of things that clean a refrigerator well is short, and the list of things that damage one is longer than people expect. Abrasive powders and scouring pads come first, because refrigerator liners and shelf plastics scratch easily and a scratched surface stains faster and holds odour better than the smooth one it replaced. That damage is permanent and cumulative, so the shelf you scoured this year is the shelf that looks cloudy next year no matter how well you clean it.
Solvent cleaners are second. Anything containing acetone, strong alcohol, or aggressive degreasers can craze or soften interior plastics, and the effect often does not show up until days later as a network of fine cracks. Ammonia-based glass cleaners are in the same category, and they also leave a smell that lingers in an enclosed cabinet. Bleach is not generally necessary inside a refrigerator, and where people do use it they frequently use it far too strong. Check your appliance manual before applying any of these to interior surfaces, because the manual is the only source that knows your specific materials.
The rule that matters most is not about damage to the appliance, it is about you: never mix cleaning products. Bleach with ammonia releases chloramine gas, and bleach with an acid such as vinegar releases chlorine gas, both of which are genuinely harmful to breathe, and both of which are easy to create accidentally by using one product and then another on the same surface. If you use anything beyond soapy water, use it alone, rinse the surface with clean water before applying anything else, and ventilate the kitchen.
For the outside of the appliance the rules change again, particularly on stainless steel, where wiping across the grain and using the wrong product leaves marks that are hard to remove. Our stainless steel cleaning notes cover the exterior in detail. Inside, warm water with dish soap or baking soda does ninety percent of the work, and a mild dilute vinegar solution handles most of the rest if your manual permits it.
Odour control that actually works
Odour in a refrigerator is a source problem wearing a disguise. The smell you notice is almost never coming from the surface you can see, which is why wiping the shelves and then adding a deodoriser so often fails. Work the sources in order of likelihood. First, spoiled food, including the item pushed to the back of a shelf and the bag of produce liquefying at the bottom of a crisper drawer. Second, spilled liquid that has run under a drawer or into the trough where the drawers sit, which is invisible until you pull the drawers all the way out. Third, the drain hole and the drip pan, which is the source people almost never find. Fourth, the gasket folds. Fifth, the ice bin, which stores the smell after you have fixed the cause.
Only once all five are clear does an absorber earn its keep. Baking soda works by adsorbing ambient odour molecules, and an open box or a shallow dish of it on a middle shelf is worth having permanently, replaced every couple of months since it saturates. Activated charcoal does the same job with more capacity and a longer service life. Freshly ground coffee, crumpled newspaper, and a cut lemon all appear in home remedies, and while they can mask or partly absorb, none of them removes a source and coffee in particular adds its own strong scent to an enclosed space.
For a smell that has soaked into the plastic liner itself, which happens after something has been left rotting for weeks, the approach is time rather than chemistry. Clean the interior thoroughly with a baking soda solution, then leave a generous open container of baking soda or activated charcoal inside with the doors closed and the unit running, and give it several days. Repeat if needed. If the unit is empty and off, leaving the doors propped open in a ventilated room does the same job faster, though only do that if the appliance is not in use and there is no risk of a child climbing in.
Avoid scented sprays and gels inside the cabinet entirely. Fat absorbs fragrance readily, so butter, cream, cheese, and milk pick it up and hand it back to you at breakfast. The fix for a refrigerator that smells is to find what is causing it, not to cover it.
How often to clean a refrigerator
The right interval is not one number, it is five, because the jobs build up at very different rates. A spill needs attention the day it happens. Coil dust takes a year to matter. Treating all of it as a single quarterly event means either doing the fast jobs too rarely or the slow jobs pointlessly often. The chart below breaks the seven steps down by how long each one actually takes in a typical deep clean, which is the honest picture of where your two hours goes and which parts you can compress when you are short on time.
Where the time goes in a refrigerator deep clean
Illustrative minutes per step for a full deep clean including coils, totalling about two hours. Bars scale with minutes. Your times vary with cabinet size and how overdue the job is.
Washing and drying the removable parts is the longest single block, which is why warming the glass and starting the soak early pays off. The drain and pan take the least time and prevent the most complaints. Minutes are illustrative.
Turn that into a calendar with five entries. Wipe spills the day they happen, which is a ten-second job that saves a ten-minute one. Do a weekly sweep: pull anything spoiled, wipe the shelf you use most, and glance in the crisper drawers. Deep clean the full seven steps about every three to four months, and pull it forward if something has leaked. Clean the coils about annually, or every six months with shedding pets, and check the drip pan at the same time. Change the water filter on the interval your manual specifies rather than when the light says so, and put that date in your phone. Set your household size in the cleaning-schedule planner and it will size the weekly and quarterly intervals to how hard your refrigerator actually works.
Why clean coils show up in your running cost
The refrigerator is unusual among household appliances because it never stops. It has no idle mode in the way an oven or a washing machine does, so anything that makes it work slightly harder makes it work harder for every hour of every day for a decade. That is why the coil step, which feels like the most optional part of this list, is arguably the one with the longest payoff.
The mechanism is straightforward. A refrigerator does not create cold, it moves heat: the compressor pumps refrigerant that absorbs heat inside the cabinet and releases it at the condenser coils outside. If the coils are insulated by a layer of dust and pet hair, that heat leaves more slowly, the refrigerant returns warmer, and the compressor runs longer cycles to reach the same set temperature. Coil cleaning is commonly cited as one of the more worthwhile efficiency habits on a refrigerator for exactly this reason, and it also reduces the thermal load on the compressor, which is the component whose failure usually ends the appliance’s life.
What nobody can honestly give you is a precise percentage for your unit. The improvement depends on how dirty the coils were to begin with, how warm the room is, how old the appliance is, and how well the door seals. Anyone quoting you a firm saving figure for a refrigerator they have not measured is guessing. The sensible framing is that the job costs you twenty minutes and a vacuum, it definitely does not make things worse, and it addresses a mechanism that is real. Treat any number you see, including the illustrative figures in the planner on this site, as a planning estimate rather than a measurement.
The gasket sits in the same category. A door seal that no longer contacts cleanly lets warm, humid room air leak into a cabinet that is running constantly to stay cold, which means more run time and more frost. Cleaning the gasket is free and takes five minutes. For how these small factors add into the annual number, see our refrigerator running-cost report and our notes on lowering an electric bill.
A worked example: one Saturday morning refrigerator reset
Put the seven steps together on one illustrative morning so you can see how the timing actually flows. Picture a three-person household with a standard bottom-freezer refrigerator, one shedding cat, and a faint sour smell that has been there for a fortnight and survived two rounds of throwing things out. The coils have never been touched in four years of ownership. This is a full catch-up clean, which is the slowest version of the job.
The run starts at nine with the cooler already loaded with ice packs. Emptying and triage takes twenty minutes and produces a bin bag: two duplicate sauces, a bag of salad that has liquefied at the bottom of the left crisper drawer, and three unlabelled containers nobody can vouch for. That liquefied salad turns out to be part of the smell, but not all of it. The shelves and drawers come out over the next ten minutes, with the two glass shelves laid flat on a towel to warm up while the rest of the work continues, and a phone photo taken of the door bin positions first.
While the glass warms, the interior wipe runs: baking soda solution, top down, into every moulded channel, and then the gasket, where a soft cloth run through the folds lifts a grey film all the way around. That is twenty minutes. The drain hole comes next and is the real find: with the crisper drawers fully out, the small opening at the base of the rear wall is plugged, and there is standing water in the trough behind the drawers. A turkey baster of warm water and a pipe cleaner clears it in about six minutes, and the water finally runs away. The drip pan underneath, reached by unclipping the base grille after unplugging the unit, holds a shallow layer of sludge that explains the rest of the smell entirely.
With the unit already unplugged, the coils get done in the same trip: a coil brush between the fins, then a crevice tool, and roughly four years of cat hair and dust comes out in about twenty minutes. Meanwhile the shelves and drawers get their sink wash and go on towels to dry. By eleven, everything is dry, refitted, and reloaded with liquids in sealed containers and raw items on the bottom shelf, an open dish of baking soda on the middle shelf, and the ice bin emptied and washed. Total elapsed time is about two hours. None of these figures are measured on any specific appliance; they are an illustrative walkthrough, and your own cabinet size and backlog will change them. The value is the sequence, and the finding: the smell was in the drain and the pan, not on the shelves.
Common mistakes when cleaning a refrigerator
Most refrigerator cleaning goes wrong in a small number of predictable ways, and two of them can break something or hurt you rather than just wasting your time.
- Pouring hot water on cold glass shelves. Tempered glass that has been at refrigerator temperature for months can crack from thermal shock when warm water hits it, occasionally while you are holding it. Let the shelves sit out for fifteen to twenty minutes first, and use warm water rather than hot.
- Touching the coils without unplugging. The condenser area contains a fan that can cycle on without warning and live electrical connections. Unplug at the wall before the grille comes off, and leave it unplugged until everything is dry and refitted.
- Skipping the drain hole and the drip pan. These are the two places a persistent smell hides, and they are missing from almost every refrigerator cleaning routine. If you only add one thing to your usual clean, add these.
- Scrubbing with abrasives. Scouring pads and abrasive powders scratch refrigerator liners and shelf plastics permanently, and scratched surfaces then hold stains and odour better than they did before. Soak, then wipe. Use a baking soda paste when you need mild abrasion.
- Mixing cleaning products. Using a bleach product and then an ammonia or vinegar product on the same surface can produce harmful gas in an enclosed kitchen. One product at a time, rinsed between, with the window open.
- Putting wet parts back in. Water left in a drawer channel or under a shelf frame becomes condensation and then frost in a cold cabinet, and frost becomes the next smell. Dry everything and give it ten extra minutes.
- Leaving food out too long. The cooler exists for a reason. Perishables held above a safe refrigerator temperature for an extended period should be discarded rather than risked, so if the job is running long, put them back and clean in two sessions.
Clear those seven and you have removed the causes behind nearly every failed refrigerator clean, plus the two that cost real money.
Troubleshooting: harder refrigerator cleaning calls
The seven steps cover a routine deep clean, but some situations need judgment rather than a procedure. Here is how to think through the common ones.
What if the smell survives the full seven steps? Go back to the drain and the pan first, because a drain that flushed slowly rather than freely is still partly plugged and the trough behind the crisper drawers may still hold liquid. Then check the freezer side, which people forget entirely, and empty and wash the ice bin, since ice holds odour long after the cause is gone. If the cabinet itself has absorbed the smell, that is a time problem: clean with a baking soda solution, leave a generous open absorber inside with the unit running, and give it several days before judging.
What if the drain will not clear? Flush with warm water repeatedly rather than escalating to force, and if there is ice in the passage, warm water is what melts it. Do not push a rigid metal wire in hard, because refrigerant lines run in that area and a puncture is a repair that can exceed the value of an older unit. If the drain clears and then blocks again within weeks, or ice keeps reforming at the same spot, that is a defrost system fault rather than a dirt problem and it is worth a technician looking at it.
What if a glass shelf cracks while I am washing it? Stop, and treat it as broken glass rather than a cleaning setback: tempered glass fails into small pieces but they are still sharp. Do not run the refrigerator with a cracked shelf holding weight. Replacement shelves are usually available by model number, and this is exactly the failure that warming the glass first is meant to prevent.
What if I cannot find my coils or my drip pan? Both vary enormously by design. On many modern units the condenser is behind a base grille at the front rather than exposed on the back, and on some it is a sealed compartment reached only from behind. The manual, or the model number typed into a search, is the reliable route, and if neither shows you an access panel, that is a legitimate reason to leave it to a service visit rather than dismantling panels. Some drip pans are fixed and are not meant to be removed.
What if the refrigerator does not cool properly after I clean it? Give it several hours before concluding anything, since a cabinet that stood open needs time to recover. Then check the obvious: that the unit is actually plugged back in, that the base grille is refitted so airflow is right, that vents inside the cabinet are not blocked by food pushed against the back wall, and that the doors are closing fully. If it still runs warm after a day, that is beyond cleaning. Our appliance lifespan report covers how to weigh a repair against a replacement.
Your refrigerator cleaning checklist
Save this list and work it by interval rather than trying to do all of it at once. Clearing it keeps the cabinet fresh, the compressor cycling normally, and the smells from ever starting.
- The day it happens: wipe any spill immediately, before it dries onto glass or plastic.
- Weekly: pull anything spoiled, wipe the shelf you use most, check both crisper drawers, and glance at the door bins.
- Monthly: wipe the door gasket folds, wipe the interior of the door, and check the drain hole area behind the crisper drawers for standing water.
- Every three to four months: run the full seven steps, shelves out and washed, interior and gasket wiped, drain flushed, drip pan emptied.
- Every six to twelve months: unplug, clean the condenser coils and the fan grille, and wash the drip pan. Twice a year with shedding pets.
- On your manual’s interval: replace the water filter, and empty and wash the ice bin at every deep clean.
- Never: pour hot water on cold glass, touch the coils with the unit plugged in, use abrasives or solvents on the liner without checking the manual, or mix two cleaning products.
Set your household size and electricity rate in the cleaning-schedule planner to size these intervals to your home, then work the list one interval at a time. For the wider routine across every appliance in the house, see our appliance maintenance plan.
The bottom line
Cleaning a refrigerator well is not harder than cleaning any other appliance, it is just more complete than what most people do. Seven steps cover it: empty and triage the food into a cooler, pull the shelves and bins and let the glass warm before it meets water, wash the removable parts in warm soapy water and dry them fully, wipe the interior and work the gasket folds, clear the drain hole and empty the drip pan, unplug and clean the condenser coils, then reload deliberately and set a schedule. The two steps that separate a real clean from a wipe-down are the drain and the coils, and they are exactly the two that are missing from the routine most households have. Do the whole list about every three to four months, unplug before your hands go near the back, never mix cleaning products, and let your manual decide anything the label cannot. What you get back is a refrigerator that does not smell, does not puddle, and does not work harder than it has to for the next ten years.
A note from the bench: these test notes describe a general routine for deep cleaning a typical home refrigerator and are educational rather than professional advice, with every minute, interval, and dollar figure an illustrative planning number rather than a measurement taken from any one appliance. Your own manual outranks everything written here, particularly on where the drain, drip pan, and condenser sit on your model, which parts are safe to immerse or put through a dishwasher, and which cleaners are permitted on your interior surfaces. Several cautions hold regardless of model: unplug the unit at the wall before your hands go near the coils, the fan, or anything behind a grille, warm cold glass shelves before washing them, never combine cleaning products, since bleach with ammonia or with an acid releases harmful gases, and do not force rigid tools into a drain passage where refrigerant lines run. On food, err toward caution rather than curiosity, discard perishables that have been held above a safe refrigerator temperature for an extended period, and check current food safety guidance if you want specific thresholds. If a refrigerator still puddles, smells, or runs warm after a thorough clean, that is a fault rather than a dirt problem and it belongs with a qualified technician.
Frequently asked questions
How do I clean a refrigerator?
Work from the inside out in one continuous session. Empty the shelves into a cooler and triage what comes out, pull the shelves, drawers, and door bins, and let the glass ones warm up before they meet warm water. Wash the removable parts in a sink of warm soapy water, wipe the fixed interior walls and the door gasket with a mild soapy cloth, then clear the drain hole and empty the drip pan if your model gives you access. Finish by unplugging the unit and vacuuming the condenser coils, then reload the food, place a deodorizer, and set a schedule so the next clean is a wipe rather than a rescue. Budget about two hours for a full deep clean, most of which is washing and drying parts.
How often should you clean a refrigerator?
Match each job to how fast its mess builds up rather than doing everything at once. Wipe visible spills the day they happen and give the shelves and door bins a quick wipe about weekly, since that is what stops a small drip from becoming baked-on residue. Do a full deep clean, meaning shelves out and washed, walls wiped, gasket cleaned, roughly every three to four months, and pull the crisper drawers whenever produce has gone off in them. Clean the condenser coils about once a year, or more like every six months if you have shedding pets, and check the drip pan at the same time. Treat any interval as a starting point and shorten it if you see film, smell odour, or find frost building faster than usual.
Why does my refrigerator smell bad even after cleaning?
A smell that survives a wipe-down almost always has a source you have not reached yet. The usual suspects are the drain hole and the channel behind the crisper drawers, where spilled liquid pools out of sight, the folds of the door gasket, which sit outside anything you wipe casually, and the drip pan underneath the unit, which collects everything the drain carries away. Pull the drawers fully out and inspect the well they sit in, flush the drain hole, and check the gasket creases with a cloth. If the smell is still there after all of that, look at the freezer side and at anything absorbent nearby, because odour transfers into ice and into open food long after the original spill is gone.
Can I use bleach to clean the inside of a refrigerator?
Plain warm water with a little dish soap, or a mild baking soda solution, handles almost every job inside a refrigerator and is what most manufacturers point you toward. Bleach is generally not necessary and can be aggressive on interior plastics, seals, and stainless trim, so check your appliance manual before using any bleach, solvent, ammonia cleaner, or abrasive on interior surfaces, because the manual is the authority on your specific materials. The one non-negotiable rule is that you never mix cleaning products: bleach combined with ammonia or with an acid such as vinegar releases harmful gases. If you decide a disinfecting step is worth it in your household, use one product on its own, ventilate the kitchen, and rinse the surfaces with clean water afterward.
Do dirty condenser coils really cost you money?
The mechanism is real even though the exact figure is not something anyone can quote for your specific unit. Condenser coils shed the heat pulled out of the cabinet, and when they are blanketed in dust and pet hair they shed it less efficiently, so the compressor runs longer to hit the same interior temperature. Coil cleaning is commonly cited as one of the cheapest efficiency habits available on a refrigerator, and it also reduces heat stress on the compressor, which is the expensive part. What nobody can honestly tell you is a precise percentage, because it depends on how dirty the coils were, your kitchen temperature, and the age of the unit, so treat any specific saving number, including the illustrative ones in the planner on this site, as a planning estimate rather than a measurement.
What should I do with the food while I clean the fridge?
Move everything into a cooler with ice packs, or into a second refrigerator if you have one, before you start, because the job takes long enough that food sitting on a warm counter is a genuine risk rather than a theoretical one. Use the transfer as a triage moment: anything visibly spoiled, leaking, or long past a date goes straight in the bin, and anything you cannot identify goes with it. Perishable food that has been held above a safe refrigerator temperature for an extended period should be discarded rather than tasted or risked, and food safety authorities publish current temperature and time thresholds worth checking if you are unsure. The cooler also keeps the counter clear, which makes the actual cleaning faster.
Why is water pooling in the bottom of my refrigerator?
Water collecting under the crisper drawers or along the back floor of the fresh food compartment is the classic sign of a blocked defrost drain. Every frost-free refrigerator melts its evaporator frost on a cycle and routes the meltwater down a small drain hole to a pan underneath, where it evaporates, and when food debris or ice plugs that hole the water backs up into the cabinet instead. Clearing it is usually a matter of finding the hole, which is typically a small opening low on the rear interior wall, and flushing it gently with warm water and a soft flexible tool. If the drain runs clear and water still pools, or if you find ice repeatedly reforming in the same spot, that points to a defrost system issue worth having a technician look at rather than cleaning harder.
How do I keep a refrigerator clean between deep cleans?
Three habits do most of the work. Wipe spills the day they happen, because a fresh drip takes ten seconds and a dried one takes a scrub pad and a lot of patience. Store liquids and anything that can leak in sealed containers or on a washable liner, and put raw items on the lowest shelf so nothing drips onto food below. Do a two-minute Sunday sweep where you pull anything spoiled, wipe the shelf you use most, and check the crisper drawers for produce that has turned. Do those three and the quarterly deep clean stops being a rescue mission and becomes a routine tidy that takes half as long.