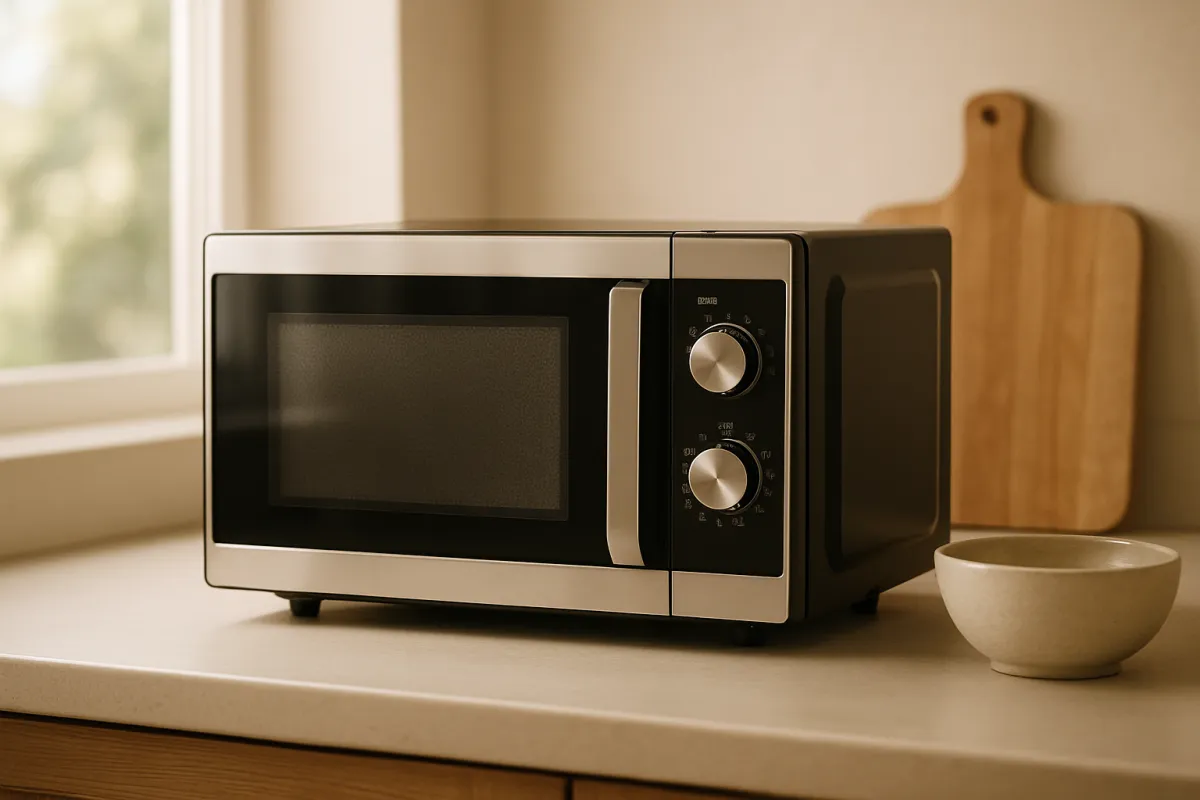
What's on this page
- What a microwave actually has to do in your kitchen
- Before you start: what to measure and what to know
- Step 1: Decide the mounting type before anything else
- Step 2: Measure the space, the door swing and the clearances
- Step 3: Size the capacity from what you actually heat
- Step 4: Read the wattage and what it means for cooking time
- Step 5: Decide which cooking features earn their keep
- Step 6: Check the details that annoy people daily
- Step 7: Plan the installation, the venting and the clearance
- Over-the-range venting: ducted against recirculating
- Inverter power delivery and what it changes
- Sensor cooking, convection and combination ovens
- Microwave safety: the rules that are not optional
- What a microwave costs to run
- A worked example: choosing for a small galley kitchen
- Common mistakes when choosing a microwave
- Troubleshooting the decision when it will not resolve
- Choosing for a rental, a dorm or a very small kitchen
- Reading a microwave spec sheet without getting lost
- How long a microwave lasts and when to replace one
- Your microwave choosing checklist
- The bottom line
A microwave is the appliance people put the least thought into and use the most, which is exactly why so many kitchens contain one that is slightly wrong. It is too small for a dinner plate, or it swings its door into the corner it was pushed against, or it took the counter space that the kettle and the toaster were already fighting over, or it replaced a range hood and now the kitchen fills with steam every time a pot boils. None of that shows up in a spec comparison. It shows up on the third day, and then for the next nine years.
These test notes give you a seven-step method for how to choose a microwave, in the order the decisions actually constrain each other. The first step is the one most buyers skip, because the mounting type quietly decides your size range, your budget, your installation, and in one case whether your kitchen has working ventilation at all. For where a microwave sits among the rest of the kitchen’s running costs, see our appliance wattage and running-cost reference, and for how long you should expect one to last, our appliance lifespan report. Set your household size, cooking style and wattage in the microwave sizing planner as you read and it will size the decision to your kitchen.
Key takeaways
- Decide the mounting type first: countertop, over-the-range, built-in or drawer. It sets the size range, the price band and the installation work before any other choice is available to you.
- An over-the-range unit is also your kitchen's ventilation, and recirculating venting returns heat and moisture to the room, so it does far less than ducting outside.
- Capacity in cubic feet describes the box, not what fits. The turntable diameter and cavity width are what decide whether your dinner plate turns.
- Wattage on the box is cooking output power, not wall draw, and time scales roughly inversely with it: about 90 seconds at 1,000 watts becomes about 150 at 600.
- Never run a microwave empty, keep metal and sealed containers out, treat superheated water as a real hazard, and never open the case, because the high-voltage capacitor can hold a dangerous charge after unplugging.
What a microwave actually has to do in your kitchen
Before comparing anything, be honest about the job. Microwave marketing is built around cooking, with preset buttons for baked potatoes and pizza and popcorn, but that is not where the minutes go in most households. The overwhelming majority of a home microwave’s working life is spent reheating things that were already cooked, warming drinks, and defrosting. The chart below shows an illustrative split of where the minutes land in a typical household, and it explains why the feature list on the box is a poor guide to what you should pay for.
Where a home microwave's minutes actually go
An illustrative split of typical household use across a year. Segments sum to 100 percent. Your own mix shifts with how much you cook from scratch.
Reheating dominates, which is why turntable size, door swing and how fast you can start a 30 second job matter more day to day than the preset menu. Splits are illustrative and vary by household.
Read that shape and the priorities reorder themselves. If more than half your use is reheating a plate, the plate has to fit and turn, so cavity dimensions outrank cubic feet. If a further fifth is defrosting and softening, how the oven delivers reduced power matters more than its peak power. And if only about a tenth is genuine cooking, the convection mode and the twelve preset buttons are competing for money that would be better spent on a cavity that fits your dishes and a door that opens the right way. That is the whole argument of these test notes in one chart.
Before you start: what to measure and what to know
This is a shopping decision rather than a build, so the preparation is measurement and honesty rather than tools. Twenty minutes with a tape measure changes which units are even on your list, and it is the step that prevents the two expensive outcomes: a unit that does not physically fit, and a unit that fits but blocks something.
Gather these before you look at a single product page.
- The space, measured three ways. Width, height and depth of the opening or the counter run, plus the depth again including the door handle, which sticks out beyond the case.
- The door swing arc. Stand where the microwave will live, open an imaginary door to the left, and see what it hits. Most microwave doors hinge on the left.
- The dish you reheat most. Measure your dinner plate across, and measure your largest casserole dish on both sides. These two numbers do more work than any spec.
- The clearances the manual requires. Every unit states minimum free space at the top, sides and back for its vents. They vary by model, and they are not decorative.
- What is above the cooktop now, if you are considering an over-the-range unit: a hood, a cabinet, a duct going somewhere, or nothing.
- The circuit. Kitchen counter circuits are commonly shared. Know what else is on the one you will plug into, because a microwave is a large intermittent load.
- Your electricity rate, from an actual bill, if you want the running-cost arithmetic later to mean anything. Our notes on lowering an electric bill cover where to find it.
Time to work through the whole decision properly is about an hour, and none of it is difficult. Two ground rules before you start. The manual for any unit you are seriously considering is downloadable before you buy, and it contains the clearance and installation requirements that the product page omits. And for anything that is not a countertop unit, the installation is part of the decision rather than an afterthought, because it is where the cost and the constraints live.
Step 1: Decide the mounting type before anything else
Everything downstream is set by this. Capacity ranges, price bands, installation work, ventilation, even how you physically get a hot bowl out are all consequences of where the unit lives, so choosing the type first collapses a confusing field into a manageable one.
Countertop is the default and the simplest. No installation, no trim kit, no professional, and if it dies in six years you unplug it and put another one down. The full size range lives here, from compact units for drinks and bowls up to large full-size cavities. The cost is counter space, and in a small kitchen that is not a small cost: a full-size countertop microwave claims a substantial patch of the most contested surface in the house.
Over-the-range mounts above the cooktop in place of a range hood, which frees the counter and gives the appliance a second job, ventilation. That second job is the whole story of this category and it gets its own section below. These are typically built to a standard 30 inch width to match a standard range, and their capacity sits in the full-size band even though the cavity is shallower than the case suggests.
Built-in means a unit fitted into cabinetry or a wall using a manufacturer trim kit. It looks the tidiest, it frees the counter without taking the cooktop’s ventilation, and it is the least forgiving choice because the trim kit is model-specific and provides the airflow path around the unit. Replacing one years later can mean the new model does not suit the old opening.
Microwave drawers install below the counter and open downward like a drawer. They remove the overhead reach entirely, which matters more than it sounds for anyone lifting a hot, full dish down from head height, and they leave the wall above the cooktop free for a proper hood. They are the most expensive category and need cabinet depth and support planned for them.
One honest note on the order of cost. Countertop is cheapest, over-the-range next, then built-in, then drawer, and installation complexity climbs in the same order. That ranking holds even though individual models overlap heavily, which is why these test notes talk in categories rather than in prices.
Step 2: Measure the space, the door swing and the clearances
With a type chosen, measurement decides which units in that type are actually available to you. This is where most bad microwave purchases are made, and all of them are preventable with a tape measure.
Start with the three obvious dimensions of the space: width, height and depth. Then take depth a second time, to the front of the handle rather than the front of the case, because published depth figures sometimes exclude it and a unit that sits proud of the counter edge by an inch is a unit people knock into.
Now the clearances. Every microwave needs free air around it, because the magnetron and the transformer produce heat that has to leave through vents in the case. Manuals state minimum free space at the top, the sides and the back, and the figures vary by model, so read the specific manual rather than assuming a rule. This is why a countertop unit shoved into a snug cabinet cubby is a genuinely bad idea: the cubby blocks the vents, the unit runs hot, and its life shortens. If you want a microwave inside cabinetry, buy a model designed for it with the trim kit made for it, and let the kit provide the airflow path.
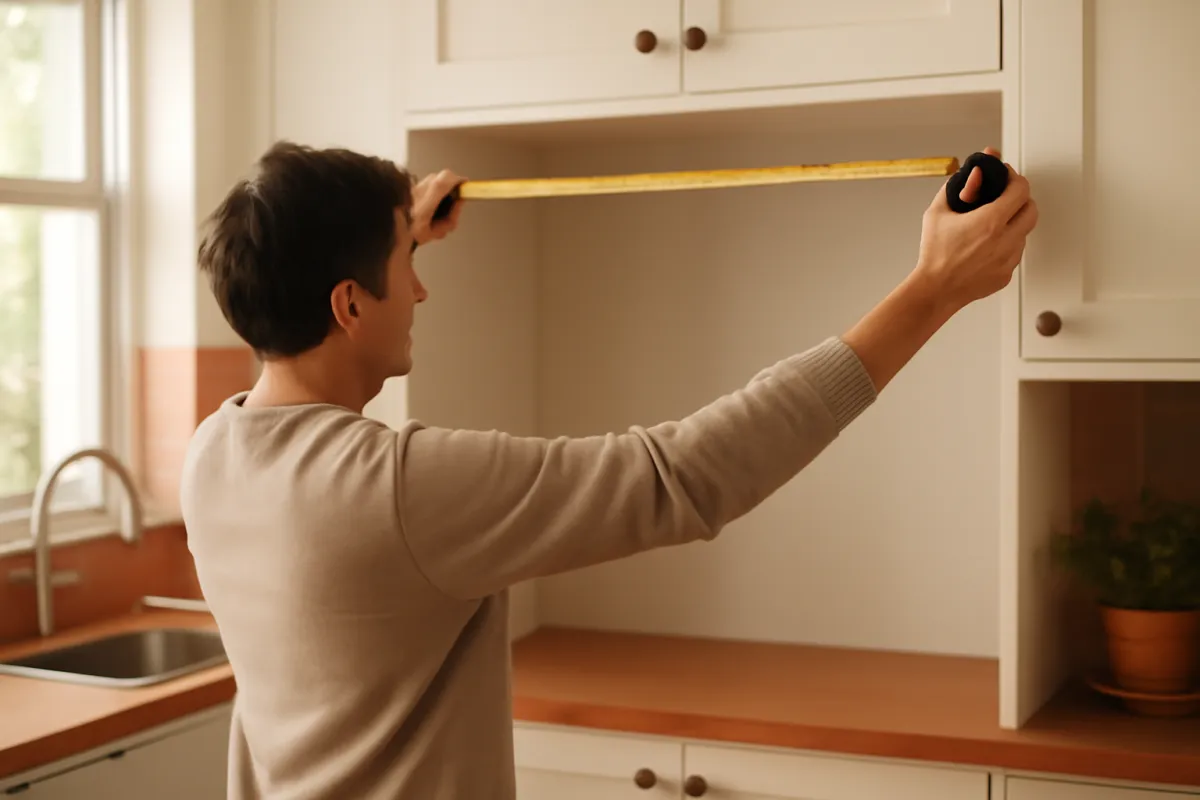
Then the door swing, which is the constraint nobody checks. Microwave doors overwhelmingly hinge on the left and swing to the left, which is fine in the middle of a run and a problem in a right-hand corner, next to a wall, or beside a fridge that also opens left. Open your hand like a door where the unit will sit and watch what it collides with, and where you will be standing when you take a hot dish out. If the answer is that you would be reaching across an open door, the position is wrong even if the unit fits. Drawer models sidestep this entirely by opening downward, and a small number of built-ins use a drop-down door like an oven.
Two more measurements worth taking. The route into the kitchen, if the unit is large, because doorways and turns have defeated deliveries before. And the height of the person who uses it most, against the height of the shelf or the over-the-range position, because a cavity floor above shoulder height turns every full bowl into a careful lift.
Step 3: Size the capacity from what you actually heat
Cubic feet is the number on the box and it is close to useless on its own. It describes the volume of the cavity, which tells you very little about whether a flat, wide dinner plate will rotate inside it. The useful measurements are the turntable diameter and the cavity width and height, and manufacturers publish them if you look past the headline.
Work from your own dishes. A dinner plate is commonly somewhere around ten and a half to eleven inches across, so a turntable smaller than that will let the plate overhang, catch on the cavity wall, and stall the rotation. That is the single most common size complaint about compact units and it is entirely predictable before purchase. A full-size bag of microwave popcorn needs the tray to rotate freely too, and it is bulkier than people remember.
The casserole dish is where the arithmetic gets interesting and where a lot of full-size units still disappoint. A rectangular dish that is 9 inches by 13 inches does not sweep a 13 inch circle when it rotates. It sweeps a circle the size of its diagonal, which works out at close to 16 inches, and very few home microwaves have that much clear width. The practical consequences are worth knowing in advance: either you buy a flatbed model with no turntable, where the dish sits still and the energy is distributed another way, or you switch off the turntable if your model allows it and rotate the dish by hand halfway through, or you use round dishes for anything that goes in the microwave.
The rough capacity bands are still useful as a starting filter. Compact units of roughly 0.5 to 0.9 cubic feet suit mugs, bowls and packets for one or two people, and typically carry the smallest turntables and the lowest wattages. Mid-size units of about 1.0 to 1.5 cubic feet are the sweet spot for households that mostly reheat plates. Full-size units from about 1.6 cubic feet upward are what you need for platters and larger dishes, and over-the-range models generally start in this band regardless of what your household needs, which is a case of the mounting type setting a floor above your requirement.
Set your household size and cooking style in the microwave sizing planner and it will suggest a minimum capacity and a turntable diameter to hold out for. Treat both as a floor rather than a target.
Step 4: Read the wattage and what it means for cooking time
Wattage is the most quoted microwave number and the most misunderstood one, so it is worth being precise about what it is.
The figure on the box is cooking output power: how much microwave energy the oven delivers into the food. It is not what the appliance draws from the wall. Producing microwave energy is a lossy business, so the input draw is meaningfully higher than the output figure, commonly by something like half again, which is why a 1,000 watt oven wants a solid kitchen circuit and why the nameplate on the back of the unit shows a bigger number than the marketing does. If you want the draw for a circuit-loading question, read the nameplate rather than the advertisement. Our wattage and running-cost reference covers how appliance draw translates into current and cost.
For the food, the useful rule is that time scales roughly in inverse proportion to power. Halve the power and the same job takes about twice as long. The chart below applies that to a single mug of liquid taken from the fridge, using an illustrative 90 seconds at 1,000 watts as the reference point.
Seconds to reheat one mug, by oven wattage
Illustrative times for the same mug of refrigerated liquid, scaled in inverse proportion from a reference of 90 seconds at 1,000 watts. Bars scale with seconds.
The gap that people feel is at the bottom of the range: a compact unit takes roughly two thirds longer than a full-size one on the same mug. The gain from 1,000 to 1,200 watts is real but small. Times are illustrative and vary with starting temperature, volume and container.
Two qualifications keep this honest. First, wattage is not evenness. An oven with high output and poor energy distribution gives you a scalding rim and a cold middle, which is a distribution problem that no amount of extra power fixes, and it is why stirring and standing time still matter. Second, packaged food instructions are usually written against an assumed oven wattage, frequently stated on the packet, so a lower-wattage oven needs longer than the packet says and a higher-wattage one needs less. Below roughly 700 watts most people notice the wait on everyday reheating. Above about 1,200 watts the returns flatten out.
Step 5: Decide which cooking features earn their keep
Feature lists are where microwave marketing does its work, and most of the list is buttons rather than capability. Three features change what the oven can actually do. Almost everything else changes how many ways there are to start it.
Inverter power delivery is the one that changes results. On a conventional microwave, a reduced power level is produced by cycling the magnetron on and off, so 50 percent power is full power half the time rather than half power all of the time. Inverter models vary the delivery continuously, so a low setting really is a sustained low level. That matters on exactly the jobs where pulsed full power ruins things: defrosting without cooking the edges of a joint, softening butter without a melted puddle at one end, warming chocolate, holding a sauce. If you defrost regularly, this is worth more than 200 extra watts.
Sensor cooking uses a humidity sensor to detect the steam coming off the food and stop when it is done, rather than running a fixed time you guessed at. Done well it removes the reheat guesswork, which is the single most common microwave frustration. It has one requirement people miss: the sensor reads escaping moisture, so the food generally needs to be loosely covered for it to work as intended, and an uncovered plate can confuse it.
Convection adds a heating element and a fan, turning the cavity into a small oven capable of browning and crisping. In a kitchen with no second oven it is genuinely useful and can carry real cooking. Against that, it adds cost, it makes the cavity hot so cleaning and clearances change, cycles take longer because it preheats, and the control interface gets busier. Buy it if you will use it weekly; skip it if it is aspirational.
What does not earn its keep, in our reading: long preset menus for specific foods, which are fixed-time programs dressed up as intelligence, and app connectivity on a device you stand in front of to operate. The two small features that do earn their keep cost nothing extra and are worth checking for: a one-touch 30 second start, which you will press several times a day for years, and the ability to switch the turntable off for a rectangular dish.
Step 6: Check the details that annoy people daily
This is the step that separates a microwave you tolerate from one you stop noticing, and none of it appears in a spec comparison. Every item here is something a household complains about for the life of the appliance.
Turntable size against your plate. Covered in Step 3 and worth repeating, because it is the complaint that never goes away.
Door swing direction against your layout. Also covered above. Add one detail: check whether the door opens with a handle or a push button. A push button usually needs a free hand, which you may not have while holding a hot dish, and handles are easier to open with a forearm or an elbow.
Control legibility. Flat membrane keypads with low-contrast printing and small text are hard to read in a dim kitchen and harder still above eye level on an over-the-range unit. Physical dials are unfashionable and excellent. Look at the panel in person if you can, and look at it from the angle you will actually stand at.
Noise. Two sources: the operating hum while it runs, and, on an over-the-range unit, the ventilation blower, which is far louder and which you will run while cooking. In an open-plan kitchen that noise sits in the living space. Ventilation noise is one of the main reasons people stop using an extractor at all, which then makes the ventilation question academic.
The beep. Many models let you mute the end-of-cycle beep, often by holding a key, and many do not. If your kitchen is near a bedroom, or open to a room where someone works, this small thing becomes a large thing. Check the manual before buying rather than after.
Interior light and window. The screen in the door blocks microwave energy by design, and darker screens make it hard to see whether something is about to boil over. A decent interior light helps.
Cleaning. A flatbed cavity with no turntable and no ring is dramatically easier to wipe out than one with a glass plate and a roller ring, and the cavity coating varies in how well it releases splatter. Our appliance maintenance plan covers the routine that keeps any of them presentable.
Step 7: Plan the installation, the venting and the clearance
For a countertop unit this step is short: put it somewhere with the clearances the manual asks for, plug it into a wall outlet rather than an extension cord or a light-duty power strip, and confirm what else shares that circuit. Done.
For everything else, the installation is a project. An over-the-range unit is a two-person job and should be treated as one. The appliance is heavy, it mounts on a wall plate and then bolts up through the floor of the cabinet above, and it has to be held in position while those bolts go in. Dropping it is how people damage a cooktop and themselves.
The requirements to confirm before you buy an over-the-range unit are specific. There must be a cabinet above the range of the right width and depth to take the unit and the mounting bolts, and it has to be securely fixed to the wall. There must be a 120 volt outlet inside that cabinet, or the wiring to add one, which is electrical work. The manufacturer specifies a minimum clearance between the cooktop and the underside of the microwave, and that figure comes from the appliance manuals and local code rather than from any general article, so read both. The old hood has to come out, and the wall behind it is rarely as tidy as the hood implied.
Then the blower. Over-the-range units generally ship configured for recirculating, and converting to a ducted installation means repositioning the blower inside the unit, which is a documented procedure in the manual and a genuine surprise to people who did not read it. Get this right before the unit is on the wall.
For a built-in unit the trim kit is the installation. It is model-specific, it is what creates the airflow gap around the appliance, and fitting a microwave into a cabinet without the kit designed for it is a heat problem waiting to happen. For a drawer model, plan the cabinet depth, the support and the electrical supply with whoever is building or modifying the cabinetry, because retrofitting one into existing cabinets is often more work than it appears.
Over-the-range venting: ducted against recirculating
This deserves its own section because it is the part of the over-the-range decision that is genuinely consequential and the part that gets waved through.
When an over-the-range microwave replaces a range hood, it inherits the job of removing what comes off the cooktop: heat, water vapour, grease aerosol, smoke and cooking odour. How well it does that depends almost entirely on where the air goes.
Ducted installations send the air outside, either vertically through the cabinet and up, or horizontally through the exterior wall. Everything the blower captures leaves the building. This is the configuration that actually ventilates, and it is the reason a hood exists.
Recirculating installations pass the air through the metal mesh grease filter and then a charcoal filter, and return it to the kitchen. The grease filter catches a share of the aerosol and the charcoal filter absorbs a share of the odour, so it is not nothing. What it categorically does not do is remove heat or moisture, because that air comes straight back into the room. If you boil pasta under a recirculating unit, the steam has nowhere to go, and moisture in a kitchen is a durable problem rather than a passing one.
The practical decision runs like this. If a duct route already exists, use it, and check during installation that the blower has been set for it. If no route exists, find out what one would cost before you commit, because it is the difference between having ventilation and having a filter. If ducting is genuinely impossible, which is common in apartments and in interior kitchens, then recirculating is what you have, and the honest response is to manage moisture other ways: lids on pots, a window when practical, and realistic expectations. Our notes on reducing indoor humidity cover the wider picture.
Two more venting details. The charcoal filter in a recirculating setup is a consumable and is frequently never replaced, at which point the odour control has quietly stopped. The metal grease filter is washable and needs washing on a schedule, and a clogged one both reduces airflow and is a fire risk over a cooktop. Our range hood cleaning walkthrough covers both filters and the method.
Inverter power delivery and what it changes
It is worth spending a little longer on the inverter question because it is the one specification where the marketing word maps onto a real mechanism and most buyers have no idea what the mechanism is.
A magnetron is essentially a full-power device. It is on, producing microwave energy at its rated output, or it is off. So when a conventional oven offers you power level 5, what it does is run the magnetron at full output for part of each cycle and switch it off for the rest. Averaged over the whole run, the energy delivered is about half. Moment to moment, the food is receiving alternating blasts of full power and nothing.
For reheating a bowl of soup that hardly matters. For anything where the goal is gentle, sustained warmth, it matters a great deal, because each full-power burst cooks the outer layer while the inside is still catching up during the off periods. That is precisely why conventional defrost cycles leave you with a joint that is cooked grey at the edges and frozen in the middle, and why butter comes out melted at one end and cold at the other.
An inverter model varies the power supplied to the magnetron continuously, so a reduced setting is a genuinely reduced, continuous level. Defrosting becomes gentler and more even, simmering is possible, and softening and melting jobs stop being a race against the edges.
Who should care. Anyone who defrosts more than occasionally, anyone who cooks in the microwave rather than only reheating, and anyone who has been annoyed by melted chocolate that seized or butter that turned to liquid. Who should not. A household whose microwave use is coffee, leftovers and popcorn at full power will get very little from it. Look at your own version of the split in the chart above and decide from that rather than from the sticker.
Sensor cooking, convection and combination ovens
The other two capability features are worth a closer look, because both are frequently oversold and both are genuinely good in the right kitchen.
Sensor cooking works by detecting the humidity rising off the food as it heats, and using that to decide when the job is done rather than running a timer. The appeal is obvious to anyone who has reheated the same plate for 90 seconds, found it cold in the middle, given it another 45, and turned the edges to leather. When it works it removes the guessing. Its requirements are worth respecting: the food generally wants a loose cover so steam is produced and detected in a way the sensor expects, an uncovered plate or a very small portion can confuse it, and the sensor is not a replacement for stirring and standing time on anything thick.
Convection turns the cavity into a small oven with a heating element and a fan. In combination modes it can use both microwave energy and conventional heat, which is how these ovens brown and crisp things a microwave alone cannot. The two situations where it earns its cost are a kitchen with no second oven, where it becomes real baking and roasting capacity in a small footprint, and a household that wants overflow oven capacity for holidays and large meals. The costs are honest ones: a higher price, a hot cavity that changes how you clean and what clearances you respect, longer cycles because of preheating, more complex controls, and usually a heavier unit.
Combination wall ovens, where a microwave sits above or below a conventional oven in one built-in stack, are the tidiest version of this idea and the least flexible. They look excellent, they save wall space, and they tie two appliances to one product decision and one replacement cycle. If the microwave half fails outside warranty, you are dealing with a built-in appliance rather than an unpluggable box, which is a consideration worth weighing at purchase rather than at failure. Our energy-efficient appliance buying method covers how to weigh integrated appliances against separate ones more generally.
Microwave safety: the rules that are not optional
Microwaves are among the safest appliances in a kitchen and they have a small number of genuine hazards, all of which are avoidable. These are not optional and they are worth reading even if you have owned one for years.
Never run it empty. With no food or liquid to absorb the energy, it reflects back into the magnetron. That can damage the unit and, in the worst case, do considerably worse. If children use the microwave, this is the rule to teach first.
Keep metal out unless the manual explicitly allows a specific use. Foil, metal trim on plates, twist ties, cutlery and some takeaway containers can arc, which produces sparks inside the cavity. A few manufacturers permit small pieces of foil for shielding under stated conditions, and the manual is the only authority for your unit. If you see sparking, stop the oven and unplug it.
Nothing sealed. Whole eggs in the shell, closed jars, tightly capped bottles, sealed pouches and unpierced skins can build steam pressure and burst, sometimes after the oven has stopped and while you are holding them. Pierce potatoes, sausages and egg yolks, and vent lids rather than clamping them.
Superheated water is a real hazard, not a myth. Plain water in a smooth clean container can pass its boiling point without visibly boiling, because there is nothing to nucleate bubbles. Disturbing it, by moving it or adding a spoon or a coffee granule, can make it erupt violently out of the container. Reduce the risk by not heating plain water longer than needed, by using a container that is not perfectly smooth or by leaving a non-metallic stirrer in it, and by letting it stand for a short while before you move it. Treat this seriously with children in the kitchen.
Use containers labelled microwave safe. Some plastics warp, and many takeaway containers are not made for it. Glass and ceramic without metallic decoration are usually the safe default, and your manual and the container’s own marking are the authority.
Do not use an oven with a damaged door, hinge, latch or seal, and never defeat the interlocks. The door assembly is what contains the energy inside the cavity, and a damaged one is a reason to stop using the appliance rather than to be careful with it.
Never open the case to repair one. The high-voltage capacitor inside can hold a dangerous charge long after the unit is unplugged. Microwave repair is a job for a qualified technician, and for most units the honest answer is replacement.
Installation safety. An over-the-range unit is a two-person lift over a cooktop, with electrical connections and structural cabinet requirements, and getting the clearance above the cooktop right is a code matter rather than a preference. If any part of that is outside what you are confident doing, that is a normal reason to hire it out.
What a microwave costs to run
A microwave is a high-wattage appliance that runs for minutes, which puts it in the category where the impressive number on the label produces a small number on the bill. It is still worth doing the arithmetic, because one part of it surprises people.
Start with the cooking. A 1,000 watt oven draws meaningfully more than 1,000 watts at the wall, and using an illustrative figure of about 1,540 watts of draw, four uses a day averaging two minutes each works out at roughly 75 kilowatt hours over a year. At an illustrative 16 cents per kilowatt hour that is about 12 dollars a year. That is genuinely small against the refrigerator or the dryer, and it is the reason microwaving something is usually cheaper than heating the full oven for it.

Now the part people miss. A microwave with a clock display draws a small standby load every hour of every day whether you use it or not. Using an illustrative 2 watts continuously, that is about 17 kilowatt hours a year, close to 3 dollars at the same rate. For a lightly used microwave, the clock can genuinely account for a comparable share of the appliance’s annual consumption to the cooking. It is not a reason to unplug it, but it is a neat illustration of the general principle that a small load left on permanently competes with a large load used briefly.
Set your own wattage, uses per day and electricity rate in the microwave sizing planner and it will split the annual figure between cooking and standby for you. Every number there is an illustrative planning estimate rather than a measurement from a specific unit. For the wider picture of which kitchen appliances actually move a bill, see our wattage and running-cost reference.
A worked example: choosing for a small galley kitchen
Run the seven steps end to end on one realistic scenario so the ordering makes sense. Picture a two-person household in a narrow galley kitchen. The over-the-range microwave that came with the house has died after about nine years, there is a 30 inch range below it, the previous installation ducts horizontally out through the exterior wall, and the counter run is short enough that the toaster and the kettle already compete for it. They reheat plates most days, defrost a couple of times a week, and cook in the oven rather than the microwave.
Step 1, mounting type. The tempting move is a dedicated range hood plus a countertop microwave, which would ventilate better and cost less. It fails on counter space: there is nowhere to put a full-size countertop unit without losing the only usable prep surface. The existing over-the-range position and duct stay.
Step 2, measurement. The opening is the standard 30 inch width, so width is settled. They measure the cabinet above for depth and for the mounting bolts, confirm the outlet inside it, and measure their dinner plates at about eleven inches and their largest casserole dish at 9 by 13.
Step 3, capacity. The planner suggests a minimum of about 1.3 cubic feet for two people who reheat and defrost. Over-the-range models start above that anyway, so the binding question becomes the turntable: they want at least 12 inches so the eleven inch plates turn freely. The casserole dish will not rotate in anything in this class, so they accept rotating it by hand or switching the turntable off.
Step 4, wattage. A 1,000 watt unit puts their mug at about 90 seconds and a plate at about two and a half minutes. A 700 watt compact would put the same mug at about 129 seconds, which they would notice several times a day. They set 1,000 watts as a floor.
Step 5, features. Defrosting twice a week makes inverter delivery worth paying for. Sensor reheat is worth having for the plates. Convection is dropped: they have a working oven below it and no space in the decision for a hot cavity above the cooktop.
Step 6, daily details. The kitchen is open to the living room, so blower noise and a mutable beep both matter. The controls will sit above eye level, so panel legibility gets checked in person rather than in photographs. The door hinges left, which suits the layout.
Step 7, installation. Two people, a confirmed outlet in the cabinet, the blower repositioned for horizontal ducting rather than left in its shipped recirculating configuration, and the clearance above the cooktop verified against both the microwave and range manuals.
Running cost. Four uses a day at two minutes averages roughly 75 kilowatt hours a year for cooking, near 12 dollars at an illustrative 16 cents, plus about 3 dollars for the clock. About 15 dollars a year all in, which is small enough that it played no part in the decision.
Notice where the decision was actually made. Step 1 was settled by counter space, Step 3 by a plate diameter, and Step 5 by how often they defrost. Not one of those is a headline specification.
Common mistakes when choosing a microwave
Most disappointing microwave purchases trace back to a short list of predictable errors, and two of them cost real money.
- Buying on cubic feet. Volume does not tell you whether a dinner plate turns. Turntable diameter and cavity width do, and they are published if you look.
- Ignoring the door swing. A left-hinged door in a right-hand corner is a daily irritation that cannot be fixed after purchase, and it takes ten seconds to check beforehand.
- Building a countertop unit into a cabinet. Without the trim kit designed for that model, the vents are blocked, the unit runs hot, and its life shortens. Buy a built-in model or leave it on the counter.
- Treating an over-the-range unit as a microwave that happens to be up high. It is your kitchen ventilation. If it is recirculating, the heat and the steam come back into the room.
- Leaving the blower in its shipped configuration. Many over-the-range units arrive set for recirculating, and ducting requires repositioning the blower during installation. This is missed often.
- Paying for presets instead of capability. Twelve food buttons are twelve fixed timers. Inverter delivery, sensor cooking and a cavity that fits your dishes are the things that change outcomes.
- Assuming a replacement will fit the old built-in opening. Trim kits are model-specific, and cabinetry that suited one unit may not suit its successor.
- Choosing on running cost. At a few dollars a year the energy figure should never be the deciding factor on a microwave, and letting it be one usually means overlooking something that matters more.
Troubleshooting the decision when it will not resolve
Some choices stall rather than resolve. Here is how to think through the common sticking points.
What if there is no room for the microwave anywhere? Then the mounting type is deciding for you, and the honest options are over-the-range, a drawer if the cabinetry allows, or a compact countertop unit accepted as a compromise on capacity. Before settling for compact, measure whether a shelf or an under-cabinet mount could hold a mid-size unit with its required clearances, since a small gain in capacity is what makes a dinner plate turn.
What if I want proper ventilation and my counter is full? This is the genuine conflict at the heart of the over-the-range category and there is no free answer. The three ways out are a microwave drawer below the counter with a real hood above the range, a wall or built-in position for the microwave elsewhere in the kitchen, or accepting a combined unit and ducting it properly so at least the ventilation it does provide leaves the building.
What if ducting outside is impossible? Common in apartments and interior kitchens, and it is not a reason to skip ventilation entirely. Run the recirculating setup properly: wash the grease filter on a schedule and actually replace the charcoal filter, which is the part that gets forgotten. Then manage moisture with lids, with a window where practical, and with the wider measures in our notes on reducing indoor humidity.
What if the specs do not list a turntable diameter? Ask, or measure a floor model, or read the manual, which is usually downloadable and usually contains the cavity dimensions. A retailer who cannot supply the turntable diameter of a unit they are selling has told you something useful about how much they know about it.
What if my household disagrees about high or low mounting? Weight the answer toward whoever will carry hot, full dishes most often, and toward anyone who finds reaching above shoulder height difficult. A drawer or a countertop unit removes the overhead reach; an over-the-range one does not, and no amount of getting used to it changes the physics of lifting a full bowl down from head height.
What if the old unit died and I need one now? Buy the sensible like-for-like replacement rather than making a category change under time pressure, because the category changes are the ones that involve cabinetry, ducting and electrical work. Getting the mounting type right is worth planning for properly, and a microwave you chose in a hurry stays in that kitchen for years.
Choosing for a rental, a dorm or a very small kitchen
The seven steps hold in every kitchen, but which constraint binds first changes when the kitchen is not yours or is very small.
In a rental, anything that is not a countertop unit is usually not your decision, and installing an over-the-range or built-in unit in a property you do not own is a conversation with the landlord rather than a purchase. That narrows the choice to a countertop model, which is fine, and it puts the weight on portability: a unit you can lift, that fits a standard counter depth, and that will suit the next kitchen too. Measure the next kitchen only when you know what it is, and until then favour mid-size over full-size, because a mid-size unit fits almost anywhere and a full-size one does not.
In a dorm, the rules come first and the specification second, since housing policies commonly cap microwave wattage and sometimes require an approved combination unit instead of a standalone one. Our dorm appliance notes cover how those policies typically work. In practice a compact, low-wattage unit does the popcorn and leftovers job that dorm life actually requires, and a longer reheat time is a fair trade for compliance and a smaller footprint.
In a very small kitchen, the honest question is whether a microwave earns its counter space at all. If the answer is yes, the shortlist is a compact or mid-size countertop unit, a shelf-mounted position with proper clearances, or a drawer if cabinetry work is on the table anyway. Compact units are also where the wattage penalty bites hardest, so check the reheat times in the chart above against your patience before committing to something in the 600 to 700 watt band.
In a shared house, favour simple controls and a mutable beep, because a microwave that beeps loudly at midnight in a house of six becomes a social problem rather than an appliance one. Physical dials also survive shared use better than a membrane keypad whose printing wears off.
Reading a microwave spec sheet without getting lost
Manufacturer sheets are long and only a handful of lines change the decision. These are the ones to find.
Cooking output wattage. The headline number, and the one that sets your reheat times. Remember it is output rather than draw.
Cavity capacity in cubic feet, as a rough band only, and then the cavity’s internal width, depth and height if published, which tell you far more.
Turntable diameter, or a statement that the model is flatbed. This is the single most useful line for anyone who reheats plates.
External dimensions including the handle, plus the required clearances at the top, sides and back. The clearance figures are the ones that decide whether a space works.
Ventilation configuration and blower rating, for over-the-range units, and whether the unit ships set for recirculating. Airflow ratings are comparable across models within reason, and the configuration is what determines whether that airflow leaves the house.
Electrical requirements from the nameplate, which is where you find the actual draw rather than the cooking output, and which is what you need if you are working out what shares a circuit.
Two lines that matter less than their prominence. Preset program counts tell you nothing about cooking quality. And the interior finish being described in marketing language rarely predicts how easily it wipes clean; a flatbed cavity with no turntable ring predicts that far better.
How long a microwave lasts and when to replace one
A microwave is one of the shorter-lived major kitchen appliances, with commonly cited service lives in the region of the better part of a decade, and our appliance lifespan report puts it around nine years alongside the rest of the kitchen. That figure is a central tendency with a wide spread rather than a countdown, and how it goes for you depends more on use pattern and cleanliness than on anything you can pick at purchase.
The failure that ends most microwaves is the magnetron, and it is usually not economic to replace in a countertop unit. That has one useful implication for the buying decision: the marginal money is better spent on fit, wattage and the daily details than on an expected extra year or two of life, because the replacement cycle on this category is short and the unit is not a heirloom.
Built-in and over-the-range units change that calculation, because replacing them is a project rather than a purchase. Where the appliance is integrated, a longer warranty and a manufacturer with a settled range of trim kits and mounting patterns are worth more, since the cost of the next replacement is largely installation.
Signs that a unit is at the end rather than needing a clean: it runs but heats weakly or not at all, which usually points at the magnetron; the turntable motor fails, which is cheap and sometimes worth fixing; the door latch or interlock becomes unreliable, which is a stop-using-it fault rather than a live-with-it one; and any arcing that is not explained by metal in the cavity. Sparks, burning smells and a door that does not close properly all mean unplug it now and stop.
Your microwave choosing checklist
Save this and work it in order. The first three items eliminate most of the market for you, which is what makes the rest quick.
- Mounting type decided: countertop, over-the-range, built-in or drawer, chosen on counter space, ventilation and installation appetite.
- Space measured: width, height, depth to the front of the handle, plus the clearances the specific manual requires at the top, sides and back.
- Door swing checked against the wall, the corner, the fridge and where you will stand holding a hot dish.
- Your plate measured, your largest casserole dish measured, and a turntable diameter set as a minimum.
- Wattage floor set, with the reheat times in the chart above sanity-checked against your patience.
- Features decided: inverter yes or no, sensor cooking yes or no, convection yes or no, and preset menus ignored.
- Daily details checked in person where possible: control legibility, door opening method, noise, and whether the beep can be muted.
- For over-the-range: duct route confirmed, blower configuration understood, outlet in the cabinet confirmed, cooktop clearance verified in both manuals, second person arranged.
- For built-in: the correct trim kit identified and priced as part of the purchase.
- Circuit checked for what else it carries, with the unit going into a wall outlet rather than an extension cord.
- Safety rules read by everyone who will use it: never empty, no metal unless the manual allows it, nothing sealed, and care with plain water.
- Running cost sized in the microwave sizing planner, then set aside, because at a few dollars a year it should not decide anything.
The bottom line
Choosing a microwave is a seven-step decision that most people compress into one, which is why so many kitchens end up with a unit that fits the space but not the household. Start with the mounting type, because it sets everything else and because in the over-the-range case it also decides whether your kitchen has real ventilation or a filter. Measure the space, the handle depth, the clearances and the door swing before you shortlist anything. Size the cavity from your dinner plate and your casserole dish rather than from cubic feet, and remember that a 9 by 13 dish sweeps a circle nearly 16 inches across when it rotates. Treat the wattage on the box as cooking output, use the inverse-proportion rule to translate it into seconds you will actually wait, and set a floor rather than chasing the top. Pay for inverter delivery and sensor cooking if your use justifies them, and let the preset menu go. Then check the small things that decide whether you like the appliance: the turntable, the swing, the panel, the noise, the beep. Get those right and the running cost, at a handful of dollars a year, becomes exactly what it should be, which is the least interesting thing about the decision.
A note from the bench: these test notes describe a general method for choosing a home microwave and are educational rather than professional electrical, building or safety advice. Every wattage, capacity, time and dollar figure above is an illustrative planning number rather than a measurement taken from any particular model, and reheat times in particular shift with starting temperature, portion size and container. The manual for the specific unit you are considering outranks everything written here, especially on required clearances, permitted materials, cooktop clearance for an over-the-range installation and blower configuration, and local code and your range manufacturer’s requirements govern anything above a cooktop. Several cautions hold regardless of model: never run a microwave empty, keep metal and sealed containers out unless your manual explicitly permits a use, treat plain water as capable of superheating and erupting when disturbed, stop using any oven whose door, hinge, latch or seal is damaged, and never open the case, because the high-voltage capacitor can hold a dangerous charge long after the unit is unplugged. Installation involving cabinetry, ducting or electrical connections belongs with someone qualified to do it if you are not confident, and any sparking, burning smell or door that will not close means unplug the unit and stop.
Frequently asked questions
What size microwave do I need?
Size it from the dish you reheat most often rather than from the cubic-foot number on the box, because cavity volume is a poor description of what actually fits. The practical limit is the turntable diameter and the cavity width, since a dinner plate is commonly around ten and a half to eleven inches across and a turntable smaller than that will scrape or refuse to turn. Compact units, roughly 0.5 to 0.9 cubic feet, suit drinks, bowls and packets for one or two people. Mid-size units of about 1.0 to 1.5 cubic feet handle dinner plates comfortably, and full-size units from about 1.6 cubic feet up are what you need for casserole dishes and larger platters. Set your household size and cooking style in the sizing planner on this site and it will suggest a minimum capacity and a turntable diameter to insist on.
How many watts should a microwave be?
For general reheating, something in the 900 to 1,100 watt class is the comfortable middle, and the number quoted on the box is the cooking output power rather than what the unit draws from the wall. Time scales roughly in inverse proportion to power for the same food, so a job that takes about 90 seconds at 1,000 watts takes about 150 seconds at 600 watts, which is the difference between a compact unit and a full-size one. Package instructions frequently state the wattage their times assume, and if your oven is below that figure you need longer. Higher wattage is not the same as more even heating, which depends on how the energy is distributed and delivered rather than on how much of it there is. Below roughly 700 watts most people notice the wait; above about 1,200 watts the gains get small.
Is an over-the-range microwave a good idea?
It is a genuine trade-off rather than an upgrade, and the decision hinges on ventilation. An over-the-range unit frees the counter and puts the microwave where a range hood used to be, which means it now does two jobs, and the ventilation job is the one it does less well than a dedicated hood because the blower is smaller and it sits lower over the burners. It also puts a hot dish above head height directly over the cooktop, which is worth thinking about honestly if anyone in the household finds a high reach awkward. If your kitchen has plenty of counter space and you cook in a way that produces steam and smoke, a dedicated hood plus a countertop microwave usually gives you a better result on both jobs. If counter space is the binding constraint, the combined unit earns its place.
Do over-the-range microwaves vent outside?
Only if they are installed to do so. Most models support three configurations: vertical ducting up through the cabinet, horizontal ducting out through the exterior wall, or recirculating, where the air passes through a charcoal filter and returns to the kitchen. Ducted installations remove heat, moisture, grease and odour from the house. Recirculating installations capture some grease in the metal mesh filter and some odour in the charcoal filter, and they return the heat and the water vapour straight back into the room, so they do considerably less. Many units ship configured for recirculating and the blower has to be repositioned during installation to duct outside, which is a step people discover after the box is open.
What is an inverter microwave and is it worth it?
On a conventional microwave a power level below full is achieved by cycling the magnetron on and off, so 50 percent power means full power for part of the time and nothing for the rest. An inverter model varies the power delivery continuously instead, so a lower setting really is a lower level rather than an interrupted full one. That difference shows up on the jobs where sustained gentle heat matters: defrosting without cooking the edges, softening butter without melting it, simmering a sauce, warming chocolate. For a household that mostly reheats coffee and leftovers at full power, the benefit is modest. For anyone who defrosts regularly or cooks in the microwave rather than only reheating in it, it is one of the few features that changes the result rather than the button count.
Countertop or built-in microwave: which should I choose?
Countertop units are the cheapest, the easiest to replace, and the only category that involves no installation, and the price they charge is counter space, which in a small kitchen is the scarcest resource there is. Built-in units, meaning a microwave fitted into cabinetry with a manufacturer trim kit, look tidy and free the counter, but the trim kit is model-specific and is what provides the airflow path, so it is not optional and a replacement years later may not fit the same opening. Microwave drawers install below the counter and open downward, which removes the overhead reach entirely and suits anyone who finds lifting a hot dish down from head height difficult. As a rule the order of upfront cost runs countertop, over-the-range, built-in, drawer, and the order of installation complexity runs the same way.
Is convection worth it in a microwave?
Convection adds a heating element and a fan so the cavity can behave like a small oven, browning and crisping in a way microwave energy alone cannot. It genuinely earns its place in two situations: a small kitchen with no second oven, where it doubles as one, and a household that wants roasting or baking capacity without a full range. Against that, it costs more, the cavity gets hot so the interior needs different care, cycles take longer because the oven has to preheat, and the control interface gets more complicated on a device most people want to use in one press. If you plan to use it weekly it pays for itself in usefulness. If it is aspirational, it becomes a more expensive microwave with a mode you never select.
What should you never put in a microwave?
Never run the oven empty, because the energy has nothing to absorb it and reflects back into the magnetron, which can damage the unit. Keep metal out unless your manual explicitly permits a specific use, since foil, metal trim on dishes, twist ties and cutlery can arc. Never heat anything sealed: whole eggs in the shell, closed jars, tightly capped bottles and unpierced skins can burst as steam pressure builds, so pierce potatoes, sausages and egg yolks first. Plain water heated in a smooth container can superheat, meaning it passes its boiling point without visibly boiling and then erupts when it is disturbed, so avoid heating water longer than needed and let it stand before moving it. Use containers labelled microwave safe rather than assuming, and stop using any oven whose door, hinge, latch or seal is damaged.