What's on this page
- Where indoor humidity comes from
- Before you start
- Step 1: Measure the humidity with a hygrometer
- Step 2: Ventilate the moist air out
- Step 3: Run a right-sized dehumidifier
- Step 4: Use your air conditioner to dry the air
- Step 5: Fix the moisture sources at home
- Step 6: Seal and insulate the damp spaces
- Step 7: Add moisture-absorbing helpers and mind your houseplants
- Step 8: Prevent mold and know when to call a pro
- A worked example: dropping a room from 65 to 45 percent
- Common mistakes that keep a home humid
- Troubleshooting: when the damp will not budge
- Your humidity-reduction checklist
- The bottom line
Short answer: Reduce humidity in your home by measuring first with a cheap hygrometer, aiming for a commonly cited 30 to 50 percent, then working source and symptom together. Ventilate with exhaust fans when the outdoor air is drier than indoors, run a dehumidifier sized to the room, let your air conditioner pull moisture, and stop it going in by fixing leaks, damp ground, and indoor drying racks. Never buy a dehumidifier while ignoring the source.
A humid home announces itself before a meter ever confirms it: the muggy feel of a bedroom on a July night, fog creeping up a bathroom mirror long after the shower, a musty note in a basement, beads of water on a cold window. It feels like something the weather did to the house. Mostly it is not. Indoor humidity is a balance between the moisture your home takes on and the moisture it sheds, and both sides of that balance are things you can measure and change, one at a time, in a sensible order.
These notes give you that order as eight concrete ways to reduce the humidity in your home, from measuring the problem so you know where you actually stand, to sealing the damp spaces that keep resupplying moisture no matter what else you do. Each step comes with an illustrative figure so you can see roughly where it ranks, a plain description of how to do it, and a caveat so you do not chase a fix that is not there. Because humidity and appliance running cost are joined at the hip, we point you to our sibling reports along the way, including our dehumidifier size and cost report for the machine built for the job and our air conditioner running-cost report for the cooling that dries as it runs. Feed your own room size and humidity readings into the planner as you read and watch the target move.
Key takeaways
- Measure first: a cheap hygrometer turns a vague muggy feeling into a number, and a commonly cited comfort target is roughly 30 to 50 percent relative humidity.
- Work source and symptom together: ventilation, a right-sized dehumidifier, and your AC pull moisture out, but fixing the leaks, laundry, and damp ground stops it going in.
- Size the dehumidifier to the room, not the box art. A unit too small for a damp basement runs forever and never catches up.
- Ventilation only helps when the outdoor air is drier than the indoor air. On a muggy day, opening windows makes it worse.
- The one mistake to avoid: buying a dehumidifier and ignoring the source. Find the leak, the wet crawlspace, or the indoor drying rack first.
Where indoor humidity comes from
Before you dry anything out, look at where the moisture comes from, because the shape of the problem decides the order of your work. Indoor humidity is a running total of everything that adds water to the air minus everything that removes it. The exact mix depends on your climate, your home’s construction, and your daily habits, but a common illustrative picture of where a home’s indoor moisture originates looks roughly like the breakdown below, expressed as shares of the total moisture load.
Where indoor moisture comes from
Illustrative shares of a home's indoor moisture load. Segments sum to 100 percent. Your mix varies by climate and construction.
Everyday living is the fat slice, but ground moisture and outdoor air are the ones that quietly refill a room you just dried out.
The lesson of the chart is the whole strategy in one picture. Everyday living, the moisture you add just by cooking, showering, and breathing, is the largest single slice, and it is the one ventilation is built to handle. The middle tier, ground and foundation moisture plus humid outdoor air leaking in, is the sneaky part: it refills a room you just dried, which is why sealing and a dehumidifier matter so much in a basement or crawlspace. Indoor drying and outright leaks are the smaller slices, easy to overlook and often the fastest to fix once you spot them. The steps that follow walk across this picture, measuring first, then removing moisture, then shutting off the sources that keep resupplying it. Your own home may weight these differently, especially with a wet basement or a humid climate, so treat the shares as a map rather than a measurement.
Before you start
This is a measure-and-tune project, not a renovation, and most of the early moves cost little or nothing. You can complete the measuring and the free adjustments in an afternoon, then let the durable fixes follow over days and weeks. Gather two things before you begin so every judgment you make is based on your own home rather than a guess.
- A hygrometer, the small, inexpensive meter that reads relative humidity. A basic digital model is enough, and many combined temperature-and-humidity units cost little. Place one in the problem room and, ideally, a second in a normal room for comparison.
- A sense of the problem area: which room or level feels damp, when it feels worst, whether there is visible condensation, a musty smell, or any sign of mold, and whether the dampness tracks with showers, cooking, laundry, rain, or the seasons.
A phone, the hygrometer, and a little attention are all the equipment the first steps require. The paid steps, a dehumidifier or weatherstripping, are optional and can wait until you have measured the problem and tried the free fixes. Difficulty is low throughout: nothing here asks you to open a wall or handle wiring, and anything that would, such as a serious mold remediation or a hidden plumbing leak, is explicitly handed off to a professional. With a hygrometer reading in front of you, start by turning the muggy feeling into a number.
Step 1: Measure the humidity with a hygrometer
Everything downstream depends on one number: what the relative humidity in your problem room actually is. Find it before you change anything, because a fix of any kind is guesswork until you can see the reading move. A hygrometer, the small meter that displays relative humidity as a percentage, turns the vague feeling of a muggy room into a figure you can track. Basic digital models are inexpensive, and many bundle a thermometer, since temperature and humidity travel together.
Place the meter in the room that bothers you, set it away from direct sources like a shower or a vent so it reads the room rather than a hot spot, and give it a little time to settle. A commonly cited comfort target is roughly 30 to 50 percent relative humidity, so a reading comfortably inside that band is fine, while a reading pushing past 55 or 60 percent is the muggy, mold-friendly territory these steps are built to bring down. As an illustration, a damp basement bedroom might read around 65 percent on a summer evening, well above the target, which is the example we carry through the rest of these notes. Note the reading, the room, and the time of day, since humidity swings with weather and activity.
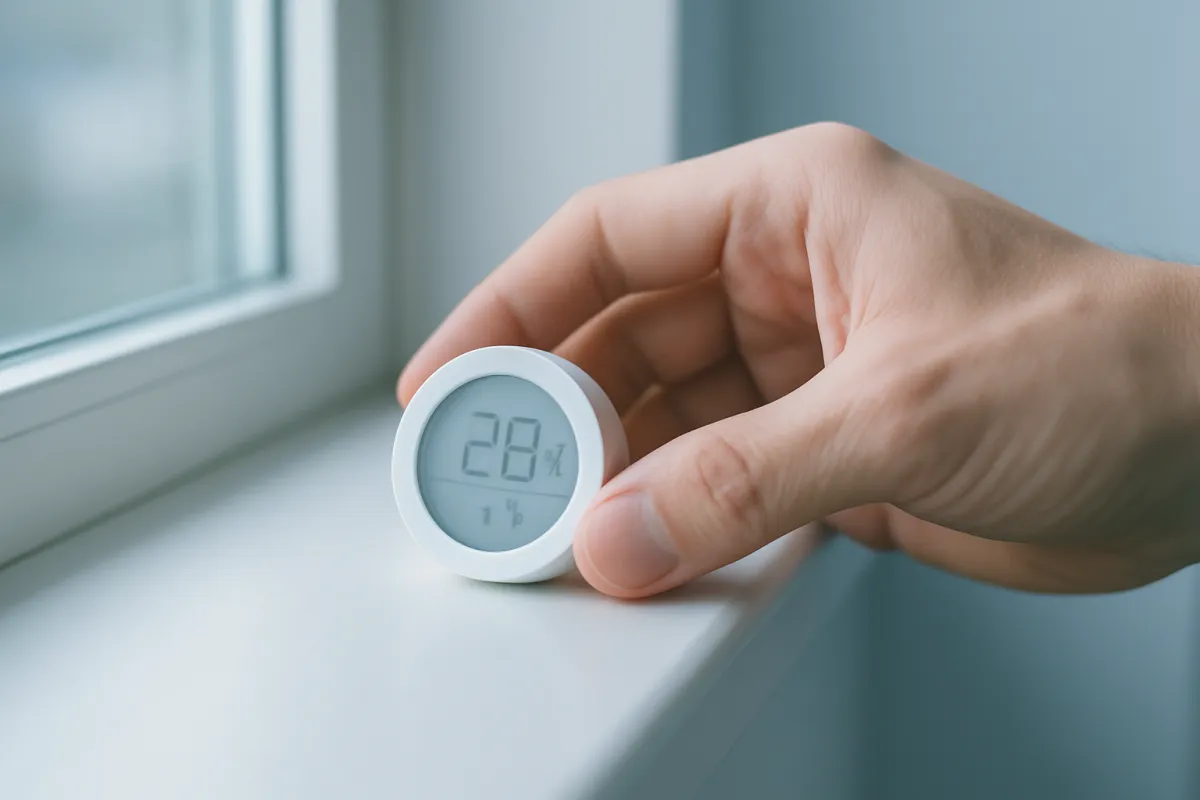
Watch out for two wrinkles. First, one reading is a snapshot, not the whole story; humidity is lowest when the room is aired out and highest after a shower, a rainstorm, or a night with the windows shut, so take a few readings across a day before you judge. Second, a hygrometer measures relative humidity, which changes with temperature, so the same amount of water in the air reads as a higher percentage in a cool room than a warm one. Enter your current reading and your target into the planner now, so the figures you work with are your own room rather than an illustrative stand-in.
Step 2: Ventilate the moist air out
The cheapest way to remove moisture is to move it outside, which is exactly what ventilation does, and it directly targets the biggest slice of the chart: the moisture daily living adds. The principle is simple. Warm, moist indoor air is swapped for drier air, either by mechanical fans that push it out or by opening the house when the outdoor air is drier than the indoor air. Because everyday cooking, showering, and drying add moisture right where you stand, catching it at the source before it spreads through the house is the most efficient move you can make.
Start with the exhaust fans you already own. Run the bathroom fan during and for a while after every shower, and use the kitchen range hood while cooking, especially when boiling or simmering, since a covered pot also cuts the steam it releases. Where a room lacks a fan, cracking a window during the moist activity helps. Beyond spot ventilation, airing out the whole house on a dry day flushes accumulated moisture: open windows on opposite sides for a cross breeze and let the drier outdoor air sweep through. As an illustration, on our 65 percent basement room, disciplined ventilation and exhaust-fan use might shave several points off the reading over a day, an illustrative contribution rather than a measured one.
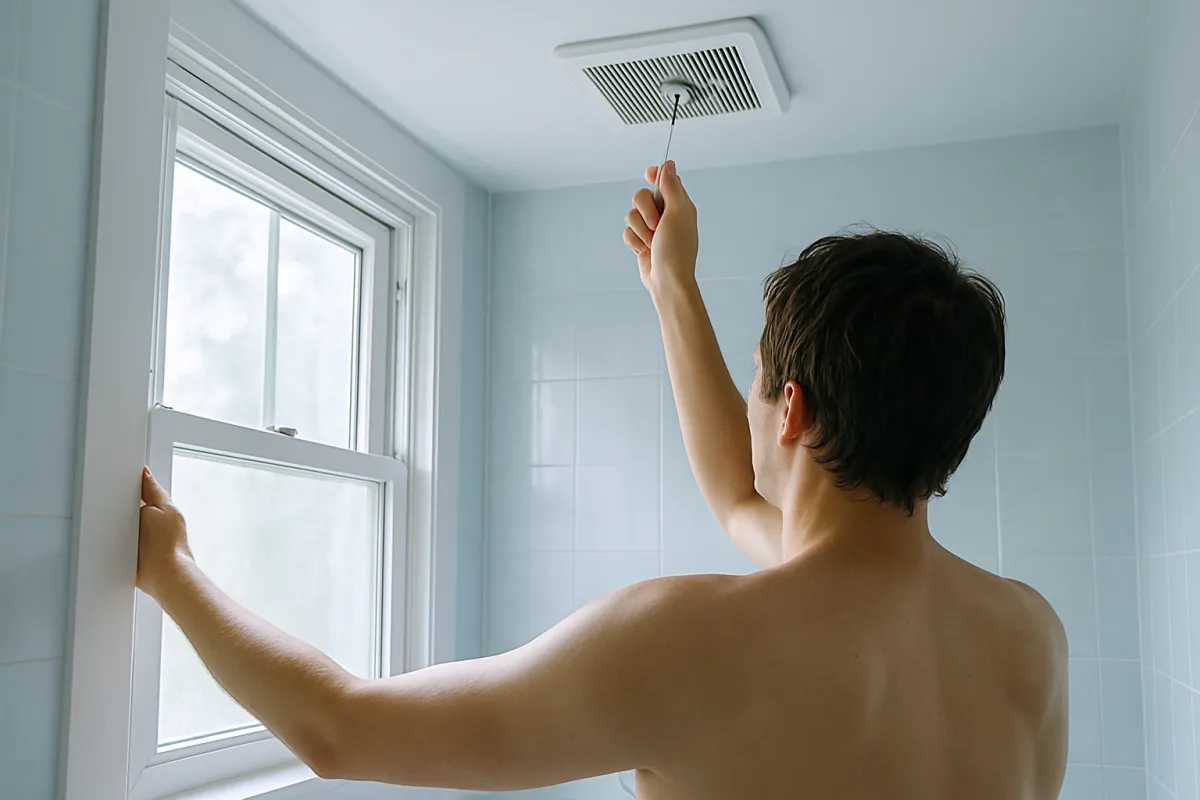
Watch out for the one rule that makes or breaks this step: ventilation only helps when the outdoor air is drier than the indoor air. On a cool, dry day, opening windows lowers the reading; on a hot, muggy day or during a humid summer stretch, it pours damp air in and makes things worse, so keep the windows shut and lean on the AC or dehumidifier instead. Check the outdoor humidity against your indoor hygrometer before you open up. Also confirm your bathroom and kitchen fans actually vent outside rather than into an attic or crawlspace, because a fan that dumps moist air into the structure just moves the problem.
Step 3: Run a right-sized dehumidifier
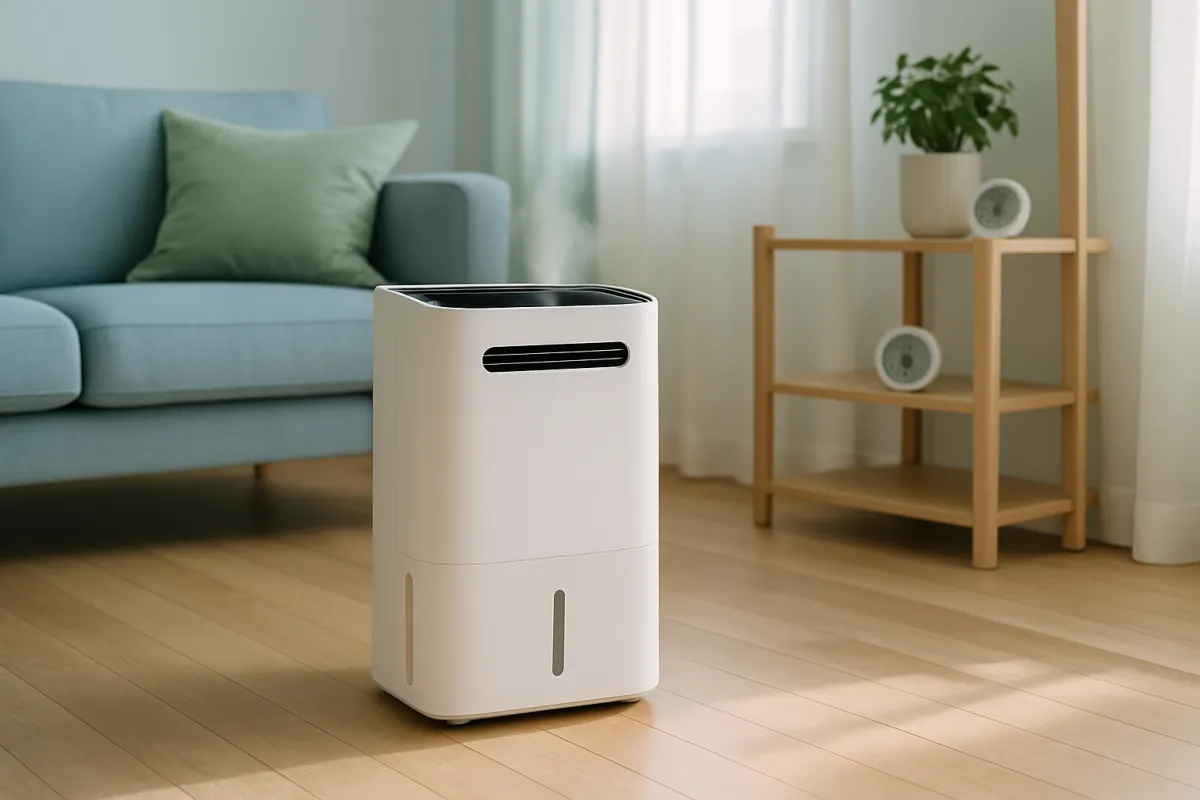
When ventilation is not enough, or the outdoor air is too humid to help, a dehumidifier is the appliance built specifically to pull moisture out of indoor air, and in a persistently damp room it is usually the most reliable tool for holding humidity in range. It works by drawing room air across a cold coil where water condenses out, drips into a tank or a routed drain, and returns drier air to the space. For a basement, a crawlspace, or a room that stays muggy no matter the season, it is often the difference between chasing the problem and actually controlling it.
The whole game here is sizing. A dehumidifier is rated by how many pints of water it can remove per day, and that rating has to match both the size of the room and how damp it is. Too small for a wet basement and the unit runs every hour and never quite catches up; matched to the space, it holds the target comfortably and cycles off. As a rough illustration, a small, mildly damp room needs far less capacity than a large, wet basement, and dampness pushes the pint number up as much as square footage does. Rather than trust a rule of thumb, match the unit to its own stated coverage rating and confirm it against your room, and for the full sizing method and what the machine costs to run, our dehumidifier size and cost report works the pints, the square footage, and the watts-times-hours math in detail. On our 65 percent basement example, a correctly sized unit is the single largest contributor to bringing the room down into range.
Watch out for two traps. First, an oversized unit is not automatically better; it costs more, and while it will dry the room, you gain little over a right-sized model that already keeps up. An undersized one is the real failure, running constantly without holding the target. Second, a dehumidifier controls the symptom beautifully but does nothing about the source, so a unit fighting a wet crawlspace or a leak will run up a running cost forever. Set its target in the 30 to 50 percent range, empty the tank or route a drain hose, and treat it as one tool alongside fixing the source, not a substitute for it.
Step 4: Use your air conditioner to dry the air
Your air conditioner is a dehumidifier you may already be underusing, because cooling and drying are the same physical process. As the AC pulls warm room air across its cold evaporator coil to cool it, moisture in that air condenses on the coil and drains away, so a running air conditioner is actively wringing water out of the house at the same time it drops the temperature. On a hot, muggy day when opening the windows would only invite more damp air in, running the AC is often the most practical way to bring both the temperature and the humidity down together.
To get the drying benefit rather than just the cooling, let the system run in longer, steadier cycles rather than short blasts. A unit that runs a bit longer keeps air moving across the coil, which is where the moisture is removed, so resist the urge to set the thermostat so cold that the room satisfies in a few minutes and shuts off. Some systems offer a fan setting that keeps air circulating; running the fan on auto rather than constantly on can help, because a fan that runs after the compressor stops can re-evaporate water off the coil back into the room. For the full watts-to-dollars picture of what the cooling itself costs, our air conditioner running-cost report works the arithmetic per hour, day, and month, so you can weigh the running cost against the comfort. On our basement example, AC use is a modest illustrative contributor, since a basement is often cooler and less AC-driven than upstairs.
Watch out for the oversized-AC trap, which is the usual reason a house stays muggy with the cooling on. A unit too large for the space cools the room quickly and then shuts off before it has run long enough to remove much moisture, winning on temperature and losing on humidity, so the room feels cool and clammy at once. There is little you can do about an already-installed oversized unit beyond running it wisely, but it is a reason a dedicated dehumidifier sometimes earns its place even in an air-conditioned home. Keep the filter clean and the coil clear so the system moves air efficiently, and confirm the condensate drain is flowing rather than backing up.
Step 5: Fix the moisture sources at home
Every step so far removes moisture from the air; this one stops it going in, and it is where the durable wins hide. Ventilation and a dehumidifier can run forever against a source that keeps resupplying the room, so finding and shutting off what actually adds the water is often the move that finally holds the reading down. The sources are usually mundane and, once you see them, fixable without spending much. The trick is to treat a damp room as a mystery to solve rather than a symptom to fight.
Start with the usual suspects. Drying laundry indoors on a rack releases the water from a whole wash load into the room air, so line-dry outside, use a properly vented dryer, or at least dry clothes in a ventilated space. Long, hot showers pour steam into the house, so shorter showers with the fan running cut it at the source. Cooking, especially boiling and simmering, adds moisture, so cover pots and run the range hood. Then hunt the hidden sources: a slow plumbing leak under a sink, condensation dripping off cold pipes, a damp crawlspace, or water pooling against the foundation after rain. As an illustration, on our 65 percent basement room, moving an indoor drying rack outside and correcting a habit or two makes a meaningful dent, an illustrative contribution alongside the appliances.
Watch out for the leak you cannot see, which is the source people most often miss. A persistent damp patch, a musty smell that will not clear, or a hygrometer that climbs even with a dehumidifier running all point to a moisture source still feeding the room, often water intrusion from the ground, the roof, or the plumbing. Chasing that with more ventilation is like bailing a boat without finding the hole. Look for staining, check under sinks and around appliances, and if the source is water coming through the foundation or a leak inside a wall, that is the point to bring in a professional rather than keep guessing.
Step 6: Seal and insulate the damp spaces
The first five steps change how you run the home; this one changes the home itself, and it is the durable fix that keeps humid air and ground moisture from refilling the rooms you just dried. Two of the fattest slices on the chart, ground and foundation moisture and humid outdoor air leaking in, are pure resupply problems: no matter how much moisture you remove, an unsealed crawlspace and leaky gaps keep letting more in. Sealing cuts that resupply at its source, which is why it compounds with every earlier step, especially in a basement or crawlspace.
Start where the moisture enters. In a crawlspace or basement, a ground moisture barrier, typically a heavy plastic sheet laid over exposed earth, blocks a surprising amount of the damp that wicks up from the soil, and sealing foundation cracks and gaps keeps groundwater and humid outdoor air out. Upstairs, weatherstrip doors and caulk the gaps around windows so muggy summer air is not pouring in through leaks, the same sealing that helps heating and cooling. Grade soil to slope away from the foundation and keep gutters and downspouts carrying rain away from the walls, since water pooling against the foundation is a leading cause of a chronically damp basement. On our basement example, sealing is a smaller but durable illustrative contributor that keeps the other steps from fighting a constant resupply.
Watch out for the timeline and the scale. Unlike a dehumidifier that lowers the reading today, sealing and a moisture barrier are an investment measured in the long run, and the payoff shows up as a room that stays dry rather than a number that drops overnight. Some of this, caulk, weatherstripping, a rolled-out moisture barrier, is well within reach for a homeowner; the bigger work, sealing a foundation, encapsulating a crawlspace, or correcting drainage and grading, can be a substantial job. If a basement takes on water, or the crawlspace is chronically wet, treat that as a moisture-intrusion problem for a qualified professional rather than a weekend fix.
Step 7: Add moisture-absorbing helpers and mind your houseplants
With the big levers pulled, a few small helpers can nudge a room the last little way, and one common source is worth a caveat. Passive moisture absorbers, the disposable tubs and hanging bags of desiccant sold to sit in a closet, a small bathroom, or a cabinet, pull a little water out of the air in a small, enclosed space. They are not a substitute for ventilation or a dehumidifier in a real damp problem, but in a tiny space with no airflow, a closet, a wardrobe, a gun safe, or a rarely opened cabinet, they can quietly keep things from turning musty.
The houseplant caveat cuts the other way. Plants release moisture into the air through their leaves and from damp soil, so a room crowded with many plants reads a little more humid than the same room without them. For a handful of plants the effect is small and usually not worth a second thought, but in a room you are actively trying to dry out, a large indoor jungle is one more moisture source to account for. As an illustration, on our basement example, absorbers and plant adjustments together contribute little to nothing measurable, which is exactly why they come last: they are fine-tuning, not the main event. In a room that is too dry, by contrast, plants and their moisture may be a welcome addition.
Watch out for treating either helper as the solution. Reaching for a tub of desiccant crystals or rearranging the plants while a wet crawlspace or an indoor drying rack goes untouched is effort spent on the shortest bar while the long ones run unchecked. If a room is genuinely damp, avoid overwatering plants, thin them out of the problem space, and improve that room’s ventilation before you count on absorbers. Use these as the finishing touch on a room already brought most of the way into range by the earlier steps, not as the first thing you try.
Step 8: Prevent mold and know when to call a pro
The whole point of reducing humidity is what it prevents, and mold is the headline. Mold needs moisture to grow, and indoor air sustained above roughly 60 percent relative humidity gives it the damp surfaces it needs, which is why holding the room in the 30 to 50 percent comfort range is the single best thing you can do to keep it away. This step is both the payoff of the previous seven and the checkpoint that tells you whether you have a humidity problem you can manage or a bigger one that needs a professional.
Keep humidity in range and stay alert to the early warning signs. Wipe up window condensation and treat heavy, recurring condensation as a signal the room’s humidity is still too high for its cold surfaces. Watch the spots mold likes: cold corners, behind furniture pushed against exterior walls, under sinks, and around windows. A musty smell is often the first clue before anything is visible. Keep air moving in still corners, pull furniture a little off exterior walls so air can circulate, and address damp spots promptly rather than letting them sit. On our basement example, holding the room at the target near 45 percent is what keeps the space from sliding back toward the conditions mold needs.
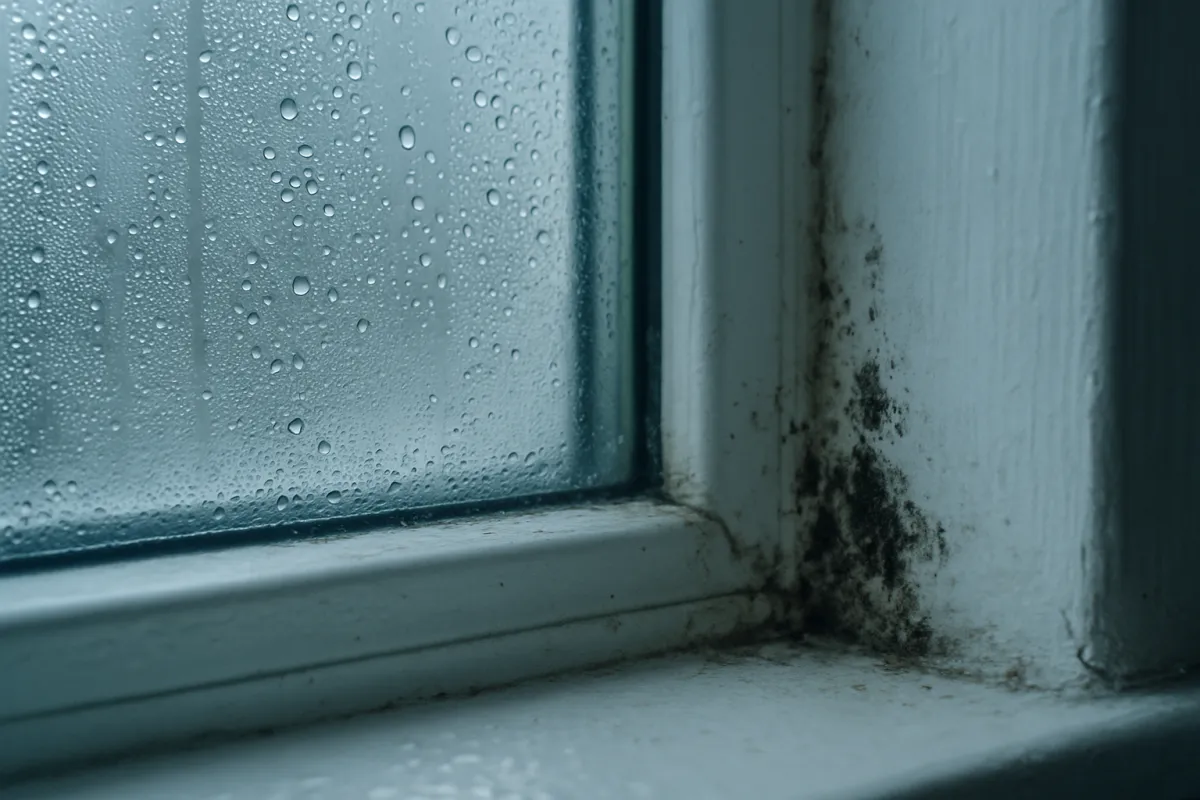
Watch out for the line between a manageable damp room and a bigger problem, because this is where the honest answer is to stop and get help. A small amount of surface mold from a one-off damp episode, cleaned up and kept dry, is one thing; a large or recurring area of mold, mold you can smell but not find, mold on porous materials like drywall or insulation, or dampness driven by water coming through the foundation or a hidden leak is another. Those point to a moisture source or an extent of growth beyond a simple wipe-down. Some people are sensitive to mold, and this article is general information rather than health or building advice, so if the problem is large, recurring, or tied to a source you cannot find and stop, bring in a qualified remediation or building professional.
A worked example: dropping a room from 65 to 45 percent
Put the steps together on one illustrative room so the numbers connect. The space is a basement bedroom reading 65 percent relative humidity on a summer evening, well above the comfort range and musty enough to notice. The goal is to bring it to a comfortable 45 percent, a 20 percentage-point drop, reached by stacking several tactics rather than leaning on any single one. The figures below are illustrative contributions, not measured results, and your own room will split differently.
Right-sized dehumidifier (Step 3). A dehumidifier matched to the basement’s size and dampness is the workhorse, contributing an illustrative 8 points of the drop. This is the largest single lever, precisely because it is the tool built for a damp, hard-to-ventilate space.
Ventilation and exhaust fans (Step 2). Running the fans, keeping showers and cooking moisture out of the space, and airing the house on dry days contributes an illustrative 5 points.
Fixing moisture sources (Step 5). Moving an indoor drying rack outside and correcting a couple of damp habits contributes an illustrative 4 points, and costs nothing.
Air conditioner use (Step 4). Running the cooling in steady cycles on muggy days adds an illustrative 2 points of drying.
Sealing and insulating (Step 6). A ground moisture barrier and sealed gaps contribute an illustrative 1 point on the reading and, more importantly, keep the other steps from fighting a constant resupply.
Add them and the illustrative drop is about 20 points, taking the room from 65 percent into the comfortable 45 percent target. The chart below shows how that 20-point drop splits by tactic.
Illustrative humidity reduction by tactic
How an illustrative 20-point drop, from 65 to 45 percent, splits across the steps. Bars scale with the point contribution. Illustrative, not measured.
The dehumidifier is the long bar in a damp basement, but ventilation and fixing the source together match it. No single tactic does the whole job.
The shape of the split is the whole lesson repeated: the dehumidifier is the workhorse in a damp, hard-to-ventilate space, but ventilation and fixing the source together contribute as much, and the durable sealing keeps the reading from creeping back. A room in a dry climate, or one whose dampness comes mostly from a single fixable source, would see its own split lean differently, perhaps with the source fix doing most of the work. Swap your own room size, current reading, and target into the planner to see your own version of this example, in your own numbers.
Common mistakes that keep a home humid
Most damp rooms stay damp not for lack of effort but because the effort lands in the wrong place. These are the pitfalls that quietly cancel out otherwise good intentions.
- Ignoring the source and treating only the symptom. Buying a dehumidifier and running it forever against a wet crawlspace or an indoor drying rack is bailing a boat without finding the hole. Find and stop the moisture source, then let the appliances hold the room.
- Sizing the dehumidifier wrong. An undersized unit runs constantly and never reaches the target, while an oversized one costs more for little gain. Match the pint rating to both the room’s size and how damp it is, using the unit’s own coverage rating rather than a guess.
- Drying laundry indoors. A single indoor drying load releases the water from a whole wash into the room air, and it is one of the most common hidden sources. Line-dry outside or use a properly vented dryer.
- Ventilating at the wrong time. Opening windows on a hot, muggy day pours damp air in and raises the reading. Ventilation only helps when the outdoor air is drier than the indoor air, so check before you open up.
- Missing a hidden leak. A slow plumbing leak, water through the foundation, or condensation off cold pipes will defeat every other step. If the reading will not drop and a damp patch or musty smell persists, hunt for the source before adding more equipment.
Clear these and your effort flows to the moves that actually lower the reading, which is the difference between a room that dries out and one that stays stubbornly muggy.
Troubleshooting: when the damp will not budge
The eight steps cover the common case, but homes differ. Here are the edge cases and what to do when the standard advice does not fit.
What if my basement or crawlspace stays damp? Basements and crawlspaces are the hardest case because they sit against damp earth and are hard to ventilate, so ground and foundation moisture, the big middle slice of the chart, dominates. Lean on Steps 3, 5, and 6: a right-sized dehumidifier with a routed drain, a ground moisture barrier over exposed earth, sealed foundation gaps, and drainage that carries rain away from the walls. If the space takes on water or is chronically wet, treat it as a moisture-intrusion problem for a professional rather than a dehumidifier alone.
What if the whole house is humid, not one room? A house-wide problem points to either a humid climate, widespread air leakage letting muggy outdoor air in, or a central source. Run the AC in steady cycles for its drying effect, air the house out only when the outdoor air is drier, and consider a larger or whole-house approach to dehumidification if a single portable unit cannot keep up. Sealing the building envelope, Step 6, matters more here because the resupply is coming in everywhere at once.
What if I get condensation on windows in winter? Winter condensation is a humidity-too-high signal in disguise: warm, moist indoor air meets cold glass and the moisture condenses out. Cold windows condense at lower humidity than warm ones, so in heating season aim for the lower end of the 30 to 50 percent range, run exhaust fans during showers and cooking, and keep air moving. Reducing the indoor moisture usually clears the glass; persistent heavy condensation means the humidity is still too high for the cold surfaces.
What if mold keeps coming back? Recurring mold in the same spot almost always means a moisture source is still feeding it, so more cleaning without fixing the damp is a losing battle. Trace the source, a leak, a cold uninsulated corner, poor airflow behind furniture, or ground moisture, and address that. If the mold is large, on porous materials, or tied to water intrusion you cannot find and stop, that is beyond a wipe-down, and a qualified remediation or building professional is the right call, especially if anyone in the home is sensitive to it.
Your humidity-reduction checklist
Work this list top to bottom, which is also measure-first then remove-then-stop the moisture. Clear it and you have given a damp room its best chance of holding in the comfortable 30 to 50 percent range.
- Measure with a hygrometer. Read the problem room, note the time and conditions, and take a few readings across a day. Aim for roughly 30 to 50 percent.
- Ventilate the moisture out. Run bathroom and kitchen fans during showers and cooking, and air the house out when the outdoor air is drier than the indoor air.
- Run a right-sized dehumidifier. Match the pint rating to the room size and dampness, set the target in range, and route a drain for a basement or crawlspace.
- Use the AC for its drying effect. Run steady cycles on muggy days, keep the filter and coil clean, and confirm the condensate drain flows.
- Fix the moisture sources. Stop indoor laundry drying, cover pots, shorten showers, and hunt down leaks, damp ground, and condensation off cold pipes.
- Seal and insulate the damp spaces. A ground moisture barrier, sealed foundation gaps, weatherstripping, and drainage that slopes away from the walls.
- Add absorbers and mind the plants, last. Desiccant tubs in tiny enclosed spaces, and thin out plants in a room you are trying to dry.
- Prevent mold and know the line. Hold the room in range, watch the cold corners and windows, and call a professional for large, recurring, or hidden mold and any water intrusion.
Save the list, work one line at a time, and re-check the hygrometer after a few days to see the effect land.
The bottom line
A humid home is not something the weather simply does to you; it is a balance you can measure and shift. Start with a hygrometer so the muggy feeling becomes a number and a target, a commonly cited 30 to 50 percent, then work in order: remove moisture with ventilation, a right-sized dehumidifier, and your air conditioner, and stop it going in by fixing the sources and sealing the damp spaces. On an illustrative basement room, stacking those tactics drops the reading from 65 to 45 percent, with the dehumidifier doing the most work but ventilation and fixing the source together matching it, and no single move doing the whole job. The biggest mistake is treating the symptom while ignoring the source, so find the leak, the wet crawlspace, or the indoor drying rack before you count on any appliance. Keep the room in range and you keep mold and that musty damp at bay, and if the problem is large, recurring, or coming through the foundation, that is the point to bring in a professional. Do the steps in that order, keep every judgment tied to your own hygrometer reading, and a damp room stops feeling like weather and starts behaving like something you control.
A note on scope: these notes exist to hand you a working order for reducing indoor humidity, not to promise any specific number. Every humidity reading, percentage-point drop, and share above is an illustrative planning figure drawn from typical ranges rather than measured on one home, and your own climate, construction, season, and habits will move the result enough to matter, so read your own room with a hygrometer before you count on any change. Nothing here is professional building, HVAC, or health advice. High humidity and mold are moisture problems that can involve hidden leaks, foundation water, and indoor air quality, and some people are sensitive to mold, so keep spaces in the comfort range per general guidance and bring in a qualified remediation, HVAC, or building professional for any large, recurring, or hidden mold, any water coming through the structure, or any health concern before you rely on the figures in this article.
Frequently asked questions
What is the ideal humidity level for a home?
A commonly cited comfort range for indoor air is roughly 30 to 50 percent relative humidity, and many people aim for somewhere in the middle of that band year round. Below about 30 percent the air feels dry and can leave skin, throats, and wood furniture unhappy, while above about 50 to 60 percent it starts to feel muggy and gives mold and dust mites the moisture they need to thrive. The exact number that feels right varies by season and by person, and in cold weather you often want to sit toward the lower end to avoid condensation on windows. Treat 30 to 50 percent as a general target rather than a precise rule, and find your own comfortable point with a hygrometer.
How do I lower humidity in my home fast?
The fastest levers are ventilation and a dehumidifier. Running bathroom and kitchen exhaust fans, cracking a window when the outdoor air is drier than the indoor air, and airing out a stuffy room move a lot of moisture in minutes. For a persistently damp space, a right-sized dehumidifier is the tool built for the job and can pull the reading down over hours rather than minutes. Your air conditioner also dehumidifies as it cools, so running it on a muggy day helps too. None of these fixes the underlying source, though, so pair the fast moves with finding and stopping whatever is adding the moisture in the first place.
Why is my house so humid even with the AC on?
A few things can leave a house humid despite the air conditioner running. An oversized AC cools the room quickly and then shuts off before it has run long enough to wring much water out of the air, so it wins on temperature but loses on moisture. A very damp source, such as a wet basement, drying laundry indoors, or a plumbing leak, can also add moisture faster than the AC removes it. And if humid outdoor air is leaking in through gaps and an unsealed crawlspace, the AC is fighting a constant resupply. Check for an oversized unit, hunt for the moisture source, and seal the leaks, and add a dedicated dehumidifier if the AC alone cannot hold the room in range.
Does a dehumidifier really lower humidity?
Yes, a dehumidifier is the appliance designed specifically to remove moisture from indoor air, and in a damp room it is usually the most reliable tool for holding humidity in range. It pulls air across a cold coil where water condenses out, drips into a tank or a drain, and returns drier air to the room. The catch is sizing: a unit too small for a damp basement runs constantly and never quite catches up, while one matched to the room's size and dampness holds the target comfortably. For the full sizing method and what a unit costs to run, our sibling report on dehumidifier size and cost works the numbers. A dehumidifier controls symptoms well, so still fix the moisture source alongside it.
Can opening windows reduce indoor humidity?
It depends entirely on whether the outdoor air is drier than the indoor air. On a cool, dry day, opening windows and airing out the house flushes moist indoor air and replaces it with drier outdoor air, which lowers the reading. On a hot, muggy day, or during a humid summer stretch, opening the windows does the opposite and lets damp air pour in, so you are better off keeping them shut and running the AC or a dehumidifier. A hygrometer indoors and a quick check of the outdoor humidity tell you which situation you are in. Use ventilation as a tool when the outside air helps, not as a blanket rule.
How do I stop condensation on my windows?
Window condensation forms when warm, moist indoor air meets a cold glass surface and the moisture condenses out, so it is really a signal that the room's humidity is higher than the cold surfaces can tolerate. The fix is to lower the indoor humidity and improve airflow: run exhaust fans when cooking or showering, keep the room ventilated, and in winter aim for the lower end of the comfort range because cold windows condense at lower humidity than warm ones. Reducing the moisture sources and, if needed, running a dehumidifier usually clears it. Persistent heavy condensation and any resulting mold are worth treating as a sign the humidity is too high for the space.
Do houseplants make a room more humid?
Houseplants do release some moisture into the air through their leaves and from the damp soil, so a room packed with many plants can read a little more humid than the same room without them. For a handful of plants the effect is small and usually not worth worrying about, but if you are fighting a genuinely damp room, a large indoor jungle is one more moisture source to account for. If a room is already too humid, thinning the number of plants, not overwatering, and improving ventilation in that space all help. In a dry room the added moisture may even be welcome, so treat plants as a minor lever that cuts both ways.
Is high humidity in a house dangerous?
Sustained high indoor humidity is more of a comfort and maintenance problem than an immediate danger, but it is worth taking seriously because it creates the conditions for mold, dust mites, and damage to wood and finishes. Mold in particular needs moisture to grow, and damp air above roughly 60 percent gives it what it needs, which is why persistent damp spots, musty smells, and visible mold should be addressed rather than ignored. Mold can affect indoor air quality and some people are sensitive to it. This article is general information, not health or building advice, so if you have a large mold problem, a chronic moisture source you cannot find, or any health concern, bring in a qualified professional.