What's on this page
- What actually gets dirty inside a dehumidifier
- Before you start
- Step 1: Unplug the unit and empty the water tank
- Step 2: Wash the bucket and check the float switch
- Step 3: Remove, wash, and fully dry the air filter
- Step 4: Clean the coils without bending the fins
- Step 5: Flush the drain hose and clear the pump
- Step 6: Wipe the grille and intake, then reassemble and test
- How often to clean each part
- A worked example: a full end-of-season clean
- Common mistakes when cleaning a dehumidifier
- Troubleshooting: ice on the coils
- Troubleshooting: a musty smell that survives the clean
- Troubleshooting: the bucket is not collecting water
- Troubleshooting: the unit keeps shutting off
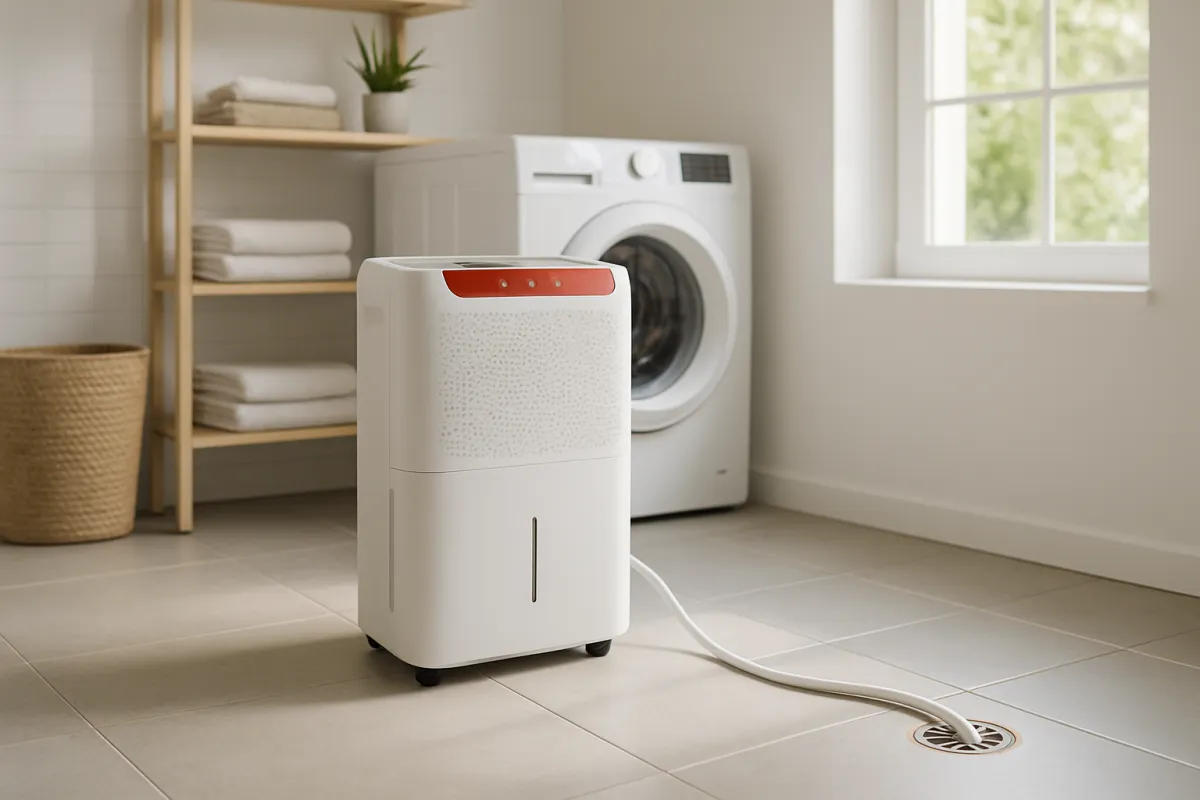
- Continuous drainage changes what you clean
- What cleaning fixes and what it does not
- The safety rules that never bend
- What a clean dehumidifier is worth on the bill
- Your dehumidifier cleaning checklist
- The bottom line
A dehumidifier is the only appliance in the house that spends its entire working life soaking wet on purpose. It pulls dusty room air through a filter, condenses moisture onto a cold coil, and drips the result into a plastic tank that then sits there, warm and still, waiting for you. Every part of that description is also a description of how something gets dirty. Dust mats into the filter and onto the fins, a slick biofilm grows on the bucket walls, sludge collects in the drain hose, and within a season the machine that was supposed to make the basement smell better is the thing that smells.
These bench notes give you a six-step method for how to clean a dehumidifier properly: unplug and drain it, wash the bucket and check the float, wash and fully dry the filter, clear the coils without wrecking the fins, flush the drain hose and pump, then wipe the grille and put it back together with a real function check at the end. Everything here uses things you already own and takes under an hour of hands-on work. If your unit is not just dirty but genuinely misbehaving, start with our dehumidifier fault walkthrough, and for what the running hours cost you, see our dehumidifier running-cost report. Set your daily running hours in the cleaning-schedule planner as you read and it will tell you how often each step is worth repeating.
Key takeaways
- Unplug the unit at the wall before anything else and leave it unplugged until every washed part is completely dry. Water and a live control board are the only genuine hazard in this job.
- The whole clean is six steps: unplug and drain, wash the bucket and float, wash and dry the filter, brush the coils, flush the drain hose, then wipe the grille, reassemble, and test.
- The filter is the highest-value habit. A matted filter starves the coil of airflow, which is what causes ice, weak collection, and longer running hours all at once.
- Never spray water or cleaner into the coil pack while it is in the cabinet, and never mix bleach with vinegar in the bucket. Brush the fins dry, along their length, not across it.
- Match the intervals to runtime, not the calendar: filter about every two weeks of heavy use, bucket about weekly, full deep clean roughly every fourteen weeks at twelve hours a day.
What actually gets dirty inside a dehumidifier
Before you open anything, it helps to know what you are removing, because a dehumidifier collects four or five distinct kinds of grime and each one responds to a different step. Knowing the mix is what tells you why washing the bucket alone never fixes a musty machine, and why the filter earns more attention than the parts you can see. The stacked bar below shows an illustrative breakdown of the buildup inside a neglected home unit after a damp season, so you can see where the trouble concentrates and where to spend your effort.
What builds up inside a dehumidifier
An illustrative split of the grime that collects in a neglected home dehumidifier after a damp season. Segments sum to 100 percent. Your mix varies by room and dust load.
Filter dust and bucket biofilm are the two biggest slices, which is why steps two and three do most of the work. Coil dust is the slice that quietly costs you runtime. The split is illustrative and shifts by home.
The shape of that split is the whole strategy in one picture. Filter dust and bucket biofilm together account for most of what you can smell, which is why the two easiest steps deliver the biggest immediate improvement. Coil dust is the slice you cannot smell and rarely see, and it is the one that costs you money, because a fin pack wearing a felt coat moves less air and forces longer running hours for the same pints of water. Drain hose sludge is smaller but nastier, since a partly blocked hose backs water up into the unit and shows up on the floor rather than in the tank. Grille grime is mostly cosmetic until it is thick enough to restrict the intake.
One more framing worth carrying into the steps. A dehumidifier has two halves that need completely different treatment: a wet half you can wash, and a dry half you must never wet. The bucket, the filter, the hose, and the outer shell are the wet half, and warm soapy water is the right tool for all of them. The coils, the fan, the compressor, the float switch mechanism, and the control board are the dry half, and the only things that should ever touch them are a soft brush, a vacuum nozzle, and a barely damp cloth. Every serious mistake in this job comes from treating a dry-half part as a wet-half part.
Before you start
This is a beginner job. Nothing in the six steps needs a specialist tool, and nothing requires opening the sealed refrigeration circuit, which is the one part of a dehumidifier that is genuinely off limits to a home cleaner. Budget about forty five minutes of hands-on work, and around five hours start to finish once you allow for drying, because the drying is not optional and it is the part people rush. The difficulty is low; the discipline is the hard part.
Gather a small kit first so you are not walking away mid-job with wet hands.
- A soft brush and a vacuum with a brush attachment, for the fins and the intake grille. A clean paintbrush works as well as anything sold for the purpose.
- Warm water, a drop of dish soap, and a cloth or sponge, for the bucket and the outer shell. Add diluted white vinegar if the bucket has a slick film or light mineral marks.
- Two or three dry microfiber cloths and a towel, one for wiping and the rest to lay parts on while they dry.
- A screwdriver, only if your model’s grille or filter cover is screwed rather than clipped, plus a flashlight so you can actually see the fins.
- Your appliance manual, or the model number to look it up, since it is the authority on whether your filter is washable, where the internal drain plug lives, and what cleaners the maker permits.
Three ground rules keep the job safe and effective. First, unplug the unit at the wall for the whole job and the whole drying period. Second, nothing electrical gets wet, which means no spraying, no rinsing under a tap, and no damp cloth anywhere near the control panel or the fan motor. Third, dry everything completely before reassembly, because a filter reinstalled slightly damp is the single most reliable way to recreate the smell you just spent an afternoon removing. With the kit ready and those three rules agreed, start at the plug.
Step 1: Unplug the unit and empty the water tank
The first step is short and there is no version of this job that skips it. Pull the plug from the wall socket rather than switching the unit off at its own button, because the control board stays live behind a power switch and a fan can still turn. If the unit is drained continuously through a hose, disconnect that hose at the machine now too, and have a shallow tray or towel underneath, since a hose that has been running downhill for weeks holds more water than you expect and it will find your floor.
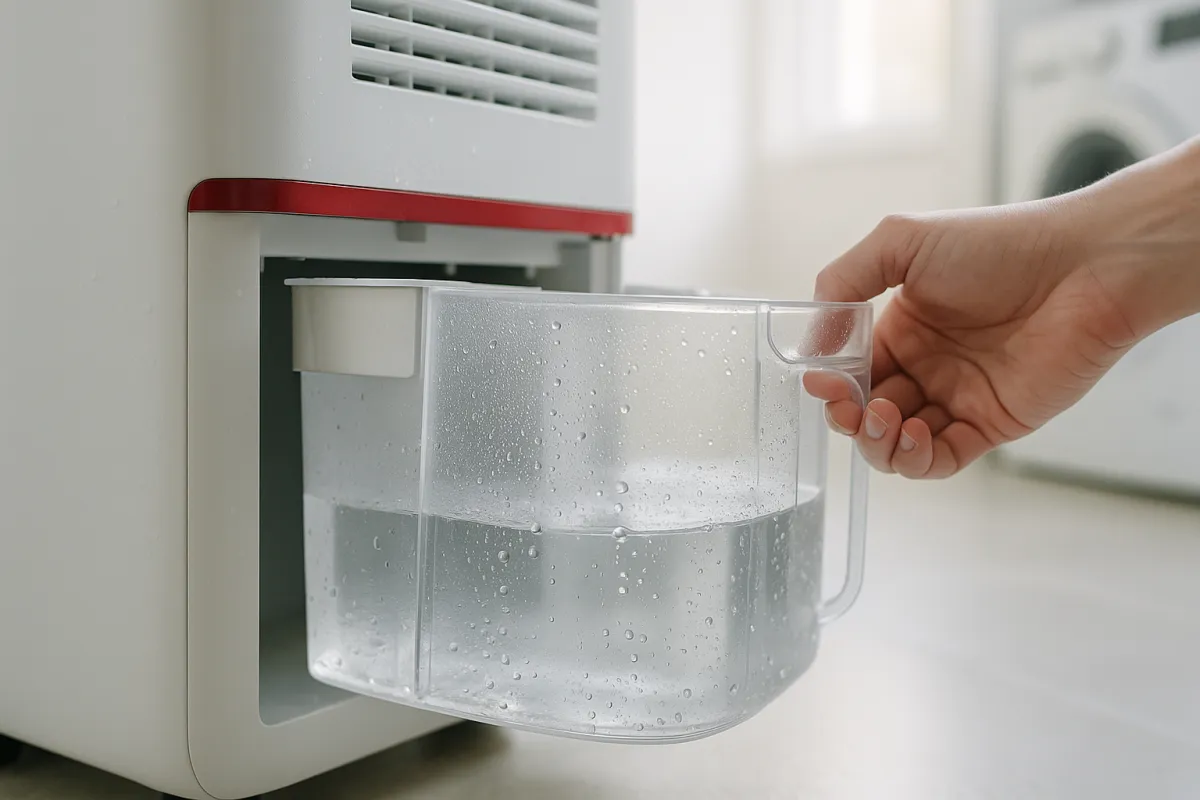
Then move the unit somewhere you can work. A bathtub, a laundry room floor, a garage, or outdoors on a mild day all beat a carpeted corner, because you will be shaking dust out of a filter and tipping residual water out of a tank. Slide the bucket out, carry it level, and empty it into a sink or drain rather than tipping it on the lawn, since the condensate in it is not clean water. Take the chance to look at the empty bucket well inside the machine, which is the tray the coil actually drips into, because debris settles there and it is easy to miss once the tank is back in.
Watch out for two things at this stage. Do not tip the whole machine on its side or upside down to drain it, because that can move compressor oil where it should not go, and some manufacturers ask you to stand a tipped unit upright for hours before running it again. And do not start unclipping panels yet: the order in these bench notes is deliberate, and working from the wet parts outward toward the dry ones keeps drips away from the coil pack you are about to brush.
Step 2: Wash the bucket and check the float switch
The bucket is where the smell lives, so this is the step with the most immediate payoff. Take the tank to a sink and wash it in warm water with a drop of dish soap, using a soft cloth or sponge on every interior face. Pay attention to the corners and the seam lines, because the slick, slightly slimy film that grows on standing condensate collects there first and it is what your nose is reacting to. For a bucket with a persistent film or light chalky marks, a solution of white vinegar in warm water helps, left to sit for a few minutes before you wipe it out. Rinse thoroughly with plain water afterwards so no soap or vinegar residue is left behind.
While the tank is out and clean, deal with the float. Most units use a float, a small buoyant arm or a floating puck in a channel, that rises with the water level and trips a switch to shut the compressor off when the bucket is full. Dust and film gum up the channel it rides in, and a float that sticks in the up position tells the machine the bucket is always full, which is one of the classic reasons a dehumidifier stops collecting for no visible reason. Rinse and wipe the float and its guide gently, then lift it by hand and let it fall a few times to confirm it moves freely. If the float assembly is part of the machine rather than the tank, clean it in place with a barely damp cloth and keep water away from the switch body behind it.
Watch out for the temptation to run the bucket through the dishwasher. Dishwasher heat can warp a thin tank enough that the float no longer reads the level correctly or the tank no longer seats, and a warped bucket puts water on the floor. Check your manual before using vinegar or any bleach solution, use one or the other and never both, and never use them together or back to back in the same tank, because bleach and an acid release a harmful gas. Set the washed bucket aside to air dry completely while you move on to the filter.
Step 3: Remove, wash, and fully dry the air filter
The filter is the part that pays you back the most, because it is the airflow bottleneck for the entire machine. On most portable units it is a fine mesh or pleated panel that slides out of a slot behind the intake grille, sometimes clipped into the grille itself. Slide it out slowly and hold it flat, since a loaded filter drops a surprising amount of dust the moment it changes angle. Take it outside or over a bin, tap the loose dust off first, then vacuum the dirty face with a brush attachment before any water touches it, because wetting a dry dust mat turns it into mud that is far harder to get out of the mesh.
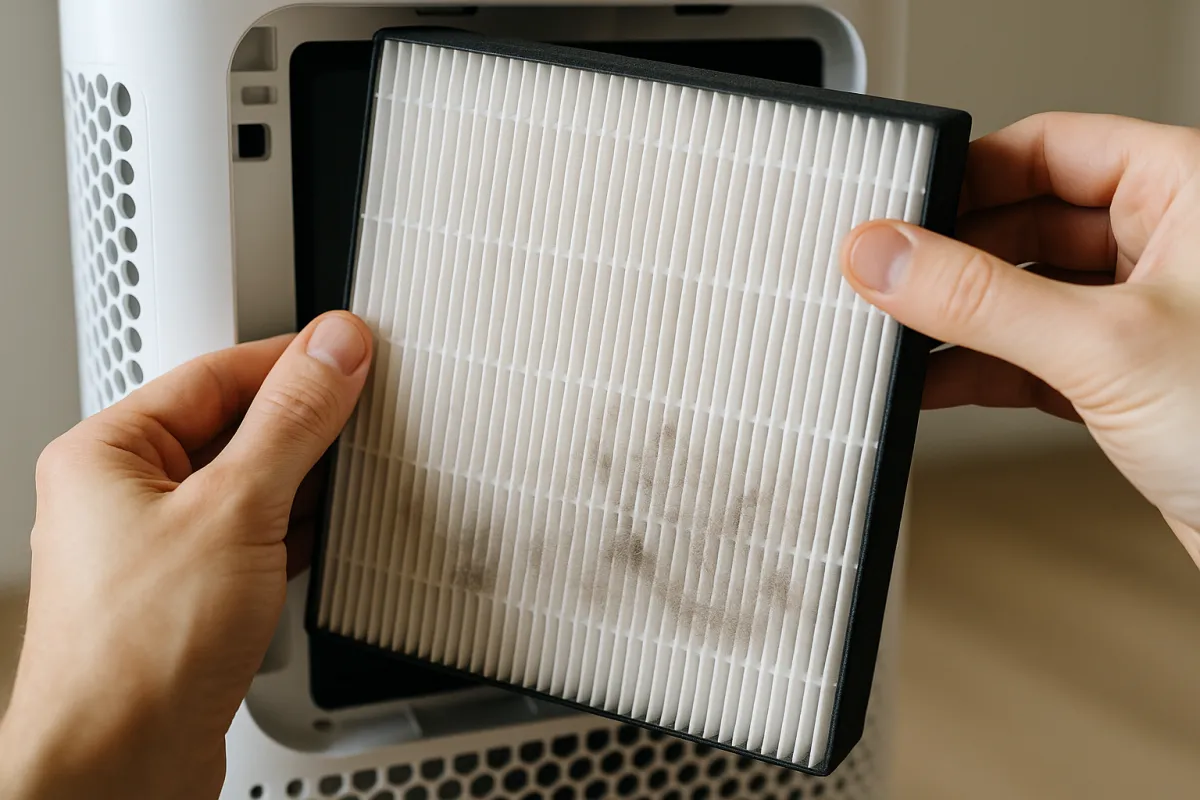
Once the loose dust is off, rinse a washable filter under lukewarm running water from the clean side toward the dirty side, so the water pushes the dust back out the way it came in rather than driving it deeper into the mesh. A drop of dish soap and a very soft brush will lift greasy kitchen dust that plain water leaves behind. Rinse until the water runs clear, shake the excess off, and lay the filter flat on a towel to dry. Then wait. A filter needs to be bone dry before it goes back in, which usually means several hours, and there is no shortcut: heat guns and hair dryers can warp the frame, and direct sunlight can make some mesh brittle.
Watch out for the assumption that every filter is washable. Some units use a disposable carbon or antimicrobial layer that is meant to be replaced rather than rinsed, and washing one of those destroys it while leaving it looking fine. Your manual settles this in one line. Watch out too for reinstalling a damp filter, which is the most common cause of a musty smell returning within a day of a clean, and for running the machine with no filter at all while the real one dries, since that sends every bit of room dust straight onto the coil you are about to spend ten minutes brushing. Feed your running hours into the cleaning-schedule planner to see how often this step is worth repeating for your unit.
Step 4: Clean the coils without bending the fins
With the filter out, you can see the coil pack, and this is the step where a careless minute does permanent damage. A dehumidifier has two coils: a cold evaporator that condenses the water, and a warm condenser that reheats the air on its way out. Both are copper tubing threaded through hundreds of thin aluminium fins spaced a fraction of an inch apart, and those fins are the airflow path. They bend under almost no pressure, and a bent section stays bent, permanently blocking the air you are trying to let through. Shine a flashlight into the pack before you touch it, so you can see which way the fins run and where the dust has matted.
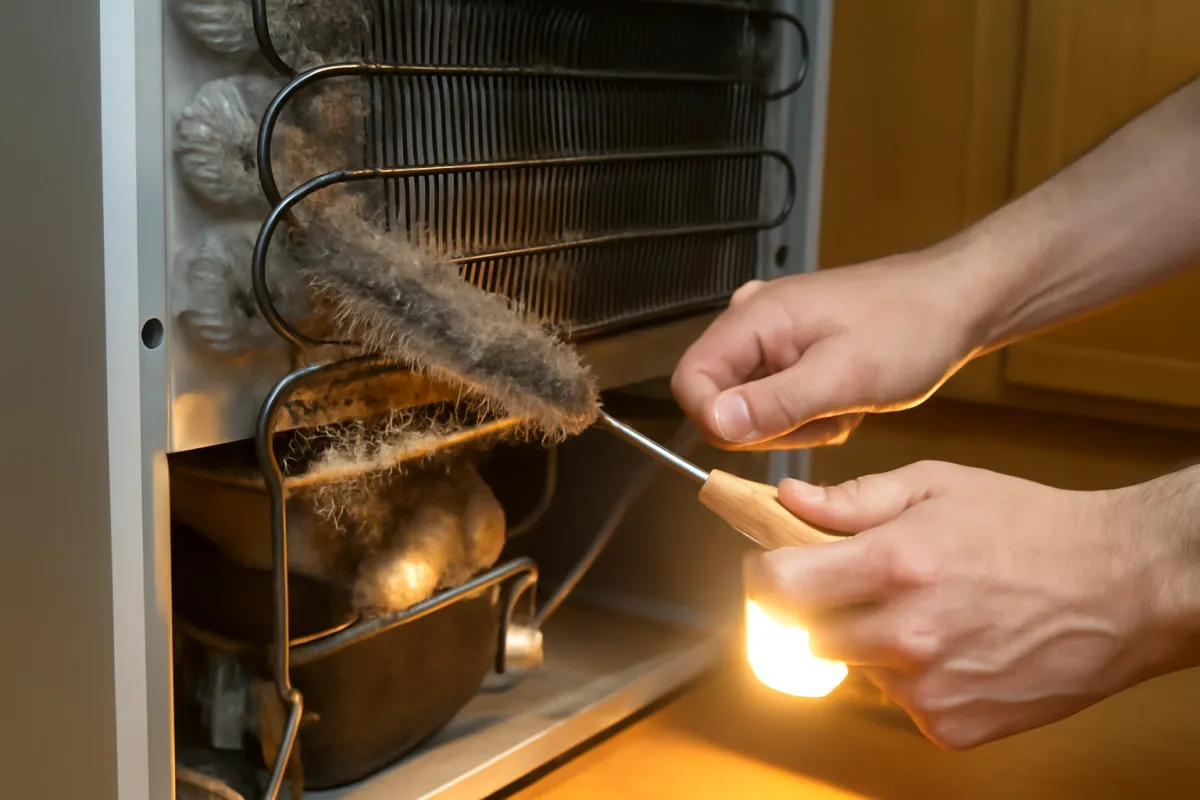
Clean dry, and clean along the fins. Use a vacuum with a soft brush attachment held so the bristles run parallel to the fin direction, usually vertically, and draw it down the face of the coil rather than scrubbing across it. A soft paintbrush does the same job in the gaps a vacuum nozzle cannot reach, flicking the dust outward so the vacuum can pick it up. Work in overlapping passes across the whole face, then check with the flashlight for the patches that are still dark. Ten minutes of patient dry brushing removes almost everything a home unit accumulates in a season, and it does it without a drop of liquid anywhere near the fan motor sitting behind the pack.
Watch out for the three things that ruin coils. Do not spray water, coil cleaner, or any liquid into the pack while it is inside the cabinet, because there is no drain path and it lands on the fan and the wiring below. Do not use compressed air at close range, which folds fins flat in a stripe you will never fully undo. Do not use a stiff brush, a screwdriver, or a knife to dig at a stubborn mat; soak time is not an option here, so accept that a small amount of embedded dust is better than a bent fin. If the fins are already crushed in a patch from an earlier clean or a knock in storage, a fin comb matched to the spacing can straighten them, but that is a repair rather than part of a routine.
Step 5: Flush the drain hose and clear the pump
If your unit drains continuously rather than into the bucket, the hose is the part most likely to be quietly failing, and it is invisible until water appears on the floor. Disconnect the hose from the drain port and take it to a sink or outside. Run warm water through it from the machine end, and if it is slow to clear, fill it with a warm soapy solution, cap or pinch both ends, shake it, and let it sit for a few minutes before flushing again. What comes out is usually a grey-brown sludge of dust and biofilm that has been building since the hose was fitted. Rinse until the water runs clean and hang the hose to drain fully.
While the hose is off, look at the drain port on the machine itself. Most have a small screen or a lip where debris collects, and a partly blocked port causes exactly the same symptom as a blocked hose: water backing up into the bucket well or out the front. Clear it with a cotton bud or the corner of a cloth. Check the internal drain plug too, the small rubber or plastic stopper that seals the port when you run on bucket mode. A forgotten plug is the number one reason a correctly fitted hose delivers nothing at all, and a plug left out is why a bucket-mode unit leaks.
Then check the hose route itself, because a clean hose in a bad route still fails. The run must fall continuously from the port to the drain with no uphill section and no low loop where water can stand, since standing water in a dip both blocks flow and grows the sludge you just removed. Coil the excess loosely rather than kinking it. If your drain is above the unit, gravity will never work and the answer is a condensate pump, not more hose. Units with a built-in pump have their own small reservoir and screen to rinse, and the pump outlet line clogs the same way the gravity hose does, so give it the same flush. Our dehumidifier fault walkthrough covers what to do when a drain still refuses to cooperate after all of that.
Step 6: Wipe the grille and intake, then reassemble and test
The last step finishes the outside and, more importantly, puts the machine back together in an order that will not create a new problem. Start with the intake grille, the louvered panel the air is drawn through, since it collects a felt of dust and hair on the room-facing side that restricts airflow before the filter even gets a chance. Vacuum it with the brush attachment, and if it unclips, wash it in warm soapy water and dry it fully. Do the same for the outlet louvers, then wipe the cabinet and the top of the machine with a barely damp cloth. Keep the cloth off the control panel except for the lightest wipe, and never spray any cleaner at the machine.
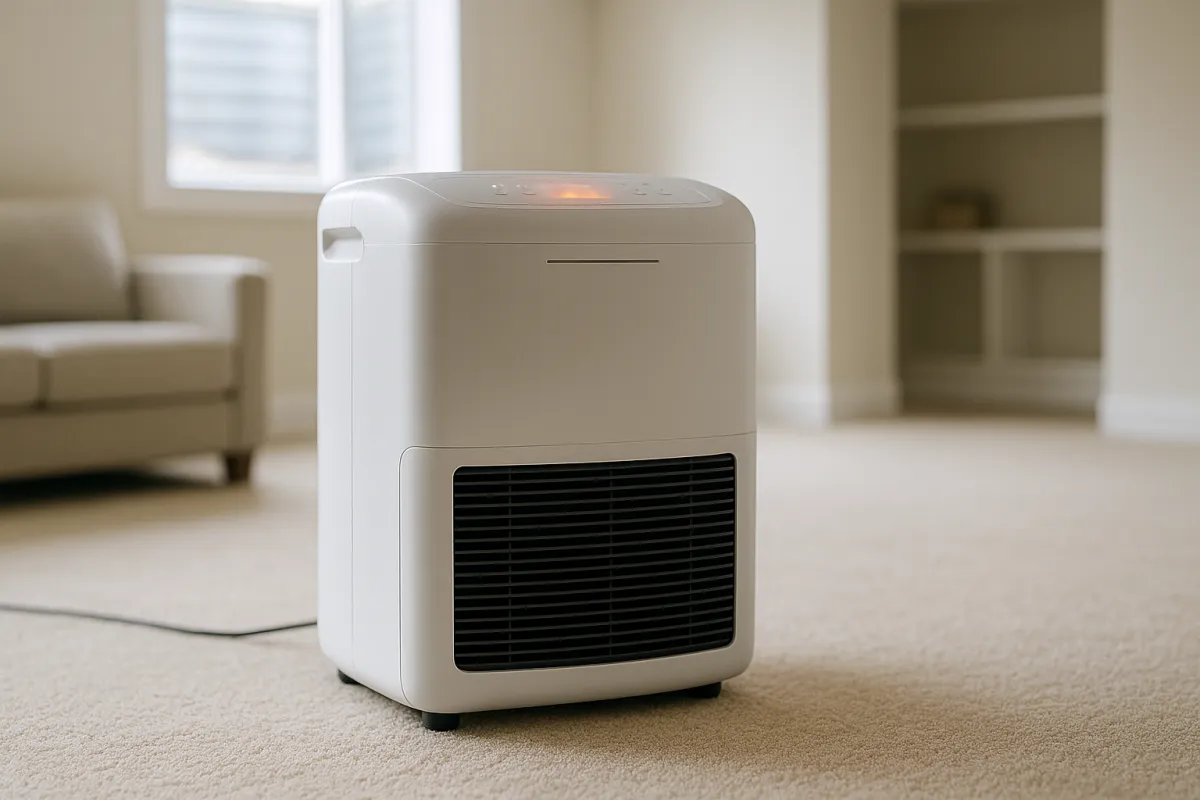
Now reassemble, and check dryness before each part goes in. The filter must be bone dry, the bucket must be dry inside, the grille must be dry, and the coil pack must have had no liquid near it at all. Seat the filter squarely in its slot, since a filter sitting crooked lets unfiltered air bypass it straight onto the clean coil. Clip the grille back on, slide the bucket in until it seats and the machine registers it, and refit either the drain plug or the hose depending on how you run it. If you have any doubt about whether something is dry, give it another hour, because nothing is lost by waiting and a lot is lost by not.
Then run the function check, which is what turns a clean into a confirmed clean. Plug the unit in, set the target humidity at least five points below what the room currently reads on a separate hygrometer, and switch it on. Listen for the fan, then for the compressor engaging after a short delay. Feel the exhaust: warm air is correct and means the machine is working as designed. Within an hour you should see condensate forming, and within a few hours the bucket should show a visible amount of water or the hose should be running. Watch out for the one failure mode that hides here: a bucket that does not seat properly leaves the float switch reading full, and the unit will run the fan and never the compressor. Reseat it firmly and listen again.
How often to clean each part
The six steps only pay off on a rhythm, and the right rhythm is set by running hours rather than by dates on a calendar. A unit that runs twenty hours a day in a damp crawl space pulls many times the air, and therefore many times the dust, of one that cycles for three hours in a spare bedroom. The chart below scales an illustrative deep-clean interval to daily runtime, using the same arithmetic as the planner on this page, so you can see how sharply the interval shortens as the machine works harder.
Illustrative deep-clean interval by daily runtime
Weeks between full deep cleans for an average dust load, scaled to how many hours a day the unit actually runs. Bars scale with the interval. Illustrative planning figures, not measurements.
A unit running around the clock needs a deep clean roughly four times as often as one running a few hours a day. Dust load moves every figure: pets, carpet, and workshops shorten it further. Illustrative.
Translate that into three habits with different clocks. The filter is the frequent one: about every two weeks while the unit runs most of the day, and closer to weekly in a dusty room, a workshop, or a home with shedding pets. The bucket is roughly weekly whenever you are running on the tank, because condensate that sits for more than a few days starts growing the film that causes the smell. The deep clean, meaning the coils, the hose, the grille, and the cabinet, follows the chart above and lands near fourteen weeks for a typical twelve-hour-a-day basement unit, which is about four deep cleans a year.
Two fixed points sit outside that scale. Clean the machine thoroughly before it goes into storage at the end of a damp season, and clean it again before it comes back out, because a unit put away with a damp bucket and a loaded filter spends months incubating exactly what you are trying to avoid. Set your own running hours and dust level in the cleaning-schedule planner to get intervals matched to your unit rather than to the illustrative twelve-hour example used here.
A worked example: a full end-of-season clean
Put the six steps together on one illustrative afternoon. Picture a 500 watt portable unit in an ordinary basement, running about twelve hours a day through a damp summer, draining into its bucket, in a house with a dog and a carpeted stair. It has not been cleaned in about six months. The symptoms are the standard set: a musty smell when you walk past it, a bucket that seems to fill more slowly than it did in June, and a faint hum that runs longer between shutoffs than it used to. Nothing here says broken. Everything here says overdue.
On the schedule in these bench notes, twelve hours a day at an average dust load puts a deep clean at about every fourteen weeks, so at six months this machine is roughly two intervals behind. The session starts at the wall: plug out, unit carried to the laundry room floor, bucket slid out and emptied into the drain. The tank goes into the sink with warm soapy water and comes back visibly different, because the slick film on the lower walls was most of the smell. The float in its channel is sticky, moves freely again after a rinse and a wipe, and that single fix is a plausible explanation for the slow-filling bucket on its own.
The filter comes out next and is grey rather than white. It gets tapped out over a bin, vacuumed, rinsed from the clean side, and laid flat on a towel where it will stay for the rest of the afternoon. With the filter out, the flashlight shows the evaporator fins wearing a felt of dust and dog hair. Ten minutes of dry vertical brushing and vacuuming clears most of it, with no liquid anywhere near the pack. The intake grille gets the same treatment and turns out to have been the dirtiest single surface on the machine. The drain port screen holds a small plug of lint, which comes out on a cotton bud.
Four hours later the filter is dry, everything goes back together, and the function check runs. The room reads 62 percent on a separate hygrometer, so the target goes to 50. The fan starts, the compressor engages after a delay, the exhaust is warm, and there is visible condensate on the coil within the hour. The smell is gone. On the illustrative arithmetic used across this site, if the blockage had been forcing two extra running hours a day on a 500 watt unit, that is about one extra kilowatt-hour a day the machine no longer has to spend. None of these figures are measured on any specific machine; they are a worked walkthrough, and yours will differ. The sequence is the transferable part.
Common mistakes when cleaning a dehumidifier
Almost every problem people create while cleaning a dehumidifier comes from a short list of habits. These are the ones worth naming, because each has a consequence that outlives the clean.
- Cleaning it plugged in. Every step involves water near a compressor, a fan motor, and a control board. Pull the plug at the wall, not the power button, and leave it out for the whole job and the whole drying period.
- Spraying liquid into the coil pack. Water sprayed into fins inside the cabinet has nowhere to drain except onto the fan and the wiring underneath. Coils are cleaned dry, with a brush and a vacuum, full stop.
- Brushing across the fins instead of along them. Thin aluminium fins bend under almost no force, and a bent section permanently blocks the airflow you were trying to restore. Move parallel to the fins, always.
- Reinstalling a damp filter. This is the most common reason a musty smell comes back within a day. A washed filter needs hours flat on a towel, and no heat gun or hair dryer, which can warp the frame.
- Mixing bleach and vinegar in the bucket. Combining them releases a harmful gas. Use one cleaner or the other, check your manual first, and rinse the tank thoroughly with plain water afterwards.
- Forgetting the drain plug. Refit it when you go back to bucket mode and remove it when you fit a hose. Getting this backwards is the classic cause of a unit that either leaks or never drains after a clean.
- Tipping the machine to empty it. Laying a unit on its side or upside down can move compressor oil where it should not be. Slide the bucket out instead, and if the unit does get tipped, stand it upright for several hours before running it.
Avoid those seven and the job is genuinely hard to get wrong, because everything else in it is soap, water, and patience.
Troubleshooting: ice on the coils
Frost or a solid sheet of ice on the evaporator is the symptom people most often try to fix with a clean, and cleaning only addresses half of it. Ice forms when the coil surface sits below freezing for long enough, and there are two paths to that: not enough warm air moving across the coil, or not enough warmth in the room to begin with. A matted filter, a blocked intake grille, a fin pack under a dust felt, or a fan that is not spinning freely all starve the coil of air, which is exactly what steps three, four, and six address. If your unit iced up before the clean and the ice is gone afterwards, airflow was the cause.
If it ices up again after a thorough clean, look at the room rather than the machine. Standard compressor dehumidifiers struggle below roughly 60 to 65 F because the coil surface simply runs colder than the air can keep it, and most stop being useful well before freezing point. A cool spring basement is the classic scene. Many units have an auto defrost cycle that pauses the compressor and runs the fan to melt the frost, and hearing that cycle kick in occasionally is normal behaviour, not a fault. Hearing it constantly means it cannot keep up.
The practical test is to let the ice melt fully with the unit off and unplugged, which can take several hours, then restart it with a clean filter in a room you have confirmed is above 65 F. If it still frosts within an hour under those conditions, the problem has moved past cleaning into airflow hardware or the sealed system, and our dehumidifier fault walkthrough is the right next stop. Never chip at ice with anything hard, because the tubing under it punctures easily and a punctured refrigerant circuit ends the machine.
Troubleshooting: a musty smell that survives the clean
A smell that comes back within a day or two almost always means something is still wet. Work the four damp reservoirs in order. First the filter: put your face to it and check it is genuinely dry through the mesh rather than just dry on the surface. Second the bucket: run a finger along the internal corners and the seam under the handle, since the slick film hides where a cloth skates past. Third the bucket well inside the machine, the tray the coil drips into, which is easy to forget entirely because the tank hides it. Fourth the drain hose, especially any low loop where water can stand.
If all four are genuinely clean and dry, the coil pack is the next suspect. Dust matted between fins stays damp between cycles and holds odor that no amount of bucket washing will reach, and a coil that was brushed quickly rather than thoroughly can look fine from the front while still holding a felt two fins deep. Take the flashlight to it again from a different angle. Run the machine for an hour with a window open afterwards to clear whatever is left in the cabinet.
If the smell persists after all of that, consider that it may not be coming from the machine. A dehumidifier moves the whole room’s air through itself, so it concentrates and reveals a smell that is actually in the carpet, the joists, or a damp wall cavity. That is a different problem with a different fix, and our note on reducing humidity in your home covers the source-control side of it. A machine cannot deodorize a room whose moisture problem is still active.
Troubleshooting: the bucket is not collecting water
An empty bucket in a room you know is damp has a short list of causes, and the clean you just did addresses several of them. The first is the one people forget: the humidistat may simply be satisfied. If the room reads 45 percent on a separate hygrometer and the unit is set to 50, it has finished, and there is nothing to collect. Drop the setpoint at least five points below the current reading and listen for the compressor.
The second is the float switch, which is why step two exists. A float stuck in the raised position tells the machine the tank is full, so it refuses to run the compressor even though the bucket is empty. Lift and drop the float by hand: it should move freely with no stickiness in its channel. The third is the bucket not seating fully, which produces the same signal, so slide it in until it clicks and the panel stops showing the full indicator. The fourth is the drain plug or hose: if the unit is set up to drain continuously, water going out the hose is exactly what an empty bucket looks like, and that is correct behaviour rather than a fault.
The fifth is airflow, which the clean should have fixed. A blocked filter or an iced coil condenses very little, so a small trickle of water in a genuinely damp room points back at steps three and four. If the room is warm and damp, the setting is low, the float moves, the bucket is seated, the plug is in, and the filter and coil are clean, then the remaining explanation sits in the sealed system, which is a technician’s job rather than a cleaning one. Our repair-or-replace notes on a dehumidifier that is not working walk that decision.
Troubleshooting: the unit keeps shutting off
Short cycling, meaning a machine that starts and stops every few minutes, has a handful of ordinary explanations and it is worth separating the normal ones from the faults. The most normal is the humidistat doing its job in a small or nearly dry room: the unit reaches the target quickly, shuts the compressor off, and restarts when the reading drifts back up. That is designed behaviour, and it looks alarming only if you are watching it. Another normal one is the auto defrost cycle pausing the compressor while the fan clears frost.
The full-bucket shutoff is the next candidate and the one most often caused by a cleaning mistake. If the bucket is not seated squarely after the wash, or the float is sticking, the machine reads full and stops, sometimes with an indicator light and sometimes without. Reseat and retest. A related one is a hose fitted without the drain plug removed, which fills the bucket well and then the tank, shutting the unit down on a schedule that looks random.
Then there are the airflow and heat causes. A restricted intake, a filter left out, or a unit pushed hard against a wall makes the machine run hot and, on models with a thermal cutout, shut down until it cools. Leave clear space on all sides. Finally, check the supply itself: a long or thin extension lead can drop enough voltage to trouble a compressor on start, which is why most manufacturers ask you to plug directly into a wall socket. If the unit still shuts off on a clean filter, a seated bucket, clear space, and a direct socket, that pattern points past cleaning.
Continuous drainage changes what you clean
Running a dehumidifier on a hose rather than a bucket changes the cleaning job in ways worth planning for. On the plus side, you stop the single biggest smell source at the root, because condensate never stands still long enough to grow a film. The bucket still needs occasional attention, since the well it sits in still gets damp and dusty, but the weekly wash becomes a monthly check. That alone is why people with a suitable floor drain nearby tend to switch.
On the minus side, you have added a component that fails silently. A gravity hose collects sludge along its whole length, and because you cannot see inside it, a partial blockage announces itself as water on the floor rather than as a warning. That makes the step five flush a fixed part of the deep clean rather than an optional extra, and it makes the hose route worth re-checking every time you move the unit. Any uphill section or standing loop both slows the flow and gives the sludge somewhere to breed.
Pumped drainage adds one more part again. A condensate pump has its own small reservoir, a float or sensor inside it, and an outlet line that is usually narrow, so it collects deposits faster than a gravity hose of the same age. Rinse the reservoir and its screen at every deep clean, and flush the outlet line the same way you flush a gravity hose. Our sizing and setup work in what size dehumidifier you need covers when a pump is the right answer in the first place, and our crawl space dehumidifier notes cover the drainage cases that are hardest to get right.
What cleaning fixes and what it does not
It is worth being honest about the boundary, because a clean is often prescribed for problems it cannot touch. Cleaning reliably fixes the smell, restores airflow lost to dust, clears a sticking float, unblocks a drain path, and often resolves icing that was caused by a starved coil. Those are real and they cover most of what people complain about. It also does something less visible: it removes the extra running hours a blocked machine spends doing the same work, which is the part that shows on the bill.
Cleaning does not fix a refrigerant leak, a failed compressor, a dead control board, a burnt-out fan motor, or a cracked tank. It does not make a unit work in a room that is too cold for compressor dehumidification, and it does not make an undersized machine keep up with a space that is too large or too wet for it. Those last two are the ones most often mistaken for dirt, because a machine losing a fair fight looks exactly like a machine that is failing. Our dehumidifier sizing report and our notes on choosing a dehumidifier sort out which fight yours is in.
There is also a limit that has nothing to do with the machine. A dehumidifier is a symptom treatment. If water is entering the space through a wall, a slab, a gutter dumping against the foundation, or an unvented dryer, the machine will run continuously and cleaning it more often just keeps a losing effort efficient. Source control comes first, which is the argument our note on reducing humidity in your home makes at length, and the machine covers what is left over.
The safety rules that never bend
Most of this job is soap and patience, but three rules are absolute and they are worth stating on their own rather than buried in a step. First, the unit is unplugged at the wall for the entire job and the entire drying period. Not switched off, not on standby, unplugged. A control board holds charge, a fan can turn under its own power, and every part of this job involves water somewhere near both.
Second, nothing electrical gets wet, ever. That means no spraying anything at the machine, no rinsing a panel that has wiring behind it, no damp cloth on the control panel beyond the lightest wipe, and absolutely no liquid into the coil pack while it sits in the cabinet. If a part cannot be removed and carried to a sink, it does not get washed; it gets brushed and vacuumed dry. The two-halves framing from the start of these bench notes is the whole rule in shorter form.
Third, cleaners are used one at a time and never combined. Bleach and any acid, vinegar included, release a harmful gas when they meet, and that includes using one shortly after the other in the same tank. Check your manual before using either, since some manufacturers permit only warm soapy water in the bucket. Beyond those three, two smaller cautions: do not open the sealed refrigeration circuit or attempt anything involving refrigerant, which is a licensed job, and do not run the machine with the filter removed, because every bit of room dust then lands directly on the coil.
What a clean dehumidifier is worth on the bill
The efficiency argument for cleaning is real but frequently overstated, so here is the honest version. A dehumidifier does not become more efficient per pint when you clean it; it stops being forced to run longer to get the same pints. Airflow is the mechanism. Push less air across the coil and you condense less water per minute, so the humidistat keeps the compressor on for more minutes to reach the same target. Running minutes are what the meter charges you for.
Put illustrative numbers on it to see the scale. Using the 500 watt unit that appears across this site’s dehumidifier work, twelve running hours a day is 6 kilowatt-hours, so at an illustrative 16 cents per kilowatt-hour that is a little under a dollar a day, or roughly 29 dollars across a 30 day month. If a matted filter and a dusty coil push that unit to fourteen hours for the same result, you are adding about 1 kilowatt-hour a day, near 16 cents, or close to 5 dollars a month. Over a four month damp season that is a meaningful number for an afternoon of brushing, and it is arithmetic rather than a measurement.
The part nobody can honestly quantify is how blocked your machine actually is, which is why percentage savings quoted for appliance cleaning should be treated as guesses. What is defensible is the direction and the mechanism. For the full running-cost picture, including how the humidistat setpoint dwarfs everything else you can control, see our dehumidifier running-cost report, and for where this task sits in a whole-home routine, our appliance maintenance plan.
Your dehumidifier cleaning checklist
Save this and work it by interval rather than trying to do everything at once. The frequent jobs are the ones that prevent the problems the deep clean has to fix.
- Every week on bucket mode: empty and wash the tank in warm soapy water, wipe the corners and seams, and check the float lifts and drops freely.
- Every two weeks in heavy use: slide the filter out, tap and vacuum it, rinse it from the clean side, and let it dry flat for hours before it goes back.
- Every deep clean, roughly every fourteen weeks at twelve hours a day: brush and vacuum the coil fins dry and along the fins, vacuum the intake and outlet grilles, wipe the cabinet, and flush the drain hose and any pump reservoir.
- Every deep clean, also: clear the drain port screen, confirm the drain plug is in or out to match how you run it, and check the hose falls continuously with no standing loop.
- Before and after storage: run a full deep clean, dry every part completely, leave the bucket empty and the filter out until you restart, and stand the unit upright somewhere dry.
- Always: unplug at the wall first, keep every liquid away from the coils, fan, and controls, dry everything fully before reassembly, and run a function check before you walk away.
- Never: spray into the fins, brush across them, reinstall a damp filter, mix bleach with vinegar, or run the machine with no filter fitted.
Set your running hours and dust level in the cleaning-schedule planner to turn those intervals into dates that fit your own unit.
The bottom line
Cleaning a dehumidifier is a six-step, forty five minute job that most people never do, which is why most dehumidifiers smell and run longer than they should. Unplug it at the wall and empty the tank, wash the bucket and free the float that decides whether the machine runs at all, wash the filter and then actually let it dry, brush the coils dry and along the fins so you restore airflow instead of destroying it, flush the drain hose and clear the port, then wipe the grille, reassemble, and confirm with a real function check that the compressor engages and condensate forms. Match the intervals to running hours rather than to the calendar, clean it before and after storage, and keep the two rules that make all of it safe: nothing electrical gets wet, and nothing goes back together damp. Do that four times a year and the machine keeps doing the quiet job you bought it for, without announcing itself every time you walk past.
From the bench: these notes describe a routine maintenance clean on a portable home dehumidifier and are offered for general education, not as a repair procedure or a promise of any particular result. Every interval, wattage, rate, and cost figure above is an illustrative planning number rather than a measurement of a specific unit, and your own model, room, dust load, and manufacturer instructions will change what is appropriate, so treat your appliance manual as the final word on cleaners, washable parts, and drain fittings. Keep the machine unplugged throughout, keep liquids away from the coils, fan, and controls, and use cleaning products one at a time, never combining bleach with vinegar or any other acid. Anything involving the sealed refrigerant circuit, the compressor, or the wiring belongs to a qualified appliance technician, not to a cleaning afternoon.
Frequently asked questions
How often should I clean a dehumidifier?
Match each job to how fast the mess it fights builds up rather than to a calendar date. Rinse the washable filter about every two weeks while the unit runs most of the day, wash the bucket roughly weekly because standing condensate grows a slick film fast, and do a full deep clean of the coils, hose, and grille every few months of continuous running. A unit that runs about twelve hours a day in an ordinary basement lands near a deep clean every fourteen weeks on the illustrative schedule used throughout these bench notes, which works out to roughly four a year. Shorten every interval if you have pets, a workshop, carpet, or a recent renovation, because dust load matters more than time does. Lengthen them for a unit that only runs a few hours a day in a clean room.
Can I put a dehumidifier filter or bucket in the dishwasher?
Treat that as a no unless your own manual specifically permits it. Dishwasher water is far hotter than these parts are designed for, and the combination of heat and detergent can warp a thin plastic bucket, distort a filter frame so it no longer seats, or craze a clear tank until it cracks. A warped bucket is worse than a dirty one, because it can stop the float switch from reading the level correctly and leave you with water on the floor. Warm water, a drop of dish soap, and a soft brush or cloth do the same job with no risk. Rinse thoroughly afterwards so no soap film is left to go slimy again.
Why does my dehumidifier still smell musty after cleaning it?
A smell that survives a wash almost always means something is still damp or something was missed. The usual suspects are a filter that was put back before it was bone dry, a residue of biofilm left in the corners and around the float of the bucket, and standing water sitting in a low loop of the drain hose. The coil fins are the other common hiding place, because a mat of dust there stays wet between cycles and holds odor no amount of bucket washing will touch. Work those four in order, dry everything fully, and run the unit with the door open for an hour. If the smell persists after that, the source may be the room rather than the machine, in which case our note on reducing household humidity is the better place to look.
Is it safe to use vinegar or bleach in a dehumidifier bucket?
Diluted white vinegar is the common household choice for the bucket because it is mild, cheap, and helps with the slick film and light mineral marks that condensate leaves behind. Some manufacturers also permit a very dilute bleach solution in the tank to discourage mold, but many do not, so your own manual is the authority and it overrides any general tip. Never combine the two, and never use them in close succession in the same tank, because bleach mixed with an acid such as vinegar releases a harmful gas. Whichever you choose, use it in the bucket only, rinse the bucket thoroughly with plain water afterwards, and keep every cleaner well away from the coils, the fan, the control panel, and any wiring. If in doubt, warm soapy water and a brush handle the job on their own.
Do I have to unplug a dehumidifier to clean it?
Yes, and it is the one step in these bench notes with no exceptions attached to it. A dehumidifier is a sealed refrigeration circuit with a compressor, a fan, and a control board packed inside a plastic shell, and every part of cleaning it involves water near that equipment. Pull the plug from the wall rather than relying on a power button, because a switched-off unit is still live at the board and a fan can turn under its own power. Leave it unplugged for the entire job and for the whole drying period afterwards, and only reconnect once every washed part is dry to the touch. Treat that as the rule that makes the other five steps safe rather than as a formality.
How do I clean dehumidifier coils without damaging them?
Work gently, dry, and along the fins rather than across them. The fins are thin aluminium plates spaced closely over the coil tubing, and they bend under very little pressure, which permanently blocks the airflow you are trying to restore. Use a soft brush or a vacuum with a brush attachment and move in the same direction the fins run, so the bristles slide between them instead of pushing them sideways. Do not spray water, cleaner, or compressed air into the coil pack while it sits inside the cabinet, because the water has nowhere to go but into the fan motor and the electronics below. If a section of fins is already bent, a fin comb sized to the fin spacing can straighten it, but that is optional refinement rather than part of a routine clean.
Why is ice forming on my dehumidifier coils after I cleaned it?
Ice on the coils points at airflow or room temperature first, and cleaning changes only one of those. If the frost started before the clean and is still there afterwards, check whether the filter is actually seated, whether the intake grille is pressed against a wall or a stack of boxes, and whether the fan is spinning freely, since any of those starves the coil of the warm air it needs. Then check the room: standard compressor units struggle below roughly 60 to 65 F, and in a cold space the coil surface simply sits below freezing no matter how clean it is. A unit in a genuinely cold room is not faulty and will not be fixed by another wash. Our note on dehumidifiers that are not working walks that symptom out in more detail.
Does cleaning a dehumidifier actually lower what it costs to run?
In many cases yes, though the honest framing is that cleaning removes a penalty rather than delivering a fixed saving. A matted filter and dusty coil cut airflow, so the machine has to run longer to pull the same pints out of the room, and running hours are what the meter charges you for. On the illustrative figures used across this site, a 500 watt unit running twelve hours a day uses about 6 kilowatt-hours a day, so two extra hours of forced runtime add roughly another kilowatt-hour, which is real money over a damp season. The size of the effect depends entirely on how blocked the machine was, so treat any percentage you see quoted as a guess rather than a measurement. What is reliable is the direction: restored airflow means less runtime for the same result.