What's on this page
- Why is my dryer not heating? Start with the symptom split
- No heat at all versus heat that never finishes the load
- Before you open anything: the safety rules for this job
- The lint fire risk, stated plainly
- The order to work the causes in, and why it saves money
- Cause one: restricted venting, the most common real answer
- How to test the vent in ten minutes
- Cause two: a half-lost 240 volt circuit on an electric dryer
- Cause three: the thermal fuse
- Cause four: the high-limit and cycling thermostats
- Cause five: the heating element itself
- Cause six: gas dryers, the igniter and the valve coils
- Cause seven: what stays with the technician on a gas machine
- Cause eight: the blower wheel and the airflow hardware inside the cabinet
- Cause nine: the moisture sensor and why it lies
- Cause ten: cycle selection, and the user error nobody admits
- Where dryer heating faults actually come from
- Heat but still damp: the other half of this complaint
- Overloading, wet loads and the physics of a full drum
- What a multimeter tells you, and what it does not
- Which repairs are genuinely DIY
- Repair or replace: the honest math
- What a restricted vent actually costs you
- A worked example: one cold drum, five suspects
- Prevention: the habits that keep a dryer hot
- When to call a pro, and what to tell them
- The bottom line
A dryer that has stopped heating is one of the most confusing faults a household appliance produces, because almost nothing about the machine looks broken. The door light comes on, the panel responds, the drum turns, the cycle counts down, and the load comes out an hour later exactly as damp as it went in, just warm from the friction of tumbling. There is no smell, no noise, no leak, no error, and the only symptom is an absence. That is precisely why people reach for the worst assumption and start pricing a new machine.
These test notes work the fault the way a bench actually works it: as an ordered list of causes running from the most likely to the least, with the tell that separates each one from its neighbours. The order matters more than the parts do, because the most common cause in this whole category is not a part at all, it is the vent. Our dryer vent cleaning walkthrough is the hands-on version of that first step, our dryer running-cost teardown prices the machine once it is healthy, and our appliance lifespan reference sets the age context for the repair decision at the end.
Key takeaways
- Restricted airflow is the most common real cause. The safety devices that cut the heat are doing their job, and replacing one without clearing the vent just buys you the same repair twice.
- A drum that turns with no heat on an electric dryer is the classic half-lost 240 volt circuit: the motor runs on 120 volts, the element does not, so losing one leg looks like a live machine with a dead heater.
- Unplug the machine at the wall, or kill the breaker, before any panel comes off. On a gas dryer, close the gas shutoff valve as well.
- Gas supply work, burner faults, a gas smell, repeated breaker trips, or any scorching go to a qualified technician, full stop.
- Lint restriction is a fire hazard, not a performance nuisance, which is why the vent comes first in this order rather than last.
Why is my dryer not heating? Start with the symptom split
Before you order a part, spend ten minutes deciding which of three complaints you actually have, because they lead to three different searches and only one of them is genuinely about heat.
The first is no heat at all. The drum turns for the full cycle, the clothes come out cool and wet, and nothing in the load has been warm at any point. The second is intermittent heat: the machine gets hot at the start, then quits partway through, and the load is warm on the outside and soaked in the middle. The third is heat that never finishes the job, where the dryer is clearly hot but two cycles are needed to dry what one used to handle.
Those three point in different directions. No heat at all points at power, a blown fuse, an open element or, on a gas machine, an ignition sequence that never completes. Intermittent heat is the signature of a machine overheating and protecting itself, which almost always means airflow. Heat that never finishes points at airflow again, or at load size, or at a moisture sensor that ends the cycle early.
Establishing which one you have costs nothing and removes most of the list. Run one small load on a normal heated setting, stand at the machine for the first ten minutes, and put a hand near the exhaust outside. Then check it again near the end.
No heat at all versus heat that never finishes the load
The distinction is worth a section of its own, because these two complaints arrive under the same sentence and share almost no causes.
No heat at all is a circuit problem in the broad sense. Something in the chain that delivers heat has opened: a supply leg, a fuse, a thermostat, the element, the igniter, or the control that commands them. The machine is not trying and failing to heat, it is not heating. The clue is that the exhaust outside stays at room temperature for the whole cycle, and clothes come out cool.
Heat that never finishes is a throughput problem. The dryer makes heat perfectly well, and the exhaust outside is warm or hot, but the load stays damp. That means the moist air is not leaving fast enough, the load is too big or too wet for the drum, or the cycle is stopping before the clothes are actually dry. Nothing in the heat system is broken at all.
Intermittent heat sits between the two and is the most diagnostic of the three. A machine that heats for twenty minutes and then goes cold for the rest of the cycle is telling you that a temperature-sensitive safety device opened. That device is not the fault. The reason it got hot enough to open is the fault, and in the overwhelming majority of cases the reason is airflow.
Before you open anything: the safety rules for this job
Read this section even if you skip everything else, because a dryer combines the two hazards that hurt people in home repair, and one of them is a fire risk that exists whether or not you ever pick up a screwdriver.
Kill the power properly. Pull the plug from the wall before any panel, cover or access door comes off. An electric dryer plug is a large four-prong or three-prong connector that takes real effort to remove, and that effort is not optional. If the outlet is behind the machine and unreachable, switch off the dryer’s breaker at the panel and tell the household you have done it. The classic accident in this job is somebody helpfully restoring power while a hand is inside the cabinet.
On a gas dryer, close the gas as well. There is a shutoff valve on the supply line behind the machine. Close it before you work near the burner assembly. If you ever smell gas, do not switch anything on or off, leave the building, and call your gas utility or emergency number from outside. That is not a repair situation.
Treat a 240 volt circuit with respect. Electric dryer circuits carry more current than a general-purpose outlet, and the panel work involved in diagnosing a lost leg is electrician territory unless you genuinely know what you are doing. Resetting a tripped breaker once is reasonable. Resetting one that trips again immediately is not; that is a fault asking to be diagnosed.
The lint fire risk, stated plainly
The reason this fault deserves more seriousness than a broken toaster is that the substance clogging the machine is highly combustible and sitting next to the heat source.
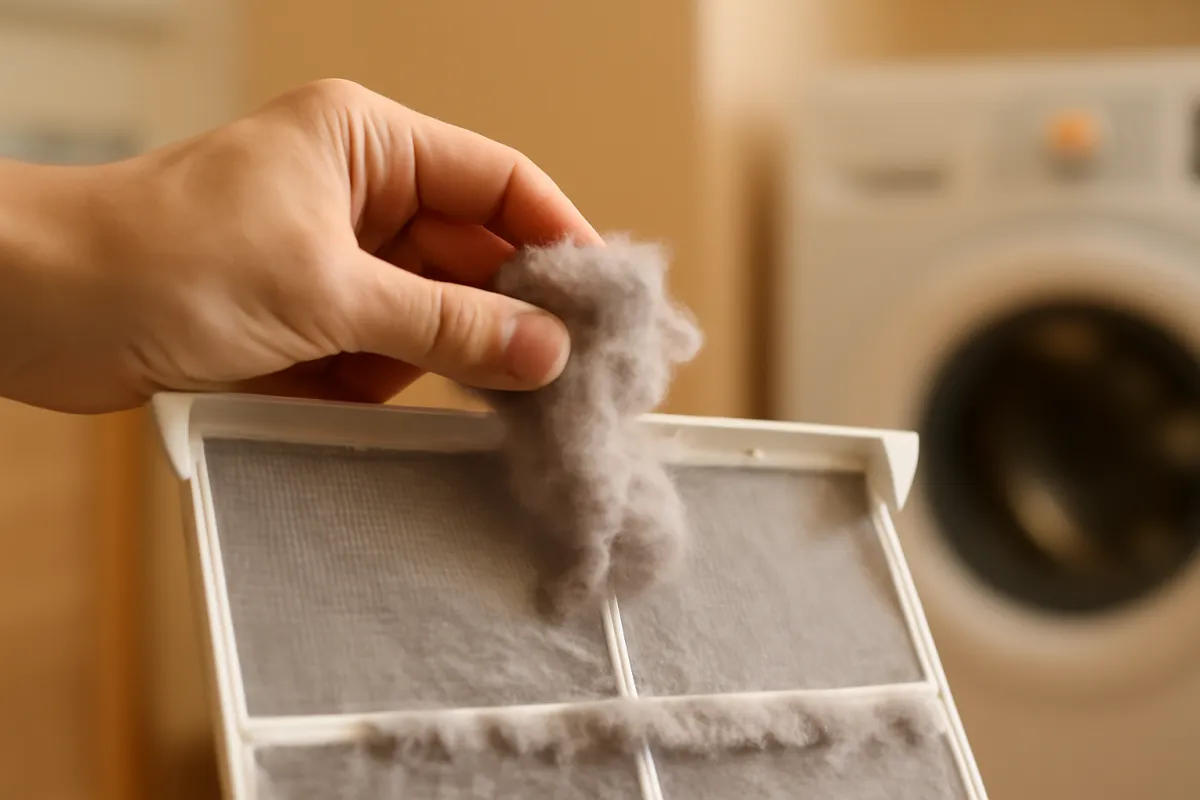
Lint is finely divided cotton and synthetic fibre. It ignites easily, it accumulates invisibly inside the lint screen housing, the blower housing and the entire duct run, and the whole point of a dryer is that it moves hot air through that same path. When the path restricts, exhaust temperatures climb, the safety devices open, and the machine appears to develop a heating fault. That appearance is the warning shot. The underlying condition is a fire risk, and it is the reason clothes dryers appear on household fire-safety lists everywhere.
Three specific practices are worth stating. Never defeat, bypass or jumper a thermal fuse or thermostat to get the machine running; those devices are the only thing standing between a restricted vent and a much worse afternoon. Never vent a dryer into a garage, an attic, a crawl space or a room, and treat indoor lint-trap kits as a compromise rather than a solution, particularly on a gas machine where the exhaust contains combustion products. And never run a gas dryer with the exhaust disconnected, because carbon monoxide is not something to experiment with.
If your household does not have working smoke alarms and, with any gas appliance, a carbon monoxide alarm, that is a more urgent job than the dryer.
The order to work the causes in, and why it saves money
The causes of this fault are wildly unequal in both frequency and price, and as usual the two run in roughly opposite directions. Working them in the wrong order is how a fifteen dollar part becomes a two hundred dollar service call.
The order these test notes use is: cycle selection and settings, the lint screen and the vent run, the power supply and breaker, the thermal fuse, the thermostats, the heating element or the gas ignition sequence, the blower and airflow hardware, the moisture sensor, and finally the timer or control board. Everything up to the thermal fuse can be worked with a flashlight, a vacuum and a vent brush. Everything after it needs a meter and a panel off.
One shortcut applies immediately when it fits. If anything changed just before the fault appeared, start there. A machine moved during a floor replacement, a transition duct crushed when the dryer was pushed back into its alcove, a storm that tripped breakers, a new load habit after a baby arrived, or a first cold snap that froze an exterior flap shut are all stronger clues than any part list. Recent disturbance is the most underused diagnostic in appliance work.
The symptom split from the previous sections layers on top. Intermittent heat lets you skip almost everything except airflow. No heat at all on an electric machine lets you go straight to supply, fuse and element.
Cause one: restricted venting, the most common real answer
This is the cause that deserves the top of every list, and the one most likely to be treated as background rather than as the diagnosis.
Understand what the machine is actually doing. A conventional vented dryer pulls room air in, heats it, drags it through the tumbling clothes where it picks up moisture, pushes it through a lint screen, through a blower, and out through a duct to the outside. Every part of that path is a potential restriction, and the machine has no way to compensate. It cannot push harder. It can only get hotter, and when it gets hot enough the safety devices cut the heat.
The restrictions, in the order you should check them: the lint screen itself, which needs clearing every single load; the housing the screen sits in, which accumulates a felt layer that a screen clean never touches; the flexible transition duct behind the machine, which gets crushed against the wall when the dryer is pushed back; the rigid duct run through the wall or floor; and the exterior hood with its flap, which can be jammed by lint, painted shut, blocked by a bird nest, or iced over in winter.
The tell is consistent across all of them. A restricted dryer runs hot inside and cool outside, the room gets humid, the top of the machine is unusually hot to the touch, and cycles get longer over months rather than failing overnight.
How to test the vent in ten minutes
You do not need equipment to establish whether airflow is the problem, and the test is worth doing before anything else because a positive result ends the search.
Go outside while the dryer runs. Find the exterior hood and put a hand in front of it on a heated cycle. A healthy dryer produces a strong, warm, obvious stream of air that you can feel from a foot away. A weak flutter, or a flap that barely lifts, is a restriction. No air at all with the machine running is a complete blockage, and it is a fire-safety matter to be dealt with immediately.
Check the flap opens. With the machine off, look at the exterior hood. Flaps get stuck by lint packed around the hinge, by paint, by nesting material, or by ice. A flap held shut is a total restriction no matter how clean the duct behind it is.
Disconnect the transition duct and run a short test. With the machine pulled forward and unplugged, remove the flexible duct from the back of the dryer. Plug the dryer in and run a brief heated cycle venting straight into the room, standing there for the whole test and stopping after a couple of minutes. If the machine now blows hard and hot, the restriction is in the duct or the hood, not the machine. This is a diagnostic test only. Nobody should run a dryer this way as a habit, and it should never be done at all on a gas dryer.
Look at what comes out of the run when you brush it. Our dryer vent cleaning walkthrough covers the brush-and-vacuum method in detail, and the volume of lint that emerges is usually its own answer.
Cause two: a half-lost 240 volt circuit on an electric dryer
This is the classic symptom in the whole category, and it produces the exact complaint of a drum that turns with no heat whatsoever.
An electric dryer is fed by a 240 volt circuit made of two live legs plus a neutral and a ground. The drum motor, the timer, the panel lights and the controls all run on 120 volts, which they take from one leg and the neutral. The heating element needs the full 240 volts across both legs. That split is the whole explanation. Lose one leg and the machine powers up, lights up, tumbles and counts down perfectly, while the element sits dead because it is only seeing half the voltage it needs.
The ways a leg gets lost are ordinary. A double-pole breaker can trip in a way that is not visually obvious, since the handle may not move fully to the off position. In an older panel with cartridge fuses in a pull-out block, one of the two fuses can blow while the other stays intact. A connection at the terminal block on the back of the dryer, at the outlet, or at the breaker can work loose over years of vibration and heat cycling.
The free version of the test: switch the breaker fully off, then fully on again, and retry. That alone resolves a real share of these. If it recurs, or if the panel uses fuses, or if anything looks scorched, that is an electrician’s call rather than a repeat reset.
Cause three: the thermal fuse
The thermal fuse is the most replaced part in this fault and the most misunderstood, because it is almost never the actual problem.
A thermal fuse is a small one-shot safety device, usually mounted on the blower housing or on the exhaust duct inside the cabinet, positioned to read the temperature of the air leaving the drum. When that air exceeds its rated temperature, the fuse opens permanently. It does not reset, it does not recover when things cool down, and it cannot be repaired. It is designed as a sacrificial part.
What it interrupts depends on the machine. On many electric dryers the fuse sits in the heat circuit, so when it blows the drum keeps turning and the heat stops, which is exactly our headline symptom. On many gas dryers and some electric ones it sits in the motor circuit, so a blown fuse means nothing runs at all and the machine appears completely dead.
Testing it is straightforward with the machine unplugged: disconnect the wiring from the fuse and check for continuity across the two terminals. Continuity means intact. An open reading means blown. Parts are inexpensive, illustratively in the low tens of dollars.
Here is the part that matters more than the test. A thermal fuse blows because the exhaust got too hot, and exhaust gets too hot because airflow is restricted. Fitting a new fuse without clearing the entire lint path is buying the same repair a second time, usually within weeks.
Cause four: the high-limit and cycling thermostats
Two more temperature devices sit in the heat circuit, they do different jobs, and confusing them sends people to the wrong part.
The high-limit thermostat is a safety device mounted on the heater housing itself, watching the temperature right at the source. It opens if the heater box overheats, which again usually means restricted airflow or a blower that has stopped moving air. Some designs reset themselves once things cool, which produces heat that comes and goes across a cycle, and some are one-shot like a fuse.
The cycling thermostat, sometimes called the operating thermostat, is not a safety device at all. It is the control that maintains drum temperature during a normal cycle, opening the heat circuit when the set temperature is reached and closing it again as things cool. That is why a healthy dryer’s element cycles on and off rather than running continuously. If a cycling thermostat fails open, the heat never comes on. If it fails closed, the machine overheats and pushes the high-limit or the fuse into doing its job.
Both are tested the same way as a fuse: unplugged, wiring removed, continuity across the terminals at room temperature. Both are inexpensive parts. And both, when they open, are usually reporting the same underlying condition the fuse reports. Fix the airflow, then fit the part, in that order.
Cause five: the heating element itself
On an electric dryer the element is a coil of resistance wire inside a metal housing, and it fails in two distinct ways that produce two very different symptoms.
The common failure is an open coil. The wire breaks, the circuit is interrupted, and there is simply no heat. The drum turns, everything else behaves normally, and the exhaust stays cool. On a machine where the break is visible, you can sometimes see the parted ends when the element is out, which makes for a satisfyingly unambiguous diagnosis.
The less common and more alarming failure is a short to the housing. A sagging coil touches the metal frame around it, which creates a path that lets the element run whenever the machine has power, regardless of what the controls are asking for. The signature is a dryer that heats continuously, sometimes even with the door open on certain designs, and that overheats and repeatedly blows fuses or scorches clothes. That one is not a slow-burn problem to schedule around.
Access varies enormously by design. Some machines put the element housing behind a rear panel, which is a genuinely approachable job. Others require lifting the top, releasing the front panel, supporting and removing the drum, and then reaching the housing, which is a bigger commitment than the part price suggests. Check what your specific model demands before you start, photograph every connector before you undo it, and order by model number rather than by appearance.
Cause six: gas dryers, the igniter and the valve coils
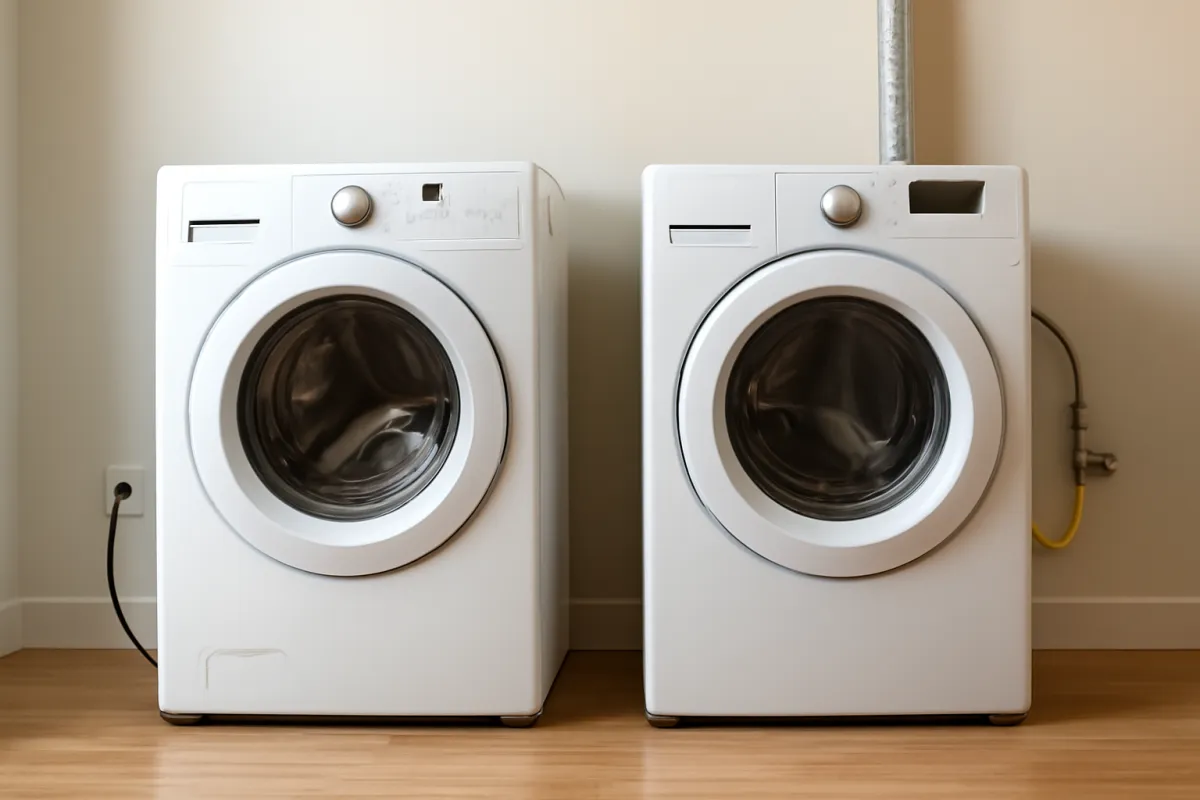
A gas dryer does not have a heating element at all, so its no-heat list is a completely different set of parts arranged in a sequence, and the sequence is what you diagnose.
The chain runs like this. The controls call for heat. An igniter, a glow bar made of a brittle ceramic-like material, heats up until it is glowing. A sensor watches for that glow and, once it is hot enough, signals the gas valve coils. The coils are electromagnets sitting over the valve’s solenoid stems; energised, they lift the valve open. Gas flows across the glowing igniter and lights. A flame sensor then confirms the flame is present, and the igniter switches off.
Each link fails with its own signature, which is why watching the burner through the inspection opening tells you more than a meter does. No glow at all points at the igniter itself, at the radiant or flame sensor that has to close before the igniter is energised, or at the supply of power to that circuit. A glow that builds, holds, and then goes out with no flame, repeating over and over, is the textbook weak-valve-coils pattern: the ignition side is working and the valve is not opening.
Two more possibilities are simpler than either. The gas shutoff valve behind the machine may be closed, which happens after any work in the laundry area. Or the household gas supply may be off or interrupted, which the stove will confirm in ten seconds.
Cause seven: what stays with the technician on a gas machine
The line between a homeowner job and a trade job is sharper on a gas dryer than on an electric one, and it is worth drawing explicitly rather than leaving to judgement.
Safe to do yourself: checking that the shutoff valve is open, confirming the household gas supply works, clearing the lint path, and watching the burner cycle through the inspection opening to observe which stage fails. Observation costs nothing and is genuinely useful to whoever comes next.
Handle with real caution: anything requiring the burner assembly to come out. Igniters are fragile and can crack from a fingertip touch on the glow element. Sensor and coil positions vary by machine. Some households do this work successfully; many should not.
Not a homeowner job under any circumstances: anything that opens or disturbs the gas supply line or its fittings, any response to a gas smell, a burner that lights with an unusual flame colour or shape, soot deposits anywhere, a machine that has ever produced a bang on ignition, or a dryer venting anywhere other than outdoors. Combustion appliances produce carbon monoxide, and the exhaust duct is the only thing carrying it out of the building. That is a licensed technician’s territory and it is not a close call.
If you are unsure which of these three groups a symptom falls into, treat it as the third one. A diagnostic fee, illustratively somewhere near 80 to 150 dollars, is inexpensive against the alternative.
Cause eight: the blower wheel and the airflow hardware inside the cabinet
Not every airflow restriction is in the duct. Two components inside the machine produce identical symptoms and get missed because the vent was already cleaned.
The blower wheel is the fan that moves all the air. It is usually a plastic squirrel-cage wheel driven directly by the motor shaft, and it fails in ways that are quiet and easy to overlook. The hub can crack and slip on the shaft so the motor spins and the wheel does not, or does so intermittently. Fins can break off, which unbalances it and cuts airflow. And the housing around it can pack solid with lint, particularly on machines that have gone years without a deep clean. The tell is a dryer that fails the exterior-airflow test even with the transition duct removed, which localises the restriction inside the cabinet.
The lint screen housing deserves separate mention because it is where the felted layer builds that a screen clean never touches. A vacuum with a crevice tool down into that housing removes surprising quantities of packed lint on a machine that has been in service a decade.
Finally, an obstruction that is genuinely common: something small has gone past the screen and lodged in the blower. A sock, a tissue mass, a pen. That produces a rattle as well as reduced airflow, and it is free to fix once the cabinet is open.
Cause nine: the moisture sensor and why it lies
The moisture sensor is the source of most “the dryer stops before the clothes are dry” complaints, and the failure mode is not a broken part at all.
Automatic dry cycles do not run for a fixed time. They run until the load reads dry, and the reading comes from two metal strips or bars mounted inside the drum, usually near the lint screen opening. Damp fabric tumbling across both strips completes a circuit; dry fabric does not. The control watches how often that circuit closes and ends the cycle when contact becomes rare enough.
Fabric softener and dryer sheets leave a thin waxy film on those strips over time. That film is an insulator. It does not stop the drum, the heat or the tumbling; it simply makes damp clothes read as dry, so the machine confidently ends a cycle on a load that is still wet. The signature is a machine that heats properly, runs a very short automatic cycle, and dries perfectly well when you switch to a timed setting instead.
The fix is free. Unplug the machine, find the two strips, and rub them with a little rubbing alcohol on a cloth or with a fine scouring pad until the metal is bright again. Then reduce or stop using dryer sheets, which is worth doing for airflow reasons as well since their residue also coats the lint screen. Run a little water through your lint screen occasionally; if it beads and sits rather than passing straight through, the mesh is coated too.
Cause ten: cycle selection, and the user error nobody admits
This is the free check that resolves more of these complaints than anybody wants to acknowledge, and it takes thirty seconds.
Every dryer has at least one setting that deliberately runs the drum with no heat. It goes by names like air fluff, air dry, no heat, or tumble, and it exists for items that must not be heated. Selected by accident, by a child, by a cleaning cloth dragged across a touch panel, or simply by a dial knocked while loading, it produces a machine that runs a complete normal-sounding cycle and dries nothing. Nobody thinks to check it because nobody remembers choosing it.
Related settings do softer versions of the same thing. Delicate and low-heat cycles run cooler and take much longer, so a load that used to take fifty minutes on normal takes far longer and comes out feeling damp at the same point in the clock. Eco or energy-saver modes on some machines reduce heat and extend the cycle deliberately. Wrinkle-guard or extended-tumble phases keep the drum turning without heat after drying finishes, so a load checked during that window feels cool and reads as a failure.
Before anything else, select a normal heated cycle explicitly, run a small load, and confirm. Also check the machine’s own manual, which manufacturers publish free, for any child lock or control lock that may be limiting options.
Where dryer heating faults actually come from
Pulling the whole list together shows the shape this category always has: the frequent causes are cheap and the expensive causes are rare, which is the opposite of what the symptom feels like.
Where a dryer heating fault usually starts
Illustrative share of no-heat complaints by cause. Bars scale to the largest slice.
Illustrative shares drawn from the shape of the complaint rather than any survey. Nearly half of these faults are airflow either directly or through the safety device that airflow tripped, and the two slices at the bottom are the only ones that routinely need a board.
The practical reading of that chart is the order these test notes already follow. Check the setting, clear the whole lint path, verify the supply, then meter the fuse and thermostats, then the element or the ignition sequence, and treat the control board as the diagnosis of last resort rather than the first fear. Someone who works it top to bottom resolves a large share of these without buying a single part, and arrives at a service call knowing exactly what to say.
Heat but still damp: the other half of this complaint
Half the people asking why a dryer is not heating actually have a dryer that heats fine and dries badly, so this branch earns its own treatment.
Start by confirming which one you have, using the exterior test. Stand outside with a hand near the vent hood twenty minutes into a heated cycle. Warm or hot air means the heat system is working and the problem is elsewhere. Room-temperature air with the machine clearly running means either no heat or no airflow, and the difference between those two is whether the top of the machine and the drum interior feel hot.
If there is heat and the clothes are still wet, the suspects in order are: restricted exhaust, so the moisture cannot leave; an overloaded drum, so clothes cannot tumble and present surface area; a washer that is not spinning properly, so the load arrives far wetter than it should; a coated moisture sensor ending automatic cycles early; and a cycle selection running cooler than you think.
That washer link matters more than people expect. A load that leaves the washer sopping rather than damp can add a large fraction to drying time, and the causes there are their own subject, covered in our washing machine leak report and our drainage hose notes. Run a spin-only cycle on a suspect load and see how much water comes out. If a second spin produces meaningful water, the problem started upstream of the dryer entirely.
Overloading, wet loads and the physics of a full drum
Load size is the least glamorous cause on the list and one of the most common contributors to a dryer that seems to have lost its heat.
A dryer does not dry clothes by making them hot. It dries them by moving hot dry air across wet fabric surfaces so moisture evaporates into the airstream, then carrying that moist air out of the house. Everything about that process depends on surface area and airflow, which is another way of saying it depends on the clothes being able to tumble freely and separate as they fall.
Pack the drum and the load moves as a single mass. The outside of the bundle dries, the inside stays soaked, air channels around the lump rather than through it, and the cycle either runs enormously long or ends with an automatic sensor reading the dry outer layer. The owner concludes the machine has stopped heating. The machine has done nothing wrong.
The rule of thumb that survives contact with reality is to fill the drum somewhere around half to two thirds by volume, loosely, and to keep bulky items like a comforter or a bath mat as loads of their own rather than as passengers. Mixing heavy towels with light shirts in one load has the same effect from the other direction: the cycle ends when the shirts are dry and the towels are not, or runs long enough to bake the shirts while it waits for the towels.
What a multimeter tells you, and what it does not
Several of the parts above are diagnosed with a meter, so it is worth being honest about what that instrument can and cannot settle.
A basic multimeter set to continuity or to ohms will tell you whether a component’s circuit is intact. On a thermal fuse, a thermostat, a heating element or an igniter, an open reading is a definitive result: current cannot pass, and that part is not doing its job. That is genuinely useful and it is the whole reason a twenty dollar meter belongs in the house.
What a meter will not tell you is why. An open thermal fuse proves the fuse is blown and says nothing about the restricted vent that blew it. A good-reading element proves the coil is intact and says nothing about whether the machine is delivering 240 volts to it. Continuity is a necessary condition, not a sufficient one.
Two rules make meter work safe and useful. Always test with the machine unplugged and the component disconnected from its wiring, because parallel paths through the rest of the circuit produce readings that mean nothing. And never take live voltage readings inside a dryer cabinet unless you are qualified to do so; measuring across a 240 volt circuit is not a beginner’s exercise, and the diagnosis it produces is one an electrician can reach faster and more safely.
Which repairs are genuinely DIY
The honest split between what a household can do and what needs a trade matters more than confidence does, because the wrong call in either direction costs money.
Genuinely do it yourself, no special skill. Selecting the right cycle. Clearing the lint screen and vacuuming its housing. Cleaning the moisture sensor strips. Pulling the machine forward and replacing a crushed transition duct with smooth metal. Brushing and vacuuming the full duct run. Clearing the exterior hood and freeing its flap. Reducing load size. Cycling the breaker once. That list covers the largest slice of the chart and needs a vacuum, a vent brush and an hour.
Do it yourself with patience and research. Replacing a thermal fuse, a cycling thermostat or a high-limit thermostat, all of which are inexpensive parts in accessible positions on many machines. Replacing a heating element on a design with rear-panel access. Clearing a blocked blower housing. These mean unplugging the machine, removing panels, photographing every connector before it comes off, and ordering the correct part by model number.
Not do it yourself for most households. Anything at the breaker panel beyond a single reset. Diagnosing a lost supply leg. Any machine that trips a breaker repeatedly, smells hot, or shows scorching. Dropping a drum on a design that requires it, unless you have the time and the walkthrough for that exact layout.
Not a homeowner job at all. Gas supply work, burner faults, gas smells and any dryer venting indoors.
Repair or replace: the honest math
When a heating fault needs a paid repair, run the same two tests we apply to every appliance on the bench, and then let a third factor break the tie.
The first is the 50 percent test: if the quote exceeds roughly half the price of a comparable new machine, replacement usually wins. The second is age weighting against the commonly cited planning window for a dryer, which sits near 13 years, so the same repair buys most of a decade at year three and a year or two at year twelve.
The third factor is specific to dryers and it usually argues for repair. There is very little expensive inside one. A drum, rollers, a belt, a motor, a blower, a heat source and a couple of thermostats is close to the whole machine, which is why our appliance lifespan reference records dryers as the longest-lived of the laundry and kitchen appliances. The parts that commonly fail in this fault are among the cheapest in the house.
Run an illustrative case. A seven-year-old electric dryer stops heating, the free checks come back clean, and a technician quotes 180 dollars for a thermal fuse and a thermostat with the vent cleared as part of the visit. A comparable new machine would run about 700 dollars. That is roughly 26 percent of replacement on a machine with about six typical years left, which is around 30 dollars a year of repair against about 54 dollars a year for a new one. Repair wins clearly. Put your own quote, price and years into our cost-per-use calculator rather than guessing.
Thirteen years of one electric dryer, with one mid-life heating repair
Illustrative split of total spend: a $700 machine, about $1,560 of electricity across 13 years at roughly $120 a year, and one $180 heating repair. Segments sum to 100 percent.
Unlike a refrigerator, a dryer usually costs more to run than to buy, at the roughly $0.48 a load and five loads a week used in our running-cost teardown. That is the strongest argument for fixing airflow: a restricted machine spends longer in the largest slice on the chart.
What a restricted vent actually costs you
The chart above makes an argument worth spelling out, because it changes how urgent the vent job feels.
Running cost is the biggest slice of a dryer’s lifetime spend, and a restricted machine does not draw more power per minute so much as it runs for more minutes. A load that needed fifty minutes now needs seventy, or needs a second cycle entirely. That is a proportional increase in the largest cost on the chart, applied to every load, for as long as the restriction lasts.
Put illustrative numbers on it. At roughly three kilowatt-hours per full load and a typical rate near 16 cents, a load costs about 48 cents and five loads a week costs about 125 dollars a year, which is the figure our dryer running-cost teardown works through in detail. A restriction that adds 30 percent to cycle times adds roughly 37 dollars a year at that usage, quietly, with no line item announcing itself.
That is more than a vent brush costs, in the first year, and putting your own load count and rate into our cost-per-use calculator turns it from a vague sense that the machine is slower into a number. It is also, and more importantly, the same restriction that is heating the cabinet past what the safety devices allow and packing combustible material into the duct. The financial argument and the safety argument point the same direction, which is not always true in appliance work.
A worked example: one cold drum, five suspects
Run one illustrative scenario end to end, because this is the shape these problems actually arrive in.
A household notices on a Saturday that a load of towels came out warm and wet. The machine is a seven-year-old electric dryer, vented through an exterior wall behind it, and nothing has been done to the vent since it was installed.
Suspect one, the setting. The panel is checked and it is on a normal heated cycle, not air fluff. Thirty seconds, nothing found, one suspect removed for free.
Suspect two, the symptom split. A small load is run and observed. The machine is hot at the start, and by twenty minutes the drum has gone cool while still turning. That is intermittent heat, which is the airflow signature, and it removes an open element from the top of the list immediately.
Suspect three, the exterior test. Outside, the vent hood flap barely lifts and the air coming out is a weak flutter rather than a stream. That is a positive result and effectively ends the diagnosis, but the household keeps going to confirm.
Suspect four, the duct. The dryer is pulled forward and unplugged. The flexible transition duct behind it is crushed almost flat where the machine was pushed back against the wall, and it is packed. It is replaced with a short run of smooth metal.
Suspect five, the run itself. The wall duct is brushed and vacuumed, producing a genuinely alarming quantity of felted lint, and the exterior hood is cleared and the flap freed.
The machine now runs hot for a full cycle and dries a load of towels in one pass. Total parts cost: a transition duct and a brush kit. Had the fault also blown a thermal fuse, as it frequently does, the illustrative 180 dollar repair would have applied on top, and the household would still have needed to do exactly this work first.
Prevention: the habits that keep a dryer hot
Most of the causes above are preventable, and the prevention is cheap enough to be worth stating as a routine rather than as advice.
Clear the lint screen every single load. Not most loads. Every one. This is the highest-value thirty seconds in household appliance maintenance and it addresses the largest slice of the chart.
Vacuum the screen housing a few times a year. The felted layer that builds below the screen is invisible from above and never comes off with the screen.
Clean the full duct run on a schedule. How often depends on the length of the run, the number of loads and the duct material, which our dryer vent cleaning walkthrough sizes properly. Put it on the same calendar as smoke alarm batteries so it actually happens.
Use smooth rigid metal duct wherever you can. Ridged foil and plastic ducting traps lint in every corrugation, crushes when the machine is pushed back, and is a worse fire risk than metal. This is the single best hardware upgrade available in this fault.
Cut back on dryer sheets, and clean the sensor strips occasionally. Residue coats the screen mesh and the moisture bars, and both effects look like a heating problem.
Do not overload, and do not push the machine hard against the wall. Leave the transition duct room to keep its shape. The same maintenance-restores-airflow logic runs through our dehumidifier cleaning notes and our eight-point appliance maintenance plan.
When to call a pro, and what to tell them
Knowing when to stop is part of doing this well, and there are five clear stopping points.
Call a technician when the fault is on a gas dryer and involves the burner, the valve or the supply. Call one when the diagnosis needs live electrical testing to separate a supply problem from a machine problem. Call one immediately for a burning smell, scorch marks, a breaker that trips repeatedly, or visible damage to wiring or the terminal block. Call one when the machine’s design requires the drum to come out and you would rather not spend a weekend learning that layout. And call one when you have worked the whole free list, found nothing, and would rather buy an hour of expertise than another evening of guessing.
What you tell them changes what the visit costs. Arrive with the symptom split, meaning no heat at all versus heat that quits partway through versus heat that never finishes. Bring the timeline and what changed just before. List what you have already ruled out: the cycle setting, the lint path, the exterior airflow test, the breaker reset. And have the model number from the plate, which usually lives inside the door opening or on the back panel.
Ask whether the diagnostic fee is credited against the repair, ask for parts and labour separated, and ask whether the part is still available for that model. On a machine near or past year 13, ask the technician what they would expect to fail next.
The bottom line
Why is my dryer not heating has a better answer than the cold, damp load suggests, and the answer starts with a question about airflow rather than a part number. If the machine heats and then quits partway through a cycle, the safety devices are protecting an overheating cabinet and the restriction that caused it is in the lint screen, the housing, the transition duct, the wall run or the exterior hood. If there is no heat at all from the first minute on an electric machine, look at the setting first and then at the classic half-lost 240 volt circuit, where the drum turns happily on 120 volts while the element sits dead. Then the thermal fuse, the thermostats and the element, in that order. On a gas machine, watch the burner through the inspection opening and let the ignition sequence tell you which link broke: no glow points one way, a glow with no flame points another.
Handle the safety part properly, because this is the appliance where a shortcut is genuinely dangerous. Unplug at the wall or kill the breaker before any panel comes off, close the gas valve on a gas machine, never bypass a thermal fuse or a thermostat to force a cold machine to run, and hand anything involving gas supply, repeated breaker trips or scorching to a qualified technician. Then let the arithmetic close it out. Dryer parts are cheap and dryers last, so a repair quote under half the price of a comparable new machine on a unit inside its window is almost always worth doing. Clear the whole lint path to the outside on a schedule and most of this report will never apply to you, which is the rare case where the safest habit and the cheapest one are the same habit.
A note from the bench: these test notes describe how clothes dryers commonly fail and how to work the fault in a sensible order. They are general information, not professional repair, electrical, or gas-fitting advice, and every dollar figure, share and interval in them is an illustrative planning number rather than a quote, a measurement or a statistic about any brand or model. Disconnect the machine at the outlet or the breaker before removing any panel, and close the shutoff valve before working near a gas burner. Gas supply work, burner faults, any gas smell, any suspicion of carbon monoxide, repeated breaker trips and any sign of scorching belong with a licensed technician rather than with an article, and a dryer must always exhaust to the outdoors. Where the manufacturer’s manual for your specific machine contradicts a general principle written here, the manual is the authority and this report is not.
Frequently asked questions
Why is my dryer turning but not heating?
On an electric dryer that is the single most recognisable fault signature in the whole category, because the drum motor and the controls run on 120 volts while the heating element needs the full 240 volts. Lose one of the two live legs feeding the circuit, through half of a double-pole breaker tripping or a single blown cartridge fuse in an older panel, and the machine looks completely alive while the element gets nothing. The other common producer of the same symptom is a blown thermal fuse on models where that fuse only interrupts the heat circuit. Both are cheap. Neither is the compressor-grade disaster people fear, because a dryer does not have one.
What is the most common cause of a dryer not heating?
Restricted airflow, by a wide margin, and it is worth understanding why before you buy any part. A dryer works by pulling room air across a heat source, through the tumbling clothes, and out of the house, and every safety device in the machine is watching the temperature of that airstream. Block the path with lint in the screen, a crushed transition duct, a packed vent run, or a stuck exterior flap, and the heat has nowhere to go, so the high-limit thermostat or the thermal fuse cuts the heat to protect the machine. The part that failed is genuinely broken, but it is a symptom. Replace it without clearing the path and you will be replacing it again.
How do I know if my dryer thermal fuse is blown?
The behaviour is the first clue and a meter is the confirmation. A thermal fuse is a one-shot device that opens permanently when the exhaust air gets too hot, and depending on the design it either kills the heat circuit while the drum keeps turning or kills the whole machine so nothing runs at all. With the dryer unplugged and the fuse disconnected from its wiring, a continuity or resistance reading across it tells you plainly: continuity means it is intact, an open reading means it has blown. Fuses are inexpensive parts, illustratively in the low tens of dollars. Fitting one without first clearing the vent is the classic wasted repair.
Why does my dryer heat but my clothes are still damp?
That is a different fault from no heat and it deserves its own search, because the machine is doing the hard part correctly and failing at the last step. The usual causes are restricted exhaust airflow, which means hot humid air is not leaving fast enough to carry moisture out, an overloaded drum where clothes cannot tumble freely, a washer that is not spinning water out properly before the load arrives, or a moisture sensor coated in fabric softener residue that reads the clothes as dry and ends the cycle early. Work airflow first, then load size, then the sensor bars. Only after those does the fault belong to the dryer's heat system at all.
Can I replace a dryer heating element myself?
On many electric dryers this is a genuinely approachable repair, but it depends on the machine's layout and on your comfort with electrical safety rather than on enthusiasm. The element sits in a metal housing that on some designs is reached by removing a rear panel and on others requires lifting the top, dropping the front, and pulling the drum, which is a considerably bigger afternoon. Unplug the machine at the wall before any panel comes off, photograph every wire before you disconnect it, and order the part for your specific model number. If the machine is on a circuit that trips repeatedly, or you find scorching, stop and call a technician instead.
Why is my gas dryer not heating up?
A gas dryer heats through a sequence rather than a single component, so the fault is usually in the sequence rather than in a burner that has simply died. An igniter glows, a sensor detects that glow and signals the valve coils, the coils open the gas valve, the gas lights, and the flame sensor confirms it. Each failure has its own signature: no glow at all points at the igniter or the radiant sensor, while a glow that builds and then goes out repeatedly without a flame usually points at weak valve coils. Anything involving the gas supply line, a gas smell, or a burner that lights unevenly is a qualified technician's job, not an evening project.
Is it worth repairing a dryer that will not heat?
Usually yes, and dryers are the appliance where that answer holds longest, because there is very little expensive in them. A drum on rollers, a belt, a motor, a blower, a heat source and a couple of thermostats is close to the whole machine, so the parts that commonly fail are inexpensive ones. Apply the same two tests we use on every appliance: if the quote exceeds roughly half the price of a comparable new machine, lean toward replacing, and tighten that threshold once the unit is past its commonly cited planning window near 13 years. An illustrative $180 heating repair on a machine that would cost about $700 to replace is an easy call.
Can a clogged dryer vent stop the dryer from heating?
Yes, and this is the connection most people miss when a fuse or thermostat gets replaced twice in one year. The vent is not a passive pipe; it is the only route the machine has to dump the heat it is making, so when the run clogs the exhaust temperature climbs past the point the safety devices are set to allow and they open the heat circuit on purpose. That is the design working, not failing. A clogged lint path is also the fire risk that makes this fault a safety matter rather than an inconvenience, which is why clearing the whole path to the outside comes before any part number.