What's on this page
- What the drain hose actually does
- Where the water is allowed to go
- Height is the variable that matters most
- Why siphoning happens, and how to stop it
- Length, and why extensions cause trouble
- What actually goes wrong
- Leaks, and where to look first
- Clogs, and the filter people forget
- Kinks, and the reinstall problem
- Replacing a drain hose
- Choosing a replacement hose
- Maintenance that prevents most of this
- When the hose is not the problem
- The standpipe itself, and what makes a good one
- Front-load and top-load differences worth knowing
- Vibration, and the slow loosening nobody watches
- A worked example: the machine that fills forever
- Safety points worth stating plainly
- A ten-minute inspection you can do today
- Drain hoses against fill hoses, which get confused
- Costs, so you know what you are deciding between
- The bottom line
Short answer: Set up a washing machine drain hose so the discharge point sits above the drum's water level, otherwise the machine siphons and drains while it fills. Push the hose a few inches into the standpipe, secure it so pump pressure cannot throw it out, never seal it airtight, and do not exceed the manufacturer's maximum length. An unsecured hose is the usual cause of a laundry flood.
The drain hose is the least considered part of a washing machine and, after the fill hoses, the one most likely to put water on your floor. It carries every gallon the machine uses, under pressure, several times a week, and almost every problem it causes traces back to how it was installed rather than to a fault in the hose itself.
These notes cover what the hose does, why height matters more than any other variable, what causes siphoning, leaks, and clogs, and how to replace one when it has finally split. Every measurement below is an illustrative planning figure drawn from typical guidance rather than a specification for your machine, which is printed in your installation manual.
Key takeaways
- The discharge point must sit above the drum's water level or the machine siphons and drains while filling.
- The hose should sit a few inches inside the standpipe, secured but never sealed airtight.
- Most drainage complaints are the pump filter or the household drain, not the hose itself.
- Extending the hose beyond the manufacturer's maximum length can leave water in the drum.
- An unsecured hose in a sink or standpipe is the most common cause of a laundry flood.
What the drain hose actually does
The drain hose carries waste water from the machine’s pump to a drain point. It is a flexible corrugated tube, commonly around one to one and a quarter inches in internal diameter, clamped to an outlet at the back of the machine and directed into a standpipe, a laundry sink, or occasionally a floor drain.
Two facts about its job explain nearly every problem it produces. The first is that it works under pump pressure rather than by gravity, so the discharge end can move under load if it is not secured. The second is that the volume is substantial and arrives fast: a single cycle can discharge a meaningful number of gallons, and the discharge rate is commonly cited in illustrative terms around 10 to 17 gallons per minute. Any drain that cannot accept that rate will back up regardless of how healthy the hose is.
The hose is also the only part of the water path that is routinely disturbed. It gets moved when the machine is pulled out, crushed when it is pushed back, and bent around whatever is behind the appliance. That is why age alone rarely kills a drain hose and handling frequently does.
Where the water is allowed to go
Three destinations are common, and each has its own requirements.
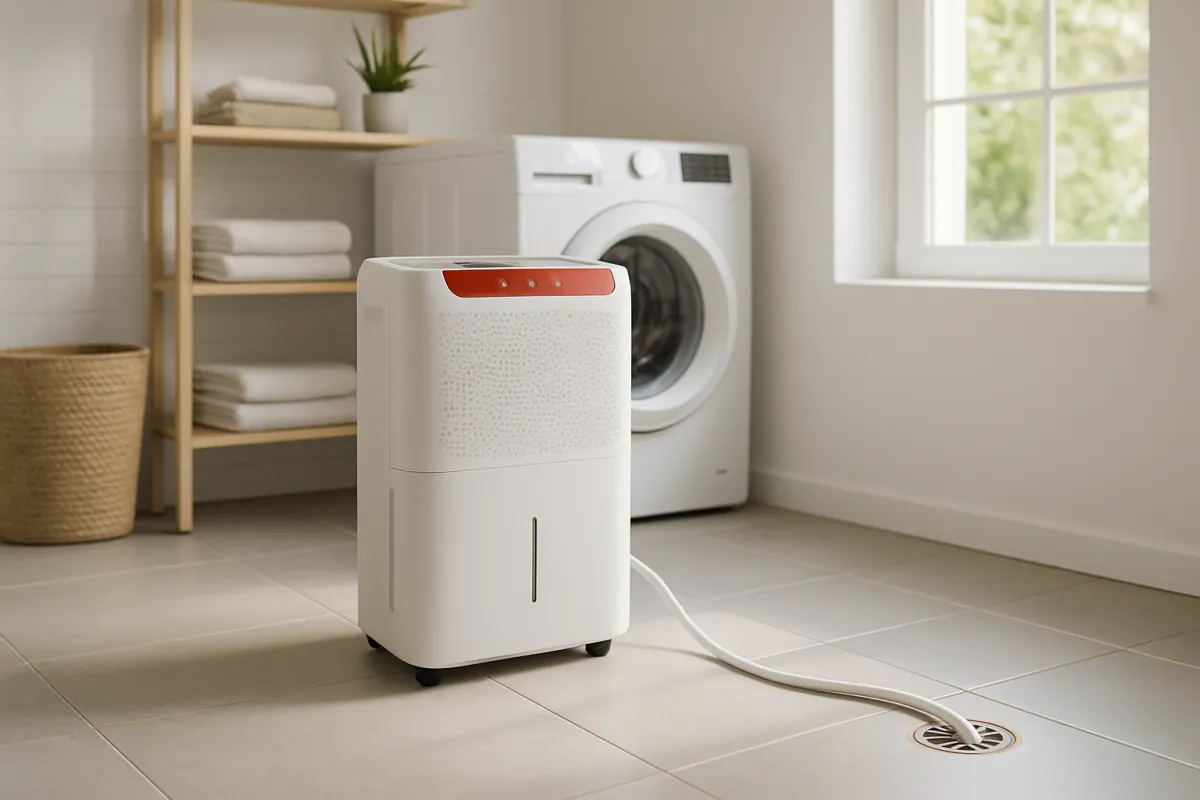
A standpipe is the purpose-built option: a vertical pipe with a trap at its base, connected to the household waste line and vented. It is designed for exactly this flow rate and is the arrangement manufacturers assume.
A laundry sink is widely used and generally permitted, provided the rim meets the height requirement and the sink drains fast enough to keep ahead of the pump. The risk is a slow sink drain, which turns a normal cycle into an overflow.
A floor drain appears in some basements and garages. It can work, but it usually sits low, which conflicts directly with the height requirement, and it is often not trapped or vented for appliance discharge. Where a floor drain is the only option, the hose usually needs raising to a proper height first and then routing down, rather than simply being dropped into the drain.
Height is the variable that matters most
If a washing machine drains when it should be filling, the height of the discharge point is the first thing to check.
Illustrative discharge height reference points
Illustrative figures drawn from typical guidance. Your installation manual states the actual minimum and maximum for your model.
The bottom bar is the problem case. A sink rim below the stated minimum can put the discharge point under the drum's water level, which is the classic siphoning setup even though the arrangement looks perfectly sensible.
The logic is simple once stated. The discharge point has to sit above the water level inside the drum. If it sits below, gravity will pull water out through the hose continuously, and the machine will keep filling to compensate. The result is a cycle that never seems to progress, a water bill that climbs, and a machine that appears faulty while working exactly as designed.
The maximum matters too, though it fails differently. The pump can only lift so far. Beyond the specified maximum it may not fully evacuate the drum, leaving standing water, extending cycles, or producing a drain error code.
Why siphoning happens, and how to stop it
Siphoning needs a continuous column of water with no air break. Three installation habits create one.
Pushing the hose too far down the standpipe. If the hose reaches the water in the trap, or fits tightly enough to seal against the pipe wall, the air break disappears. The hose should sit only a few inches inside, secured against vibration but not wedged.
Sealing the connection deliberately. People sometimes tape or seal the hose into the pipe to stop a smell. That guarantees a siphon and does not fix the smell, which is usually a dry trap or a venting problem.
Losing the required loop. Many machines specify a loop or hook near the top of the hose run, sometimes supplied as a plastic bracket, which holds the high point above the water level and breaks the siphon. It is easy to leave off during a reinstall and easy to blame the machine afterwards.
The correction is usually free: raise the discharge point to the specified height, withdraw the hose so only a short length sits inside the pipe, refit the supplied bracket, and make sure air can pass.
Length, and why extensions cause trouble
Drain hoses are supplied at a length suited to a normal installation, and extending them is where a lot of avoidable trouble starts.
Manufacturers commonly specify a maximum total length, often cited in illustrative ranges of about 8 to 12 feet including any extension. The limit exists because the pump works against both distance and lift, and the resistance of a corrugated hose is not trivial.
If extra length is genuinely needed, use an extension kit matched to the hose diameter with a proper coupling and clamps. Joining two hoses with tape produces a leak at the joint, usually at the least convenient moment.
More often, the better fix is to reduce the run rather than extend it. Moving the machine slightly, repositioning the standpipe, or removing an unnecessary loop of slack behind the appliance can bring a marginal installation back inside specification without any parts at all.
Keep the horizontal portion short where you can. Vertical lift is what the pump fights hardest, but long horizontal runs with sags collect water and add resistance too.
What actually goes wrong
Illustrative breakdown of drain hose complaints
An illustrative distribution to show where attention usually pays, not measured data from a sample of machines.
The first category is the one worth internalising: a large share of what gets diagnosed as a hose problem is actually the pump filter or the drain line, both of which are cheaper and easier to address than replacing anything.
Leaks, and where to look first
A leak that appears only while the machine is draining is a drain-side problem. A leak while filling points at the supply hoses instead, which are a different component under constant mains pressure.
Check the clamp at the machine end first. It loosens over time and is frequently left loose after a repair or a move. Tightening it costs nothing.
Inspect the hose body along its full length, paying attention to bends. Corrugated hose cracks at the outside of a tight bend, and a crack can weep only under pressure, which makes it invisible when the machine is idle.
Check the discharge end is still where it should be. An unsecured hose can move under pump pressure, and a hose that has lifted out of a standpipe will spray for the whole drain cycle.
Look for a heat source. A drain hose resting against a hot dryer vent or a heating pipe will harden and split much sooner than one routed clear.
Because drain leaks occur briefly and behind the machine, they are frequently discovered as a damp floor or a musty smell rather than as visible water. Pulling the machine out once a year to look is worth the effort.
Clogs, and the filter people forget
A machine that will not drain usually has one of three blockages, and they are worth checking in order of likelihood.
The pump filter. Most front-load machines and many others have a small access panel at the front bottom concealing a filter that traps lint, coins, buttons, and hair. It is designed to be cleaned periodically and is very often the actual cause. Symptoms are identical to a blocked hose: standing water, a drain error, a cycle that stalls. Expect water when you open it, and have a shallow tray and towels ready.
The hose itself. Detach it at the machine end after unplugging the machine, check for an obstruction, and flush it through from the far end. Debris tends to lodge at bends.
The household drain line. If the machine empties fine into a container but backs up at the standpipe, the machine is healthy and the drain is not.
Our walkthrough on cleaning a washing machine covers the filter as part of a routine, and doing it on a schedule prevents most of these calls.
Kinks, and the reinstall problem
The most common physical damage to a drain hose happens in the thirty seconds after someone finishes working behind the machine.
Pushing an appliance back into a tight alcove traps the hose between the machine and the wall, and a corrugated hose crushes easily. A partially crushed hose restricts flow, which produces slow draining and eventually a drain error, and a fully kinked one stops drainage entirely.
The habit that prevents it is simple: before pushing the machine back, route the hose deliberately, leave a gentle curve rather than a tight bend, and check behind the machine after it is in position rather than assuming.
Leaving slightly less slack also helps, since a long loose loop is what gets trapped. Excess hose coiled behind a machine is both a kink risk and an unnecessary resistance.
Replacing a drain hose
Replacement is a genuinely approachable job on most machines, provided the electrical and water safety basics are respected.
Unplug the machine at the wall and turn off the water supply taps. Pull the machine out far enough to reach the back comfortably.
Place a shallow tray and towels under the connection. The hose holds water and it will come out.
Release the clamp at the machine end. Depending on the model this is a spring clamp needing pliers or a screw clamp needing a driver. Work the old hose off the outlet, which may require a gentle twist if it has hardened.
Fit the new hose fully onto the outlet and secure the clamp. A hose that is not seated fully is the most common cause of a leak after replacement.
Route the new hose to the drain point, respecting the height requirement, fitting any supplied bracket or loop, and securing the discharge end so it cannot move.
Restore water and power, then run a short cycle and watch the connection through the drain phase specifically, because that is when the hose is under pressure.
If the machine is under warranty, check whether a self-repair affects it. And if the connection at the machine is corroded, seized, or the outlet itself is damaged, that is the point to stop and call a technician rather than force it.
Choosing a replacement hose
Match the internal diameter to the outlet on your machine rather than to the old hose, which may itself have been the wrong part.
Buy a hose long enough for the run without an extension if possible, staying inside the manufacturer’s maximum total length.
Prefer a hose supplied with the bracket or hook if your installation needs one, since the correct geometry is easier with the intended part.
Reinforced corrugated hose resists kinking better than the thinnest options and costs very little more, which is worthwhile behind a machine that gets moved.
Replace the clamp at the same time if the old one is corroded or has lost tension. It is a trivial cost against the consequence of it failing.
Manufacturer parts are not always necessary, but where a machine uses an unusual outlet or an integrated hose assembly, the correct part matters more than the saving on a generic one.
Maintenance that prevents most of this
Clean the pump filter periodically, following the interval in your manual. This single task prevents a large share of drainage complaints.
Inspect the hose annually when you pull the machine out, looking at bends, the clamp, and the discharge end.
Check the discharge end is still secured. Vibration works things loose over time, and this is the one that turns into a flood rather than a drip.
Avoid overloading, which increases vibration and, over years, works connections loose. Our note on what it costs to run a washing machine covers load sizing from the energy side, and the mechanical argument points the same way.
Keep the hose clear of heat sources and away from the point where the machine will be pushed back.
When the hose is not the problem
Several faults present as drainage problems and are not.
A failed drain pump produces no drainage and often a humming or grinding noise. It is a repair rather than a hose swap.
A faulty pressure sensor or water level switch can leave the machine believing the drum is not empty, stalling the cycle even though water has gone.
A blocked or poorly vented household drain line backs up at the standpipe regardless of the appliance.
A lid switch or door lock fault can prevent a cycle progressing to the drain stage at all, which looks like a drainage failure from outside.
The useful diagnostic is to establish whether water leaves the machine. If it does and then backs up, look downstream. If it does not leave at all, look at the pump, its filter, and the hose. Our reference on how long appliances last covers when a repair stops being the sensible choice on an older machine.
The standpipe itself, and what makes a good one
The hose gets the blame, but the pipe it discharges into determines whether the arrangement works at all.
A standpipe is a vertical pipe with a P-trap at its base connecting to the household waste line. The trap holds a water seal that keeps sewer gases out of the room. The pipe above it accepts the discharge, and a vent allows air into the system so water can flow rather than glug.
Diameter matters. A standpipe commonly needs to be wider than the hose to leave the air gap that prevents siphoning, with two inches a frequently cited figure against a hose of roughly an inch. A pipe too close to the hose diameter turns the connection into an accidental seal.
Trap height matters too. The trap needs to sit within a range below the standpipe opening, because a trap set too low can allow the water seal to be siphoned out by the force of the discharge, leaving the room open to drain odours until the next cycle refills it.
Venting is the part most often missing in older or improvised installations. Without adequate venting, a fast discharge pulls a partial vacuum behind it, which slows drainage, empties traps, and produces gurgling from nearby fixtures.
If a standpipe smells, drains slowly despite a clear hose, or makes other drains gurgle during a wash, the pipe rather than the appliance is reporting a problem, and that is plumbing work rather than an appliance fix.
Front-load and top-load differences worth knowing
The drainage principles are shared, but the two formats present differently when something goes wrong.
Front-load machines almost always have an accessible pump filter behind a small panel at the front bottom, and it is intended to be cleaned by the owner. They also hold water in the door gasket and sump, so opening a filter without a tray ready reliably produces a small flood. Their drain hoses are typically routed from the rear with a fixed rise built into the machine.
Top-load machines vary more. Many do not have an owner-accessible filter at all, which changes the diagnosis: a blockage is more likely to be in the pump or the hose rather than in a filter you can clear. Older top-loaders with a gravity-assisted design can be more sensitive to discharge height than modern pumped machines.
High-efficiency machines of either format use less water per cycle, which means less flow to carry lint and residue through the drain line. That can mean deposits accumulate in the household drain more readily than they did with an older, thirstier machine, and a drain that coped for years can start backing up after an appliance upgrade with nothing wrong with the new machine at all.
Stacked washer and dryer units add an access problem rather than a mechanical one: the hose and connections sit behind a column that is awkward to move, which is a reason to check them deliberately rather than opportunistically.
Vibration, and the slow loosening nobody watches
Every spin cycle transmits vibration into the connections, and over years that does quiet damage.
A machine that is not level vibrates considerably more. Levelling feet are adjustable for exactly this reason, and a machine that walks across the floor during a spin is working its hose connections loose every week.
Overloading amplifies it, because an unbalanced drum produces far more movement than a balanced one.
The consequences show up at the clamp and at the discharge end. A clamp that was tight at installation can be finger-loose after several years, and a discharge hose that was seated in a standpipe can gradually vibrate its way upward until it is barely in.
Checking both takes a minute during any inspection. If you only ever check one thing behind a washing machine, make it whether the discharge end is still properly secured, because that is the failure with the largest consequence.
Anti-vibration pads under the feet can help on a suspended floor, though they are a supplement to levelling rather than a substitute for it.
A worked example: the machine that fills forever
An illustrative case, because this particular fault is common and is almost always misdiagnosed.
A washer is moved to a different corner of a basement during a tidy-up. The only nearby drain is a floor drain, so the hose is run across the floor and dropped straight into it.
The next wash never finishes. The machine fills, keeps filling, and the cycle appears to stall. The owner reasonably concludes the water level sensor has failed and starts pricing a repair.
What is actually happening is a siphon. The floor drain sits at floor level, well below the water line inside the drum, and the hose now forms a continuous downhill path. Water leaves as fast as it arrives, so the machine never registers a full drum and keeps filling to compensate.
The diagnosis costs nothing: run a cycle and watch the discharge. If water is running out of the hose while the machine is filling, the level sensor is fine and the geometry is wrong.
The fix costs little more. The hose is raised so its high point sits above the drum’s water level, secured at that height against the wall, and then routed down to the floor drain. The air break is restored, the siphon stops, and the cycle completes normally.
Change one detail and the story ends differently. Had the same hose been dropped into a laundry sink whose rim sat at a proper height, there would have been no fault at all. The machine, the hose, and the drain were never the problem; the height was.
Safety points worth stating plainly
Water and electricity share the space behind a washing machine, which raises the stakes on a few otherwise mundane habits.
Always unplug the machine before working behind it, rather than only switching it off at the control panel.
Never run a washing machine unattended in a room where a drain has been backing up. Waste water reaching an electrical connection or spreading under an appliance is a genuinely dangerous situation rather than an inconvenience.
Do not seal a drain hose into a standpipe to solve an odour. The odour indicates a trap or venting fault, and sealing it can draw sewer gas toward the machine and create a siphon at the same time.
Treat a hose that has hardened, discoloured, or split anywhere as due for replacement rather than repair. Tape on a pressurised drain hose is a temporary measure at best and usually fails at the worst moment.
If the machine sits above a finished floor or a living space below, a drain pan under the appliance is worth the small cost, and some jurisdictions require one.
And where a standpipe backs up repeatedly, where the pump outlet is damaged, or where the installation would need new plumbing to meet height or venting requirements, that is a licensed plumber’s job rather than a weekend one.
A ten-minute inspection you can do today
If you have never looked behind the machine, this is the sequence worth running once and then annually.
Unplug the machine and pull it out far enough to see the back and the floor behind it.
Look at the floor first, before touching anything. Staining, a tide mark, warped flooring, or a musty smell tells you there has been water even if everything is dry now.
Follow the hose from the machine outlet to the drain. Check the clamp is tight, the hose is not cracked at any bend, and nothing has been resting against it.
Check the discharge end. Is it secured with the intended bracket, is it a few inches into the standpipe rather than jammed down, and has it worked its way upward or out.
Measure the discharge height from the floor and compare it against the range in your manual. This is the check nobody does and the one that explains the most stubborn faults.
Open the pump filter, with a tray ready, and clean it.
Check the machine is level by rocking it gently corner to corner, and adjust the feet if it moves.
Push the machine back deliberately, watching the hose, and check behind once it is in position.
Run a short cycle and watch the drain phase specifically. That is the only moment the hose is under pressure and the only moment a marginal leak reveals itself.
Drain hoses against fill hoses, which get confused
Two hoses run to the back of a washing machine and they fail in opposite ways, so telling them apart matters when something leaks.
The fill hoses, usually two of them for hot and cold, are narrow, rigid, and under mains pressure continuously, twenty-four hours a day, whether the machine is running or not. That constant pressure is why a burst fill hose is the classic laundry flood: it does not stop when the cycle does.
The drain hose is wide, corrugated, and under pressure only during the drain phase of a cycle, for perhaps a minute at a time. A drain hose failure spills what is in the drum rather than the entire mains supply.
Symptomatically, water present when the machine has not run points at the fill side. Water appearing partway through a cycle points at the drain side.
The maintenance implications differ too. Fill hoses are commonly recommended for replacement on a schedule regardless of appearance, with intervals often cited in illustrative ranges of around five years, and braided stainless versions are widely preferred over plain rubber for exactly this reason. Drain hoses are generally replaced on condition rather than on a timer, because they are not under constant stress.
If you are behind the machine anyway, checking both is sensible. The drain hose is the one this article is about; the fill hoses are the ones more likely to cause a catastrophe.
Costs, so you know what you are deciding between
The figures here are illustrative planning numbers rather than quotes, but the relative scale is the useful part.
A replacement drain hose is among the cheapest appliance parts there is, typically a small number of dollars, with an extension kit and clamps costing little more.
Cleaning a pump filter costs nothing but ten minutes and a tray.
An appliance technician call-out to diagnose a drainage fault is commonly cited in illustrative ranges of roughly $80 to $150 before parts, with the repair itself on top.
A plumber clearing a blocked laundry drain line generally starts higher again, and correcting a standpipe or adding venting is a plumbing job priced accordingly.
Water damage sits in a different order of magnitude entirely. A hose that comes out of a standpipe mid-cycle can put a drum’s worth of water across a floor in under a minute, and if that floor is above a finished ceiling the repair is measured in thousands rather than tens.
That asymmetry is the whole argument of this article. The preventive actions are all free or nearly free: correct height, secured discharge end, clean filter, annual look behind the machine. The failure they prevent is the expensive one. Our reference on how long appliances last covers the parallel judgement about when repairing an older machine stops being worthwhile.
The bottom line
The washing machine drainage hose is a simple part that fails in predictable ways, and nearly all of them are installation issues rather than defects. Get the discharge height right, leave an air break at the standpipe, secure the end so it cannot move, avoid crushing the hose when pushing the machine back, and clean the pump filter on a schedule. None of those five costs anything beyond a few minutes of attention.
Do those five things and the hose will generally outlast several rounds of worrying about it. Skip the fourth or the fifth and you will eventually meet the problem the hard way, usually with towels and usually at a weekend.
When something does go wrong, check the pump filter before assuming the hose, and check whether water leaves the machine at all before assuming either. That one distinction narrows the diagnosis faster than anything else on this page.
And if a machine has recently been moved, start with the height and the routing rather than with the machine. Appliances rarely develop faults during a house tidy-up, but installations change during one, and a hose that was correct in its old position is frequently wrong in its new one.
A note on scope: these notes exist to explain how a washing machine drainage hose is meant to be set up and what usually goes wrong with it, not to promise any specific result on your machine. Every height, length, diameter, flow rate, and percentage above is an illustrative planning figure drawn from typical guidance rather than measured on one appliance, and your installation manual states the actual specification for your model, which governs over anything here. Plumbing and appliance installation is also subject to local codes covering standpipe height, trapping, venting, and air gaps, and those requirements differ by jurisdiction. Always unplug a machine and isolate its water supply before working behind it, and call a licensed plumber or an appliance technician where a drain backs up repeatedly, where the outlet or pump is damaged, or where you are unsure.
Frequently asked questions
How high should a washing machine drain hose be?
The discharge point generally needs to sit above the machine's water level so the drum cannot empty itself by gravity, which is why standpipes are tall. Manufacturers commonly specify a minimum height in an illustrative range around 30 to 34 inches from the floor and a maximum commonly cited near 96 inches, with the exact figures printed in the installation manual for your model. Too low and the machine siphons, draining as fast as it fills. Too high and the pump struggles to lift the water, which can leave water in the drum, extend cycles, or trigger a drain error. If you are unsure, the manual is the authority; these are typical ranges rather than a specification for any particular machine.
Why does my washing machine drain hose keep siphoning?
Siphoning happens when the hose creates a continuous column of water between the drum and the drain, letting gravity pull water out while the machine is trying to fill. The usual causes are a discharge point that sits too low, a hose pushed too far down into the standpipe so it seals against the pipe, or a hose run without the manufacturer's required loop or hook near the top. The fix is normally to raise the discharge point, pull the hose back so only a few inches sit inside the standpipe, and make sure air can get past the hose rather than the connection being airtight. A machine that fills and drains at the same time, or that never seems to reach level, is usually reporting this problem.
Can a washing machine drain into a laundry sink?
Many installations do, and manufacturers commonly permit it provided the sink meets the height requirement and can accept the flow. Two cautions apply. A washer discharges quickly, with illustrative rates often cited around 10 to 17 gallons per minute, so a sink with a slow or partially blocked drain can overflow before the pump finishes. And the hose has to be secured, because an unsecured hose can whip out of the sink under pressure and empty a full drum onto the floor. Hooking the hose over the sink rim with the manufacturer's bracket, rather than simply resting it inside, is the difference between a normal cycle and a flood.
How long can a washing machine drain hose be?
There is a practical limit because the pump has finite lift and every extra foot adds resistance. Manufacturers commonly specify a maximum total length, often cited in illustrative ranges around 8 to 12 feet including any extension, and exceeding it can leave water in the drum or produce drain errors. If you need extra length, use a proper extension kit matched to the hose diameter with a secured coupling rather than joining two hoses with tape. Where a long run is unavoidable, keeping the horizontal portion as short as possible and avoiding unnecessary rises helps, because the pump works against vertical lift more than against horizontal distance.
Why is water backing up out of the standpipe?
Backing up usually points at the household drain rather than the machine. A washer discharges a large volume quickly, and a partially blocked drain line that copes with a slow sink can be overwhelmed by that surge. Lint, detergent residue, and grease build up in the line over time and narrow it. A blocked or poorly designed vent can also cause it, since drainage needs air behind it to flow. If the machine empties normally into a bucket but backs up at the standpipe, the machine and its hose are working and the problem is downstream. Persistent backing up is worth a plumber's attention rather than repeated plunging, because standing waste water near an appliance is both a hygiene and an electrical concern.
What causes a washing machine drain hose to leak?
Leaks concentrate at three points. The connection at the machine, where a clamp can loosen over time or was never fully tightened after a repair. The hose body, where age, kinking, or contact with a hot surface produces cracks or splits, most often at a bend. And the discharge end, where an unsecured hose can lift out of the standpipe under pressure and spray. Leaks that appear only during the drain portion of a cycle point to the hose or its connections rather than to the fill hoses, which leak while the machine is filling. Because the drain hose is under pressure only briefly, a small leak can be easy to miss until it has been quietly wetting a floor for weeks.
How do I unclog a washing machine drain hose?
Turn off the machine and unplug it, then place a shallow container and towels underneath, because a hose holding water will empty when disconnected. Detach the hose at the machine end, check for a visible obstruction, and flush it through with water from the opposite end. A plumber's snake can clear a stubborn blockage, though care is needed not to puncture the hose. Many machines also have a separate drain pump filter behind a small access panel at the front bottom, and that filter traps lint, coins, and hair; a clog there produces identical symptoms to a blocked hose and is far more common. Clean both before assuming the hose is at fault.
Should the drain hose be sealed into the standpipe?
No. The connection needs to allow air past the hose rather than being airtight, because a sealed connection can create the siphon this article describes and can also allow sewer gases to be drawn back toward the machine. The hose should sit a few inches inside the standpipe, secured so it cannot vibrate out, but not forced down or taped into a seal. Building codes in many jurisdictions also require an air gap or a properly vented standpipe to prevent waste water being drawn back into the appliance. If someone has sealed a hose into a pipe to stop a smell, the smell usually indicates a venting or trap problem that sealing will make worse rather than better.