What's on this page
- Why is my microwave not heating? Start by naming the symptom
- No heat at all versus weak or uneven heat
- Before you check anything: the safety rules for a microwave
- How a microwave actually makes heat
- The order to work the causes in, and why it saves money
- Cause one: the door interlock switches
- Cause two: the cup of water test
- Cause three: a blown fuse
- Cause four: the high-voltage diode
- Cause five: the high-voltage capacitor
- Cause six: the magnetron
- Cause seven: the control board
- Cause eight: a lost or weak power supply
- Where microwave heating faults actually come from
- What a multimeter settles and what it does not
- Which microwave repairs are genuinely DIY
- Repair or replace: the honest math
- What a dead microwave quietly costs you
- A worked example: one cold microwave, four suspects
- Prevention: the habits that keep a magnetron alive
- When to call a pro, and what to tell them
- The bottom line
Short answer: A microwave that runs, lights up, and turns the turntable but never heats almost always has a fault in the high-voltage heating circuit rather than the appliance as a whole. On an older or secondhand unit, start with the door switches, since a worn interlock is the most common free check. If those are fine, the blown fuse, the high-voltage diode, and the magnetron itself are the usual suspects in roughly that order, and all of them require unplugging the unit and leaving the cabinet closed, because the capacitor inside can hold a dangerous charge long after power is removed. Confirm the fault first with a simple cup-of-water test rather than guessing at parts.
A microwave that stops heating is a strange kind of broken, because almost nothing else about it looks wrong. The display counts down exactly as asked, the interior light comes on when the door opens, the turntable spins at its usual steady pace, the fan hums along in the background, and the control beeps right on schedule when the cycle ends. Open the door and the plate inside is exactly as cold as it went in. Nothing smells, nothing sparks, nothing trips a breaker. That contradiction, a machine behaving perfectly in every way you can see while failing at the one thing it exists to do, is what makes this fault so disorienting and also what makes it genuinely easy to work once you know where the heating circuit sits apart from everything else.
These notes work the fault the way a bench technician actually works it, as an ordered list of causes running from most likely and safest to check through to least likely and strictly professional territory. Our microwave cleaning walkthrough covers routine cavity upkeep rather than a dead heating circuit, our notes on an oven that will not heat work the same shape of fault on a different kitchen appliance, and our appliance lifespan reference sets the age context the repair-or-replace math below leans on.
Key takeaways
- A microwave that lights up, spins the turntable, and runs the fan can still have a completely dead heating circuit, because those parts run on separate low-voltage wiring from the magnetron.
- Worn or misaligned door interlock switches are a common, genuinely free-to-check cause, especially on an older or secondhand unit. The control will not energize the heating circuit if it believes the door is open.
- A one-cup water test on high for about a minute confirms the fault exists without touching a single internal part, and it is the right first move before anything else.
- The capacitor behind the cabinet can hold a dangerous charge even unplugged for hours. Everything past the door switches and the plug belongs to a qualified technician, not a home repair.
- Microwaves are inexpensive appliances relative to the parts that usually fail inside them, so the honest math often favors replacing rather than repairing once the fault is past the door and the fuse.
Why is my microwave not heating? Start by naming the symptom
Before anything else, spend two minutes deciding which of three complaints you actually have, because they point in different directions and only one of them is the subject of these notes.
The first is the one these notes cover: the unit powers on normally, the display works, the light comes on, the turntable turns, the fan runs, the timer counts down and beeps at the end, and food comes out exactly as cold as it went in. Nothing visibly fails. The heat simply never arrives.
The second is a unit that will not power on at all, no display, no light, nothing. That is a much simpler electrical fault, most often a tripped breaker, a dead outlet, or on a built-in or over-the-range model a blown line fuse at the panel feeding it, and it belongs with the power supply section below rather than with the magnetron and diode further down the list.
The third is heat that arrives but is weak, uneven, or much slower than it used to be. That is a partial fault rather than a dead one, commonly a magnetron that has aged and lost output, a door seal mesh that has degraded, or food habits that have changed, and it is a different conversation from the complete no-heat fault these notes are built around.
No heat at all versus weak or uneven heat
These two complaints share a start but diverge almost immediately, and sorting them first saves a lot of wasted effort.
Complete no heat is a circuit problem. Something in the chain that generates and delivers microwave energy has opened, failed closed in the wrong state, or is being deliberately blocked by a safety interlock that believes a condition is not met. The appliance is not trying weakly. It is not energizing that circuit at all.
Weak or uneven heat is usually a gradual problem rather than a binary one. A magnetron naturally loses some output as it ages over years of use, which shows up as food that used to be ready in ninety seconds now needing two minutes. A door seal mesh that has corroded, warped, or taken a dent can leak a little energy and reduce what reaches the food, though this is a safety concern as much as a performance one. Overloading the unit with a very large or dense item, or running it empty or with very little mass to absorb the energy, can also produce uneven or seemingly weak results that have nothing to do with a failing part.
The separator is the water test described below. A cup of water that stays stone cold after a full minute on high is complete no heat. A cup of water that gets noticeably warm but not as hot as it used to, or heats unevenly compared with a fresh cup tested the same way, is the weaker fault, and most of the specific causes in these notes do not apply to it.
Before you check anything: the safety rules for a microwave
Read this section even if you plan to stop at the water test. A microwave stores and switches dangerously high voltage to make microwave energy, and the part that does it holds a genuine hazard long after the appliance is unplugged.
Unplug it at the wall before anything else. Pull the cord from the outlet, not just the power button, since the control board and parts of the circuit stay connected to incoming power behind an off button.
Never open the outer cabinet. The high-voltage capacitor inside can retain a dangerous charge for hours or longer after power is removed, and discharging it safely requires a specific procedure and the right tool, not patience or a screwdriver. There is no visual inspection, resistance test, or home workaround that makes reaching inside the cabinet safe.
Stay outside the cabinet for every check in these notes. The door, the plug, the outlet, the breaker, and the water test are all genuinely safe to do yourself. Everything behind the outer case is not, regardless of how straightforward a part looks once you can see it in a diagram.
Stop using a unit that sparked, arced, or smelled of burning, and do not run another cycle to see if it happens again. Damage inside the cavity can worsen with each use and, on rare occasions, poses a fire risk.
If the unit is built in or mounted over a range, treat the installation itself with the same respect: do not attempt to pull it from its mounting or disconnect wiring behind it without confirming the circuit is dead at the breaker first.
How a microwave actually makes heat
Understanding the shape of the circuit makes the rest of this fault far easier to reason about, and it explains why so many of the likely causes sit in one tight cluster rather than spread evenly across the appliance.
A microwave oven generates heat with a magnetron, a sealed vacuum tube that converts electrical energy into microwave radiation at a fixed frequency. Food absorbs that energy, mostly through water molecules, which is why food heats and the plate underneath mostly does not. The magnetron needs a very high voltage to operate, far higher than household wiring supplies directly, so the appliance includes a high-voltage transformer to step the voltage up, a high-voltage diode to convert it to the right form, and a high-voltage capacitor to smooth and help build that voltage. Those three parts, plus the magnetron itself, make up the heating circuit, and none of them have anything to do with the turntable motor, the interior light, the cooling fan, the display, or the keypad, which all run on ordinary low voltage drawn separately from the same incoming power.
Sitting in front of that whole circuit is a safety gate: the door interlock switches. The control will not send power to the transformer and magnetron unless it reads a signal confirming the door is fully closed and latched, specifically to prevent microwave energy escaping through an open or improperly sealed door. That gate is electrically simple compared with the high-voltage parts behind it, which is exactly why it sits first in the list below rather than last.
The order to work the causes in, and why it saves money
The causes of this fault are unevenly likely and unevenly safe to check, and those two things mostly point the same direction, which keeps the order simple.
The order these notes use is: confirm the symptom with the water test, check the door switches and the door itself, check the fuse, then treat the diode, the capacitor, and the magnetron as a single cluster that needs a technician to separate safely, and finally check the control board and the power supply if the pattern does not fit the heating circuit at all. Everything through the fuse check is free and safe to do yourself. Everything past it is a professional diagnosis, not because the parts are complicated to understand, but because reaching them safely requires discharging the capacitor.
One shortcut applies whenever it fits. If anything changed just before the fault appeared, start there. A dropped or recently moved unit, a spill that got into the door area, a new or repaired door that does not latch quite the way the old one did, a recent cleaning session with liquid used near the vents, or a cycle that ended with a buzz, a crackle, or a smell are all stronger clues than any frequency table.
Cause one: the door interlock switches
On an older unit, a secondhand unit, or one with a door that has taken some wear, this is the most likely cause and also the only internal-feeling cause you can meaningfully inspect from outside the cabinet.
Most microwaves use two or three switches mounted around the door frame, often a primary switch, a secondary or monitor switch, and sometimes a third redundant switch, wired so the control only allows the heating circuit to energize when all of them report the door properly closed. This redundancy is intentional: it is a safety system, and manufacturers design it to fail toward not heating rather than toward heating with the door open.
The common ways it goes wrong are mechanical rather than electrical. A latch hook on the door can wear or bend slightly so the door looks and sounds closed but does not press the switch actuators fully. Grime, spilled food, or grease buildup around the switch pockets on the door frame can prevent full travel. A switch contact itself can simply wear out after years of thousands of open and close cycles. Any of these produces the identical picture: the display works, the light comes on, the fan and turntable run, and the heating circuit never gets the signal to turn on.
The check you can do safely. Close the door firmly and listen for a distinct click, and try opening and closing it a few times while listening carefully, since a switch that clicks inconsistently is a strong sign. Look at the latch hooks and the door edge for visible wear, a crack, or a part that no longer sits flush. Clean visible grime from the door frame and the cabinet face it presses against with a dry or barely damp cloth, with the unit unplugged. If the door looks and sounds right but the fault persists, the switches themselves may need replacement, which on many models is a reachable repair near the door frame rather than deep inside the cabinet, though it still means working with the unit unplugged and confirming which switch connector goes where.
Cause two: the cup of water test
This is the single most useful two minutes in the whole fault, and it belongs right after the door check because it tells you definitively whether the heating circuit is dead at all.
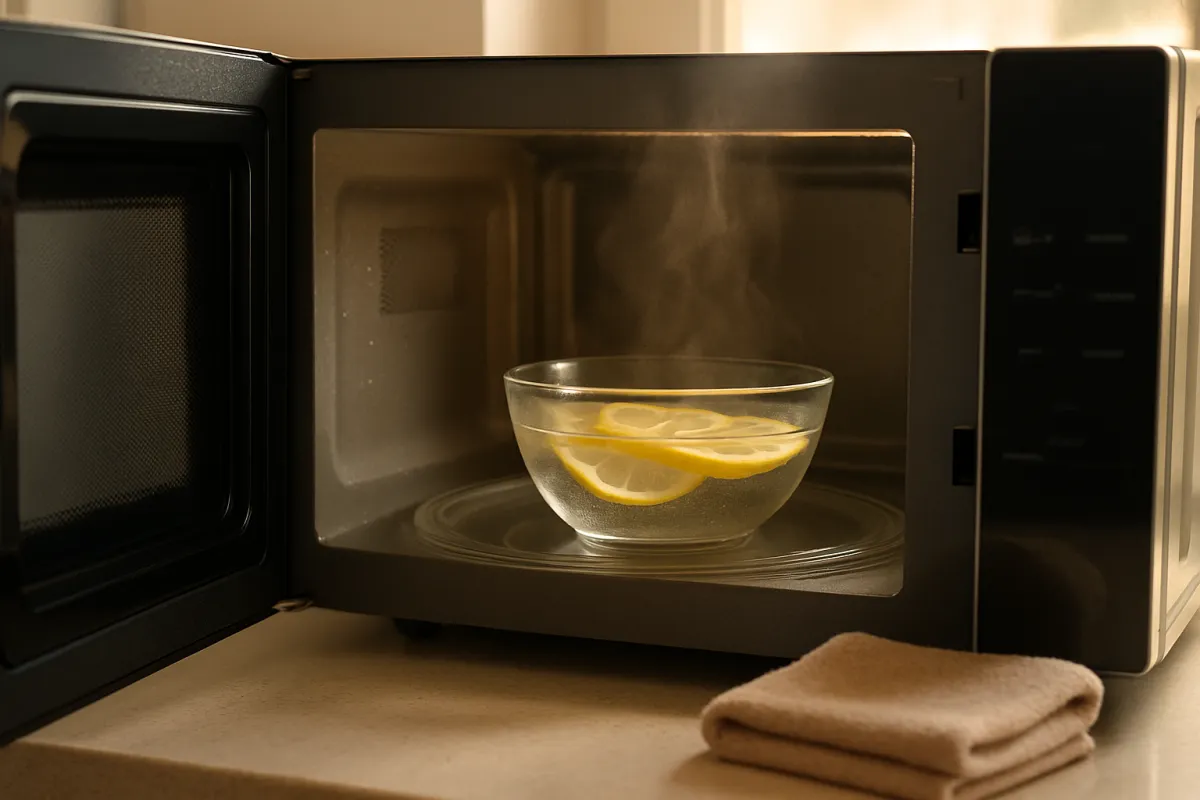
Before you start. Confirm the unit is plugged in, the display works normally, and the door closes and latches with no hesitation. Use a microwave-safe cup or mug, never metal, holding about one cup of room-temperature tap water, and place it in the center of the turntable.
Run the test. Close the door, set the microwave to high power, and run it for about one minute. Listen for the usual sounds: the fan, the turntable motor, and ideally a faint hum from the transformer that most working units produce.
Read the result. Carefully touch the outside of the cup, since the water itself may be hot even when the cup feels only mild. Water that is noticeably warm to hot confirms the heating circuit is working, and your original complaint may be about a specific food or container rather than the appliance itself. Water that is still at or near room temperature after a full minute on high confirms a genuine no-heat fault in the heating circuit.
What the result does not tell you. A cold cup confirms the fault exists. It does not single out the diode, the capacitor, or the magnetron specifically, since any of them failing open produces the identical cold result from outside the cabinet, and separating those three safely needs the capacitor discharged first, which is a technician’s step.
Cause three: a blown fuse
If the door checks out and the water test confirms no heat, the fuse is the next stop, and it is worth understanding before anything gets replaced.
Most microwaves carry a small ceramic line fuse, and many also carry a separate thermal cutoff fuse mounted near the magnetron that opens if that area runs hotter than it should. Both are one-shot protective devices rather than resettable breakers: once the element inside opens, it stays open permanently; there is no reset button and no safe way to bridge or bypass one.
A fuse that has simply aged out after years of service does happen, but a fuse that blows is more often a symptom of something else shorting downstream, commonly a failed diode or a failing magnetron drawing more current than the circuit is rated for. That is the trap in this step: replacing the fuse alone, without finding what made it open, frequently produces a unit that blows the new fuse within the first cycle or two, which wastes the part and the time.
A home multimeter can test a removed fuse for continuity safely, since the fuse itself sits in an accessible, low-risk location on many models, and an open reading confirms it is the blown part. What it cannot tell you is why it blew, and that question usually leads back behind the cabinet wall into diode and capacitor territory, which is the professional diagnosis described next.
Cause four: the high-voltage diode
Past the fuse, the next three causes, the diode, the capacitor, and the magnetron, form a cluster that is genuinely difficult to separate without professional equipment, and the diode is usually named first in that cluster because it fails relatively often and sits at a point in the circuit a technician checks early.
The high-voltage diode converts the stepped-up alternating current from the transformer into the roughly direct form the magnetron needs, effectively doubling the voltage in the process. It is a small, unassuming-looking part for how much voltage passes through it, and that stress is exactly why it is a recognized common failure point in this fault. A diode that fails open stops the heating circuit cold. A diode that fails shorted can draw excessive current, which is one of the common reasons the fuse blows alongside it.
There is no visual inspection that reliably identifies a bad diode, and testing one accurately requires working inside the cabinet with the capacitor safely discharged first, using test procedures and sometimes equipment a home multimeter was not designed for. This is squarely a technician’s diagnosis. What is useful for you to know going into a repair conversation is simply that a diode failure is common enough to mention by name, and that it is often replaced alongside the fuse in the same visit when it is found to be the cause.
Cause five: the high-voltage capacitor
The capacitor is the component behind the single hard safety rule in these notes, and it deserves to be understood even though it is never something you touch yourself.
Its job is to help the transformer and diode build and smooth the high voltage the magnetron needs, and to do that job it is built to store a genuinely dangerous electrical charge. That storage ability is precisely what makes it hazardous: unlike most components in the appliance, it can hold that charge for a long time after the microwave is unplugged, because nothing in the normal circuit forces it to release when power is removed. A trained technician discharges it with a specific tool and procedure before touching anything near it, every time, regardless of how long the unit has sat unplugged.
A failed capacitor can produce the same no-heat symptom as a dead magnetron or diode, and in some cases a visibly bulging, leaking, or physically damaged capacitor is apparent once a technician has it open and safely discharged. From your side, there is no safe check to run and no reason to try. If a technician diagnoses the capacitor as the cause, the honest question to ask is the same one that applies to the magnetron: what a comparable new microwave costs against the repair quote.
Cause six: the magnetron
The magnetron is the part people assume is at fault first, and while it is a real and common cause, it sits behind the door switches, the fuse, the diode, and the capacitor in likelihood because those are all checked or ruled out before a technician gets to it.
As a sealed vacuum tube, a magnetron has a finite service life and can simply wear out after years of regular use, producing a gradual decline in output before eventually failing to heat at all, or it can fail suddenly. It can also be damaged by running the unit empty or with very little in it repeatedly, since there is nothing to absorb the energy it produces, which is one of the preventable causes covered later in these notes. A magnetron failure produces the identical cold-water-test result as a diode or capacitor failure, and separating the three requires a technician’s test equipment.
The practical point for a household is less about diagnosing the magnetron specifically and more about the decision that follows a magnetron diagnosis. It is one of the pricier individual parts in a microwave, and on a unit already several years old, a magnetron replacement quote is one of the clearest cases in this whole fault where the repair-or-replace math below tips firmly toward a new appliance.
Cause seven: the control board
The control board runs the display, the keypad, the timer logic, and the relay or triac that switches power to the high-voltage transformer, and a fault here is less common than the causes above it but worth knowing the signature of.
Because the board handles both the low-voltage interface and the signal that triggers the heating circuit, a board fault can look like several different things depending on exactly what failed. A keypad that responds inconsistently, a display that behaves oddly, settings that do not hold, or a unit that accepts a cook time and counts it down but never sends the trigger signal to the heating circuit are all board-pattern symptoms. A board fault is distinguished from the diode, capacitor, and magnetron cluster mainly by these low-voltage quirks riding along with the no-heat symptom, since a clean, otherwise-normal-behaving unit points more toward the heating circuit itself.
Board replacement is a parts-and-labor repair that a technician prices against the appliance’s value the same way any other part is, and on an inexpensive microwave it crosses the replace-rather-than-repair line about as quickly as a magnetron does.
Cause eight: a lost or weak power supply
This is the cause that deserves a quick check even though it is the least likely one for a unit that otherwise behaves completely normally, because it is free, fast, and occasionally the actual answer.
A microwave on a standard household circuit needs a clean, adequate supply to run its transformer properly. A circuit shared with several other kitchen appliances, a worn outlet, a loose connection at the plug, or a long thin extension cord, which manufacturers generally advise against using at all for a microwave, can in rare cases starve the unit enough to affect heating performance, though this more often shows up as a unit that will not power on at all rather than one that powers on normally and simply does not heat. If the display, the light, the fan, and the turntable are all behaving normally, which they usually are in this specific fault, the supply is almost certainly fine and this is a quick box to check off rather than a direction to pursue hard.
The free check. Confirm the microwave is plugged directly into a wall outlet rather than an extension cord, confirm the breaker feeding that circuit has not partially tripped, and try a different, known-good outlet if one is nearby, mainly to rule the supply out before moving on to the parts above.
Where microwave heating faults actually come from
Pulling the causes together into one picture shows why the order in these notes starts at the door rather than at the magnetron, even though the magnetron is the part most people suspect first.
Where a microwave no-heat fault usually starts
Illustrative share of no-heat complaints by cause, across countertop and over-the-range units. Bars scale to the largest slice and sum to 100 percent.
Illustrative shares drawn from the shape of the complaint rather than from any survey, and they sum to 100 percent. The one slice a household can fully resolve alone sits at the top; everything from the diode down needs a technician for a confirmed diagnosis.
The practical reading is the order these notes already follow. Rule out the door and confirm the fault with water before spending anything, then treat the diode, the fuse, the capacitor, and the magnetron as a cluster a technician separates safely, and keep the control board and the power supply as quick checks rather than the first suspicion. Someone who works it top to bottom either resolves the fault for free at the door, or arrives at a service call already able to say exactly what they ruled out.
What a multimeter settles and what it does not
Several parts in this fault can, in principle, be tested with a basic meter, and it is worth being precise about where that instrument actually helps a household.
A multimeter on continuity confirms whether a removed fuse is open, which is a genuinely useful and safe test, since a fuse is a small, accessible, low-energy part once it is out of the appliance. That is close to the limit of what a home meter safely tells you in this fault. The diode, the capacitor, and the magnetron all sit behind the point where the capacitor must be discharged first, and even once that is done safely, testing a high-voltage diode or a magnetron correctly uses procedures and sometimes specialized equipment that go beyond a continuity check.
The rule that keeps this honest is simple: if a check requires opening the outer cabinet, it is not a homeowner multimeter task in this particular appliance, regardless of how capable the meter or the person holding it is. That is a different answer than the one for an oven or a dryer, where a cooled, unplugged appliance exposes parts you can safely test yourself, and the difference is entirely the stored charge behind a microwave’s cabinet.
Which microwave repairs are genuinely DIY
The line between a sensible home repair and a technician’s job is narrower here than on most kitchen appliances, and it is worth being direct about where it sits.
Genuinely do it yourself, no special tools. The water test. Inspecting and cleaning the door, the latch, and the switch pockets. Confirming the outlet, the breaker, and the plug. Testing a removed fuse for continuity with a multimeter. Wiping down the cavity and door seal as part of routine cleaning.
Do it yourself with patience and the right part. Replacing a worn door interlock switch on a design where it is reachable from the door frame without removing the outer cabinet, and replacing a confirmed-bad fuse once you understand it may not be the whole story. Both mean the unit unplugged, a photograph of the wiring before anything is disturbed, and the part ordered by the model number from the rating plate rather than by appearance.
Not a homeowner job, no exceptions. Anything behind the outer cabinet: the high-voltage capacitor, the diode, the transformer, the magnetron, and the control board. This is true even for a confident, experienced home repairer, because the hazard is a stored charge rather than a skill level, and it does not go away with more careful handling.
Repair or replace: the honest math
When a technician’s diagnosis lands on the diode, the capacitor, the magnetron, or the board, run the same fifty percent test used across these appliance notes, and expect it to tip toward replacement more often here than it does for larger appliances.
A comparable new countertop microwave commonly runs in the range of a hundred to two hundred dollars, which is inexpensive relative to most of the parts that fail in this fault once diagnostic labor is included. Our appliance lifespan reference puts a microwave’s typical planning window near nine years, so the same repair quote buys most of a decade of remaining service at year two and very little at year eight.
Run an illustrative case. A five-year-old countertop microwave stops heating, the door and fuse check out clean, and a technician diagnoses a failed diode with a quote near ninety dollars for the part and labor. A comparable new unit runs about one hundred fifty dollars. That quote is roughly sixty percent of replacement on an appliance with about four typical years left, which works out to around twenty two dollars a year of repair against about seventeen dollars a year for a new unit bought today. That case sits close to the line, and a household might reasonably go either way. Push the same quote onto a magnetron or a board at ninety dollars and a comparable new unit under one hundred twenty, and the math tips clearly toward buying new. Put your own quote, price, and age into our cost per use calculator rather than guessing.
Nine years of one countertop microwave, with one repair attempt before replacing
Illustrative split of total spend across a typical nine-year planning window: a $150 appliance, about $108 of electricity at roughly $12 a year, and one $90 repair attempt that still ended in replacement. Segments sum to 100 percent.
Unlike a dryer or a water heater, the purchase price and the running cost sit close together for a microwave, because the wattage is high but the minutes are short. A repair attempt that does not pay off is a larger slice of lifetime cost than it is for bigger appliances, which is the case for checking the free causes first. Illustrative planning figures, not measurements.

What a dead microwave quietly costs you
The chart above is a planning number rather than a prediction, but the habit shift a dead microwave forces is worth naming, because it shows up on the bill in a different appliance’s column.
A household without a working microwave does not stop reheating leftovers or warming a plate; it shifts that job to the stovetop or the oven, both of which run at far higher wattage for the same task and for longer. Our appliance wattage and running-cost reference notes that a microwave’s own running cost is small, commonly on the order of ten to fifteen dollars a year for a household reheating several times a day, precisely because the wattage is spent only in minutes at a time. Losing that efficient option and falling back on an oven for jobs a microwave used to handle in under two minutes can add up over the weeks it takes to get a repair quote and decide what to do.
That is not a reason to rush a repair-or-replace decision. It is a reason to treat a dead microwave as worth resolving within a reasonable window rather than letting it sit unused on the counter for months while the household quietly reaches for the stove every day instead.
A worked example: one cold microwave, four suspects
Run one illustrative scenario end to end, since this is the shape the fault actually arrives in.
A household notices on a weeknight that reheated leftovers are stone cold after the usual ninety seconds. The display worked, the light came on, the plate turned, and the timer counted down and beeped normally.
Suspect one, the door. The door is closed firmly a few times, listening for a click, and nothing seems obviously loose or worn. This unit is only three years old and gets ordinary daily use, so a worn interlock seems less likely than on an older unit, though it is not ruled out entirely.
Suspect two, the water test. A cup of tap water goes in, the door closes, and the unit runs on high for one minute. The cup comes out still essentially room temperature. The fault is confirmed as genuine, complete no-heat, not a food or container issue.
Suspect three, the fuse check. With the unit unplugged, the accessible line fuse is located per the owner’s manual, removed, and tested with a multimeter. It reads open, confirming a blown fuse.
Suspect four, the technician call. Rather than simply ordering a replacement fuse and hoping, the household books a technician, mentions the water test result and the blown fuse, and asks what commonly causes a fuse to blow on a unit this age. The technician finds a failed high-voltage diode once the capacitor is safely discharged, replaces both the diode and the fuse, and quotes about ninety five dollars all in.
The decision. A comparable new countertop unit runs about one hundred fifty five dollars locally. The quote is roughly sixty one percent of replacement on a unit with about six typical years left on the nine-year planning window, working out to around sixteen dollars a year of repair against about seventeen dollars a year for new. The household repairs it, reasoning that a sixty percent quote on a three-year-old appliance with most of its service life still ahead is a fair trade, even though the same diagnosis on an eight-year-old unit would have pointed the other way.
Prevention: the habits that keep a magnetron alive
Most of what fails in this fault is not preventable in the way a dirty filter is, but three habits genuinely extend a magnetron’s working life and cost nothing.
Never run the unit empty. A magnetron needs something in the cavity to absorb the energy it produces. Running it with nothing inside, even briefly to test it, directs that energy back at the magnetron itself and is a recognized way to shorten its life or damage it outright.
Keep metal and foil out of the cavity. Metal reflects microwave energy rather than absorbing it, which can cause arcing against the cavity walls or the door mesh, and repeated arcing damage is one of the causes of the mica waveguide cover failures mentioned earlier in these FAQs.
Clean spills and residue regularly rather than letting them bake on. Food residue on the mica cover or the cavity walls can scorch, carbonize, and eventually contribute to arcing in the same spot repeatedly. Our microwave cleaning walkthrough covers the steam-and-wipe method that keeps the cavity, the door seal, and the mica cover in good condition without scrubbing that could damage them.
Treat the door gently. Avoid slamming it shut or leaning on it, and address a door that feels looser or catches differently than it used to before it becomes the interlock fault covered in cause one.
When to call a pro, and what to tell them
Knowing when to stop checking and book a visit is most of what makes this fault manageable rather than stressful.
Call a technician once the door checks out, the water test confirms the fault, and either the fuse tests open or you are not confident testing it yourself. Call one immediately for any sign of arcing, sparking, smoke, or a burning smell, and do not run the unit again in the meantime. Call one for any built-in or over-the-range unit where even reaching the accessible parts safely means working near or inside cabinetry. And treat a magnetron, capacitor, diode, transformer, or board diagnosis as the point where the conversation shifts from repair instructions to the repair-or-replace math above.
What you tell them changes what the visit costs and how fast it goes. Report the water test result plainly: the unit ran, the light and turntable worked, and the water stayed cold after about a minute on high. Mention whether you heard a buzz, a crackle, or any unusual sound right before or during the fault. Say whether you already checked and cleaned the door and listened for the interlock clicks. If you tested the fuse yourself and it read open, say so and ask what they suspect caused it to blow rather than assuming the fuse alone is the fix. Have the model number from the rating plate, usually inside the door frame or on the back panel, ready before you call.
The bottom line
Why is my microwave not heating usually comes down to one tight cluster of parts rather than a mystery, and the fastest way through it is two free, safe checks before any part gets named. Close the door firmly and listen for the interlock switches to click, since a worn or misaligned switch is a common, genuinely fixable cause on an older unit. Then run the one-cup water test: a cup that stays cold after a minute on high confirms a true heating-circuit fault rather than a problem with a specific food or container. From there, a blown fuse is often the visible symptom of a diode, a capacitor, or a magnetron failing behind it, and separating those three safely needs a technician, because the capacitor can hold a dangerous charge long after the unit is unplugged.
Respect the one hard safety line in these notes: everything outside the cabinet, the door, the plug, the outlet, and a removed fuse, is yours to check. Everything behind the cabinet wall belongs to a qualified technician, every time, regardless of experience or confidence. Then let the arithmetic close out the decision. Microwaves are inexpensive relative to the parts that most often fail inside them, so once the diagnosis moves past the door and the fuse, run the fifty percent test against a comparable new unit’s price before committing to a repair, and expect that math to favor replacement more often on this appliance than it does on almost anything else in the kitchen.
A note on scope: these notes describe how household countertop and over-the-range microwaves commonly fail to heat and how to work the fault in a sensible, safety-first order. They are general information rather than professional appliance repair advice, and every dollar figure, share, and interval in them is an illustrative planning number rather than a quote, a measurement, or a claim about any brand or model. Unplug the appliance at the wall before any check, and never open the outer cabinet or reach near the area behind it: the high-voltage capacitor inside can hold a dangerous charge long after the unit is unplugged, and discharging it safely requires a specific technician procedure. The high-voltage diode, capacitor, transformer, magnetron, and control board are not homeowner repairs under any circumstances. Stop using any unit that has sparked, arced, or produced a burning smell, and where a manufacturer’s documentation contradicts a general principle written above, the documentation is the authority and these notes are not.
Frequently asked questions
Why does my microwave hum but not heat?
A hum with no heat usually means the fan and turntable motor are getting power while the high-voltage heating circuit is not, which narrows the fault to the door switches, the fuse, the high-voltage diode, the capacitor, or the magnetron itself rather than to the whole appliance. The control board and the low-voltage side are clearly alive if the display works and the light comes on, so the fault sits downstream in the part of the circuit that only exists to make microwave energy. A louder than normal hum or a buzzing that changes pitch during a cook cycle is also worth noting, since it sometimes points at a failing capacitor or transformer rather than a cleanly open part. Either way this is not a part to keep testing by running more cook cycles, because a shorted high-voltage component can fail further each time it is powered.
Is it safe to open my microwave to look inside?
Looking is fine. Opening the outer case and reaching inside is not, and this is the one hard line in these notes. The high-voltage capacitor behind the cabinet can hold a dangerous electrical charge even with the unit unplugged and the cord removed for hours, because it is built to store energy rather than release it the moment power stops. There is no visual check, no multimeter reading, and no amount of caution that makes touching that area safe without the specific discharge procedure a trained technician uses. Everything in these notes that can be checked safely, the door, the plug, the breaker, and the water test, stays outside the cabinet. Everything behind the cabinet goes to a qualified appliance technician.
Can a microwave door switch stop it from heating?
Yes, and on a secondhand or several-year-old unit it is one of the more likely causes. Most microwaves use two or three interlock switches on the door frame that the control reads before it will allow the high-voltage circuit to energize, as a safety measure against microwave energy leaking out an open or improperly latched door. A switch that has worn, a door that no longer seats squarely, a latch hook that has drifted out of alignment, or a buildup of grime in the switch pocket can all make the control decide the door is not properly closed even when it looks closed to you. The result is a unit that runs the fan and the turntable, because those do not depend on the interlocks, while the heating circuit never engages. Pushing the door firmly shut and listening for a distinct click from each switch position is the free first check.
How do I test if my microwave magnetron is dead?
You do not test a magnetron directly without training, because doing so safely requires working around the same high-voltage capacitor covered above. What you can do safely is the water test described in these notes: place a microwave-safe cup holding about one cup of room-temperature water on the turntable, close the door, and run the unit on high for roughly a minute. Water that is still cool or only slightly warm after that time, with the turntable turning and the light on, is a strong sign the unit genuinely is not heating rather than you imagining it. That result does not single out the magnetron specifically, since a dead diode, a blown fuse, or a failed door switch produces the identical outcome from the outside. It tells you the appliance has the fault, not which part has it.
Why did my microwave stop heating after a buzzing or arcing noise?
A buzzing, crackling, or visible arcing noise right before the heating stopped is a meaningfully different clue than a quiet failure, and it points toward damage inside the cavity rather than a simple open circuit. The most common producer is a worn or punctured mica waveguide cover, the small panel that protects the waveguide opening from food spatter, which lets energy arc against metal or a food residue buildup instead of reaching the food properly. A scorched or pitted metal mesh on the door, or a piece of metal or foil that was run in the unit, can cause the same arcing. If you saw sparks or smelled burning, stop using the unit entirely rather than running it again to see if the noise repeats, and do not assume this is a DIY part swap even when the mica cover itself is an inexpensive and visible piece.
Is it worth repairing a microwave that will not heat?
Often no, and this is where microwaves diverge sharply from an oven or a refrigerator. A countertop microwave is one of the cheaper major appliances in the kitchen, commonly in the range of a hundred to two hundred dollars for a comparable new unit, while the parts most likely to be at fault here, the magnetron, the high-voltage transformer, or the control board, are not cheap, and the diagnostic time to find a high-voltage fault safely adds real labor on top of the part. Apply the same fifty percent test used across these appliance notes: if a repair quote runs past roughly half the price of a comparable new microwave, replacement usually wins, and on this particular appliance that line gets crossed quickly. A simple door switch or the mica cover are the exceptions where repair genuinely makes sense, because both are inexpensive and do not involve the high-voltage side at all.
Can a microwave fuse be reset, or does it need replacing?
It needs replacing. The fuses used in a microwave, typically a ceramic line fuse and sometimes a separate thermal cutoff near the magnetron, are one-shot safety parts, not breakers, and once the internal element inside them opens they stay open permanently. There is no reset button, no bridging wire, and no safe workaround, because the fuse opened to protect the appliance or the person using it from a fault that is very likely still present elsewhere in the circuit. Replacing a fuse without finding why it blew is also a common mistake, since a fuse that opened because of a shorted diode or capacitor will simply blow again, sometimes immediately. Fuse replacement belongs with the diagnostic step that explains the failure, not as a standalone fix.
Why does my microwave turntable turn but nothing gets hot?
This is the single most common way the fault is described, and it is genuinely useful information rather than a confusing detail. The turntable motor, the interior light, the display, and the cooling fan all run on ordinary low voltage and are wired largely independently of the high-voltage heating circuit, so a microwave can run every visible, audible sign of normal operation while the part that actually heats stays completely dead. That split is exactly why the water test matters more than watching the turntable spin: a spinning plate confirms the low-voltage side is healthy and tells you nothing at all about the magnetron, the diode, the capacitor, or the door switches that gate the high-voltage side. Treat a turning turntable as a clue about where the fault is not, rather than reassurance that the appliance is fine.