What's on this page
- Why cleaning your coffee maker matters
- Signs your coffee maker needs cleaning
- Before you start: what you need
- Step 1: Empty the maker and rinse the removable parts
- Step 2: Wash the carafe, basket, and filter holder
- Step 3: Mix your descaling solution
- Step 4: Run the descaling cycle
- Step 5: Let it soak, then finish the cycle
- Step 6: Rinse with several fresh water cycles
- Step 7: Clean the reservoir, exterior, and warming plate
- Step 8: Dry the parts and set a cleaning schedule
- How to clean a single-serve pod coffee maker
- A worked example: a full coffee maker descale
- How often to clean and descale a coffee maker
- How to prevent mineral buildup
- Common mistakes when cleaning a coffee maker
- Troubleshooting: harder coffee maker problems
- Your coffee maker cleaning checklist
- The bottom line
Short answer: How to clean a coffee maker comes down to two parts. Wash the carafe, filter basket, and lid in warm soapy water after each use to remove coffee oils, then descale the machine by running equal parts white vinegar and water, or a commercial descaler, through a brew cycle with no coffee, pausing partway to let it soak. Finish with at least two, ideally three, cycles of plain water. Descale about monthly, sooner with hard water or heavy use.
Learning how to clean a coffee maker is the fix for bitter coffee, slow sputtering brews, and the faint musty smell that no amount of fresh beans can cover, and it is a simple job you can do in about an hour with white vinegar or a descaler and a few cycles of plain water. A coffee maker is one of the appliances people assume stays clean because hot water runs through it every morning, but hot water is exactly the problem: it leaves mineral scale behind as it heats, and the coffee it brews leaves an oily film on every surface it touches. Left alone, that scale narrows the tubing and drops the brewing temperature while the oils turn rancid, and a damp reservoir grows mold, so the machine slowly makes worse coffee and starts to smell.
These notes give you a clear, step-by-step method for cleaning a coffee maker, from washing the carafe and basket that hold the coffee oils to descaling the internal tubing with a vinegar and water solution and, most importantly, rinsing it clean afterward. We also cover single-serve pod machines, which need their needles and tank cleaned differently, how often to descale based on your water and habits, the signs your machine is overdue, and how to prevent buildup in the first place. For a neighboring kitchen appliance on the same acid-and-rinse logic, see our companion walkthrough on how to clean a dishwasher, and for how this fits a whole-home routine, our eight-point appliance maintenance plan. Feed how much you brew and how hard your water is into the cleaning-schedule planner as you read, and it will tell you how often to run each step.
Key takeaways
- Two different messes build up: coffee oils and residue on the carafe, basket, and brew head, and mineral scale inside the tubing and heating element from your water.
- Wash the removable parts (carafe, filter basket, lid) in warm soapy water after each use to stop the oils that make coffee taste bitter and sour.
- Descale the machine itself by running equal parts white vinegar and water, or a commercial descaler, through a brew cycle with no coffee, letting it soak partway through.
- The rinse is not optional: run at least two, ideally three, cycles of fresh plain water afterward, because leftover vinegar taste is the most common cleaning complaint.
- Descale about monthly as a starting point, sooner in a hard-water home or with heavy use, and let filtered water and dry parts stretch the interval.
Why cleaning your coffee maker matters
How to clean a coffee maker comes down to two separate jobs, because the machine collects two very different kinds of grime and each needs its own fix, so it helps to know what you are removing before you start. The first is coffee itself: coffee is oily, and every brew leaves a thin film of oil and fine residue on the carafe, the filter basket, the brew head, and anywhere the coffee flows. Those oils turn rancid within days, which is why a machine that is never washed brews a harsh, bitter, sour cup even from fresh beans. The second is mineral scale, the chalky limescale that your water leaves behind as it heats, which coats the inside of the tubing and the heating element where you never see it. The stacked bar below shows an illustrative breakdown of what builds up inside a neglected coffee maker, so you can see why washing the visible parts alone never fully fixes the problem.
What builds up inside a coffee maker
An illustrative split of the residue that collects in a neglected home coffee maker. Segments sum to 100 percent. Your mix varies by water hardness and habits.
Mineral scale is the largest slice, which is why descaling matters most, and it grows faster in hard-water homes. Coffee oils are next, which is why the carafe and basket need washing. The split is illustrative and shifts by home.
The shape of that split is the whole strategy in one picture. The biggest slice, mineral scale, lives inside the machine where a sponge cannot reach, so it needs a chemical descale rather than scrubbing, and it grows faster the harder your water is. Coffee oils and residue are the second slice, and they sit on the surfaces you can reach, which is why washing the carafe, basket, and brew head after use does most of the taste work. Mold and yeast grow in the damp reservoir and drip tray, which is why drying those parts matters as much as cleaning them. The biofilm is the bacteria layer that a warm, wet machine breeds, and it lives on all of those surfaces. Keep that ranking in mind as you work, because it tells you that descaling and washing are two separate jobs that both have to happen.
Signs your coffee maker needs cleaning
Whether you call it a coffee maker or a coffee brewer, the machine usually tells you it is due long before you would think to check a calendar, and learning to read the signs means you clean on need rather than guesswork. The most common signal is the taste: coffee that has turned bitter, sour, or flat despite fresh, good beans is almost always a dirty machine rather than bad coffee, because every pot passes over rancid oils and under-extracts through scaled, cooler tubing. A weak or lukewarm brew is the classic scale symptom, since mineral buildup insulates the heating element and drops the water temperature below the range that extracts coffee properly.
Listen and watch, too. A machine that has started to sputter, gurgle loudly, or take noticeably longer to finish a pot than it used to is telling you scale has narrowed its water path. A visible chalky, white or greenish crust around the water outlet or in the reservoir is scale you can actually see, which means far more has built up inside. A musty or moldy smell, or dark spots in the reservoir and around the lid, points to mold and yeast in the damp areas. And oily brown streaks or a slick film in the carafe and basket are the coffee residue that needs washing. If your machine has a descale indicator light, treat it as a prompt, but do not wait for it, because these sensory signs often appear first. Any one of them means it is time to run the routine below.
Before you start: what you need
This is a genuinely low-skill task with no tools required, and the difficulty is beginner as long as you respect the one rule that matters: rinse thoroughly at the end. Nothing in the steps needs anything you cannot find in a kitchen. Plan on about an hour for a full clean, though most of that is hands-off time while the descaling solution soaks and the rinse cycles run, so your actual effort is more like fifteen minutes. Work with the machine unplugged whenever you are handling removable parts or reaching near the needles on a pod machine.
Gather a small, ordinary kit before you begin so you are not stopping mid-job.
- White distilled vinegar or a commercial descaler, the workhorse for dissolving mineral scale. Citric acid powder is a low-odor alternative.
- Dish soap and a soft sponge or brush, for washing the carafe, basket, lid, and brew head.
- A supply of fresh, clean water, ideally filtered, for mixing the solution and for the all-important rinse cycles.
- A soft cloth, for wiping the exterior, warming plate, and reservoir.
- A paperclip or the needle-cleaning tool, if you have a single-serve pod machine with entrance and exit needles.
- Your machine’s manual or model number, to confirm whether vinegar is approved and whether any parts are dishwasher safe.
One thing to check before you reach for the vinegar: a small number of machines, including some pod models and any with certain internal metals, advise against vinegar and specify their own descaler. If your manual says so, follow it. With the kit ready, start by clearing the machine out.
Step 1: Empty the maker and rinse the removable parts
The first step is the quick setup that makes everything after it work, and it is worth doing properly rather than rushing. Unplug the machine or switch it off, then empty out any old water sitting in the reservoir and toss any used grounds and the paper filter from the basket. Pour out and discard whatever is in the carafe. You are starting from an empty, cold machine so that the descaling solution you add later is not diluted by leftover water and so that no old grounds foul the cycle. This takes under a minute and is easy to skip, but starting clean is what lets the descale actually reach the scale.
With the machine empty, remove every part that comes out: the carafe, the filter basket or brew basket, the permanent mesh filter if your machine has one, and the lid or brew-head cover if it detaches. Give each a quick rinse under warm running water to knock off the loose grounds and the worst of the oily film before the proper wash in the next step. Take a look at the brew head, the underside of the lid where the water sprays down, and you will usually see a crust of old coffee and scale around the spray holes. Watch out for the temptation to treat this as the whole job: a rinse removes the loose debris, but the oils and scale need the wash and descale that follow.
Step 2: Wash the carafe, basket, and filter holder
With the loose grounds gone, wash the removable parts properly, because these are the surfaces that hold the coffee oils responsible for bitter, sour cups. Fill the sink or the carafe with warm water and a squirt of dish soap, and wash the carafe, the filter basket, the permanent filter, and the lid with a soft sponge or brush. Pay attention to the inside of the carafe, especially the bottom and the pour spout where oils pool, and to the mesh of a permanent filter, whose fine screen traps oil and fine grounds that a quick rinse never clears. Scrub until the surfaces feel clean rather than slick, since that slick feel is the rancid oil film you are removing.
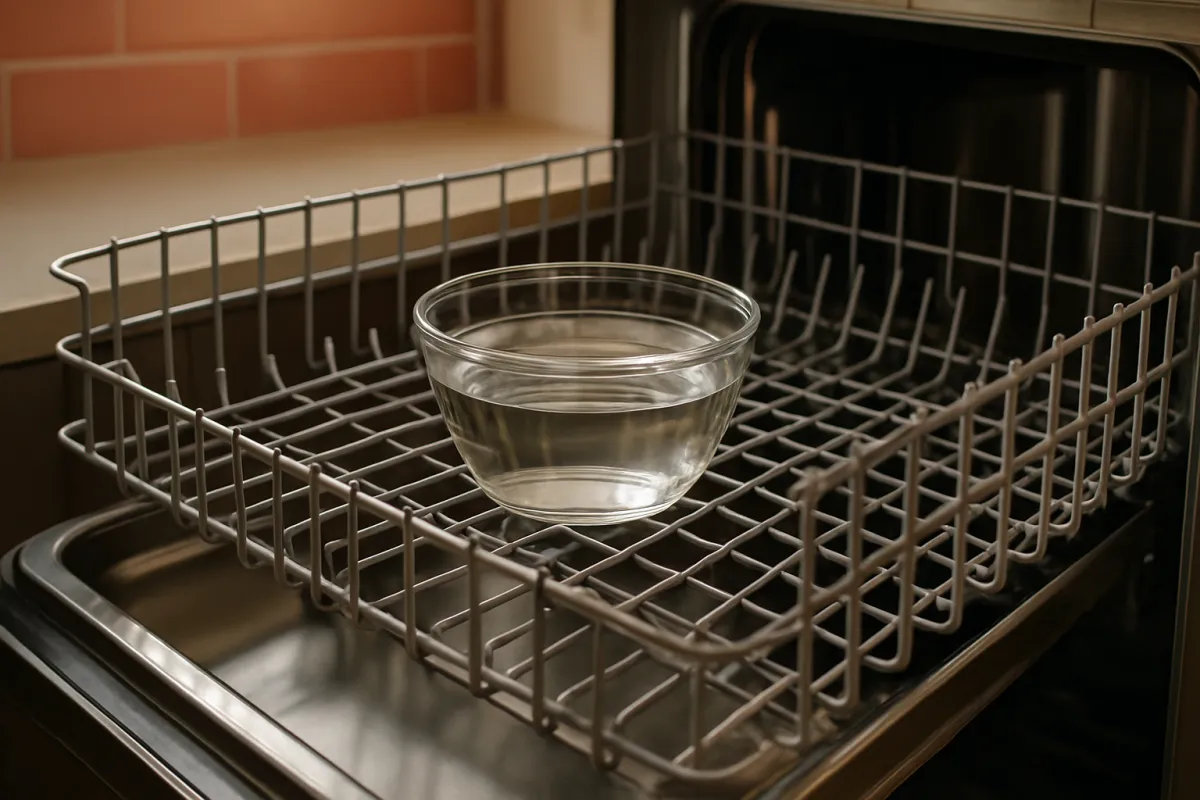
For a permanent mesh filter that has gone brown and will not come clean with soap alone, let it soak in a bowl of equal parts vinegar and warm water for thirty minutes to break down the baked-on oils, then scrub and rinse. Check whether your carafe, basket, and lid are marked dishwasher safe, which many are for the top rack only, and if so the dishwasher is a fine alternative for these parts, though hand washing is always safe. Watch out for putting a thermal stainless carafe or any printed or electronic part in the dishwasher, since the high heat can warp or damage them. Wash these parts after every use as your default habit, because same-day oils rinse off easily while week-old oils need soaking. For the same acid-soak logic on a bigger machine, see our note on how to clean a washing machine.
Step 3: Mix your descaling solution
The parts are clean, so now turn to the scale inside the machine, and it starts with mixing the right solution. The standard home descaler is white distilled vinegar cut with water at roughly a one-to-one ratio: for a typical twelve-cup machine, that is about six cups of vinegar and six cups of water, or simply fill the reservoir half with vinegar and half with water up to its normal full line. The vinegar is a mild acid that dissolves the mineral scale, and diluting it with water makes enough volume to run a full cycle through every part of the water path while keeping the smell manageable. For a lightly scaled machine you can use a little less vinegar, and for a badly scaled one a stronger mix, but one-to-one is the reliable default.
If you prefer to avoid the vinegar smell, mix a commercial descaler per its label directions, or dissolve about two tablespoons of food-grade citric acid powder into a full reservoir of warm water, which cleans on the same acid principle with almost no lingering odor. Whatever you choose, make enough to fill the reservoir to its normal brewing level, because a partial fill will not push solution through the whole system. Watch out for using undiluted vinegar in a machine the manual does not clear for it, and never mix vinegar with bleach or any other cleaner, since combining acids and bleach releases a harmful gas. Pour your finished solution into the empty reservoir, and leave the carafe empty on the warming plate to catch it, with no coffee and no paper filter in the basket.
Step 4: Run the descaling cycle
With the reservoir full of solution and the basket empty, start a normal brew cycle to pull the descaler through the entire water path. Turn the machine on and let it begin brewing exactly as if it were making coffee, so the solution heats and flows up through the tubing, over the heating element, out through the brew head, and down into the carafe. This is the step that actually attacks the scale, because the hot acid moving through the same route the water normally takes is what dissolves the buildup coating those internal surfaces. You will often notice the solution running slower than clean water would at first, which is the scale it is working on.
The key move that separates a good descale from a token one comes partway through: once about half the solution has brewed through, switch the machine off and let the solution that is sitting in the reservoir and tubing soak for thirty to sixty minutes. That soak is what lets the acid work on the heavier scale that a single fast pass would not touch, and it is the difference between a machine that brews properly again and one that is still sluggish. For a heavily scaled machine, a full hour of soaking is worth it. Watch out for skipping the soak to save time, since the contact time is doing most of the descaling, not the flow. After the soak, move to finishing the cycle.
Step 5: Let it soak, then finish the cycle
After the solution has soaked, turn the machine back on and let it finish brewing the rest of the descaling solution all the way through into the carafe. This clears the loosened scale out of the system and confirms the water path is flowing freely again. As it runs, notice whether the flow sounds stronger and faster than it did at the start of Step 4, which is the sign the scale has dissolved and the tubing has opened back up. When the cycle finishes, pour the used solution out of the carafe and down the drain, where it does no harm, and have a look at what came through: on a badly scaled machine you may see gritty flecks of dislodged scale in the carafe.
If your machine was very heavily scaled and the brew still sounds labored or the flow is still weak after this first full cycle, it is fine to run a second descaling cycle with a fresh batch of solution before you move on to rinsing. One thorough descale handles most machines, but a neglected one that has never been cleaned can need two passes to fully clear. Empty the reservoir and the carafe completely once the descaling is done. Watch out for stopping here and brewing coffee next, which is the mistake that ruins the effort, because the machine is now full of vinegar or descaler that will taint every pot until you rinse it out. The rinse is the next and most important step.
Step 6: Rinse with several fresh water cycles
The descaling is done, and now comes the step people shortcut and regret: flushing every trace of the cleaning solution out with fresh water. Fill the reservoir to its full line with plain, clean water, put the empty carafe back, and run a complete brew cycle with no coffee and no filter, exactly like the descaling cycle but with water only. When it finishes, pour that water out, refill with fresh water, and run it again. Run at least two full water cycles, and a third if you used vinegar, because vinegar smell and taste cling to the tubing and are the number one reason a freshly cleaned machine brews an unpleasant first pot.
The test for when you are done is simple: run cycles until the water coming out has no vinegar smell and the carafe rinses clean with no sour odor. Sniff the outflow and the carafe after each cycle, and only stop when they smell like plain water. Commercial descalers usually rinse out in one or two cycles, but still follow the label and do not assume, and citric acid rinses cleaner than vinegar but still deserves a full cycle or two. Watch out for the false economy of a single quick rinse, which leaves enough vinegar behind to taint your coffee and send you back to buying beans you blame for the taste. When the rinse water is clean, your machine is ready to brew again, and it is worth setting your usage in the cleaning-schedule planner to see how often to repeat this.
Step 7: Clean the reservoir, exterior, and warming plate
With the inside descaled and rinsed, finish the job by cleaning the parts your hands touch and the spots mold likes, because a clean water path does not help if the reservoir is growing mold or the warming plate is crusted with burnt coffee. Wipe out the water reservoir with a soft damp cloth, paying attention to the corners and any lid or valve where a slick, sometimes pinkish or dark film of mold and yeast collects in the constant damp. If the reservoir is removable and dishwasher safe or washable, give it a proper wash. A reservoir that has grown visible mold can be wiped with a little vinegar solution and then rinsed well.
Turn to the outside. Wipe the exterior and the control panel with a damp cloth to remove splashes and dust, giving a stainless housing its wipe along the grain and a dry buff as our notes on cleaning stainless steel appliances lay out, and clean the warming plate on a drip machine, where spilled coffee bakes onto the hot metal into a brown crust: a damp cloth handles fresh spills, and a paste of baking soda and a little water lifts stubborn burnt-on marks once the plate is cool and unplugged. Clear the spray holes in the brew head if any are blocked with scale or grounds, since a partly blocked head brews unevenly. Watch out for wiping a reservoir dry with a linty towel, which sheds fibers into your water: let it air dry instead. These finishing touches are what make the machine both work well and look and smell clean.
Step 8: Dry the parts and set a cleaning schedule
The machine is clean, so the last step locks it in by drying everything properly and turning the routine into a rhythm you will actually keep. Let all the washed removable parts, the carafe, basket, filter, and lid, air dry completely before you put them back or store them, because a coffee maker put away damp is exactly how mold and that musty smell get started. Leaving the reservoir lid open between uses so the inside can dry is one of the simplest habits that prevents buildup. Once everything is dry, reassemble the machine and it is ready for its next pot.
From here, the value is not in doing this once but in matching each task to how fast its mess builds up. The chart below groups the routine by interval so you can see that most of the work is quick and frequent while the full deep clean comes around far less often.
Coffee maker cleaning tasks by frequency
An illustrative count of coffee maker cleaning jobs that fall into each interval. Bars scale with the number of tasks. Your list varies by machine and water.
The every-use jobs are emptying the grounds, washing the carafe, and washing the basket. Weekly covers the reservoir, the warming plate and exterior, and the mesh filter. Monthly covers the descale, the brew head, and pod needles. The quarterly job is one deep clean. Counts match the checklist below and shift by water hardness.
Turn that grouping into a calendar you can keep. Make washing the carafe and basket and emptying the grounds an automatic part of every brew. Slot wiping the reservoir and exterior into a weekly chore, run the descaling cycle about monthly (sooner in a hard-water home), and reserve a full deep clean of every part for the change of season. Watch out for the classic failure, which is not the doing but the remembering, so lean on a recurring reminder or your machine’s descale light. Set how much you brew and how hard your water is in the cleaning-schedule planner to get a starting read on how often your machine needs each step.
How to clean a single-serve pod coffee maker
A single-serve pod machine cleans on the same principles but has three parts a drip machine does not, so it deserves its own walkthrough. The descaling is identical in spirit: fill the water tank with a one-to-one vinegar and water solution or the brand’s descaler, run repeated brew cycles with no pod, emptying the mug each time, until the tank is nearly empty, let it sit for thirty minutes, then run several full tanks of fresh water to rinse until there is no vinegar smell. That handles the internal scale, and pod machines scale just as readily as drip ones. Where they differ is the removable parts and the needles.
Start with the parts you can take out. Remove the drip tray and the pod holder assembly and wash them in warm soapy water, since the drip tray catches overflow and the pod holder collects grounds and old coffee. Wash the water tank as well, and let it air dry rather than wiping it, because the tank is a prime spot for mold in the damp. The critical extra job is the needles: a pod machine has an entrance needle above the pod and an exit needle below, and both clog with dried coffee grounds, which is the usual cause of a weak, partial, or sputtering brew. With the machine unplugged, use the needle-cleaning tool many machines include, or straighten a paperclip and gently work it into each needle hole to clear the grounds, being careful since the needles are sharp. Clean the needles about monthly along with the descale, and the pod holder and tray weekly, and the machine keeps brewing a full, hot cup.
A worked example: a full coffee maker descale
Put the steps together on one illustrative afternoon so you can see how the routine flows. Picture a twelve-cup drip machine in a hard-water home that brews two pots most days and has never been descaled in the year the household has owned it. The coffee has turned noticeably bitter over the past month, the brew takes longer and ends with a loud sputter, and there is a chalky white ring around the water outlet. Those are the classic signs of both heavy scale and built-up oils, so the machine needs the full routine, not just a wipe.
The clean starts empty. The old water is poured out, the used grounds and paper filter go in the trash, and the carafe, basket, and permanent filter come out for a warm soapy wash, with the brown, oil-clogged mesh filter given a thirty-minute vinegar soak because soap alone will not clear it. For the descale, the reservoir is filled to its twelve-cup line with six cups of white vinegar and six cups of water, the empty carafe goes back, and a normal brew cycle starts. Halfway through, the machine is switched off and the solution soaks for a full hour given how scaled it is. Then the cycle finishes, and gritty flecks of dislodged scale wash into the carafe, a good sign. Because the machine was so neglected, a second vinegar cycle runs to finish the job.
Now the rinse, which matters most. The reservoir is filled with plain filtered water and run through, emptied, refilled, and run again, and after the second cycle there is still a faint vinegar smell, so a third water cycle runs until the outflow smells like plain water. The reservoir is wiped out, the warming plate’s burnt ring is lifted with a baking soda paste, and every part is left to air dry with the lid open. The next morning’s pot is hotter, faster, and tastes clean again. None of these numbers are measured on one specific machine; they are an illustrative walkthrough, and your own water, usage, and machine will differ. The value is the sequence: wash the parts, descale with a soak, and rinse until it is truly clean.
How often to clean and descale a coffee maker
The right frequency ties each task to how fast its particular mess builds up, and the honest answer for descaling is that it depends almost entirely on your water hardness and how often you brew. A hard-water home brewing daily can need to descale every two to three weeks, while a soft-water home brewing occasionally might stretch to every couple of months, so the common once-a-month guidance is a starting point rather than a rule. The washing tasks, by contrast, tie to every use regardless of water. The table pairs each part with how to clean it and how often, so you can build a schedule around the jobs that matter rather than a vague sense that you should clean it sometime.
| Part | How to clean | How often |
|---|---|---|
| Carafe (glass or thermal) | Wash with warm soapy water; top-rack dishwasher only if marked safe | After each use |
| Filter basket or brew basket | Empty grounds, wash with soap and a soft brush | After each use |
| Permanent mesh filter | Scrub under water; soak in vinegar and water for baked-on oils | Weekly |
| Water reservoir | Wipe with a damp cloth and air dry; wash if removable | Weekly |
| Full machine (descale) | Run vinegar and water or descaler, soak, then rinse cycles | Monthly, or every 2 to 3 weeks in hard water |
| Warming plate and exterior | Wipe with a damp cloth; baking soda paste for burnt marks | Weekly |
| Brew head and spray holes | Wipe and clear any scale or grounds from the holes | Monthly |
| Pod machine needles | Clear with the cleaning tool or a paperclip, unplugged | Monthly |
| Every removable part (deep clean) | Take everything out, wash, soak the filter, and air dry | Quarterly |
The pattern in that table is the same one the frequency chart showed: the washing habits happen constantly and the descaling comes around far less often. If you only take two things from it, make them washing the carafe and basket after every brew, which prevents the bitter-oil taste, and descaling on a schedule matched to your water, which keeps the temperature and flow right. Everything in between is maintenance that keeps a deep clean from ever becoming a big job. Set your own brewing and water hardness in the cleaning-schedule planner for a starting read tuned to your kitchen.
How to prevent mineral buildup
The best clean is the one you do not have to do as often, and a few simple habits slow both the scale and the oils so your descaling interval stretches. The single biggest lever is your water: because scale is minerals left behind by hard water, brewing with filtered or bottled water instead of straight hard tap water dramatically slows how fast scale forms inside the machine. A simple carbon filter pitcher is enough to cut the mineral load, and some machines take a charcoal water filter in the reservoir that does the same job. If your water is genuinely hard, filtered water is the highest-value change you can make, and the same prevention logic runs through our companion walkthrough on how to descale a kettle, which fights this machine’s mineral problem in its simplest form.
The second lever is drying. Mold and that musty smell start in standing water, so empty the reservoir and carafe when you are done for the day rather than leaving water to sit, and leave the reservoir lid open between uses so the inside can dry out. Wash and dry the carafe and basket after each use so oils never get the chance to bake on and turn rancid. Do not leave a wet paper filter and spent grounds sitting in the basket for days. Watch out for treating a charcoal water filter as permanent: if your machine uses one, replace it on the schedule in the manual, because a spent filter stops helping and can itself harbor growth. These habits cost seconds and they are what turn descaling from a monthly chore into an occasional one.
Common mistakes when cleaning a coffee maker
Most coffee maker trouble traces back to a small number of avoidable habits rather than a failing machine. These are the pitfalls that quietly keep coffee tasting off or, in a couple of cases, damage the machine.
- Skipping or shortcutting the rinse. This is the most common mistake by far. Leftover vinegar taints every pot, so run at least two, ideally three, fresh water cycles until there is no vinegar smell before you brew coffee again.
- Only ever washing the carafe. The carafe is the visible part, but the basket, permanent filter, and brew head hold oils too, and the internal scale needs a descale. Washing the carafe alone leaves most of the problem in place.
- Never descaling at all. Many people wash the parts but never descale, so scale quietly builds until the brew is weak and slow. Descaling is a separate job from washing and both have to happen.
- Using vinegar in a machine that forbids it. A few machines specify their own descaler for a reason. Check the manual, and never mix vinegar with bleach or any other cleaner.
- Putting the wrong parts in the dishwasher. Thermal carafes, printed parts, and electronic bases can warp or fail in dishwasher heat. Only dishwasher-safe parts go in, top rack only, and hand washing is always safe.
- Storing the machine wet. A damp reservoir and a wet basket breed mold and the musty smell. Air dry every part and leave the lid open between uses.
Clear these six and you have removed the causes behind almost every bad-coffee-from-a-clean-machine complaint, at the cost of a few minutes a week and one descale a month.
Troubleshooting: harder coffee maker problems
The steps cover routine cleaning, but some situations need a judgment call. Here is how to think through the common ones without guessing.
What if the coffee still tastes like vinegar after cleaning? You did not rinse enough, which is the most common outcome. Run more full cycles of fresh plain water, sniffing the outflow after each, until there is no vinegar smell at all, then run one more for safety before brewing coffee. Vinegar clings to the tubing longer than people expect, so err on the side of an extra cycle.
What if the brew is still slow or weak after descaling? The machine was likely heavily scaled and needs a second descaling cycle with fresh solution and a longer soak, up to a full hour. If a second thorough descale and a check that the brew head spray holes are clear does not restore the flow, the heating element or pump may be failing, which is past a cleaning fix.
What if my pod machine brews only a partial cup or sputters? That is usually a clogged needle, not scale. Unplug it and clear both the entrance and exit needles with the cleaning tool or a straightened paperclip, since dried grounds block the water path. If clean needles and a descale do not fix it, the pump may be the issue.
What if there is mold in the reservoir? Wash it out, wipe it with a vinegar solution, and rinse well, then prevent it returning by emptying the reservoir daily and leaving the lid open to dry. Persistent mold in a sealed, hard-to-reach reservoir on a cheap machine is sometimes a reason to replace it rather than fight it.
Your coffee maker cleaning checklist
Save this list and work it by interval. Clearing it keeps the coffee tasting clean and the machine brewing hot and fast, and stops scale and mold before they start.
- Every use: empty the grounds and paper filter, wash the carafe, and wash the basket in warm soapy water.
- Weekly: wipe out the reservoir and exterior, clean the warming plate, and soak a brown permanent filter in vinegar if needed.
- Monthly (sooner in hard water): run a full vinegar-and-water or descaler cycle with a soak, then rinse with several fresh water cycles, clear the brew head spray holes, and clean the pod needles on a single-serve machine.
- Quarterly: do a full deep clean of every removable part.
- As prevention: brew with filtered water, empty and air dry the reservoir and parts, and leave the lid open between uses.
- Always: rinse until there is no vinegar smell before brewing coffee, and check the manual before using vinegar or the dishwasher.
Set how much you brew and how hard your water is in the cleaning-schedule planner to see how often your machine needs each step, then work the list one interval at a time.
The bottom line
How to clean the coffee maker, in one paragraph: it is not a specialist job or an expensive one; it is a short routine that stops a bitter-coffee, slow-brew, musty-smell decline that most people blame on their beans. Wash the carafe, basket, and filter after every brew to clear the coffee oils, and descale the machine itself about monthly by running equal parts vinegar and water, or a commercial descaler, through a cycle with a soak in the middle. Then rinse with at least two or three cycles of fresh water, because leftover vinegar is the one mistake that undoes the whole effort. Clean a pod machine the same way, plus its needles and tank, descale sooner if your water is hard or the signs appear, and prevent buildup with filtered water and dry parts. Do that on a rhythm matched to how much you brew, and the machine goes back to making a hot, fast, clean cup.
A note on scope: these notes exist to hand you a safe, repeatable routine for cleaning a home coffee maker, not to promise any specific result. Every interval and figure above is an illustrative planning number drawn from typical guidance rather than measured on one machine, and your own water hardness, usage, and manufacturer instructions will change what and how often you should do each job, so treat your machine’s manual as the authority. Nothing here is professional advice. A few safety notes are firm: confirm your manual allows vinegar before you use it, since a small number of machines specify their own descaler, never combine vinegar or any acid with bleach because the mix releases a harmful gas, and rinse thoroughly with fresh water before brewing so no cleaner reaches your cup. If a machine still brews poorly after a thorough descale, the fault may be a failing heating element or pump rather than scale, which is past a cleaning fix.
Frequently asked questions
How do I clean a coffee maker?
Start by emptying any old water and grounds, then wash the carafe, filter basket, and any removable parts in warm soapy water so coffee oils do not build up. To descale the machine itself, fill the reservoir with a solution of equal parts white vinegar and water, or a commercial descaler mixed per its label, and run it through a normal brew cycle without a paper filter or coffee. Pause the cycle partway so the solution soaks the internal tubing for thirty to sixty minutes, then let it finish. The single most important part is the rinse: run at least two, and often three, cycles of fresh clean water afterward to flush every trace of vinegar out, because leftover vinegar taste is the most common complaint after descaling. The whole routine takes about an hour, most of it hands-off soaking and rinsing.
Can I use vinegar to descale a coffee maker?
Yes, plain white distilled vinegar is a common and effective home descaler because it is a mild acid that dissolves the mineral scale that hard water leaves inside the tubing and heating element. Mix it roughly one part vinegar to one part water, though some people use up to a stronger ratio for a badly scaled machine, and run it through a brew cycle with no coffee or paper filter in place. The catch is that vinegar has a strong smell and taste that clings, so a thorough rinse with several cycles of fresh water afterward is not optional. A few manufacturers, notably some pod machines and those with aluminum or certain internal components, advise against vinegar and specify their own descaling solution, so check your manual first. When in doubt, a purpose-made descaler rinses cleaner and is the safer choice for an expensive machine.
How often should I descale my coffee maker?
A common starting point is descaling about once a month, but the honest answer is that it depends almost entirely on your water hardness and how often you brew. In a hard-water home a daily-use machine can scale up enough to need descaling every two to three weeks, while a soft-water home brewing occasionally might stretch it to every two or three months. The machine often tells you when it is due: longer brew times, a sputtering or gurgling sound, a weak or lukewarm pour, or a visible white crust around the water outlet all point to scale. Some machines have a descale indicator light that estimates the interval for you. Treat any fixed schedule as a floor, and descale sooner if you see those signs, because scale only ever accumulates faster once it starts.
How do I clean a single-serve pod coffee maker?
A single-serve pod machine cleans in three parts: the exterior and drip tray, the water tank, and the needles that pierce the pod. Remove and wash the drip tray and the pod holder in warm soapy water, and wash the water reservoir, letting it air dry rather than wiping it with a linty cloth. The entrance and exit needles clog with dried coffee grounds and are the usual cause of a weak or partial brew, so clean them with the tool many machines include, or straighten a paperclip and gently clear each needle hole with the machine unplugged. To descale, fill the tank with a vinegar and water solution or the brand's descaler, run repeated brew cycles with no pod until the tank empties, let it sit, then run several tanks of fresh water to rinse. Descale a pod machine on the same monthly-ish rhythm as any other.
Why does my coffee taste bitter, sour, or off?
Stale coffee oils and residue are the usual culprit, and they build up fast because coffee is oily and those oils turn rancid and bitter over days on the carafe, the basket, and the brew head. A machine that is never washed passes every new pot over that rancid film, which is why fresh beans can still brew a harsh, sour cup. Mineral scale is the second cause: it lowers the brewing temperature and slows the flow, so the water under-extracts and the coffee tastes weak and flat rather than clean. Mold or yeast growing in a damp reservoir adds a musty, off note. The fix is the full routine here: wash the parts that hold the oils after each use, and descale on a schedule to keep the temperature and flow right.
How many times should I rinse after descaling?
Run at least two full cycles of fresh, clean water after descaling, and three is better if you used vinegar, because vinegar taste and smell are stubborn and the number one reason a freshly cleaned machine brews an unpleasant first pot. Empty the reservoir, refill it with plain water, run a complete cycle, discard that water, and repeat until you can no longer smell any vinegar in the outflow or the carafe. Commercial descalers usually rinse out in fewer cycles than vinegar, but still follow the label, which typically calls for one or two rinse cycles. Do not brew your first real pot until the rinse water smells and tastes clean. Skipping or shortcutting the rinse is the single most common mistake, so err on the side of one extra cycle.
Can I put coffee maker parts in the dishwasher?
Some parts can go in the dishwasher and others should not, so it depends on the part and the manufacturer. Many glass carafes, permanent filter baskets, and lids are marked dishwasher safe, usually for the top rack only, and the manual or a molded symbol on the part will say. Thermal stainless carafes, painted or printed parts, and most electronic bases must never go in the dishwasher, and the machine body obviously stays out entirely. When a part is dishwasher safe, the top rack and a gentle cycle protect it from warping in the high heat near the heating element. When you are unsure, hand washing in warm soapy water is always safe and takes a minute, so default to that for anything not clearly marked.
What can I use instead of vinegar to descale a coffee maker?
A purpose-made descaling solution is the cleanest alternative and is what most manufacturers recommend, because it dissolves scale effectively, rinses out with less residual taste than vinegar, and is formulated to be gentle on internal components. Citric acid is another common option: dissolve a couple of tablespoons of food-grade citric acid powder in the full reservoir of water and run it like the vinegar cycle, which many people prefer because it has almost no lingering smell. Lemon juice works in a pinch on the same acid principle but is less consistent and can leave pulp. Whichever you choose, the method is the same, brew the solution through with no coffee, let it soak, and rinse thoroughly with several fresh water cycles. Always check your manual, since a few machines specify their own product and void nothing else.