What's on this page
- Before you start: what to gather
- Step 1: Match the unit to your space and moisture problem
- Step 2: Measure the space and rate the dampness
- Step 3: Size it by pints per day
- Step 4: Choose how it drains: bucket, hose, or pump
- Step 5: Pick the control features that matter
- Step 6: Weigh the energy use and efficiency
- Step 7: Plan placement and maintenance before you buy
- Portable, whole-house, or crawlspace: matching the type
- Compressor vs desiccant: matching the tech to the temperature
- A worked example: choosing for a 1,200 sq ft damp basement
- Common mistakes when choosing a dehumidifier
- Troubleshooting: cold rooms, big spaces, and musty smells
- The dehumidifier buyer’s checklist
- The two decisions that carry the choice
- Do dehumidifier brands matter?
- The bottom line
Short answer: Choose a dehumidifier by naming the space and the problem first, ambient dampness or a fixable leak, then sizing by area and dampness and rounding up to the next real capacity, because undersizing means a unit that runs all day. Decide drainage next: a bucket for a mildly damp room, a continuous hose for anything wet, a built-in pump only when the drain sits above the unit. Insist on a humidistat.
A dehumidifier is one of the few appliances where the wrong choice is quieter than a bad one. It does not fail dramatically. It just runs and runs, never quite drying the room, or fills its bucket while you are at work and sits idle for hours, or costs more in electricity every season than anyone expected. Almost every one of those disappointments traces back to a decision made at the shelf, not a defect in the box.
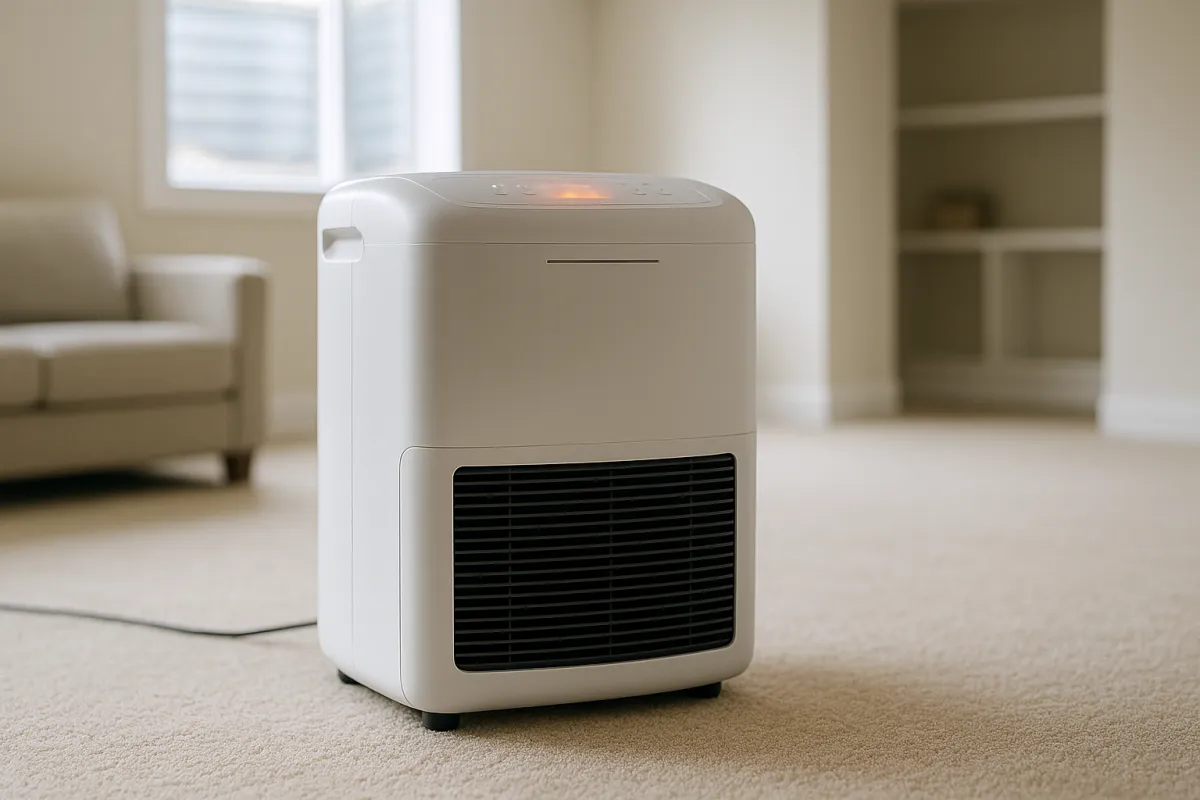
These notes turn choosing a dehumidifier into a repeatable seven-step method you can run on any unit before you spend. You will name the space and the moisture problem, measure the room and read its dampness, size it by pints per day, pick your drainage and your controls, weigh the running cost, and plan where it goes, in that order, so the decision rests on your room rather than the packaging. For the full pint-and-cost arithmetic, our companion breakdown of what size dehumidifier you need and what it costs to run does the deep math, and our walkthrough on how to reduce humidity in your home covers whether you even need the machine. You can size and price your own pick in about a minute with the cost-per-use calculator.
Key takeaways
- Choosing starts with the space and the problem: name where the unit goes and whether you are fighting ambient dampness or a fixable leak before you shop.
- Size by two inputs, area and dampness, then round up to the next real capacity. Undersizing is the expensive mistake because the unit then runs all day.
- Drainage is a decision, not a running cost: a bucket for a mildly damp room, a continuous hose for anything wet, a built-in pump only when the drain sits above the unit.
- A humidistat is the feature that matters most, because it lets the machine cycle to a target instead of grinding, which is the biggest lever on your electricity bill.
- Electricity, not a consumable, is the dominant running cost, so weigh efficiency, and screen for the traps before you compare the units that can actually do the job.
Before you start: what to gather
This walkthrough takes about half an hour and needs no tools beyond a tape measure and, ideally, a cheap hygrometer. The difficulty is low. The discipline is in doing the steps in order rather than jumping straight to reviews and buying the unit with the best photos.
Gather three things before you shop:
- The space, measured and named. The length and width in feet of the room you actually want to dry, plus a plain description of what it is: a finished basement, a musty crawlspace, a laundry room, a whole floor. The space decides almost everything downstream, from the pint size to the drainage.
- An honest read of the dampness. Whether the space smells musty in humid weather, feels heavy, shows damp patches after rain, or is visibly wet to the touch. A hygrometer reading in the space is better still. Dampness is half the sizing equation and the half most people flatter.
- Where the water will go, and where the unit will sit. Whether there is a floor drain nearby and whether it sits below the machine, plus a spot with air around it and a power outlet within reach. Knowing this before you shop tells you whether you need a drain port, a pump, or neither.
A quick word on posture: every pint figure, wattage, and dollar amount in this walkthrough is an illustrative planning number drawn from typical ranges, not a measured result for any specific model, and the goal is to teach you the method rather than point you at a machine. With the space measured and the moisture named, the seven steps below take you from a shelf of near-identical white boxes to one unit you can defend on numbers. Keep the cost-per-use calculator open in another tab; you will feed it real figures at Step 6.
Step 1: Match the unit to your space and moisture problem
Start before the specs, with the question the box cannot answer for you: what space are you drying, and why is it damp? The honest limit of any dehumidifier is that it treats humid air, not the reason the air is humid, so the first decision is whether the machine is the right tool at all. A dehumidifier is the right answer for ambient dampness with no single obvious cause: a naturally humid basement, a muggy regional climate, a laundry room that stays damp, a home that simply runs humid in summer. It is the wrong answer as a mask for an active leak, a grading fault that channels rainwater toward the foundation, or a missing vapor barrier, because you would be paying electricity indefinitely to chase water you could stop at the source.
So name the space and name the problem in one breath. “A finished basement that smells musty every summer” points to a portable unit sized from the wetter end of the chart. “A crawlspace that seeps after every heavy rain” points to a source fix first and a dedicated low-profile unit second. “A whole humid house across two floors” is where a ducted whole-house unit starts to make sense. The space is the input that quietly reshapes every later step, so pin it down before you look at a single pint rating.
Watch out: the classic error is buying the machine as a cure for a leak. If you see the extremely-wet signs, standing water, seepage after every rain, a floor that stays wet, treat that as a source problem first and bring in a professional. Often the right plan is both: fix the source, then let a correctly sized dehumidifier handle the ambient humidity that remains. Our note on reducing humidity in your home covers the source-versus-symptom question in depth.
Step 2: Measure the space and rate the dampness
With the space named, put numbers on it. Measure the length and width in feet and multiply for the floor area: a basement 25 feet by 40 feet is 1,000 square feet. For an open, connected space, measure the whole area as one, because the air mixes and the machine has to dry all of it. Write the square footage down, because it is one of the two inputs that set the pint size in the next step.
The second input is dampness, and it is worth pinning down rather than guessing, because it matters about as much as area. The industry describes spaces in rough bands you can read without a meter. Moderately damp: musty in humid weather, a little clammy, no visible water marks. Very damp: the musty smell is present most of the time, the air feels heavy, and you see damp patches after wet weather. Wet: visible moisture, beads on cool surfaces, damp spots that do not dry. Extremely wet: standing dampness or obvious seepage, which sends you back to Step 1 and a possible source fix.
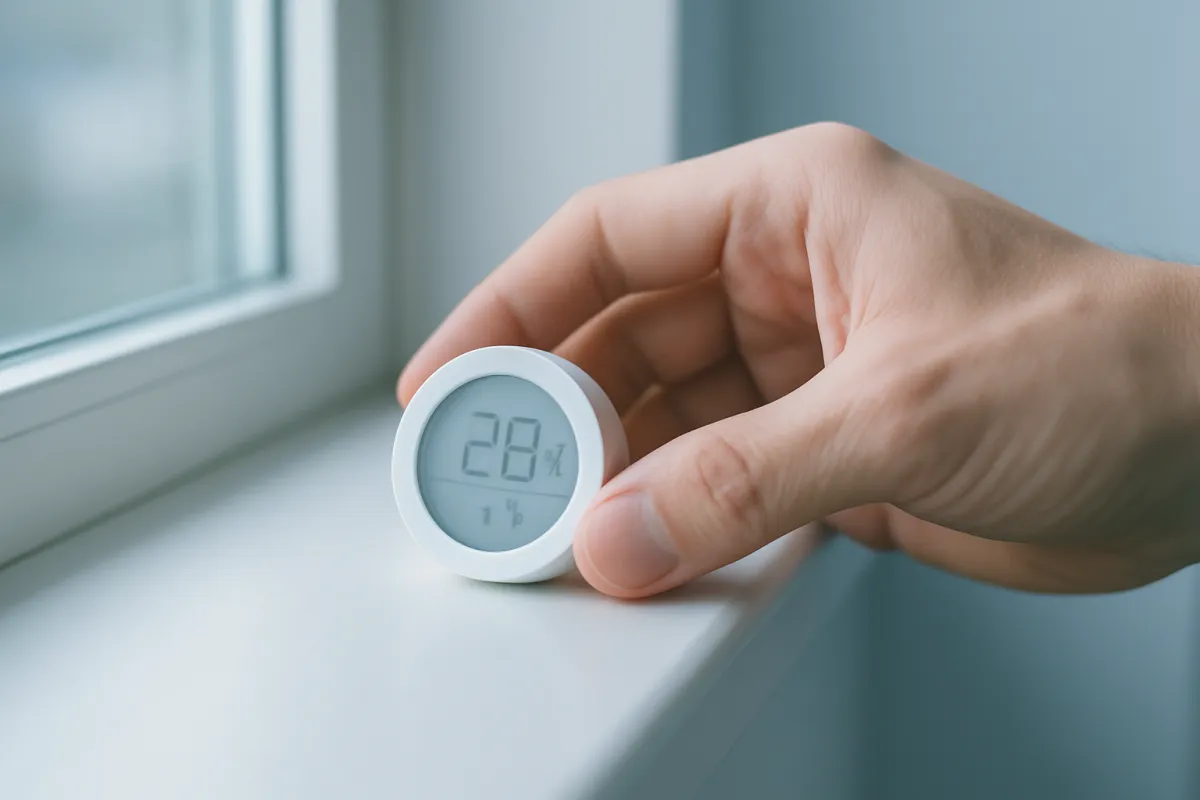
A cheap hygrometer removes the guesswork. Anything reading above about 60 percent relative humidity confirms you have a real job for the machine, and the higher the number, the wetter the band you should size from.
Watch out: be honest with the band you pick, and if you are between two, choose the wetter one. Undersizing because you flattered the room is the most common sizing mistake, and it is the expensive one, because the machine then runs constantly trying to catch up. Basements and crawlspaces almost always read damper than their floor area alone suggests, so lean up rather than down for below-grade spaces.
Step 3: Size it by pints per day
Capacity on a dehumidifier is measured in pints per day, and the number describes how much water the machine can pull from the air in 24 hours under a standard test, not a promise of how much your room will actually give up. A 20-pint unit does not mean your basement produces 20 pints a day. It means that under the test’s temperature and humidity, the machine could remove that much, so the rating is a way to compare machines, not a forecast for your room.
Turn your two inputs into a pint target by reading area and dampness together, then round up to the next real capacity on the shelf. As an illustrative guide, a 1,000 square foot space that feels very damp points to a unit near the high teens of pints, a 1,500 square foot very damp space toward the low twenties, and a large or wet basement into the thirties. The chart below holds a 1,200 square foot room fixed and shows how the dampness band alone moves the size you should shop for, so you can see why the honest dampness read in Step 2 matters as much as the tape measure.
Pint capacity to shop for, by dampness (1,200 sq ft)
Illustrative capacity for one 1,200 square foot space as the dampness band climbs. Bars scale with the pint figure.
Same room, four dampness bands: the pint target climbs by more than half from the driest to the wettest. Feed your own square footage and dampness into the calculator for the exact figure.
One caution when you read ratings: the test standard changed in 2019 to measure capacity at a lower, more realistic temperature, so machines labeled under the new standard show lower pint numbers than older stock for the same hardware. A unit that was a “70-pint” model under the old test is often around 50 under the new one. When you compare listings, size from the newer, lower numbers, which describe real-world performance more faithfully. Because sizing and its running cost are a whole topic on their own, our dehumidifier size and cost breakdown carries the full table and the pint math; use it for the exact number and keep moving through the decision here.
Watch out: round up, never down. An undersized unit runs continuously and never quite pulls the humidity to target, which costs you electricity for a room that still feels damp. Modestly oversizing is the safer error, because the machine reaches target and cycles off. The one exception is going wildly oversized in a small room, where very short cycles are less efficient, so aim for comfortable headroom rather than the biggest unit on the shelf.
Step 4: Choose how it drains: bucket, hose, or pump
Every dehumidifier collects water two ways, and choosing the right one for your space is a decision about uptime, not running cost. Get it wrong and a correctly sized unit still fails, because it spends hours switched off with a full tank.
The bucket, or reservoir, catches condensate until it fills, then the machine shuts off until you empty it. In a mildly damp room that fills the bucket every day or two, that is perfectly fine and needs no setup. In a wet basement the bucket can fill several times a day, and every full bucket is dead time when the machine sits idle because nobody was there to empty it. That is the quiet way a right-sized unit still loses.
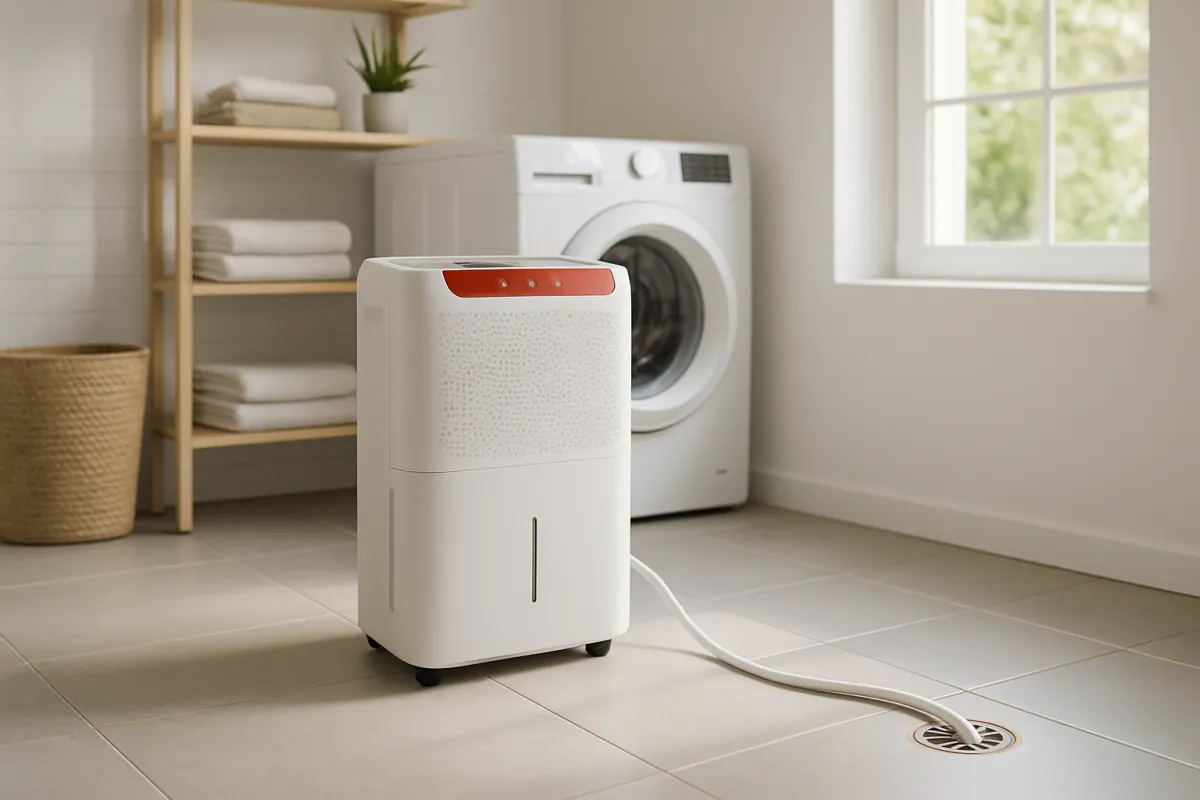
A continuous gravity hose solves that for most wet spaces. Nearly every unit accepts a garden-style hose on a drain port, and condensate runs straight to a floor drain by gravity, so the machine never stops for a full tank. This is the setup to plan for any space that runs wet, and it costs almost nothing beyond a hose. The one requirement is a drain at or below the level of the machine, so gravity does the work.
A built-in condensate pump is the answer when the only drain sits above the unit, or too far for gravity, which is common in a basement whose sole drain is a laundry tub on the wall. The pump lifts the water up to a sink, a window, or an overhead line. It is a genuine convenience for that situation and a needless expense otherwise, so buy it for the lift you actually have, not as a default upgrade.
Watch out: match the drainage to the space at the shelf, not after the fact. Buying a bucket-only unit for a wet basement means committing to emptying a tank several times a day forever, and buying an expensive pump model for a room with a floor drain at foot level means paying for a lift you will never use. Decide where the water goes before you choose the unit, and the drainage decision makes itself.
Step 5: Pick the control features that matter
Strip away the marketing and only a handful of controls change how the machine actually lives in your home. Buy those first and treat the rest as tie-breakers.
A built-in humidistat is the one that is close to non-negotiable. This is the control that reads the room’s humidity and cycles the compressor off once the air hits your target, then back on when it drifts up. It is the single biggest lever on your running cost, because it turns runtime from a fixed drain into a managed one. A unit set to hold 50 percent and left to cycle costs far less than the same machine pinned on continuous, and the room ends up no wetter. Almost every modern portable has one, so treat a very cheap unit with only a plain on-off switch as a reason to look elsewhere.
Auto-restart brings the unit back to its previous setting after a power blip, so a summer storm does not leave the basement quietly re-humidifying for a week until you notice. A defrost or low-temperature mode lets a compressor unit keep working in a cool space, like a chilly basement or a garage, without icing up its coils, which is exactly where many people most want to dry. A timer or a simple schedule is a modest bonus that trims runtime further.

Watch out: do not pay a premium for controls that do not change the result. App connectivity, a dozen fan speeds, voice assistants, and mood lighting are pleasant, but none of them decides whether the machine holds your humidity target for a reasonable cost. Buy the humidistat and the capacity first; weigh the smart features last and pay for them only if the price is small.
Step 6: Weigh the energy use and efficiency
Here is where a dehumidifier parts ways with something like an air purifier. On a purifier, the filters are the big lifetime cost and the electricity is a rounding error, which is exactly why our evidence review of whether air purifiers are worth it spends so much time on the filter schedule. On a dehumidifier, it is the reverse: there is no expensive consumable, but the machine draws real power, so electricity is the dominant running cost and efficiency is where you save real money over the unit’s life.
The math is the same watts-times-hours-times-rate calculation we use for any appliance. A mid-size dehumidifier draws somewhere around 300 to 700 watts while the compressor runs. Take 500 watts as a working figure, run it 12 hours a day, and it uses about 6 kilowatt-hours daily, which at a typical rate near $0.16 per kilowatt-hour is roughly $0.96 a day, or about $29 a month while it runs. The figure to shop against is the integrated energy factor, which expresses how many liters the machine removes per kilowatt-hour it consumes. Higher is better, and it directly shrinks that monthly number. An Energy Star badge means the unit cleared a bar on that figure, which is worth seeking out on a machine you expect to run for months at a time.
The chart below splits the first-year cost of a mid-size unit run seasonally, so the shape of the spend is visible before you commit. The purchase dominates year one, but the power recurs every season after, which is the whole argument for buying on efficiency.
A dehumidifier's first-year cost (unit vs power vs upkeep)
Illustrative split for a mid-size unit: about $220 to buy, $80 in seasonal power, $10 in upkeep. Shares sum to 100.
The unit dominates year one, but the power slice returns every season while the purchase does not. Over a few years of heavy use, an efficient machine repays its premium. Figures illustrative.
The practical move is to do the arithmetic rather than trusting the badge alone. Feed two candidates’ wattages into the cost-per-use calculator and compare the annual figures, not the sticker prices, and lean harder on efficiency the more months of the year the machine will run. Our note on choosing energy-efficient appliances generalizes this trade for the rest of the house.
Watch out: the shelf price hides the recurring number. A cheaper unit that draws more watts for the same water removed costs more over a few humid seasons than a pricier efficient one, so a low sticker on a thirsty machine is a false economy in a space that runs long hours.
Step 7: Plan placement and maintenance before you buy
The last step protects the money you are about to spend. A dehumidifier only delivers its rated capacity if air can move through it and its coils stay clean, so decide where it will sit and how you will keep it running before you commit, not after it disappoints.
Placement first. Put the unit where air can circulate around it rather than jammed in a corner or shoved against a wall, because a machine starved of airflow behaves like an undersized one. Give the intake and outlet room to breathe, keep it reasonably central to the space, and make sure a power outlet is within reach without a flimsy extension cord, since these units draw real current.
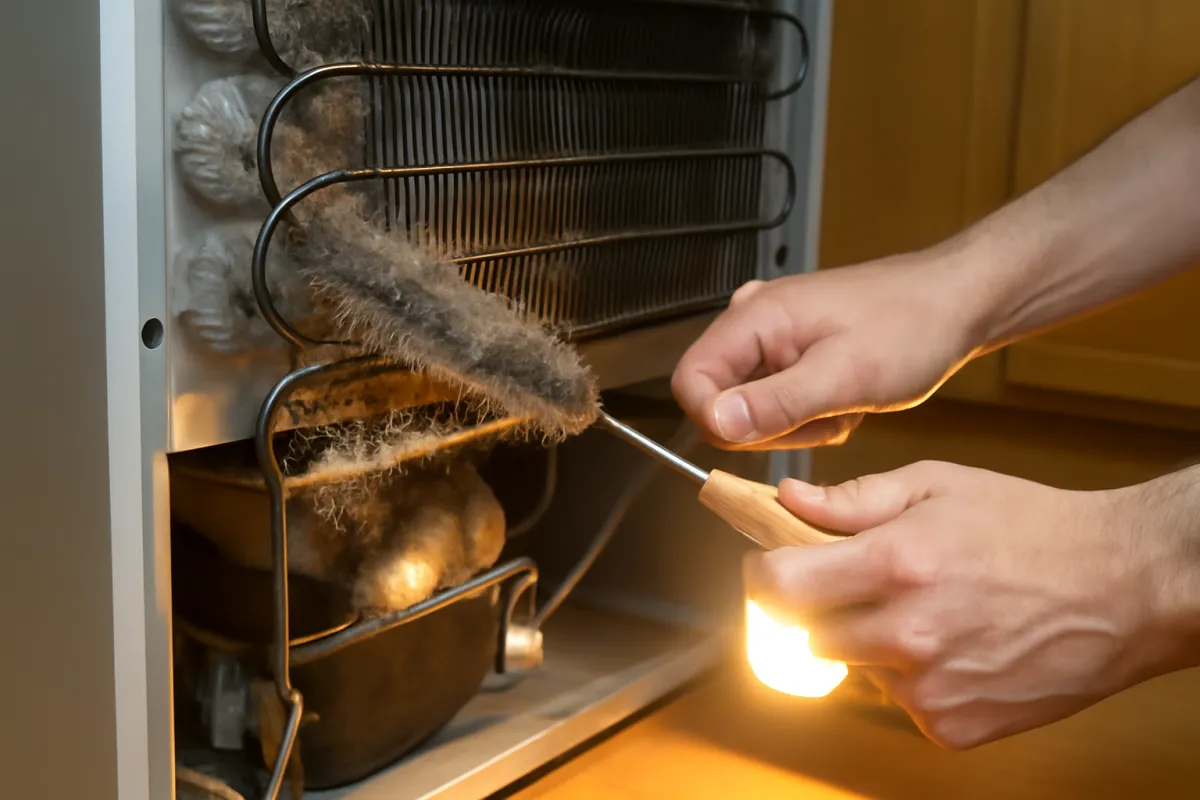
Maintenance is light but not optional, and neglect shows up as lost efficiency rather than a dramatic failure. There are three things to watch. The air filter is usually a washable mesh that catches dust before it reaches the coils; rinse it every few weeks in a dusty space, monthly otherwise, because a clogged filter chokes airflow and quietly raises your running cost. The coils should stay reasonably clean, so wipe accessible dust off periodically. And the tank benefits from an occasional rinse to discourage slime and smell, unless you are draining continuously, in which case it stays largely dry.
Watch out: the maintenance decision belongs at the shelf too. A unit with an awkward, hard-to-reach filter or a tank that is a chore to remove is one you will neglect, and a neglected dehumidifier drifts from efficient to thirsty without ever breaking. Favor a design whose filter pops out and whose tank lifts cleanly, and read our guide to maintaining your appliances for the routine that keeps the rest of the house running the same way.
Portable, whole-house, or crawlspace: matching the type
The seven steps assume a portable unit, which is what most people need, but the type is itself a choice worth making deliberately, because it follows straight from the space you named in Step 1.
A portable unit is the freestanding kind you wheel into the room that needs it. It is cheaper to buy, needs no installation, and can move to wherever the problem is this season. For a single damp basement, a muggy bedroom, or a laundry room, this is almost always the right tool, and it is what the sizing, drainage, and control steps above are written around.
A whole-house dehumidifier is a different animal: a larger unit that ties into your ductwork or a dedicated duct run and conditions the whole home’s air. It costs considerably more up front and usually needs professional installation, but for a large home with humidity across multiple floors, it can be more effective and, per pint removed, sometimes more efficient than three or four portables running independently. It also disappears into the mechanical room instead of sitting in your living space. The deciding question is scope: one problem room means a portable, while whole-home humidity is where the ducted unit earns its cost.
A crawlspace is a special case. These are handled with a dedicated low-profile unit and, ideally, encapsulation with a vapor barrier, so the machine is drying a sealed space rather than fighting the open ground forever. Size a whole-house or crawlspace unit with a professional, since the calculation involves your ductwork and air handling as well as floor area.
Compressor vs desiccant: matching the tech to the temperature
Most portable dehumidifiers are compressor machines, which pull water by chilling a coil, and they work well in warm, humid air. Their weakness is the cold: as a space drops toward the low end of the range, the coil can frost and the machine spends energy defrosting rather than drying, so its efficiency falls in exactly the chilly basements and garages people most want to dry. This is why the defrost mode from Step 5 matters for below-grade spaces.
Desiccant dehumidifiers take a different path, absorbing moisture onto a drying material rather than condensing it, which lets them keep working in cold spaces where a compressor unit struggles. The trade is running cost: desiccant models generally draw more power for the same water removed at normal temperatures, so in a warm room they lose the efficiency contest. The rule of thumb is to match the technology to the temperature. Choose a compressor unit for a warm or normal space, a desiccant unit for a genuinely cold one such as an unheated garage or a winter cabin, then run the wattages through the cost-per-use calculator so the choice rests on the annual figure rather than the label. For most homes drying a basement in summer, a compressor unit with a defrost mode is the straightforward pick.
A worked example: choosing for a 1,200 sq ft damp basement
Run the whole method on one realistic case. You have a 1,200 square foot finished basement that reads very damp: musty most of the time, damp patches after heavy rain, no standing water. There is a floor drain in the corner, at floor level. What do you buy, and what does it cost?
Steps 1 and 2, space and dampness. The space is ambient basement humidity with no active leak, so a dehumidifier is the right tool. It measures 1,200 square feet, and a hygrometer reads in the mid-60s percent, which confirms the “very damp” band you would have guessed from the musty smell.
Step 3, size. Reading 1,200 square feet at very damp lands near 19 pints on the illustrative math, so you round up and shop for a 20-pint modern unit, or a touch more for headroom so it cycles rather than grinds. You confirm the pint number is the newer rating, not an old one.
Step 4, drainage. Because the floor drain sits at floor level in the corner, a plain gravity hose reaches it, so you skip the pump and plan a continuous drain from day one. The bucket becomes a backup for the rare times the hose is off.
Step 5, controls. You insist on a humidistat and set it to hold about 50 percent, and you choose a unit with auto-restart and a defrost mode, since the basement runs cool.
Step 6, running cost. Say the unit averages 500 watts and, through the humid season, runs about 12 hours a day. That is roughly $0.96 a day, near $29 a month while it runs, and across a three-month humid summer it works out around $80 in electricity, which is the power slice in the chart above. Run it harder in a wetter climate and the figure climbs, so you swap your own rate and hours into the cost-per-use calculator to see your version.
Step 7, placement and maintenance. You set it a foot off the wall near the drain, with air around it, and plan to rinse the filter monthly. The whole decision took half an hour and rests on your basement, not the box art.
Common mistakes when choosing a dehumidifier
Most regretted purchases in this category trace to a short list of avoidable errors. Recognizing them is half the method.
- Buying the machine as a cure for a leak. A dehumidifier treats humid air, not the reason it is humid. Running one against an active leak or a drainage fault means paying electricity forever to chase water you could stop at the source. Fix the source first, then dehumidify what remains.
- Undersizing the capacity. The single most common technical error: flattering the dampness or ignoring it, buying the smallest unit that might cope, and ending up with a machine that runs all day and never quite wins. Round up, and size from the honest dampness band.
- Skipping the drainage plan. Buying a bucket-only unit for a wet basement, then discovering it shuts off several times a day with a full tank. Decide where the water goes before you choose the unit.
- Overpaying for a pump you do not need. The mirror-image error: buying an expensive pump model for a room with a floor drain at foot level. Reach for the pump only when the drain sits above the machine.
- Ignoring efficiency on a long-hours machine. Judging a basement unit by its sticker price and never comparing the wattage, then paying the difference back in electricity every season. On a dehumidifier the power is the recurring cost, so efficiency is where the money is.
- Paying for smart features over the humidistat. Choosing the unit with the nicest app and skipping the one with the better controls or capacity. The humidistat and the pint size decide the result; the app decides almost nothing.
Troubleshooting: cold rooms, big spaces, and musty smells
A few situations do not fit the simple one-room recipe, so here is how to handle the common edge cases.
What if my space is cold, like a garage or an unheated basement? A standard compressor unit can frost its coil and lose efficiency below the mid-60s Fahrenheit, so choose a model with a defrost mode for a cool basement, or a desiccant unit for a genuinely cold garage or cabin. Match the technology to the temperature rather than forcing a warm-room machine to work in the cold.
What if my space is large or open-plan? Measure the whole connected area as one and size to that total, not the corner you stand in. Very large spaces can exceed a single portable unit’s capacity, in which case two well-placed units, or a whole-house unit tied into the ductwork, dry faster and more evenly than one machine straining at its limit.
What if the room still smells musty after the machine runs? First confirm the humidistat is holding a target in the 30 to 50 percent band and the unit is actually reaching it; a persistent smell above 60 percent usually means the unit is undersized or the doors and windows are letting fresh humid air in. If the humidity is genuinely low and the smell remains, you may be dealing with a moisture source or existing mold that the machine cannot undo, which is a job for a specialist.
What if the bucket keeps filling and shutting the unit off? That is the signal to switch from the bucket to a continuous drain. Run a gravity hose to the nearest floor drain, or add a pump if the drain sits above the unit, and the machine stops losing hours to a full tank.
The dehumidifier buyer’s checklist
Run any candidate past these seven checks. Clear all seven and the purchase will almost certainly do real work in your space.
- Space named and problem diagnosed. Ambient dampness the machine can fix, not an active leak that needs a repair first.
- Room measured and dampness rated honestly. Square footage in hand, dampness band chosen from the wetter side when you are unsure, ideally confirmed with a hygrometer.
- Sized by pints and rounded up. The right capacity for your area and dampness, read from the newer ratings, with a little headroom so it cycles rather than grinds.
- Drainage matched to the space. A bucket for a mildly damp room, a continuous gravity hose for anything wet, a pump only if the drain sits above the unit.
- Humidistat confirmed, plus the useful controls. A real humidistat, ideally with auto-restart and a defrost mode for a cool space, and no premium paid for features that do not change the result.
- Efficiency weighed against the running cost. Integrated energy factor or Energy Star checked, wattages compared in the cost-per-use calculator, efficiency prioritized on a long-hours machine.
- Placement and maintenance planned. A spot with airflow and power, and a filter and tank you will actually keep clean.
The two decisions that carry the choice
Step back from the seven steps and notice that two decisions carry most of the outcome: the size and the drainage. Everything else, the controls, the efficiency, the smart features, changes convenience and running cost at the margins, but a unit that is the wrong capacity or drains the wrong way for your space disappoints no matter how good the rest of the spec sheet reads.
Size is the honest driver of whether the machine can keep up. A unit sized from the wetter end of the chart, with a little headroom and rounded up to the next real capacity, reaches your target and cycles off, which is efficient and easy on the compressor. An undersized unit runs flat out and never wins, so the owner concludes dehumidifiers do not work when the real fault was the size. Get the two inputs, area and dampness, honest, and this decision makes itself.
Drainage is the decision that keeps a correctly sized unit actually running. The best-sized machine in the house still fails if it sits switched off with a full bucket while you are at work, so matching bucket, hose, or pump to your space is what turns rated capacity into real drying. Get these two right for your measured space, and the controls, efficiency, and placement steps refine a choice that is already sound rather than rescuing one that is not.
Do dehumidifier brands matter?
Shop for a dehumidifier and you will meet the same handful of names again and again. It is tempting to shortcut the decision by picking a brand you trust and buying its most popular model, but the method in these notes works precisely because it ignores the badge. A brand does not have a pint rating, a humidistat, or an efficiency figure; a specific model does, and two machines from the same maker can sit in different tiers and suit different spaces. The label on the front tells you far less than the spec sheet inside.
What a strong brand does buy is consistency and support: parts that stay available, controls that behave predictably, and a design you are willing to live with in a finished basement. Those are real conveniences, and they matter for the long run, since a unit you cannot get parts for is one you replace sooner. But none of them changes whether the machine is the right capacity for your space and drains the way your room needs, which are the decisions that decide whether you are happy with it.
So use the familiar names as a starting shortlist, not a verdict. Pull two or three popular models in the capacity your space calls for, then run each one through the seven steps: match it to your space, confirm the pint size, check the drainage options, insist on a humidistat, and compare the efficiency. Whichever badge survives that screen for your space is the right one, and it is often not the most advertised. Buy the machine you sized on purpose, not the name you recognized.
The bottom line
Choosing a dehumidifier well is a decision made at the shelf, not a gamble you discover months later. Name the space and the moisture problem, measure the room and read its dampness honestly, size by pints and round up, match the drainage to where your water goes, insist on a humidistat and the few controls that matter, weigh the efficiency against the running cost, and plan where the unit sits and how you will keep it clean. Do those seven steps in order and the shelf of near-identical white boxes resolves into one machine that fits your space, your moisture, and your budget. Illustratively, a mid-size basement unit lands near $29 a month while it runs and does genuine, quiet work holding your air where you want it. The unit that disappoints is the one bought on the photo; the one you will be glad you chose is the one you sized on purpose.
A note on scope: these notes are a buying method, not a product recommendation or professional advice. Every pint figure, wattage, and dollar amount above is an illustrative planning number drawn from typical ranges, not a measured result for any specific model, and real capacities, electricity rates, and runtimes move enough to change your result meaningfully. None of it is professional advice on moisture, mold, drainage, or electrical work. If you see signs of an active leak, structural damp, or health-related mold, bring in a qualified specialist rather than relying on a machine, and confirm any unit’s current pint rating, efficiency, and drainage options against the maker’s own figures before it goes in your cart.
Frequently asked questions
How do I choose a dehumidifier?
Work in order rather than shopping on brand. First name the space and the moisture problem you are solving, then measure the room and read how damp it feels, then size the unit by pints per day and round up to the next real capacity. From there, choose your drainage (bucket, gravity hose, or a built-in pump), insist on a humidistat and the handful of controls that matter, weigh the efficiency against the running cost, and plan where it will sit before you spend. Doing the steps in that order turns a wall of near-identical white boxes into one unit you can defend on numbers.
What features matter most on a dehumidifier?
Only a short list changes the ownership experience. A built-in humidistat is the one that is close to non-negotiable, because it lets the machine cycle to a target instead of grinding all day, which is the single biggest lever on your running cost. A drain port for a continuous hose, and a built-in pump if your drain sits above the machine, keep a wet-space unit working unattended. Auto-restart and a defrost or low-temperature mode round out the useful set. App connectivity, a dozen fan speeds, and mood lighting are pleasant but do not change whether the machine holds your humidity target for a reasonable cost.
Do I need a dehumidifier with a pump?
Only if the place you want to drain the water is higher than the machine, or too far for gravity to help. A built-in condensate pump lifts water up to a sink, a window, or an overhead drain line, which is genuinely useful in a basement where the only drain is a laundry tub on the wall. If you have a floor drain at or below the level of the unit, a plain gravity hose does the same job for less money and with nothing to fail. Buy the pump for the lift you actually need, not as a default upgrade.
Should I get a dehumidifier with a drain hose or is the bucket fine?
It depends on how much water the space produces and how often you want to think about it. A bucket, or reservoir, is fine for a mildly damp room that fills it every day or two. In a wet basement or crawlspace the bucket can fill several times a day, and a full bucket shuts the machine off, so you lose hours of drying every time you are not there to empty it. For any space that runs wet, plan on a continuous drain hose to a floor drain from day one, and treat the bucket as a backup rather than the primary plan. It is the difference between a unit that works while you are out and one that quits mid-morning with a full tank.
What is a humidistat and do I need one?
A humidistat is the control that reads the room's relative humidity and switches the compressor off once the air reaches your target, then back on when it drifts up. Practically every modern portable unit has one, and it is the feature that turns a dehumidifier from a machine that runs flat out into one that cycles to hold, say, 50 percent. That matters because runtime is what you pay for: a unit set to a target and left to cycle costs far less than the same unit pinned on continuous, and the room ends up no wetter. If a very cheap unit lacks a real humidistat and only offers a plain on-off, treat that as a reason to look elsewhere.
How do I know what size dehumidifier to buy?
Size a dehumidifier by two inputs: the floor area of the space and how damp that space feels, then round up to the next real capacity on the shelf. Both push the pint-per-day number up, and dampness matters about as much as area, so a very damp room needs meaningfully more capacity than the same room that is only moderately damp. As an illustrative starting point, a 1,000 square foot space that feels very damp often points to a unit near the high teens of pints, and a large or wet basement can reach into the thirties. Our companion breakdown of what size dehumidifier you need runs the full pint math and the running cost, so use it for the exact number and treat this walkthrough as the decision around it.
Is an Energy Star dehumidifier worth the extra cost?
Usually, because electricity is the dominant running cost of a dehumidifier and efficiency compounds every hour it runs. An Energy Star unit has to clear a bar on its integrated energy factor, which measures how much water it removes per kilowatt-hour, so a certified model draws fewer watts for the same water pulled. In a basement that runs long hours through a humid season, the premium you pay up front is often repaid through the power you do not spend. The honest move is to compare the wattage and efficiency figures of two candidates and run them through the running cost math rather than trusting the badge alone, but as a rule the efficient unit wins over a few seasons of heavy use.
Do dehumidifier brands matter?
Less than the spec sheet does. A brand does not have a pint rating, a humidistat, or an efficiency figure; a specific model does, and two units from the same maker can sit in very different tiers. What a strong brand buys you is consistency and support: parts that stay available, clear controls, and a design you are willing to live with. Those are real conveniences, but none of them changes whether the machine is the right capacity for your space and drains the way your room needs. Use the familiar names as a starting shortlist, then run each candidate through the same checks and let the one that fits your space win, whatever the label.