What's on this page
- Why is my dehumidifier not working? The short answer
- How a dehumidifier works, in one minute
- Start here: five checks before you open anything
- Why is my dehumidifier not collecting water
- Why is my dehumidifier freezing up
- Why is my dehumidifier icing up
- Why is my dehumidifier leaking
- Dehumidifier not draining to hose: the gravity checklist
- Why is my dehumidifier blowing hot air
- The unit runs but the room stays damp
- It will not turn on at all
- It keeps shutting off after a few minutes
- Noises: rattles, gurgles, and clicks
- Where the faults usually trace back
- The 15 minute clean that fixes most of it
- Repair or replace: the honest math
- When to replace a dehumidifier outright
- Crawl space units: same faults, harder access
- The maintenance routine that prevents round two
- What troubleshooting costs you in electricity
- A worked example: one basement unit, two symptoms
- The bottom line
Short answer: A dehumidifier that is not working usually has one of three cheap causes: a clogged filter starving airflow, a room too cold for the coils, or a drain setup fighting gravity. Check, in order, the humidity setting against a real hygrometer, the room temperature, the filter and coils, the bucket and its float switch, and the drain path. Warm exhaust alone is normal. Skip repairs above roughly half the price of a comparable new unit.
Why is my dehumidifier not working is really six or seven different questions wearing one coat: the bucket stays empty, the coils grow a beard of ice, water shows up on the floor instead of in the tank, the hose refuses to drain, or the exhaust feels like a hair dryer. Each symptom has a short list of causes, most of them cheap, and a repeatable way to tell the five-minute fix from the fault that means the machine is done.
This breakdown walks every symptom in turn, in the order that makes diagnosis fastest. It covers what to check before you blame the machine, the exact causes and fixes behind each complaint, the repair-or-replace math when a quote lands, and the small maintenance routine that prevents round two. If the verdict turns out to be a new unit, our breakdown of how to choose a dehumidifier and our sizing work in what size dehumidifier you need and what it costs pick up where this one ends.
Key takeaways
- Most "broken" dehumidifiers are victims of three cheap causes: a clogged filter starving airflow, a room too cold for the coils, or a drain setup fighting gravity. Check those before anything else.
- An empty bucket in a warm, damp room with a clean filter points at the float switch first and the sealed system second. Ice on the coils points at airflow or room temperature first.
- Warm exhaust is normal and means the unit is running as designed. It only signals a fault when the bucket stays empty at the same time.
- Gravity drainage fails for boring reasons: an uphill section, a forgotten internal drain plug, or a clogged port screen. A drain above the unit needs a pump, not more hose.
- A commonly cited replace test: skip repairs above roughly half the price of a comparable new unit, and lean toward replacement once the machine passes the midpoint of a typical 8 to 12 year life.
Why is my dehumidifier not working? The short answer
Work the cheap and likely causes before the expensive and rare ones. In practice that means checking, in order: the humidity setting against a real hygrometer reading, the room temperature, the filter and coils for dust, the bucket and its float switch, and the drain path. Those five checks catch the large majority of complaints without a single tool.
The reason the order matters is that the symptoms overlap. A clogged filter can make a unit ice up, stop collecting water, and blow hotter air, all at once, so chasing any one symptom in isolation wastes time. Airflow, temperature, and drainage are the three systems that fail cheaply and often; the compressor and refrigerant circuit fail rarely and expensively. Diagnose in that order and you will either fix the machine in an afternoon or know with confidence that it is time to price a replacement.
One more framing that saves grief: a dehumidifier that runs but never seems to dry the room may not be faulty at all. It may be the wrong size for the space, a mismatch our dehumidifier sizing report covers in detail. A working machine losing a fair fight looks a lot like a broken one.
How a dehumidifier works, in one minute
Every symptom below makes more sense once the machine’s one trick is clear. A compressor dehumidifier is a small refrigeration loop with a fan. The fan pulls room air through a filter and across a cold evaporator coil. Because cold air holds less moisture, water condenses on that coil, drips into a bucket or out a drain port, and the now-dry air passes over a warm condenser coil before returning to the room a few degrees warmer than it arrived.
Three consequences follow. First, the machine needs airflow: block the filter and the cold coil gets too cold, frosts over, and stops condensing. Second, it needs a warm enough room: below roughly 60 to 65 F, the coil surface drops below freezing and ice forms faster than the auto defrost can clear it. Third, it needs a working refrigeration loop: if the refrigerant leaks out or the compressor will not pump, the coil never gets cold and nothing condenses, no matter how hard the fan blows.
A humidistat supervises the whole show, switching the compressor off once the room reaches the target. A float switch cuts everything when the bucket fills. Most faults live in that supporting cast, not in the refrigeration loop itself, which is exactly why the cheap checks come first.
Start here: five checks before you open anything
Before touching a screwdriver, run this sequence. It takes about ten minutes and resolves an outsized share of complaints.
Check the setting against reality. Put a separate hygrometer in the room, a few feet from the unit. If the room reads 45 percent and the unit is set to 50, the machine is not broken, it is finished. Set the target at least 5 points below the current reading and listen for the compressor to click on.
Check the room temperature. Standard compressor units struggle below roughly 60 to 65 F and most stop being useful near 41 F. A cool basement in spring is the classic scene of a wrongly accused dehumidifier.
Check the filter and intake. Pull the filter and hold it to a light. If light struggles through, so does air. Wash it, dry it, and look past it at the coils for a felt of dust.
Check the bucket. Reseat it firmly. The float must hang free; a bucket seated a half inch off kills the whole machine via the safety switch.
Check the drain path. If a hose is attached, confirm it falls continuously, is not kinked, and that any internal drain plug was removed. Then give the unit an honest hour in a closed room and measure again with the hygrometer.

Why is my dehumidifier not collecting water
An empty bucket has a strict hierarchy of causes, and the good news is that the common ones cost nothing to fix.
The room does not need drying. The humidistat’s job is to stop the machine. Confirm with a separate hygrometer before assuming a fault; the unit’s own sensor can read a few points off, and its location right at the intake skews it further.
The room is too cold. Below the design range, the coil frosts instead of condensing, the auto defrost cycles the compressor off, and collection crawls to nothing. If your space runs cold, no amount of repair changes the physics; a desiccant unit is the right machine for that job.
Airflow starvation. A clogged filter or dust-matted coil means too little warm air reaches the cold surface. The unit runs, the fan hums, and almost nothing condenses. The fix is the cleaning routine below, and it is the single most common cure in this whole report.
The float switch is lying. If the bucket is misaligned or the float arm sticks, the unit believes the tank is full and refuses to condense. Reseat the bucket, work the float gently by hand, and listen for the click.
The compressor is not engaging. Stand by the unit as it starts. You should hear the fan first, then a deeper hum and a slight vibration a moment later. Fan noise with no compressor hum, in a warm room with a clean filter and a low target setting, points at the overload, capacitor, or control board.
The refrigerant has leaked. The compressor hums, the coils stay room temperature, and the bucket stays dry. On a portable unit this is usually the end of the road economically; sealed-system work commonly costs more than the machine did, a math problem the repair-or-replace section below makes concrete.
Work the list top to bottom and stop at the first fix that restores a cold coil and a dripping tray.
Why is my dehumidifier freezing up
Frost on the coils is the machine telling you the cold side got colder than the air moving over it could support. Three triggers cover nearly every case.
Room temperature. This is the big one. In a space below roughly 60 to 65 F, a standard compressor unit’s coil surface can dip below freezing in normal operation. Light frost forms, airflow drops, the coil gets colder still, and the frost snowballs into a block of ice. If your unit lives in a chilly basement, garage, or crawl space, suspect temperature before any component.
Starved airflow. A dirty filter, dust-blanketed coil, or a unit shoved against a wall reduces the warm air washing over the cold coil, and the coil overshoots cold. The frost pattern often starts at one corner and spreads. The cure is the filter-and-coil clean plus a foot of clearance on the intake side.
A failing fan. If the fan bearing is dragging or the motor is weak, airflow falls even with a clean filter, and the same snowball starts. A fan that rattles, hesitates on startup, or spins noticeably slower than it used to is a repairable part, and on many units an affordable one.
The immediate first aid is always the same: switch the unit off, leave the fan running if the model allows fan-only mode, and let every trace of ice melt before restarting. Running a compressor against an iced coil strains it for no benefit. Then fix the trigger, not just the ice.
Why is my dehumidifier icing up
If the frost keeps returning after you have thawed the unit, cleaned the filter, and confirmed the room is warm, you have graduated from freezing up to chronically icing up, and the suspect list changes.
The auto defrost is not doing its job. Most modern units carry a defrost sensor on the coil that pauses the compressor and lets the fan clear light frost. If that sensor drifts or fails, frost accumulates every cycle until the coil is a solid block. The tell is a unit that ices even in a warm room with strong airflow. On some models the sensor is a cheap clip-on part; on others it is bundled into a board that costs real money.
A low refrigerant charge. Counterintuitively, a slightly leaked system runs the coil colder in patches, and a patchy, persistent ice pattern in a warm room is a classic signature. Confirming it requires gauges and a technician, and on a portable unit the visit often costs more than the fix is worth.
Short, cold nights. A unit in a space that drops below the design range overnight can begin icing at 3 a.m. and present you with the block at breakfast, even though the afternoon room feels warm. A cheap thermometer with a minimum-reading memory settles this in one night.
The honest decision point: recurring ice with a verified warm room, clean airflow, and a healthy fan means a sensor or sealed-system problem. Price the repair against the replace test below before authorizing anything, and if the space itself is simply cold, move the unit or buy a desiccant model rather than fighting the physics.
Why is my dehumidifier leaking
Water on the floor around a machine whose whole purpose is capturing water is almost always a routing problem, not a production problem. Four places account for nearly all of it.
The bucket is not seated. The drip tray above the bucket aims a stream at a target; a bucket a half inch out of square catches most of it and lets the rest run down the housing. Pull the bucket, wipe everything dry, reseat it firmly, and run the unit while you watch with a flashlight.
The bucket or tray is cracked. Hairline cracks hide well. Fill the bucket in a sink and set it on newspaper for ten minutes. Do the same visual pass on the drip tray edges, where brittle plastic cracks first with age.
The internal drain channel is clogged. Dust and biofilm build a soft dam in the channel between coil tray and bucket, and water finds the floor instead. A flush of warm water through the tray with the unit unplugged, plus a pipe cleaner through the channel, clears it.
The hose connection is bad. If the unit only leaks when hose-draining, the machine is innocent. Check the washer inside the hose fitting, confirm the threads went on straight, and follow the whole hose for a sag where water pools and backs up.
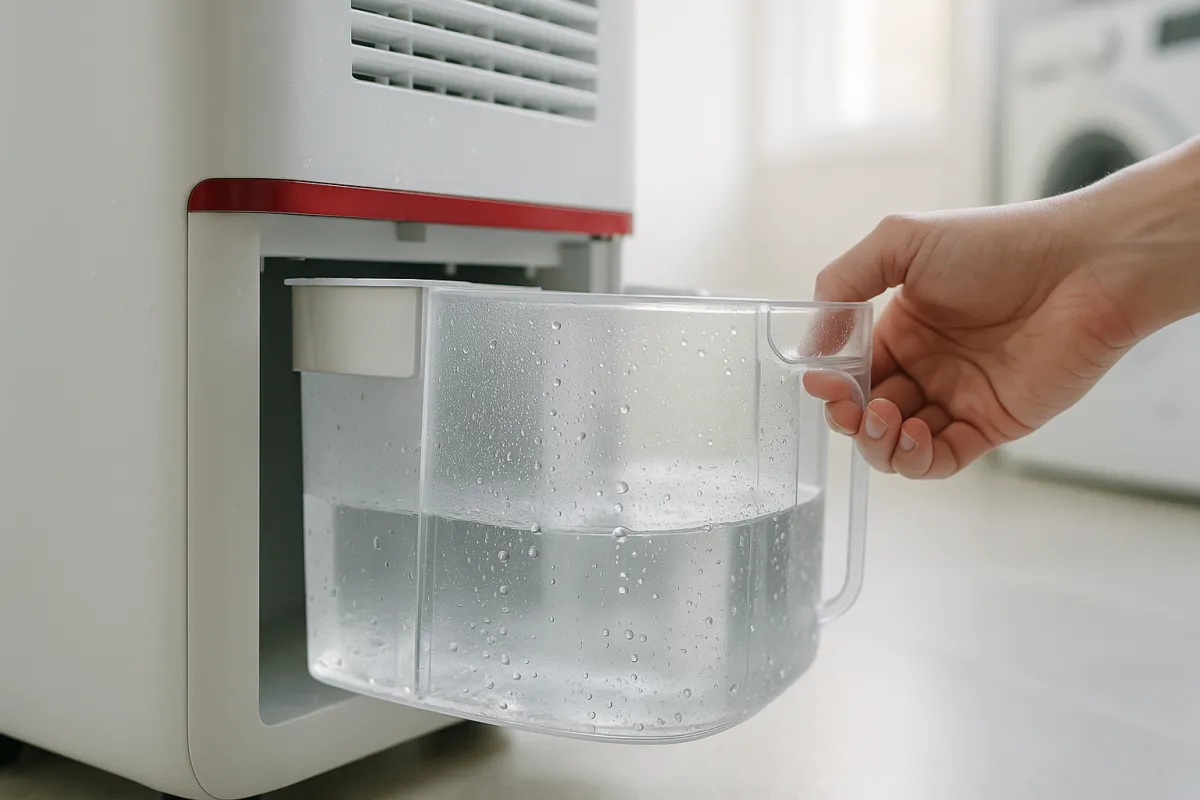
One caution worth stating plainly: water pooling around an electrical appliance deserves respect. Unplug the unit before you investigate, dry everything, and only then run your test with eyes on it.
Dehumidifier not draining to hose: the gravity checklist
Continuous drainage is the feature everyone wants and the one most often set up wrong. When a unit is not draining to hose, run this checklist in order, because each item is more common than the one after it.
The internal plug is still in. Many models ship with a rubber plug or cap seated inside the drain port, and the bucket keeps working until it is removed. It is the single most missed step in the manual. Check the port with a flashlight.
The hose runs uphill somewhere. Gravity drainage needs a continuous fall from port to outlet. A hose that dips to the floor and rises to a utility sink lip will drain until the low loop fills, then stop. Shorten the run, raise the unit on a sturdy platform, or lower the outlet.
The outlet is higher than the port. No length of hose fixes a drain that sits above the unit. That situation needs a model with an internal pump, or an external condensate pump between unit and drain.
A kink or a clog. Garden-hose-style runs kink at corners, and the port screen or hose mouth silts up with dust sludge over a season. Detach the hose, flush it, and clear the screen.
The wrong mode is selected. Some units require choosing continuous-drain mode in the settings before they bypass the bucket, and a power cut can reset it.
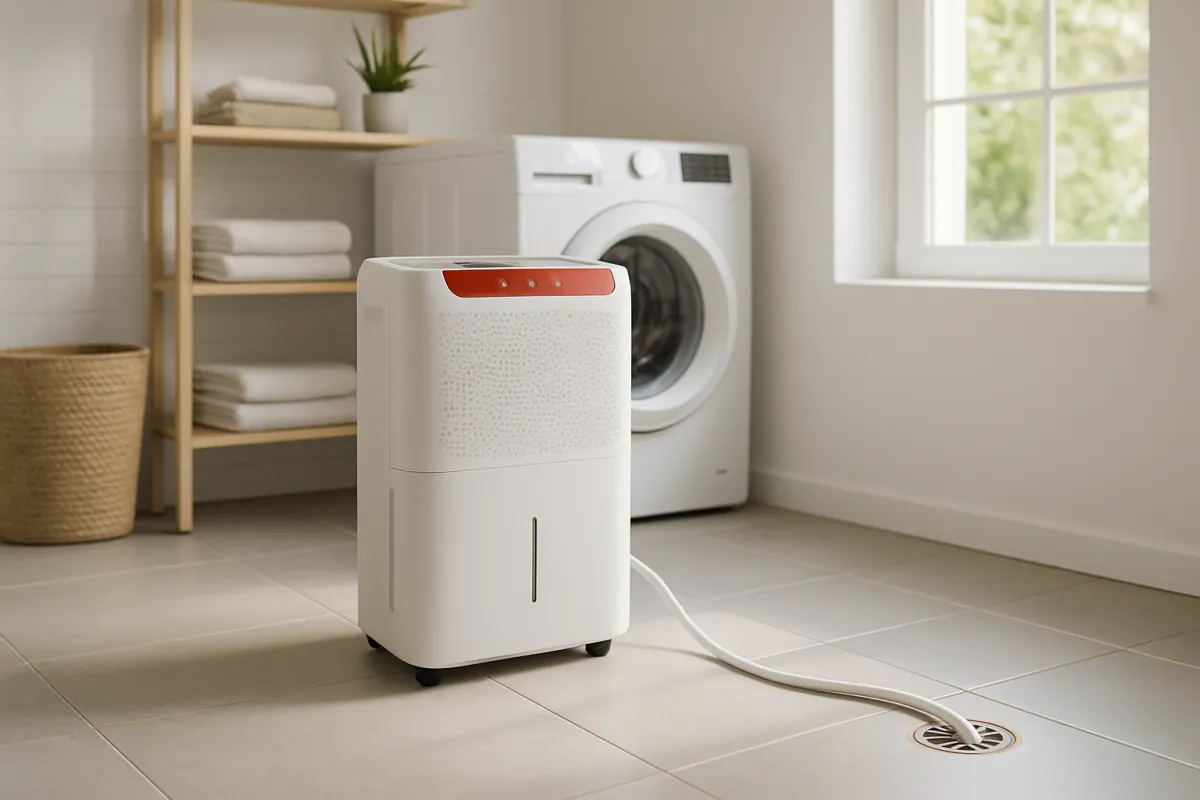
Set up right, hose draining is the most reliable mode a dehumidifier has, and it is the standard configuration for the sealed crawl space installs in our crawl space dehumidifier report, where nobody is walking down to empty a bucket.
Why is my dehumidifier blowing hot air
Here is the symptom that is usually not a symptom. A refrigerant dehumidifier reheats the air it dried before returning it to the room; the exhaust typically runs several degrees warmer than the intake, and in a small closed room the space itself creeps warmer over hours. Warm output plus a filling bucket is a machine working exactly as designed, and the mild warmth is even useful in a chilly basement.
It becomes a real symptom in two situations. The first is hot air with an empty bucket: the compressor side is making heat but the cold side is doing no work, which sends you back to the airflow checks and, if those pass, toward a sealed-system fault. A unit with a blocked filter also runs hotter than normal because the same heat leaves in less air, so the cleaning routine below often moderates an exhaust that has crept from warm to hot.
The second is anything that smells or trips. A scorched or electrical odor, housing hot to the touch near the plug, a warm wall outlet, or a breaker that trips when the compressor starts are electrical warnings, not quirks. Stop using the unit, and have it inspected or retire it. A dehumidifier draws real current for hours unattended, and that is precisely the appliance category where an electrical fault deserves zero patience.
If the concern is simply that the warmth is making a living space uncomfortable, the fix is placement: move the unit toward the damp source, crack the door, and let the humidistat cycle it rather than running it continuously.
The unit runs but the room stays damp
A filling bucket and a stubborn hygrometer reading mean the machine is healthy and the match is wrong. Three mismatches cover it.
Undersized capacity. A small 20-pint unit in a large, wet basement can run around the clock and lose. Compare your square footage and dampness against the capacity ladder in our sizing and cost report; moving up a size class matters more than any setting.
Fresh moisture is winning. Open windows in humid weather, a dryer venting indoors, an unsealed crawl space, or ground water wicking through a basement wall all resupply moisture as fast as the unit removes it. The machine is bailing a boat with a leak; our companion work on reducing humidity at the source covers the caulk-and-ventilation side of the fight.
Placement and circulation. A unit jammed in a corner dries its corner. Centralize it, give the intake a foot of clearance, and close the room’s windows and doors so it is not trying to dry the outdoors.
The test that settles it: close the room, run the unit on its lowest target overnight, and log the hygrometer before and after. A healthy unit that cannot move a closed room more than a few points is undersized for that space’s moisture load, and the answer is capacity, not repair.
It will not turn on at all
Dead silence gets a short, strict sequence. Confirm the outlet first with a lamp, since basement circuits and GFCI outlets trip quietly, and a tripped GFCI upstream can kill a whole run of outlets. Reset any GFCI, check the breaker panel, and try a different circuit before blaming the machine.
Next, the float switch, because a full-bucket lockout is indistinguishable from death on many models: empty the bucket, reseat it squarely, and jiggle the float arm gently. Then the small details that catch everyone: a timer or delay function engaged, a child lock on the panel, or a power cut that reset the unit into standby.
If the panel lights but the compressor never starts, you are into component territory: the compressor’s start capacitor and overload protector are the usual suspects, and both are inexpensive parts on most units, though the labor of getting to them varies. If nothing lights on a known-good outlet, the power board or cord has failed. Price either repair against the replace test below before committing; on an older unit, a board often decides the question by itself.
One practical note: after any power interruption, most compressors need a few minutes before restarting, and some units enforce that delay silently. Give a freshly plugged-in machine five minutes before declaring it dead.
It keeps shutting off after a few minutes
Short cycling has two families of cause, and the bucket tells you which one you are in.
If the unit stops with a full-bucket light and an empty bucket, the float mechanism is the problem: a sticking arm, a misaligned bucket, or a splash of condensate fooling the sensor. Clean and reseat, and work the float by hand until it moves freely.
If the unit stops without complaint and restarts later, it may simply be satisfied: a humidistat near its target cycles the compressor in short runs, which looks alarming and is normal. Set the target 10 points lower for an hour and see whether the runs lengthen. If they do, the machine is fine.
The worrying version is thermal: a compressor that overheats and trips its overload will run a few minutes, die, and refuse to restart until it cools. Chronic overheating traces back to blocked airflow, coil dust, a failing fan, or a weakening compressor. Clean everything first, since airflow is the fixable cause, and treat a unit that still trips hot as a candidate for the replacement math rather than a candidate for heroics.
Noises: rattles, gurgles, and clicks
Most dehumidifier sounds are innocent, and knowing which is which saves an unnecessary breakdown. A gurgle or soft hiss after the compressor stops is refrigerant equalizing, completely normal. A click at start and stop is the relay doing its job. A steady low hum with mild vibration is the compressor working; if the vibration walks the unit or buzzes the floor, level the feet and set it on a rubber mat.
The sounds that mean something: a rattle that tracks fan speed is usually a loose grille, a dust-caked blade, or debris in the fan housing, all reachable behind the filter panel on most units. A grinding or squealing that rises with the fan is a bearing on its way out, a repairable part worth fixing on a young unit. A loud mechanical knock from the compressor at startup, or a buzz-click-buzz pattern where the compressor tries and fails to start, points at the start capacitor or a compressor reaching the end.
New noises after a unit has been tipped or transported deserve one specific caution: moving a compressor appliance on its side can shift the oil, and running it immediately can hurt it. Stand it upright for several hours before the next start, a rule this category shares with refrigerators.
Where the faults usually trace back
Pull the whole symptom list together and a pattern emerges: the glamorous failures are rare and the boring ones are everywhere. The split below is illustrative, drawn from the shape of complaints this category generates rather than any formal survey, but it matches what a decade of bench time teaches.
What is actually wrong, when a dehumidifier "stops working"
Illustrative share of complaints by root cause. Bars scale to the largest slice.
Four in five complaints trace to airflow, temperature, or drainage, all owner-fixable. Only the refrigerant and compressor slice routinely ends a machine.
The practical takeaway sits right in the chart: before any repair call, you can personally rule out roughly 80 percent of the causes with a hygrometer, a filter wash, and a hard look at the hose run. The repair trade knows this too, which is why the first question a good technician asks is when you last cleaned the filter.
The 15 minute clean that fixes most of it
Since airflow tops the fault chart, the highest-value repair in this category is a cleaning routine. Unplug the unit first, every time.
Pull the filter and wash it in warm water with a drop of dish soap, then let it dry completely before it goes back; a damp filter in a dust stream mats instantly. While it dries, shine a light at the evaporator coil behind the filter opening. A gray felt on the fins is your airflow thief. Vacuum it gently with a brush attachment, stroking along the fins, never across, because bent fins block air permanently.

Wipe the fan blades if the housing gives access behind the filter panel, rinse the bucket with a splash of white vinegar to knock back the biofilm, and flush the drain channel and port screen with warm water. Set the unit back with a foot of clearance on the intake side, plug it in, and give it an hour in a closed room against a hygrometer.
Do this monthly in the humid season and twice more in the shoulder months. It is fifteen minutes that prevents the iced coils, the hot exhaust, the short cycling, and the slow-death dust suffocation that between them fill most of this report. Our broader routine in how to maintain your appliances puts this on the same calendar as the rest of the house.
Repair or replace: the honest math
When a fault survives the free fixes, a quote decides the machine’s fate, and the framework is the same cost-per-use discipline we apply to every appliance on the bench. Two commonly cited rules do most of the work. First, skip any repair costing more than about half the price of a comparable new unit. Second, weight the decision by remaining life: a typical portable compressor unit serves somewhere around 8 to 12 years, so a repair at year three buys far more future than the same repair at year eight.
Run an illustrative case. A mid-size unit cost $275 new; at year three the fan motor fails and the quote is $140. That is 51 percent of replacement, right at the line, but the unit has most of a decade left, electricity dominates its lifetime cost anyway, and the fan is a wear part unrelated to the compressor’s health. Repair is defensible. The same $140 quote at year eight, or any sealed-system quote at any age, tips the other way.
Five years of one dehumidifier, repaired at year three
Illustrative split of total spend: $275 unit, about $500 of seasonal electricity, one $140 repair.
Electricity, not hardware, dominates the five-year bill, which is why a repair that keeps an efficient unit running often beats replacing it with a cheaper, thirstier one.
The chart carries the quiet second lesson: because power is the biggest slice, efficiency belongs in the replace decision too. Replacing a failed old unit with a more efficient one recovers part of the purchase price in the power bill, while repairing an inefficient veteran locks in its appetite. Feed your own unit price, rate, and hours into our cost-per-use calculator and the trade-off turns into a number.
When to replace a dehumidifier outright
Some verdicts should skip the repair quote entirely. A confirmed refrigerant leak or dead compressor on a portable unit is the clearest: sealed-system labor commonly exceeds the value of the whole machine, and a leak that is patched can leak again. A unit that trips breakers, smells scorched, or shows heat damage around the cord or plug is an electrical retirement, not a repair candidate. And a unit past roughly year eight with any three-figure quote is spending tomorrow’s replacement money on yesterday’s machine.
Age brings a subtler argument too. Efficiency standards and designs improve, and an old workhorse often removes less water per kilowatt-hour than a current mid-range unit, so the veteran costs more every month it survives. If the fault chart above ends at the sealed system, or the quote fails the half-price test, the productive next step is our breakdown of how to choose a dehumidifier, which covers capacity, efficiency, drainage features, and the build details that decide whether the next unit reaches year twelve.
When you do replace, buy the features that killed the last one: a unit with a better defrost design for a cool space, a built-in pump for a drain that sits high, a washable filter you will actually wash. The failure mode of the old machine is the most honest shopping list you will ever get.
Crawl space units: same faults, harder access
Everything above applies under the house, with the volume turned up. A crawl space unit runs long hours in dusty, sometimes cool air, drains by hose or pump because nobody is emptying a bucket down there, and fails in the dark where nobody notices for weeks. The result: the same fault list, but found later and dirtier.
Three habits keep a crawl space machine honest. Put a remote hygrometer upstairs so the space’s humidity is on a screen you actually look at; a stuck reading is your early warning. Check the drain run each season, since a hose to a low corner or a condensate pump line is the most likely failure point, and a failed drain in a crawl space means the unit waters the ground you paid to dry. And clean the filter more often than the living-space schedule, because crawl space air carries more dust than conditioned air ever will.
Icing deserves special mention down there: crawl spaces run cooler than living space, and a compressor unit that ices every spring morning is telling you it wants to be a desiccant model or a unit specifically rated for low temperatures. The full picture, sizing, sealing, and setup included, lives in our crawl space dehumidifier report.
The maintenance routine that prevents round two
The fixes in this report share a common ancestor: dust, biofilm, and neglect, compounding quietly through a humid season. The prevention schedule is short enough to actually keep.
Monthly, in season: wash the filter, glance at the coil, rinse the bucket with a vinegar splash, and confirm the drain still flows by watching it for a minute.
Twice a season: vacuum the coil fins and the fan, check the hose run end to end for sags and kinks, and clear the port screen.
Yearly, at season’s start: run the unit an hour against a hygrometer in a closed room and note how many points it moves. That one number, logged somewhere, is your machine’s health record; a unit that moved a closed room 8 points last June and 3 points this June is asking for the coil clean, and if clean coils do not restore it, you have caught a sealed-system decline a season early.
Always: a foot of clearance at the intake, a level floor, and an upright posture during any move, with a rest before restart. None of this is glamorous, and all of it is cheaper than the repair visit it replaces. The same logic runs through our whole appliance maintenance manual: machines rarely die suddenly; they suffocate slowly, and the owner holds the airway.
What troubleshooting costs you in electricity
A brief word on the meter while you diagnose, because a faulty dehumidifier can waste real money in the weeks before you notice. A mid-size unit averaging 500 watts through 12 running hours a day uses about 6 kilowatt-hours daily, roughly $0.96 at an illustrative $0.16 per kilowatt-hour, near $29 a month while the humid season runs. That is the healthy baseline.
The failure modes bend that number in opposite directions. An iced or airflow-starved unit runs longer hours for less water, so the monthly cost climbs while the room stays damp: the worst of both. A short-cycling unit spends its energy on compressor starts, the most wearing moments of its life. And an undersized unit running 24 hours instead of 12 quietly doubles the baseline. So the hygrometer test is also a financial instrument: a unit that moves the room efficiently is earning its bill, and one that cannot is billing you for failure.
Run your own wattage, hours, and rate through the cost-per-use calculator to set your baseline, then compare against a month of actual behavior. A dehumidifier’s running cost is the largest line in its life, as the five-year chart above showed, which makes wasted running hours the most expensive symptom on this whole list.
A worked example: one basement unit, two symptoms
Here is the whole method compressed into one plausible afternoon. A three-year-old, 35-pint unit in a 900 square foot basement presents two complaints: the bucket has been filling slowly for weeks, and this morning the coils wore a visible frost jacket.
The five checks run first. The hygrometer reads 62 percent against a 45 percent target, so the machine genuinely has work it is failing to do. The basement thermometer reads 66 F, warm enough to clear the temperature suspect. The filter, held to the light, is a gray blackout curtain: the airflow suspect just confessed. The bucket seats fine; the unit is on bucket mode, so drainage is not in play.
First aid follows: unit off, ice melted fully into the bucket, filter washed and dried, coil fins vacuumed along their length, fan blades wiped, and the unit repositioned a foot off the wall. An hour later, in the closed room, the hygrometer has moved 4 points and the coil is cold but frost-free. By the next morning the basement reads 48 percent and the exhaust has settled from hot back to merely warm.
Total cost: zero dollars and under an hour of labor, against a symptom pair, no water plus ice, that reads like a dying machine. That outcome is not luck; it is the fault chart doing its job, because the two most common causes were checked before the two most expensive ones were even considered. Had the frost returned on clean coils in that warm room, the next stop would have been the defrost sensor, and the quote would have met the half-price test with the unit’s seven remaining expected years on the scale.
The bottom line
Why is my dehumidifier not working almost always has a cheaper answer than it first appears. Check the setting against a real hygrometer, the room temperature against the design range, the filter and coils against the light, the bucket against its float switch, and the hose against gravity, in that order. Those five checks resolve the large majority of empty buckets, iced coils, floor puddles, and stubborn hoses without a tool. Warm exhaust with a filling bucket is not a symptom at all.
When the free fixes fail, let the math rule: repairs above roughly half the price of a comparable new unit, sealed-system faults on portable machines, and three-figure quotes past year eight all point toward replacement, and the failure that killed the old unit writes the shopping list for the next one. Size the replacement honestly with our sizing report, choose it carefully with the buying breakdown, and then spend fifteen minutes a month making sure this report never applies to it.
This breakdown is for general information about appliance troubleshooting and is not professional repair, electrical, or safety advice. Every dollar figure, lifespan, and percentage in it is illustrative rather than a quote or a measured statistic, and your unit, rates, and repair prices will differ. Unplug any appliance before opening or cleaning it, treat water near electricity with caution, and hand anything involving refrigerant, wiring, or a scorched smell to a qualified technician. When a manufacturer’s manual disagrees with a general rule here, the manual wins.
Frequently asked questions
Why is my dehumidifier not collecting water?
The most common reasons, roughly in order: the room is drier than the setting so the unit has nothing to grab, the room is too cold for the coils to condense anything, the filter or coils are clogged so air cannot reach the cold surface, the bucket float switch thinks the tank is full, or the unit has lost refrigerant or its compressor is not engaging. Check the cheap causes first with a hygrometer and a filter inspection. If the compressor hums but the coils never get cold in a warm room with a clean filter, the sealed system is the likely culprit, and that usually means replacement rather than repair on a portable unit.
Why does my dehumidifier keep freezing up?
Frost forms when the cold coil gets too cold for the air moving over it, and the usual triggers are a room below roughly 60 to 65 F for a standard compressor unit, a dirty filter or blocked coil starving the airflow, or a failing fan. Unplug the unit, let the ice melt fully, clean the filter, and confirm the fan spins freely. If it still ices in a warm room with clean airflow, the auto defrost sensor or the refrigerant charge may be at fault. In genuinely cold spaces, a desiccant dehumidifier is the right tool because it does not rely on a cold coil at all.
Why is my dehumidifier leaking water on the floor?
Leaks usually come from one of four places: a bucket that is not seated squarely under the drip tray, a crack in the bucket or tray, a clogged or misrouted internal drain channel, or a hose connection that is loose or threaded on crooked. Pull the bucket, inspect it in good light with water in it, and watch where the first drip appears with the unit running. A unit that only leaks when the hose is attached almost always has a hose problem, not a machine problem, typically a bad washer, cross threading, or a low spot in the hose run.
Why is my dehumidifier not draining through the hose?
Gravity drainage needs a continuous downhill run, and most failures are exactly that simple: the hose rises somewhere along its length, the outlet sits higher than the drain port, or a kink or clog blocks flow. Some units also keep using the bucket until a plug or cap inside the drain port is removed, which is an easy step to miss. Check the manual for that plug, keep the hose short and falling the whole way, and clean the port screen. If the drain sits above the unit, gravity cannot do it, and you need a model with a built-in pump or an external condensate pump.
Why is my dehumidifier blowing hot air?
Warm exhaust is normal. A refrigerant dehumidifier pulls in room air, chills it to wring out moisture, then reheats it over the warm coil before sending it back out, so the outlet typically runs several degrees above room temperature. It is only a symptom when the air is hot but the machine is collecting little or no water, which points to airflow starvation or a sealed-system fault, or when the unit smells scorched or trips a breaker, which is an electrical problem worth taking seriously. Hot air plus a filling bucket is a machine doing its job.
Why does my dehumidifier run but not lower the humidity?
If the bucket is filling, the machine is working, and the problem is the match between machine and room. An undersized unit in a large or very damp space can run all day and lose the race, especially with fresh moist air leaking in from outside or a crawl space below. Check the reading with a separate hygrometer rather than the unit's own display, close windows, and compare the room's square footage and dampness against the capacity you bought. If the bucket is not filling at all, work through the not-collecting-water checks instead: room temperature, filter, coils, and the compressor.
Is a dehumidifier worth repairing, or should I just replace it?
For most portable units, the honest math favors replacement once the fault is in the sealed system. A commonly cited rule is to skip a repair that costs more than about half the price of a comparable new unit, and to lean toward replacement once the machine is past the middle of its typical 8 to 12 year service life. Cheap faults, a float switch, a fan, a clogged drain, are worth fixing at any age. An illustrative $140 quote on a unit that costs $275 new sits right at the line, and age becomes the tiebreaker.
How long should a dehumidifier last?
A typical portable compressor dehumidifier lasts somewhere around 8 to 12 years with basic care, illustratively, and hard-run basement units often sit at the shorter end because they work long seasons in dusty air. The two habits that stretch the lifespan are cleaning the filter monthly during the humid season, so the coils never starve for air, and giving the unit space from the wall so it can breathe. Frequent short cycling, chronic icing, and running in rooms colder than the design range all shorten the compressor's life.