What's on this page
- Why kettles scale up, and why it matters
- Signs your kettle needs descaling
- Before you start: what you need
- Step 1: Empty and rinse the kettle
- Step 2: Mix your descaling solution
- Step 3: Boil the solution and switch off
- Step 4: Let it soak for thirty to sixty minutes
- Step 5: Pour out and scrub the stubborn spots
- Step 6: Clean the spout and the limescale filter
- Step 7: Rinse, boil, and discard fresh water twice
- Step 8: Dry the kettle and set a descaling schedule
- Descaling a stovetop kettle
- Descaling with a descaler, citric acid, or lemon juice
- A worked example: rescuing a hard-water kettle
- How often to descale a kettle
- How to slow limescale between descales
- Common mistakes when descaling a kettle
- Troubleshooting: harder kettle problems
- Your kettle descaling checklist
- The bottom line
Short answer: How to descale an electric kettle, in short: fill it halfway with equal parts white vinegar and water, boil, and leave it to soak for thirty to sixty minutes before pouring out the dissolved scale. Citric acid does the same job with less smell. Boil and discard at least two rounds of fresh water afterward. Repeat about monthly with hard water and daily boils, toward quarterly with softer water.
Learning how to descale an electric kettle, or a stovetop one, is the fix for slow, noisy boils, chalky white flakes floating in your tea, and the crusted element you can see through the lid, and the whole job is an hour of mostly hands-off soaking with vinegar or citric acid you may already own. The kettle is the hardest-working small appliance in most kitchens and the most predictably neglected, because scale creeps up quietly: every boil evaporates a little water and leaves its dissolved minerals behind, and the layer thickens daily until the kettle is heating your water through a crust of rock. By the time flakes appear in a cup, the element has been running slow and hot for weeks.
These notes give you a clear, step-by-step method for descaling a kettle: empty and rinse, mix a vinegar or citric acid solution, boil it, soak, scrub the stragglers, clean the spout filter, and rinse with boiled-and-discarded fresh water until every trace of the descaler is gone. We also cover stovetop kettles, the alternatives when vinegar’s smell is unwelcome, how often to repeat the job for your water, and the habits that slow the scale down. The kettle shares its chemistry with the machine beside it, so see the companion walkthrough on how to clean a coffee maker, and the same mineral story at house scale in our notes on flushing a water heater. Feed your boils per day and water hardness into the descaling-schedule planner as you read, and it will pin the interval to your kitchen.
Key takeaways
- Limescale is the mineral residue hard water leaves behind as it boils, and it insulates the element, so a scaled kettle boils slower, louder, and more expensively every day.
- The core method is a half-kettle of equal parts white vinegar and water, boiled and left to soak for thirty to sixty minutes, then poured out with the dissolved scale.
- Citric acid does the same job with almost no lingering smell, and a commercial descaler per its label is the safe route when a manual objects to vinegar.
- The rinse is not optional: boil and discard at least two rounds of fresh water afterward, until the water smells and tastes like nothing.
- Descale about monthly in a hard-water home with daily boils, stretching toward quarterly with softer water, and slow the buildup by filling from a filter and emptying the kettle after use.
Why kettles scale up, and why it matters
Before the fix, the mechanism, because it explains every choice in the method. Hard water carries dissolved calcium and magnesium minerals, and boiling is exactly the process that forces them out of solution: heat drives the minerals to precipitate, and evaporation concentrates what remains, so every boil deposits a fine mineral film on the hottest surfaces, the exposed element or heated base plate, and on the walls at the waterline. The film builds into the familiar crust, white to tan to brown, hard as stone because it essentially is stone. Nothing about it is dirt; a kettle used only for clean water still scales, which is why people are surprised to find their cleanest appliance coated inside.
The crust matters for four practical reasons. It insulates the element, so boils take longer and draw more electricity for the same cup, an effect that compounds across a multi-boil day. It flakes, which is where the white flecks in your tea and the papery film on its surface come from. It makes the kettle loud, because water boiling against a scaled surface rumbles and knocks harder than against clean metal. And it shortens the kettle’s life, since a blanketed element runs hotter than its design intends and a thick layer can trip the thermal cutoff before a true boil. The health question gets a straight answer later in these notes; the short version is that the scale is a taste, speed, and cost problem, not a safety one, and an hour with a mild acid reverses all of it.
Signs your kettle needs descaling
The kettle announces scale in stages, and catching the early stage keeps the job trivial. First comes the visible film: open the lid of a dry kettle in good light and a healthy interior looks uniformly metallic or clean, while a scaling one shows a chalky bloom on the element or base and a tide line at the usual fill level. Next come the flecks, mineral flakes that break loose and end up floating in a finished cup or caught on the spout filter, which is usually the sign that finally sends people looking for a fix. A crunchy or gritty sound when you swirl the last of the water in a kettle is the same stage heard rather than seen.
The performance signs follow. Boils take noticeably longer than they used to, the boil gets louder and harsher, with knocking or a deep rumble replacing the smooth building hiss, and in a badly scaled kettle the automatic switch can click off before the water has truly boiled, because the cutoff senses the overheating element rather than the water. Any of these means the layer is established and thickening. The honest rule of thumb: if you can see crust or find flakes, descale this week; if boils have slowed or the kettle has gotten loud, descale today, because from here every day adds mineral faster, and a thin layer soaks off in half an hour while a thick one needs repeat treatments.
Before you start: what you need
This is one of the easiest jobs in the kitchen, beginner difficulty with no tools, and the only skill involved is waiting. Plan about an hour end to end, of which the hands-on share is maybe ten minutes: a few minutes of setup, a soak you ignore, a quick scrub and rinse, and a couple of rinse boils. Everything happens with the kettle on its base or the stovetop as normal; there is nothing to disassemble beyond a removable spout filter, and nothing sharp or hazardous beyond hot water treated with ordinary respect.
The short kit list, most of which is already in the kitchen:
- White distilled vinegar, the classic descaler, or food-grade citric acid powder, the low-odor alternative that many people prefer once they try it.
- A commercial descaler, optional, for kettles whose manuals specify one; follow its label.
- A soft sponge or cloth, for the post-soak wipe. Nothing abrasive inside the chamber.
- A little baking soda, optional, for rubbing stubborn patches after the acid has done its work.
- Fresh water, for the solution and the rinse boils; filtered if you have it.
- The kettle’s manual, one minute of checking, because a minority of makers restrict vinegar on certain finishes and seals.
That last point is the one genuine pre-check. Most stainless and glass kettles are entirely happy with diluted vinegar, but if your manual names its own descaling product or warns off acids, follow it; citric acid or the named product almost always satisfies both the manual and the chemistry. Before the first step, it is worth seeing where the hour actually goes, because the shape of the job is what makes it easy.
Where the descale hour goes
An illustrative split of a typical one-hour kettle descale by stage. Segments sum to 100 percent. A heavily scaled kettle stretches the soak, not the effort.
More than half the job is the soak, which asks nothing of you, and the rinse boils run themselves. The hands-on share is the thin middle slice, which is why this is an easy job to actually keep doing. The split is illustrative.
With the kit assembled and the shape of the hour clear, the job starts at the sink.
Step 1: Empty and rinse the kettle
Start by pouring out whatever water is standing in the kettle, and give the inside a quick rinse and swirl with fresh water to flush any loose flakes and dust. Standing water is part of how the kettle got here, minerals concentrate as old water evaporates between uses, so the descale begins from empty. If your kettle has a removable lid or a wide mouth, look inside in good light and take stock of what you are treating: a light chalky bloom on the element or base plate needs only the standard soak, while a built-up crust with real thickness, gray or tan and clearly layered, should get the long end of every soak time in the steps ahead and possibly a second round.
Two small things while the kettle is empty. First, check whether the spout filter, the little mesh screen most electric kettles carry behind the spout, clips out; most do, and it will get its own cleaning in Step 6, so note how it releases. Second, wipe the outside and the base contact area dry if you have splashed, and keep the electrical base of an electric kettle dry throughout the job; all the liquid work happens in the chamber, and the base never gets submerged or rinsed. Watch out for the impulse to attack visible crust with a scraper or knife right now: bare force scratches finishes and achieves little, because the acid soak ahead will do in thirty quiet minutes what steel cannot do safely.
Step 2: Mix your descaling solution
Now mix the working solution directly in the kettle. The standard is equal parts white vinegar and fresh water, filled to about the halfway mark of the kettle, comfortably covering the element or base plate and the visible tide line but leaving headroom, because a boiling vinegar solution froths a little more than plain water and you do not want it spitting from the spout. For a typical kettle, that is around two cups of vinegar and two of water; precision does not matter, the one-to-one ratio does. The chemistry is simple: limescale is an alkaline carbonate, vinegar is a mild acetic acid, and contact dissolves the scale into solution, faster when hot, which the next step arranges.
If you are using citric acid instead, dissolve one to two tablespoons of the powder in the same half-kettle of water; it descales just as well, smells like almost nothing, and rinses out faster, which is why it earns a permanent place in many hard-water kitchens. A commercial descaler follows its own label quantities. Whichever you choose, use one product only. Watch out for the two mixing mistakes that matter: never add bleach or any other cleaner to the acid, since mixes involving bleach release harmful gases, and never use undiluted vinegar on the theory that stronger is faster, because the fumes on boiling are unpleasant, the smell lingers longer, and the dilute solution dissolves scale perfectly well given the soak time it is about to get.
Step 3: Boil the solution and switch off
With the solution mixed, put the kettle on its base or burner and bring it to a boil as normal, then let it click off, or take a stovetop kettle off the heat as soon as it whistles. Heat is the accelerant here: the acid works at room temperature, but a hot solution dissolves scale several times faster, so one boil turns a slow overnight job into a half-hour one. As it heats, expect some theater: fizzing and soft crackling as the acid meets the carbonate and releases harmless carbon dioxide, a stronger rumble than usual where the water boils against crusted metal, and a sharp vinegar smell riding the steam. Crack a window or run the hood if the smell bothers you; with a one-to-one solution it is noticeable rather than overpowering.
Two cautions keep this step tidy. Do not walk away from a stovetop kettle during this boil, and do not re-boil the solution repeatedly; one boil is the design, and the soak does the rest. And resist the urge to boil a brim-full kettle of solution: the half-fill from Step 2 exists because froth needs headroom, and a spitting spout is how vinegar ends up on the counter and the base. If your kettle’s tide line of scale sits above the halfway mark, you will treat the upper walls in Step 5 with the poured-out solution and a sponge rather than by overfilling now. When the boil finishes, leave the kettle exactly where it is, full, and start the clock on the soak.
Step 4: Let it soak for thirty to sixty minutes
This is the step that does the work, and it asks nothing of you. Leave the hot solution standing in the kettle for thirty minutes as a baseline, and a full hour for a kettle with visible layered crust. The acid keeps dissolving scale the whole time, working fastest while hot, and the fizzing you may still hear early in the soak is the sound of the layer breaking down. Somewhere in this window most of the visible scale simply vanishes into solution: what looked like a permanent geological feature of your kettle lifts from the element and the walls without a single stroke of scrubbing. Patience here is what makes the next step trivial, and shorting the soak is what makes people conclude the method failed.
A few useful things fill the wait. Unclip the spout filter now if it is removable and drop it into a mug topped up with solution poured from the kettle, giving it its own soak ahead of Step 6. Check the kettle once mid-soak: swirl it gently to move the solution across the tide line, and if the liquid has gone cloudy and gray, that is dissolved mineral and a sign of progress, not a problem. For a heavily scaled kettle where crust is still clearly visible at the hour mark, pour off, mix a fresh half-kettle of solution, boil, and soak again; a second fresh round beats one long exhausted one, because the acid depletes as it works. Watch out only for forgetting the kettle entirely: an overnight vinegar soak will not hurt most interiors, but it lengthens the rinse and gains little over an hour.
Step 5: Pour out and scrub the stubborn spots
Pour the spent solution down the sink, where it does no harm, and look inside: the transformation is usually most of the job done, with bright metal where the crust was and at most a few residual patches at the tide line, on element mounts, or in corners the solution reached only thinly. Those patches have been chemically softened even where they have not dissolved, so they now respond to gentle mechanics. Rub them with a soft sponge or cloth, and for anything that resists, dip the sponge in a little of the reserved solution or sprinkle a pinch of baking soda on it and rub; the mild grit finishes what the acid started. The upper walls above your fill line clean the same way, wiped with solution on the sponge.
Keep the mechanics gentle and the tools soft. Watch out for wire wool, scouring pads, knives, and anything else abrasive inside the chamber: they scratch stainless, cloud glass, and damage the coating on coated bases, and a scratched interior scales faster next time because deposits key into the roughness. The element and base plate take the same soft-sponge treatment as the walls; if a patch on the element itself will not lift after a second acid round, leave it, because a trace of residual mineral is cosmetic and will surrender to the next scheduled descale. Give the whole interior a rinse under the tap to flush the loosened debris, and the chamber is clean; two small jobs remain before the rinse boils.
Step 6: Clean the spout and the limescale filter
The spout filter is the small mesh screen behind the spout of most electric kettles, and it exists precisely because of this job: it catches scale flakes on their way to your cup, which means it silts up with mineral before almost any other part. If it clips out and has been soaking in a mug of solution since Step 4, it now needs only a rub between finger and thumb under running water, with an old toothbrush through the mesh if the buildup was heavy, and it comes back white and free-flowing. A filter that does not remove cleans in place: tip the kettle and work the brush or sponge over the mesh through the spout opening, then rinse through.
Give the spout itself and the lid the same attention, because scale collects wherever water lingers: around the spout opening, under the lid’s rim, and on a stovetop kettle’s whistle cap, which unscrews or unclips on most designs and appreciates a few minutes in the leftover solution. Wipe the exterior with a damp cloth while you are here, nothing stronger, and dry the outside, keeping every drop away from an electric kettle’s base contacts. Watch out for reassembling the filter damp with debris still in the mesh: a half-cleaned filter sheds its silt into the first boil, which is the flake-in-the-tea problem the filter was meant to prevent. Thirty extra seconds under the tap prevents it, and with the filter clipped home, the kettle is ready for its rinse.
Step 7: Rinse, boil, and discard fresh water twice
The descaling is done; now remove every trace of the descaler, because the most common complaint after this job is tea that tastes faintly of vinegar, and it is entirely preventable. Rinse the chamber a couple of times with fresh tap water, swirling and dumping, then fill to the halfway mark with fresh water, boil, and pour the boiled water away. That first rinse boil pulls the residual acid out of every crevice the sponge could not reach, including under the element mounts and inside the spout. Refill, boil, and discard a second time, then sniff the empty kettle and, if in doubt, taste a sip of a third boil’s water: it should smell and taste like nothing at all.
Vinegar usually needs the full two rounds and sometimes a third; citric acid typically rinses clean in one or two, and a commercial descaler follows its label, which usually says the same. Watch out for the false economy of skipping straight to a real cup of tea after one quick swirl: acid hides in the filter mesh and the spout, and one tainted pot undoes the goodwill of the whole job. The boiled rinse water does not have to be wasted, it will happily water plants once cooled. When the water passes the smell-and-taste test, the kettle is done: cleaner, quieter, faster to boil, and cheaper to run than it was an hour ago, and the only remaining step is deciding when you will do this again.
Step 8: Dry the kettle and set a descaling schedule
Finish the physical job by leaving the kettle empty with the lid open for a few minutes so the interior dries, wiping the exterior and base area dry, and returning it to service. Then spend the two minutes that determine whether you are ever back here doing archaeology: set the schedule. Scale rebuilds at a rate set by your water hardness and your boil count, so the right interval is personal. A hard-water home with a many-boil tea habit sits near a monthly descale, moderate water stretches to about two months, and genuinely soft water may need only a quarterly once-over. The signs outrank the calendar in both directions: visible bloom or flakes mean descale now, and a spotless interior on the scheduled day means your interval can stretch.

Make it automatic rather than remembered. Put a recurring reminder in your phone at the interval that fits, or anchor the kettle to a chore you already do on rhythm, descaling alongside the monthly coffee maker clean is a natural pairing since the same solution mixes for both. Feed your boils per day and water hardness into the descaling-schedule planner for a starting interval tuned to your kitchen rather than a guess. The point of the schedule is economic: a thin monthly film dissolves in a thirty-minute soak with no scrubbing, while a year’s crust needs double treatments and still leaves shadows. Descaling on rhythm converts this from a rescue job into a trivial one.
Descaling a stovetop kettle
A stovetop kettle descales with exactly the same chemistry, and the differences are worth two minutes because they are all practical. The method maps directly: half-fill with one-to-one vinegar and water or a citric solution, bring to the boil on the burner, move it off the heat, soak thirty to sixty minutes, pour out, soft-sponge the stragglers, and do two boil-and-discard rinse rounds. The heat source changes the cautions. Stay in the kitchen for the descale boil, because a stovetop kettle has no automatic cutoff and a forgotten one will boil dry, which is bad for the kettle at any time and worse mid-descale. Lift the whistle cap or leave the spout open while boiling the solution so froth vents freely.
The stovetop design also moves where the scale sits. With no exposed electric element, deposits spread across the kettle floor directly above the flame and collect thickly in the whistle cap and spout, which is why the cap gets its own soak in the leftover solution in Step 6. Materials deserve a glance too: plain stainless is as tolerant as any electric kettle, enamel exteriors want only mild soap and a soft cloth, and copper kettles keep their acid work strictly internal, since vinegar will strip the patina or lacquer outside. An aluminum kettle, less common now, is the one material where prolonged strong acid soaks are worth avoiding; keep the solution dilute and the soak to the short end there. Everything else, schedule, prevention, and rinse discipline, carries over unchanged.
Descaling with a descaler, citric acid, or lemon juice
Vinegar earns its default status on price and availability, but the alternatives are genuinely good and sometimes better. Citric acid is the standout: a tablespoon or two of the food-grade powder dissolved in a half-kettle of water, boiled and soaked exactly like the vinegar method, dissolves scale at least as effectively, and its great advantage is the exit, almost no smell during the job and almost no taste after, so it usually rinses clean in one boil. It is cheap, keeps indefinitely as a dry powder, and doubles for the coffee maker’s descale and other scale jobs around the kitchen. For households that descale monthly in hard water, it is the pleasant way to make the habit stick.
If you would rather descale a kettle with a descaler made for the job, commercial descaling liquids and sachets are formulated versions of the same acid chemistry, often citric or lactic based, and they are the right answer whenever a kettle’s manual specifies its own product or warns off vinegar; follow the label, which will describe a familiar heat-and-soak routine. Lemon juice sits at the bottom of the effectiveness list but does work: it is a weaker, less consistent acid that suits light scale and adds a pleasant smell, at the cost of pulp to rinse away. The things to keep out of a kettle are easier to list: bleach, oven and drain cleaners, and any abrasive powder used inside the chamber. The rule that survives every product choice: one product at a time, mixed with nothing, rinsed fully by boil-and-discard before the kettle serves a drink.
A worked example: rescuing a hard-water kettle
Run the method through one illustrative kitchen to see the timings land. Picture an electric kettle in a hard-water home, boiled five or six times a day for a year with no descale ever: the base plate wears a gray-white crust with visible layers, a tide line rings the walls, flakes have started appearing in tea, and boils have slowed enough to notice while getting louder. That is a heavy case, so it earns the long end of every step. The owner empties and rinses the kettle, clips out the silted spout filter, and mixes two cups of vinegar with two of water in the chamber, dropping the filter into a mug of the same mix.
The kettle boils, fizzes theatrically against the crust, and stands for a full hour, during which the solution turns cloudy gray. Poured out, the base plate is mostly bright metal with two stubborn patches at the mounts, so a second fresh half-kettle boils and soaks another forty minutes, after which a soft sponge with a pinch of baking soda clears the shadows. The filter rubs clean under the tap, the spout and lid rim get the sponge, and two boil-and-discard rounds of fresh water later, a third boil smells and tastes of nothing. Total elapsed time: a little over two hours because of the double soak, hands-on share perhaps fifteen minutes, cost a few cents of vinegar. The follow-up matters as much as the rescue: with a monthly reminder set and the kettle now filled from a filter pitcher, the next descale is a single thirty-minute soak. These numbers are an illustrative walkthrough rather than a measured test, but the shape, one heavy rescue and then easy maintenance, is the pattern to copy.
How often to descale a kettle
Frequency is the difference between a trivial job and a project, so it deserves its own arithmetic. Scale accumulates in proportion to the minerals passing through the kettle, which is water hardness multiplied by boil volume: a soft-water kitchen boiling once a day deposits a tiny fraction of what a hard-water, six-boil household does, and their sensible schedules differ by months. The chart below lays out illustrative starting intervals by water hardness for a typical daily-use kettle, and your own boil count then stretches or shrinks the bar.
Illustrative descale interval by water hardness
Commonly used starting intervals between kettle descales for a typical daily-use household, in weeks. Bars scale with the weeks. Heavy boil counts shorten every bar.
Intervals are illustrative starting points, not rules: the kettle's own signs, visible bloom, flakes, slow or loud boils, outrank the calendar in both directions. Filtered filling stretches every bar.
Calibrate from the chart rather than obeying it. Start at the bar for your water, hardness shows up as how fast white spots return to a wiped draining board, or your utility’s water report says it outright, then let two rounds of evidence adjust it: if the scheduled descale finds only a faint film, add a couple of weeks to the interval, and if flakes or slow boils arrive early, subtract. Boil count scales it linearly, so a twice-a-day kettle can roughly double the bar while an office-grade ten-boil kettle should cut it by more than half. The descaling-schedule planner runs exactly this arithmetic from your inputs. However the interval lands, keep the jobs light: frequent thin-film descales are quick, cheap, and scrub-free, which is the whole reward of a schedule.
How to slow limescale between descales
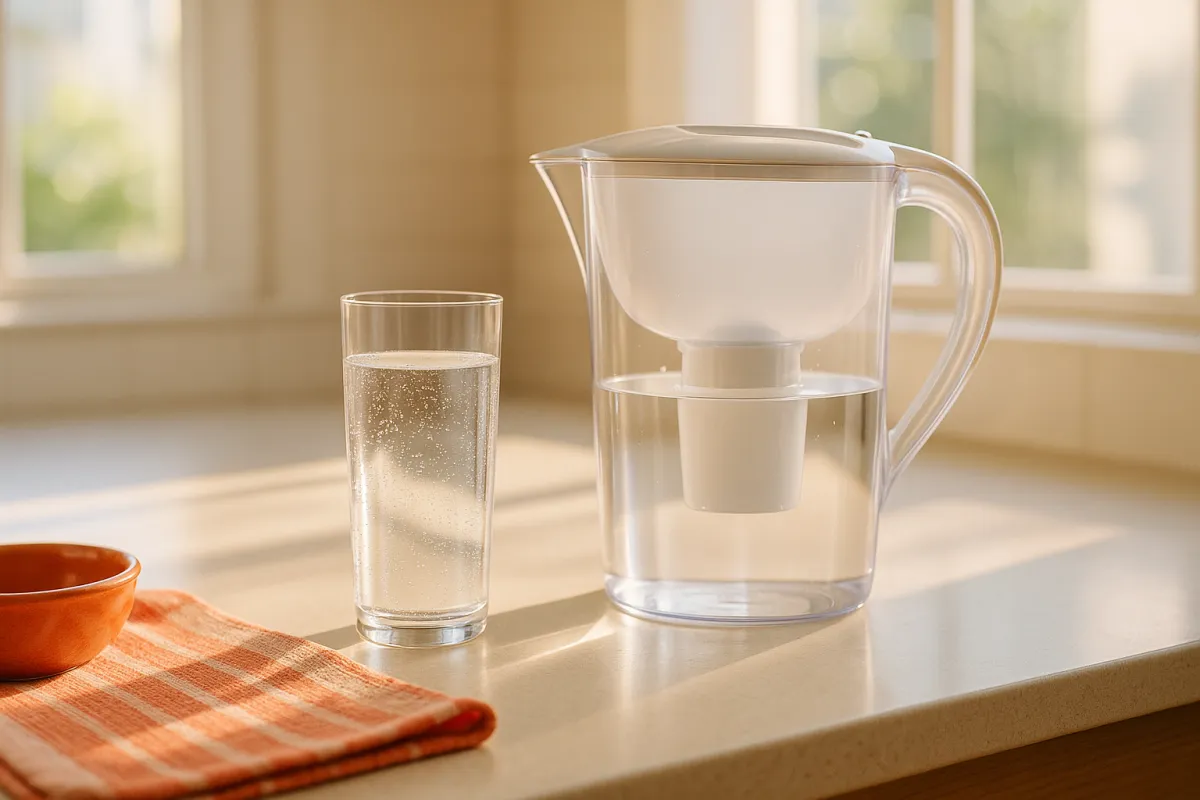
Prevention cannot beat chemistry, hard water will always scale a kettle eventually, but three habits meaningfully stretch the interval, and they cost almost nothing. The biggest is what goes in: filling the kettle from a carbon filter pitcher or a filtered tap removes part of the mineral load before it can bake on, and in hard-water homes the difference is visible within weeks, a faint bloom where a crust used to form. The same filtered fill improves tea and coffee flavor directly, which is a nice case of one habit paying twice; our notes on water filters versus bottled water cover that side of the trade.
The second habit is what stays in: nothing. Empty the kettle after the last boil of the day instead of leaving water standing, because standing water evaporates between uses and abandons its minerals on the walls, and a kettle stored empty with the lid ajar to dry simply has nothing to deposit. Boil only the water you need, both for scale and for the electricity a full kettle wastes, a habit our electric bill walkthrough files under the easiest savings in the house. The third habit is the early response: at the first faint bloom on the base, run a short soak rather than waiting for the schedule, since a film dissolves in minutes. Together, in an illustrative hard-water kitchen, these habits can push a monthly interval toward quarterly, which across a kettle’s life is dozens of descales that never need doing.
Common mistakes when descaling a kettle
Nearly every disappointing descale traces to one of a short list of errors, so name them and the job becomes hard to get wrong.
- Shorting the soak. The acid needs thirty to sixty minutes of contact, most of it after the boil. Pouring out after five minutes and scrubbing furiously is the method people abandon; the soak is the method.
- Skipping or rushing the rinse boils. Vinegar hides in the filter mesh and spout, and one swirl under the tap does not remove it. Two boil-and-discard rounds minimum, until the water smells and tastes of nothing.
- Scraping with metal. Knives, wire wool, and scouring pads scratch the chamber, and scratched surfaces scale faster next time. The acid plus a soft sponge does everything scraping pretends to.
- Using undiluted vinegar or a witches’ brew. Stronger is not faster in any way that matters, and mixtures are dangerous: acid never meets bleach, and one product at a time is the permanent rule.
- Forgetting the filter and the spout. The mesh filter silts up first and sheds flakes into cups if reassembled dirty; the spout and whistle cap hoard scale where the sponge never visits.
- Boiling a full kettle of solution. Froth needs headroom; a half-fill treats the element and tide line, and the poured-out solution on a sponge handles the upper walls.
- Ignoring the manual’s product note. A minority of kettles specify their own descaler or exclude vinegar. Citric acid or the named product settles it; sixty seconds of checking beats a voided warranty.
- Descaling once and never again. The crust took months and the schedule is what keeps it from returning. Set the reminder before the glow of the clean kettle fades.
Clear these eight and the descale is what it should be: an hour of mostly ignoring a kettle, a few cents of acid, and a machine that behaves like new.
Troubleshooting: harder kettle problems
The standard method handles the standard kettle; here is how to think through the cases that resist it.
What if crust remains after two full soak rounds? You are likely looking at a very thick, layered deposit. Switch to citric acid at the stronger end, two tablespoons in a half-kettle, boil, and soak for a full hour, repeating once more if needed; the remaining shadow after that is usually stained metal rather than scale, which is cosmetic. If genuine thickness persists on an old, cheap kettle, weigh the effort against replacement honestly.
What if the water still tastes odd after proper rinsing? First run one more boil-and-discard round, since taste is the most sensitive detector of residual acid. If an off taste survives a clean, fully rinsed kettle, the culprit is usually the water itself or a silted filter mesh; re-clean the filter, and try a filtered fill, which changes the taste question entirely.
What if the kettle clicks off before boiling, even after descaling? Scale on the element was one cause, and you have removed it. If early cutoff continues with a clean chamber, the thermal switch or element is tiring, which is a repair-or-replace question, and for most budget electric kettles an honest replacement one. Check that the lid seats fully first, since a gaping lid vents the steam the cutoff relies on.
What if the kettle leaks after descaling? The descale did not cause it, but it can reveal it: a seam or gauge-window seal previously caulked shut by scale now weeps. That is a failing gasket, not a cleaning issue, and on an electric kettle a leak near the base merits retirement rather than repair.
What if the exterior has scale spots or water marks? Wipe with a cloth dampened in the leftover solution, then a clean damp cloth, then dry, keeping liquid away from base contacts. Polished and copper exteriors get mild soap only.
Your kettle descaling checklist
Save this list and run it by interval; it compresses everything above into the version you will actually use.
- Every use: boil only what you need, and pour out any water left when the drinks are made.
- Daily: leave the kettle empty with the lid ajar overnight so the interior dries; fill from the filter pitcher if you have one.
- Weekly: glance inside in good light; a faint bloom on the base means run a short soak soon rather than waiting for the schedule.
- On your interval, monthly in hard water to quarterly in soft: half-fill with one-to-one vinegar and water or a citric solution, boil, soak thirty to sixty minutes, pour out, soft-sponge the stragglers, clean the spout filter, then boil and discard fresh water at least twice until it tastes of nothing.
- Every descale: check the manual’s product note the first time, keep the electrical base dry throughout, never mix products, and reassemble the filter only when it rinses clean.
- Twice a year: review the interval against the evidence, spotless interior means stretch it, early flakes mean shrink it, and update your reminder.
Feed your boils per day and water hardness into the descaling-schedule planner to set the interval line in that list, then let the reminder do the remembering.
The bottom line
Descaling a kettle is an hour of mostly hands-off chemistry that reverses everything hard water does to the hardest-working appliance in the kitchen: half-fill with equal parts white vinegar and water or a spoonful of citric acid, boil, soak for thirty to sixty minutes, pour the dissolved crust away, soft-sponge the stragglers, clean the spout filter, and rinse with two boil-and-discard rounds until the water tastes of nothing. The scale itself is harmless minerals, but it taxes every boil in time, noise, electricity, and element life, so the schedule is the real product of the job: roughly monthly in hard water, stretching toward quarterly with softer water or a filtered fill, adjusted by what the base plate shows you. Empty the kettle after use, fill it through a filter, catch the film while it is thin, and the descale stays a thirty-minute soak you barely notice instead of a rescue project, with every cup tasting the way the tea intended.
A note on scope: these notes lay out a general home routine for descaling ordinary electric and stovetop kettles and are educational only, not professional advice, with every interval, quantity, and cost an illustrative planning figure rather than a measurement of any particular product or water supply. Your kettle’s manual is the authority on which descaling products its finish and seals accept, and where it names one, use it. The firm cautions: keep an electric kettle’s base and contacts dry at all times, never leave a stovetop kettle boiling unattended, use one cleaning product at a time and never alongside bleach, and rinse by boiling and discarding fresh water until no taste remains before serving any drink. Statements about limescale and hard water reflect common general understanding rather than medical guidance; if you have specific concerns about your drinking water, consult your utility’s water quality report or a qualified professional. A kettle that leaks, cuts out early when clean, or smells electrical has moved past cleaning and should be repaired by a professional or retired.
Frequently asked questions
How do I descale a kettle?
Fill the kettle about halfway with a solution of equal parts white vinegar and water, bring it to a boil, switch it off, and let the hot solution soak for thirty minutes to an hour, longer for a heavily scaled kettle. Pour it out and the bulk of the limescale goes with it, then rub any stubborn patches with a soft sponge or a little baking soda, and rinse the spout filter if the kettle has one. Finish by rinsing thoroughly: fill with fresh water, boil, and discard, and repeat once or twice more until no vinegar smell or taste remains. The whole job takes about an hour, nearly all of it hands-off soaking, and costs pennies. Citric acid or a commercial descaler works the same way with less lingering smell.
Can I use vinegar to descale a kettle?
Yes, white distilled vinegar is the classic kettle descaler: limescale is an alkaline mineral deposit, and vinegar is a mild acid that dissolves it on contact, faster when hot. Mix it roughly one to one with water, boil, and soak. Two caveats keep it safe. First, check your kettle's manual, because a minority of manufacturers advise against vinegar on certain interior finishes or seals and specify their own descaler instead. Second, vinegar's smell and taste linger, so the rinse matters: boil and discard fresh water at least twice afterward, and keep going until the water smells and tastes like nothing. If the smell bothers you or the manual objects, citric acid does the same chemistry with almost no odor and rinses out faster.
How often should I descale a kettle?
Match the interval to your water and your use rather than a fixed date. In a hard-water home with daily boils, scale builds fast enough that descaling roughly every four weeks is a common rhythm, and very hard water can justify every two to three weeks. Moderate water stretches the interval to a couple of months, and genuinely soft water may need only an occasional descale a few times a year. The kettle tells you when the schedule is wrong: visible white or tan crust on the base, mineral flakes floating in your tea, longer boil times, more noise, or a kettle that clicks off early all mean scale has gotten ahead of your interval. Descaling is easiest when the layer is thin, so leaning early beats waiting for symptoms.
Is limescale in a kettle bad for you?
Limescale is mostly calcium and magnesium carbonate, the same minerals that make water hard, and drinking trace amounts of it is generally considered harmless; hard water is drunk safely in large parts of the world every day. The problems limescale causes are practical rather than medical. It flakes into drinks and leaves chalky flecks and a papery film on tea, it insulates the heating element so the kettle takes longer and uses more energy per boil, and a thick layer can make the kettle noisy or trip its cutoff early. The reason to descale is taste, speed, energy, and the life of the kettle, not safety. If your concern is the taste or look of hard water generally, filtering the water you fill with slows scale and improves the cup at the same time.
What can I use instead of vinegar to descale a kettle?
Citric acid is the favorite alternative: dissolve a tablespoon or two of the food-grade powder in a half-full kettle of water, boil, soak for twenty to thirty minutes, and rinse. It descales as effectively as vinegar with almost no lingering smell, which is why many people switch to it permanently. Commercial descaling solutions and sachets work well too; follow their labels, which typically involve a similar heat-and-soak pattern. Lemon juice works on the same acid principle, though it is weaker and can leave pulp behind, and a fifty-fifty splash of it in water with a boil and soak will handle light scale. What does not belong in a kettle is anything harsh: bleach, oven cleaner, or abrasive scouring inside the chamber, all of which can damage the finish of something you drink from.
Why does my kettle take longer to boil than it used to?
Limescale is the usual culprit. The mineral layer builds on the heating element or the heated base, and it acts as insulation between the element and the water, so the same element has to run longer to move the same heat, which you notice as slower boils and sometimes a louder, harsher rumble. The energy cost moves in step with the time: a scaled kettle uses noticeably more electricity per boil than a clean one, an effect that compounds across several boils a day. A thick scale layer can also overheat the element locally, which shortens its life, and can trigger the boil-dry or thermal cutoff before a true boil. A descale reverses all of it in an hour; if boils stay slow when the kettle is visibly clean, the element itself may be tiring, which is a replacement question rather than a cleaning one.
How do I descale a stovetop kettle?
The same chemistry works, with the heat supplied by the burner instead of an element. Fill the kettle about halfway with equal parts vinegar and water or a citric acid solution, bring it to a boil on the stove, then take it off the heat and let it soak for thirty minutes to an hour. Pour it out, rub remaining patches with a soft sponge, rinse well, then boil and discard a round or two of fresh water until no taste remains. Mind two stovetop-specific points: never let the kettle boil dry on the burner during the descale, and clean the whistle cap and spout, where scale likes to collect, with a soak in the same solution. The exterior, especially on enamel or copper kettles, should only meet gentle cleaners, and the manual's finish-specific advice wins.
How do I stop limescale coming back in my kettle?
You cannot change your water district, but you can change what reaches the kettle and what stays in it. Filling from a carbon filter pitcher or a filtered tap noticeably slows scale in hard-water homes, since the filter removes part of the mineral load before it can bake on. Emptying the kettle after each use instead of leaving water standing helps more than people expect, because standing water evaporates between boils and leaves its minerals behind. Rinsing the kettle and letting it dry overnight, boiling only the water you need, and running a quick vinegar or citric soak at the first sign of crust all keep the layer thin. None of this eliminates descaling in a hard-water home, but together these habits can stretch the interval from monthly toward quarterly.