What's on this page
- Why is my dishwasher not draining? Start with the standing water
- Do these three things before you touch anything
- The safety part: power, glass, and the drain cleaner rule
- How to get the standing water out
- The order to check things in, and why it saves money
- Cause one: the filter and the sump
- What lives in the sump under the filter
- Cause two: the drain hose, kinks and blockages
- The high loop and the air gap: the installation fault behind this symptom
- Cause three: the garbage disposal knockout plug
- Cause four: the disposal itself, and the sink drain behind it
- Cause five: a blocked air gap on the sink
- Machine-side: the drain pump
- Machine-side: the check valve and the drain solenoid
- Machine-side: the control board and the door latch
- When it drains slowly rather than not at all
- Where dishwasher drainage faults actually come from
- Which repairs are genuinely DIY
- Repair or replace: the honest math
- A worked example: one flooded sump, four suspects
- Prevention: the habits that stop this coming back
- The five minute check worth doing twice a year
- When to call a pro, and which one
- The bottom line
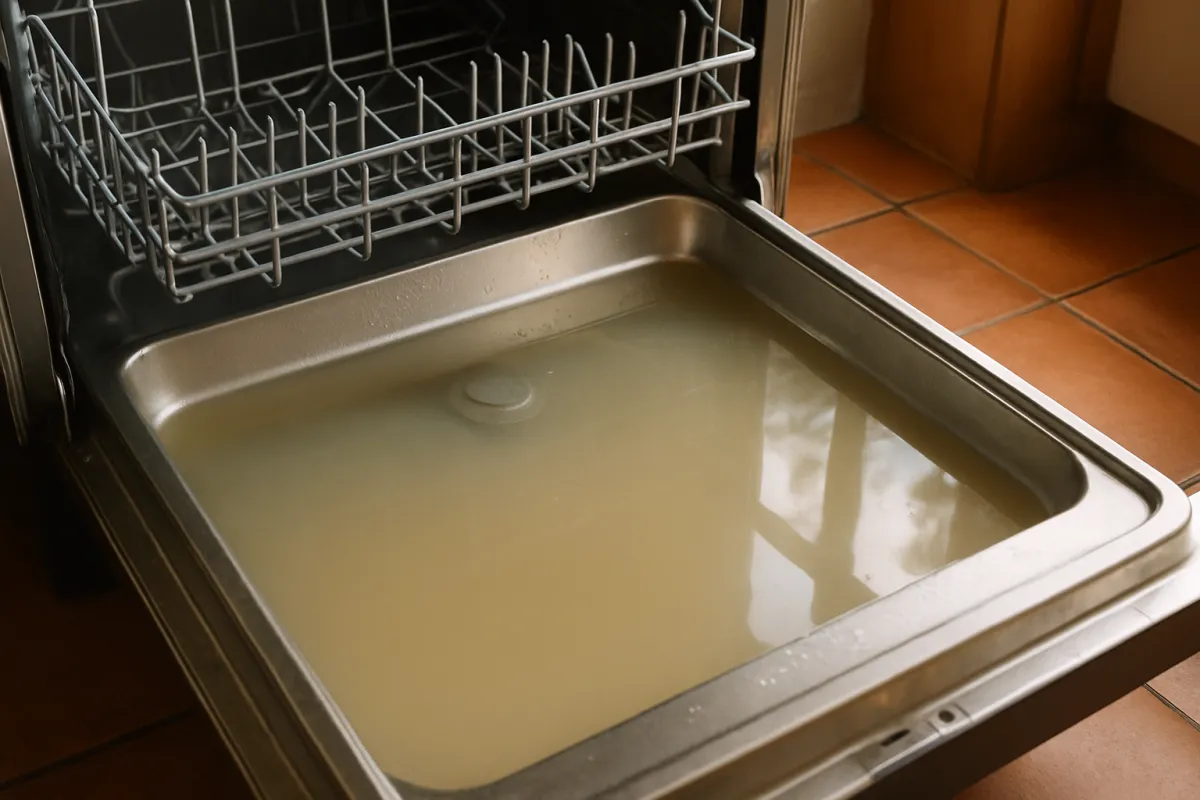
A dishwasher that will not drain announces itself the same way every time: you open the door expecting clean dishes and find a shallow pool of gray water sitting in the bottom of the tub, usually with a film of detergent on the surface and a smell that was not there yesterday. It reads as a dead machine. It usually is not. Standing water is one of the most solvable appliance faults there is, because it points at exactly one system, and the cheapest suspect in that system is also by far the most common one.
These test notes work the fault the way it should actually be worked, from the cheapest and most likely cause to the most expensive and rarest. Standing water first tells you this is a drainage problem rather than a wash problem, which already halves the search. Then the filter and sump, then the drain hose and its high loop, then the garbage disposal connection, then the sink air gap, and only after all of that the machine-side parts where the job changes from a towel and a screwdriver to a service call. Our dishwasher cleaning walkthrough covers the maintenance half of this and is not repeated here, and our dishwasher running-cost teardown prices what the machine costs to operate once it is healthy again.
Key takeaways
- Standing water at the end of a cycle is a drain fault, not a wash fault. That single observation eliminates the heating element, the spray arms, the detergent dose, and most of the machine.
- The filter and sump cause the largest share of these complaints and cost nothing to fix. Many current machines hide the filter well enough that owners never knew it existed.
- Cut power at the breaker before reaching into the sump. The drain pump can start under machine control, and there is often broken glass in that water.
- A missing high loop or a plugged garbage disposal inlet produces this exact symptom and is an installation fault, not an appliance fault. Both are common after kitchen work.
- Never pour drain cleaner into a dishwasher. It is not designed for those chemicals, and a machine that will not drain simply holds them for whoever opens the door next.
Why is my dishwasher not draining? Start with the standing water
The water in the bottom of the tub is not just a symptom, it is the first and best piece of diagnostic evidence you will get, and it is worth reading carefully before you touch anything.
A dishwasher does two separate jobs in one machine. It fills, heats, and sprays water around the tub, and then it evacuates that water and refills for the rinse. Standing water at the end of a cycle tells you the first job worked and the second one did not. If the dishes came out wet but visibly cleaner, if the detergent cup opened, if the tub is warm, then the fill valve, the heating element, the spray arms, the circulation pump, and the wash cycle itself are all doing their jobs. The fault is downstream of all of that, on the path the water takes out of the machine.
That path is short and easy to hold in your head. Water collects in the sump, a shallow well in the floor of the tub. It passes through a filter that catches food debris. It reaches the drain pump, which pushes it out through a flexible hose. The hose leaves the machine, runs under the sink cabinet, and connects either to a garbage disposal inlet, to a dedicated branch on the sink drain, or to an air gap fitting on the counter that then feeds the disposal or the drain. Six components, in a line. A blockage or failure anywhere along that line produces the same puddle.
Do these three things before you touch anything
Three actions come before any diagnosis, and doing them in this order makes everything afterwards safer and quicker.
Cancel the cycle and note where it stopped. Most machines have a cancel or drain option that runs the pump on its own. Selecting it and listening is a real test: a pump that hums or runs and moves nothing is telling you something different from a pump that is silent. Do this once, listen carefully, and then stop. Repeatedly forcing drain cycles on a blocked machine achieves nothing and can overheat a pump straining against a closed port.
Cut the power at the breaker. Not just at the machine’s controls, and not by trusting that the cycle has ended. A dishwasher is hardwired or plugged into a receptacle inside a cabinet, its control board can start the drain pump on its own schedule, and you are about to put your hand into a sump with an impeller in it. Turning off the circuit at the panel is the difference between a maintenance task and an injury.
Get the water out before you investigate. Almost nothing below can be inspected properly through four inches of dirty water, and scooping it out first also removes the risk of tipping it onto the floor when you pull the lower rack. The next section covers how to do that without making a mess.
The safety part: power, glass, and the drain cleaner rule
This is the section to read even if you skip everything else, because these are the three ways this job actually hurts people.
Power first, always. The drain pump in a dishwasher is driven by a motor that the control board can energise without warning, including in machines that appear to be off but are still powered. Before you remove a filter, reach into the sump, or put a hand anywhere near the impeller, switch off the circuit at the breaker panel and confirm the machine is dead. A machine that is merely “not running” is not a machine that is safe to reach into. If the dishwasher is on a plug inside a neighbouring cabinet, unplug it as well, so nobody can restore the breaker and start a cycle while your hand is in the sump.
Assume there is glass in that water. The sump collects what falls off the dishes, and that routinely includes chips from glassware, shards from something that broke unnoticed, and the sharp edges of foil or a shattered lid. The water is cloudy, so you cannot see any of it. Wear waterproof gloves, and scoop and pour rather than groping around blind with bare fingers. Use a cup or a small container to lift the water into a bucket, then a sponge or a turkey baster for the last inch, and lift debris out with a paper towel rather than pinching at it. The detergent in that water is also alkaline enough to irritate skin over a long job, which is a second reason for gloves.
Never put drain cleaner in a dishwasher. This one is worth stating plainly, because it is the most common bad instinct with this fault and it has two separate failure modes. First, a dishwasher is not a drain pipe. It is a sealed box of rubber gaskets, plastic impellers, flexible hose, and stainless steel, and caustic or acidic drain products are not formulated for prolonged contact with those materials. Second, and more seriously, a machine that will not drain does not flush the chemical away. It holds it. That means a caustic solution sitting in an appliance at waist height, waiting for the next person to open the door, and then being sprayed around the tub by the next cycle if anyone runs one. If the blockage is genuinely in the sink drain rather than the machine, clear it mechanically or call a plumber. There is no version of this fault that drain cleaner improves.
Two smaller cautions round it out. Do not run the machine to “flush it through” while a blockage is unresolved, because a pump straining against a closed port is being damaged. And if water has reached the floor of the cabinet or the base of the machine, dry it before working, so you are not kneeling in a conductive puddle in front of an appliance circuit.
How to get the standing water out
Removing the water is the first physical step, and doing it properly saves the mess that makes people give up on the job halfway.
Lay towels along the floor in front of the machine and pull the lower rack all the way out, slowly, because a rack lifted quickly out of standing water drips across the kitchen. Set the rack in the sink or on a towel. If the machine has a lower rack that will not clear the water, take the dishes out first.
Then bail. A plastic cup or a small measuring jug lifts most of the water into a bucket in a couple of minutes. When the level drops below what a cup can scoop, switch to a sponge or a turkey baster, squeezing into the bucket each time. Old towels finish the job. The goal is a dry sump floor, because you cannot see a blockage through water, and you cannot tell whether a cleared drain is actually draining unless you started dry.
Two things to watch while you bail. Note whether the water is greasy, whether it carries food debris, and whether it smells of the sink rather than of detergent, because sink smell in the tub points at backflow from the drain rather than at a failure to pump. And look at what is in the bottom of the bucket once it settles: a layer of food sediment tells you the filter has not been serving its purpose for some time.
If the water level rises again on its own after you have emptied it, without the machine running, you are looking at a siphon or backflow problem rather than a pump problem, and the drain hose routing section below is where that gets solved.
The order to check things in, and why it saves money
The reason a checking order matters is that the causes of this fault are wildly unequal in both frequency and price, and they run in roughly opposite directions. The most common cause is free to fix. The rarest is the most expensive. Working the list in the wrong direction means people pay for a diagnostic visit to be told their filter was full.
The order these test notes use is: filter and sump, drain hose and its routing, garbage disposal connection, sink air gap, drain pump, check valve, control board. Each step is cheaper and more likely than the one after it, and each one is genuinely quick. Working the whole list from the top takes an evening and no parts.
There is one exception to the order, and it is worth applying immediately when it fits. If the machine stopped draining within days of a plumber, an installer, or a kitchen fitter working under that sink, jump straight to the disposal knockout plug and the drain hose routing. Recent work under the sink is the single strongest clue this fault ever offers, and it takes ten minutes to check.
Cause one: the filter and the sump
This is where the majority of cases end, and it is a five minute job that a surprising number of households have never done once.
Older machines used a hard food disposer that ground debris and pushed it down the drain, and they had no user-serviceable filter. Most current machines dropped the grinder, because it was noisy and used energy, and replaced it with a fine mesh filter that catches the debris instead. That filter is designed to be removed and rinsed regularly. The problem is that it is not obvious. It sits in the floor of the tub under the lower rack, often as a cylindrical cup with a fine mesh plate around it, and unless somebody read the manual, it can go a decade without being touched.
When it loads up, the effects arrive in a predictable order. First the dishes come out gritty, because the machine is recirculating the same debris. Then the cycle takes longer. Then the water drains slowly. Then it stops draining at all, because the mesh has effectively become a solid plate over the drain path.
To clear it, with the power off: pull the lower rack, find the filter assembly in the tub floor, and turn the cylindrical part counterclockwise until it releases. Most lift straight out at that point, and on many machines a flat mesh plate lifts out underneath it. Take both to the sink, rinse under hot running water, and work the mesh with a soft brush and a little dish soap. Hold the mesh up to a light: you want to see light through it evenly, not through a few clear patches surrounded by grease. If it is glazed with fat, a soak in hot soapy water does more than scrubbing does.
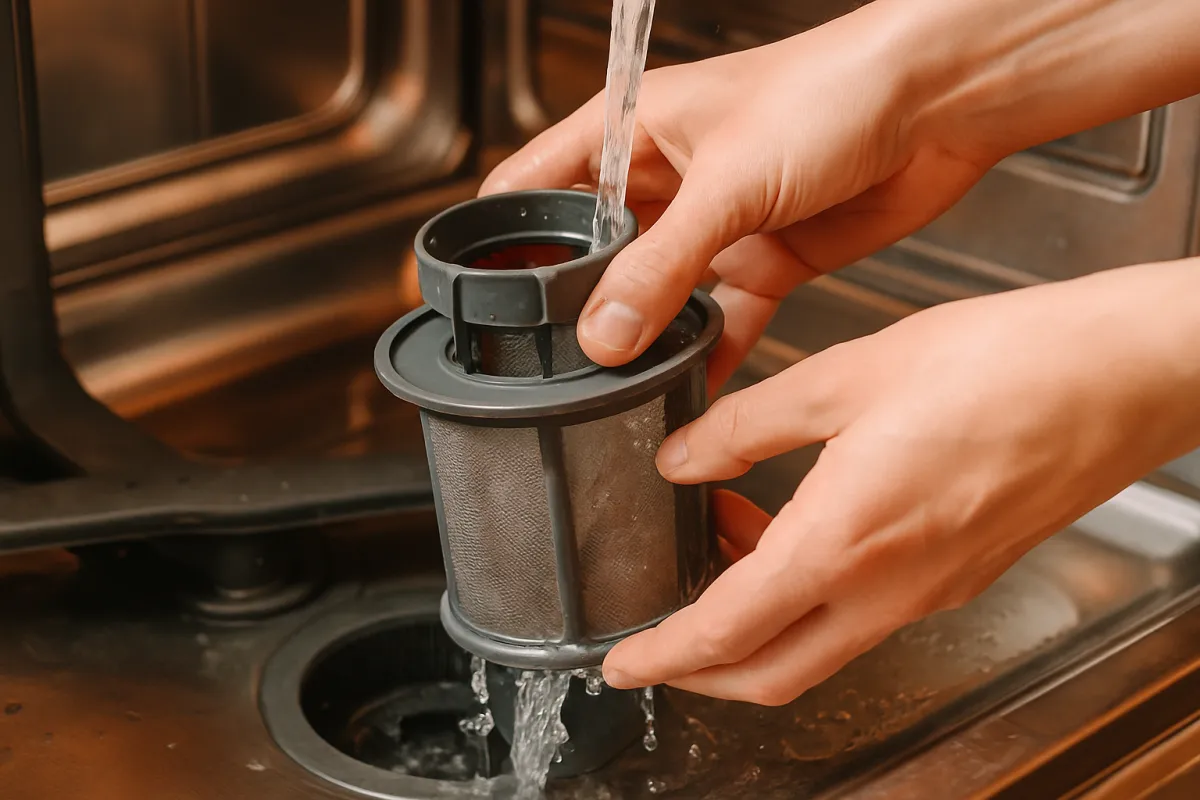
Refit it the same way it came out and make sure it locks. A filter that is sitting in place but not turned home lets debris bypass into the sump, which is how a cleared filter turns into a blocked pump a month later.
What lives in the sump under the filter
With the filter out, you are looking at the sump, and this is the part of the job people skip because it is unpleasant. It is also where the fault often actually is.
The sump is a shallow well, usually with an opening at one side leading to the pump. Shine a light into it. What accumulates there is food sediment, grease, broken glass, fruit stickers, seeds, bones, twist ties, and, on machines fed by hard water, a chalky scale that binds all of it together. Any of that can bridge the opening to the pump.
Clear it wearing gloves. Lift solids out with a paper towel rather than pushing them further in, and use a soft brush or an old toothbrush around the edges of the opening. If there is scale, a cloth wrung out in warm white vinegar, held against the deposit for a few minutes, softens it enough to wipe away without scraping. Do not use a screwdriver or anything metal in the sump, since the surfaces there are easy to gouge and a scratched sump collects debris faster afterwards.
While you have a light on it, look for the drain impeller if it is visible through the sump opening. On some designs you can see part of it and even feel whether it moves. With the power confirmed off, an impeller that will not turn at all is a real finding and takes you straight to the drain pump section below. An impeller that turns freely tells you the pump is probably fine and the blockage is further along.
Finish by pouring a jug of hot water into the sump and watching. On a machine whose only problem was the filter, that water level drops away as soon as the pump runs on a drain cycle. That is your confirmation, and it is worth doing before you put the racks back and call the job done.
Cause two: the drain hose, kinks and blockages
If the filter and sump are clean and the machine still holds water, the next suspect is the flexible hose that carries water from the pump to the sink cabinet.
Drain hoses fail in three ways, and all three are visible or feelable without tools. Kinks are the most common. The hose is corrugated and flexible, which is exactly what allows it to be folded flat when a machine is pushed back into its opening after a repair, a floor replacement, or a deep clean. A hose crushed against the back wall of the cabinet or trapped under a levelling foot restricts flow long before it closes completely. Internal blockage builds from the same grease and debris the filter is supposed to catch, and it collects preferentially in the low points and the tight bends. Splits and perished sections are less common but show as damp patches under the cabinet rather than as a drainage failure.
To inspect, open the cabinet under the sink and follow the hose from the drain connection back toward the machine as far as you can see. The section behind the dishwasher itself usually cannot be seen without pulling the machine out, which means unclipping it from the counter, disconnecting power and water, and easing it forward on cardboard to protect the floor. That is a bigger job, so do the visible portion first.
If you disconnect the hose at the sink end, have a bucket ready, because it holds water. Look at what comes out. A hose that discharges a slug of gray sludge when disconnected was the blockage. Flushing it through with hot water from the sink tap while the end is in a bucket clears most partial blockages, and running a long flexible brush through it clears the rest. If the hose is genuinely packed or has a permanent kink where it has been folded for years, replace it. It is an inexpensive part, and reusing a hose you have already found to be the problem is a false economy.
The high loop and the air gap: the installation fault behind this symptom
This is the cause that catches households whose dishwasher has never drained properly since the day it was fitted, and the mechanism is worth understanding because it explains several confusing symptoms at once.
The drain hose has to be routed so that dirty water cannot run backward from the sink into the dishwasher. There are two accepted ways to do that. The high loop raises the hose up under the countertop, secures it at the highest point the cabinet allows, and then brings it back down to the drain connection. That rise is a physical barrier: water in the sink drain cannot climb over the top of the loop to reach the machine. The air gap is a small fitting mounted through the sink deck or counter, where the hose from the machine rises to the fitting, discharges into open air inside it, and a second hose carries the water down to the disposal or drain. The break in the pipe run makes backflow physically impossible. Which one is used varies by region and by local plumbing practice, and the manual for the machine states what the manufacturer expects.
When neither is present, the hose runs more or less flat from the machine to the drain connection, and three things follow. Sink water and disposal debris can flow backward into the tub, which is why people find dirty water appearing in a dishwasher that has not been run. The machine can siphon itself empty mid-cycle, which produces poor washing rather than standing water. And drainage becomes sluggish, because the pump has no help from gravity and any restriction downstream backs straight up.
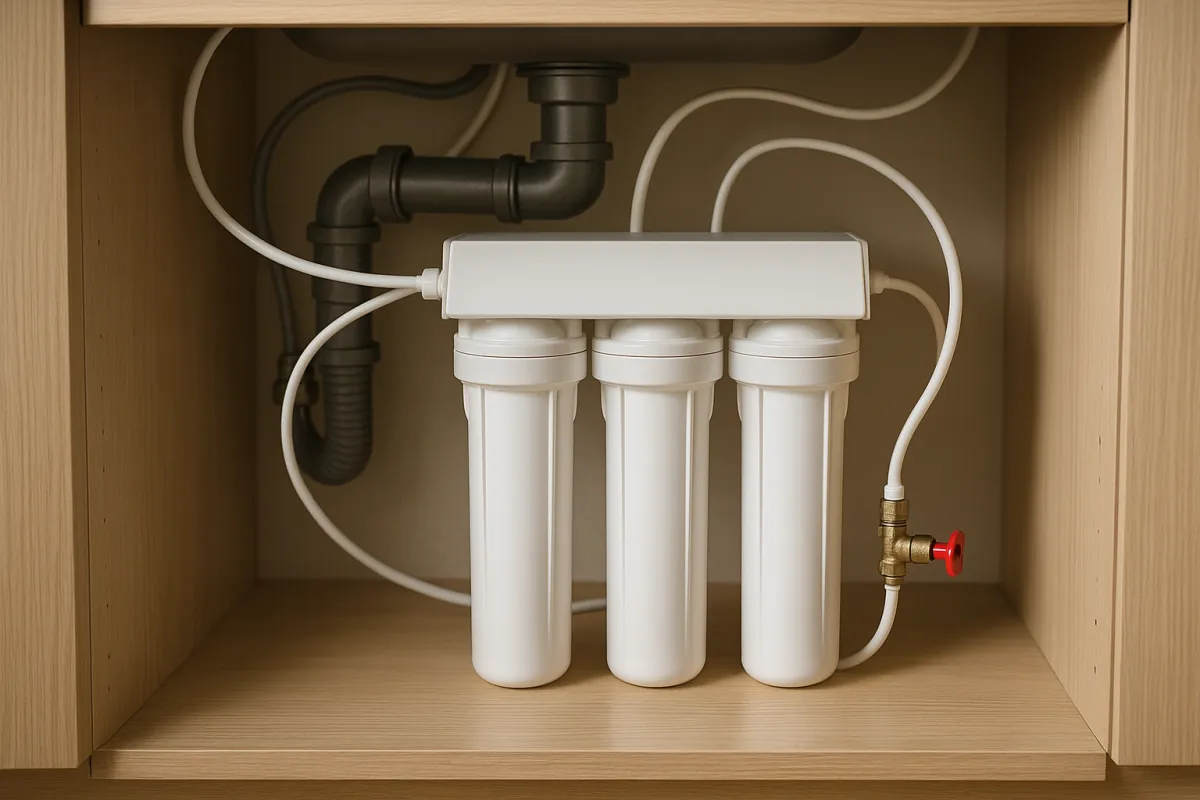
Fixing it is genuinely cheap. Buy a hose clamp or a pipe strap, route the drain hose up to the underside of the countertop, fasten it there so it cannot slip down, and run it back to the connection. Five dollars of hardware and twenty minutes. If a fitting sits on the sink deck already, you have an air gap and it belongs in the section below instead.
Cause three: the garbage disposal knockout plug
This deserves its own section because it is a genuinely common cause after kitchen work, it produces total drainage failure rather than partial, and it is invisible unless you know to look for it.
A garbage disposal ships from the factory with a solid plug sealing the small dishwasher inlet on its upper side. That plug is there because not every installation uses that inlet: plenty of dishwashers connect to a dedicated branch on the sink drain instead. It is intended to be knocked out during installation when the inlet is going to be used.
The failure is exactly what it sounds like. A disposal gets fitted, the dishwasher drain hose gets clamped onto the inlet, and nobody removes the plug. The hose now ends at a solid wall. The dishwasher pumps hard against a sealed port, moves nothing, and leaves standing water on the very first cycle after the work. Everything else in the machine is perfect.
The tell is timing, and it is the strongest clue in this entire report. If the dishwasher drained fine before a disposal was installed and has not drained since, check the plug before you check anything else.
Checking it is simple. Power off both appliances at the breaker. Under the sink, loosen the clamp and pull the dishwasher drain hose off the disposal inlet, with a bucket underneath. Look into the inlet with a flashlight. If you see a solid face rather than an opening into the disposal body, the plug is still there. To remove it, put the tip of a screwdriver against the centre of the plug and tap the handle firmly with a hammer until the plug drops into the disposal body. Then reach in, retrieve the loose plug, and make sure it has actually come out, because a plug left rattling inside the chamber will be thrown against the grinding ring the next time the disposal runs. Refit the hose, tighten the clamp, restore power, and run a drain cycle.
Cause four: the disposal itself, and the sink drain behind it
Even with the plug out, the disposal and the pipework behind it can be the blockage, and the distinction matters because it changes who you call.
A garbage disposal that is full of undrained waste, or whose own outlet into the trap is restricted, gives the dishwasher nowhere to pump. The signs are easy to read from the sink itself: the sink drains slowly or not at all, the disposal sounds different when it runs, or water backs up into the other sink bowl when the disposal is used. If the sink is misbehaving on its own, fix that first, because no amount of work on the dishwasher will help.
Run the disposal with cold water for thirty seconds before every dishwasher cycle if you suspect this, since a disposal holding a load of waste is a partial blockage by definition. Our garbage disposal cleaning walkthrough covers keeping that unit clear and the specific habits, mostly around grease and fibrous waste, that stop it from becoming the dishwasher’s problem.
Behind the disposal sits the trap and the branch line, and this is where the fault stops being an appliance fault. Grease is the usual culprit: it leaves the kitchen warm and liquid, cools in the horizontal branch, and builds a lining that narrows the pipe over years. A dishwasher pump moves water much faster than a tap does, so a branch that copes with a slow sink can be exposed the moment a dishwasher discharges into it. The signature is that the sink gurgles or backs up while the dishwasher drains, or that water appears at the air gap or in the second sink bowl during the drain phase specifically.
Clearing a trap is within reach for most households: a bucket, a pair of hands, and the willingness to unscrew two slip nuts. Clearing a branch line further back is a plumber’s job, and recognising that early saves the cost of an appliance technician visit that finds nothing wrong with the machine.
Cause five: a blocked air gap on the sink
If your setup has an air gap, that small chrome or plastic cylinder sitting on the sink deck beside the tap, it is a suspect in its own right, and it is a two minute check.
The air gap works by discharging the dishwasher’s water into an open chamber and letting it fall into a second, larger hose that carries it to the disposal or drain. Debris that gets past the dishwasher filter arrives in that chamber, and the outlet hose below it can silt up. When it does, the water backs up inside the fitting and comes out of the vent slots on top, which is why the classic air gap symptom is water spitting or bubbling onto the counter beside the sink during the drain phase.
Check it by lifting off the decorative chrome cover, which usually pulls straight up, then removing the plastic cap underneath, which may unscrew or unclip. Look inside with a flashlight. Debris in the chamber comes out with a paper towel or a bottle brush. If the chamber is clear but water still backs up, the blockage is in the larger hose between the air gap and the disposal or drain, which is the more common location. Loosen its clamp, pull it off at the disposal end, and flush it through with hot water or push a flexible brush along it.
Two details worth knowing. The hose from the air gap down to the disposal is wider than the hose from the dishwasher up to the air gap, which is deliberate, and fitting them the wrong way round creates a permanent restriction. And a genuinely clean air gap that still overflows during drain is telling you that the disposal or the branch line behind it is blocked, so it is a signpost rather than the fault itself.
Machine-side: the drain pump
With the whole external path cleared and the machine still holding water, the diagnosis moves inside, and the drain pump is the first and most likely of the internal suspects.
The drain pump is a small motor with an impeller that pushes water from the sump into the hose. It fails in three recognisable ways.
Jammed by debris. A shard of glass, a fruit pit, a twist tie, or a wedge of label can lodge against the impeller and stop it turning. This is the good outcome. The pump is fine, the obstruction is not, and on machines where the impeller can be reached from inside the sump, clearing it costs nothing. With power off at the breaker, remove the filter assembly and the sump cover if the design allows, and look for the impeller. If it will not turn by hand, work the obstruction free with gloved fingers or plastic tweezers rather than metal tools.
Electrically dead. A pump that produces no sound at all during the drain phase, on a machine whose display shows a normal cycle, is either not being commanded or has failed. This is where the diagnosis genuinely benefits from a technician, because separating a failed pump from a failed control signal needs testing rather than guessing.
Running but not moving water. A pump that hums, buzzes, or runs continuously without shifting the level has either a worn impeller, a broken impeller vane, or something downstream still blocked. Confirm the hose is clear before condemning the pump, because a pump straining against a blockage sounds exactly like a failing one.
Replacing a drain pump is an intermediate job. On machines with access from the front, after removing the lower panel and tipping the machine back, it is a realistic afternoon with a walkthrough for that layout. On machines where the pump is only reachable by pulling the whole unit out and laying it on its back, it is unpleasant. As an illustrative planning range, a professional drain pump replacement commonly lands somewhere around $150 to $300 including labor, with access driving most of the variation.
Machine-side: the check valve and the drain solenoid
Two smaller components sit on the same path and produce their own versions of this fault, and they are worth knowing about because a technician will name them and the names are otherwise opaque.
The check valve is a simple one-way flap in the drain path, usually near the pump outlet, whose only job is to stop water that has already been pumped out from running back into the tub. When it sticks open, the machine appears to drain and then refills itself from the hose, which shows as a small amount of water back in the sump shortly after the cycle ends rather than a full tub. When it sticks closed, the pump has nowhere to push and nothing drains at all. Debris and scale cause both, which is why a machine on hard water benefits from the descaling covered in our dishwasher cleaning walkthrough.
The drain solenoid, on machines that use one, is an electrically operated actuator that opens the drain path when the cycle calls for it. Some designs use a solenoid to move a valve, others use a dedicated pump and no solenoid at all, and the manual or the parts diagram for the machine settles which you have. A failed solenoid gives you a machine that sounds entirely normal, runs its full cycle, and simply never opens the exit.
Both parts are inexpensive in themselves. The cost of dealing with them is almost entirely diagnosis and access, which is why the sensible sequence is to exhaust every free check first and then pay once for a diagnosis rather than buying parts on a hunch. Ordering a solenoid for a machine that does not have one is a common and avoidable outcome of guessing.
Machine-side: the control board and the door latch
At the far end of the list sit the electronic causes, and they matter mainly because of what they do to the repair-or-replace arithmetic.
The control board is the machine’s brain, and a board that has lost the ability to command the drain phase produces a machine that washes and then stops without draining. The tell is usually behavioural rather than mechanical: cycles ending early, buttons responding inconsistently, error codes appearing, lights behaving oddly, or the machine draining fine on one cycle and not on another. Boards are among the most expensive parts on a dishwasher relative to the price of the machine, commonly quoted in an illustrative $250 to $450 range with labor, which on any machine near its typical service window usually fails the repair test outright.
The door latch and its switch are a quieter cause of the same symptom. Most dishwashers refuse to run any part of a cycle unless the latch tells the board the door is closed. A worn latch or a failing switch can interrupt a cycle partway, which leaves the machine sitting with water it never got around to pumping. The clue here is that the machine stops at inconsistent points rather than always at the same one, or that pressing the door firmly changes its behaviour. A latch assembly is a cheap part and often a straightforward replacement, so this is one of the few electrical suspects worth checking before you write the machine off.
If the diagnosis lands on a control board, the honest next step is usually to price a replacement machine rather than a repair. Our appliance lifespan test notes put a dishwasher at roughly 10 years of typical service, which is the number the arithmetic below turns on.
When it drains slowly rather than not at all
Partial drainage is the version of this fault worth catching, because it is the same problem at an earlier and much cheaper stage.
The symptoms are subtle. A film of water left across the sump floor rather than a damp surface. A drain phase that runs noticeably longer than it used to. Dishes at the bottom of the lower rack coming out with a residue the top rack does not have. A faint drain smell in the kitchen that was not there last year. None of that stops the machine working, so it gets tolerated, and the underlying restriction keeps building.
The causes are identical to the total blockage causes, just earlier along. A filter that is halfway loaded. A hose whose bore has narrowed with grease. A branch line that is slowly closing. A disposal that is habitually full. A check valve accumulating scale. Everything in this report applies, and all of it is easier at this stage because you are removing a partial deposit rather than digging out a solid one.
Treat slow drainage as the same job with a better deadline. Clean the filter and sump, check the hose routing and secure the high loop, run the disposal before each cycle, and if the sink itself is slow, deal with that first. Machines that get this attention rarely progress to the full standing water version of the fault at all.
Where dishwasher drainage faults actually come from
Pulling the whole list together shows the pattern this category always shows: the cheap causes are common and the expensive ones are rare. The split below is illustrative, drawn from the shape of complaints this fault produces rather than from any formal survey, and it is meant to set your search order rather than to be a statistic.
Where a dishwasher drainage fault usually starts
Illustrative share of no-drain complaints by cause. Bars scale to the largest slice.
Roughly four in five of these faults sit outside the machine's electronics entirely, in a filter, a hose, or a sink connection. Only the last slice routinely ends a dishwasher.
The practical reading of that chart is the search order these test notes already follow. Clear the filter and the sump before you take anything apart, check the hose and the disposal connection before you buy a part, and treat the control board as the diagnosis of last resort rather than the first fear. Someone who works the list top to bottom fixes this for free about four times out of five.
Which repairs are genuinely DIY
The honest split between what a household can do and what needs a trade matters more than enthusiasm does, because the wrong call in either direction costs money.
Genuinely DIY, no special skill. Bailing out the standing water. Removing, rinsing, and refitting the filter. Clearing the sump. Straightening a kinked drain hose. Fastening a high loop under the countertop. Clearing an air gap and its outlet hose. Knocking out a garbage disposal plug. Clearing the disposal and running it before a cycle. Removing and cleaning a sink trap. That list covers the large majority of the chart above, and none of it needs more than a bucket, gloves, a screwdriver, and a flashlight.
DIY with patience and research. Replacing the drain hose end to end. Pulling the machine out to inspect the hidden section of hose. Replacing a door latch assembly. Replacing a drain pump on a machine with front access. These involve disconnecting power and water, moving a heavy appliance without damaging the floor, and getting clamps and connections back correctly. Watch a walkthrough for the specific layout in front of you before committing, photograph every connection before you undo it, and put a towel down for the water that stays in the hoses.
Not DIY for most households. Anything involving the control board, the wiring harness, or diagnosis by electrical testing. Anything on a machine that has tripped a breaker or shows heat damage. Anything where the machine cannot be safely drained or moved.
Not the appliance at all. A blocked sink branch line is a plumbing job. Recognising that early is worth the price of a call-out on its own.
Whichever category you land in, the breaker stays off and the water supply stays closed until the job is finished.

Repair or replace: the honest math
When a drainage fault needs a paid repair, the decision uses the same two tests we apply to every appliance on the bench.
The first is the 50 percent test: if the repair quote exceeds roughly half the price of a comparable new machine, replacement usually wins. The second is age weighting, because a dishwasher is commonly cited at around 10 years of typical service, so the same repair buys most of a decade at year two and a couple of years at year eight.
Run an illustrative case. A machine that would cost about $650 to replace stops draining at year seven, and after the free checks come back clean the quote is $200 for a drain pump. That is about 31 percent of a replacement, comfortably under the line, and it buys the remaining years of a machine that is otherwise sound. Repair is the clear answer. Change one variable: the same machine at year seven, diagnosed with a failed control board, quoted at $400. That is about 62 percent of replacement, on a machine past the middle of its window, and both tests now point the same way.
Five years of one dishwasher, with one mid-life drain repair
Illustrative split of total spend: a $650 machine, about $250 of electricity and water at five loads a week, and one $200 drain pump repair. Segments sum to 100 percent.
A dishwasher costs far more to buy than to run, near $50 a year at five loads a week, which is why a repair that adds years usually beats replacing the machine early.
That balance is the quiet argument for repairing dishwashers readily when the failure is mechanical. The purchase is by far the biggest slice, running cost is small, and a $200 repair that adds three or four years is cheap against a $650 replacement. The exception is the control board, which is expensive enough relative to the machine that it flips the answer on its own. Put your own machine price, quote, and expected remaining years into our cost-per-use calculator and the comparison stops being a feeling.
A worked example: one flooded sump, four suspects
Here is the method compressed into one plausible evening, with real decisions at each fork.
A seven year old dishwasher finishes a normal cycle and leaves about three inches of cloudy water in the tub. The dishes are clean but gritty on the lower rack. The kitchen had a new garbage disposal fitted two weeks earlier. The sink itself drains normally.
The safety steps run first. The cycle is cancelled, the breaker for the kitchen appliance circuit goes off, gloves go on, and the water comes out with a cup and a bucket. There is visible food sediment in the bottom of the bucket, and a small triangle of glass, which justifies the gloves.
Four suspects fit: the filter, the disposal knockout plug, the drain hose, and the pump. The recent disposal work moves the plug to the front of the queue despite the standard order, because recent work under the sink is the strongest clue this fault offers.
Under the sink, the drain hose comes off the disposal inlet into a bucket, and a flashlight shows a solid face rather than an opening. The plug is still in. A screwdriver and two taps of a hammer drop it into the disposal body, it gets retrieved, the hose goes back on and the clamp is tightened.
Before restoring power, the filter comes out anyway, because the gritty dishes suggested it needed attention regardless. It is glazed with grease and takes ten minutes in hot soapy water with a brush. The sump is wiped out, and a jug of hot water goes in.
Power back on, drain cycle selected. The pump runs for about forty seconds and the sump is left damp rather than wet. Total cost: zero dollars, an hour, and a fault that reads like a dead machine at first glance. That result is not luck, it is the order doing its work, because the two most likely causes were checked before anything expensive was considered.
Prevention: the habits that stop this coming back
Almost everything in this report is preventable, and the prevention is short enough to actually do.
Scrape, do not rinse. Modern dishwashers are designed to handle food residue, and their sensors read a load that has been rinsed spotless as a clean load and shorten the cycle accordingly. What they are not designed to handle is bulk: bones, pits, corn husks, fibrous vegetable ends, seeds, and paper labels. Scrape those into the bin and let the machine deal with the rest.
Clean the filter on a schedule. Monthly is a reasonable default for a household running the machine most days, and every couple of months for lighter use. It takes five minutes and it is the single highest-value habit on this list, because it targets the cause of the largest slice of the chart above.
Run the disposal before the dishwasher. Thirty seconds with cold water clears the chamber the dishwasher is about to pump into, and it removes an entire category of fault at no cost.
Run hot water at the sink before starting a cycle. It clears cooled grease from the branch line the dishwasher is about to discharge into, and it means the machine starts with hot water rather than heating a tub of cold.
Descale if your water is hard. Scale binds debris together in the sump and coats the check valve, which turns loose sediment into a solid blockage. Our dishwasher cleaning walkthrough covers the method and the interval.
Check the hose whenever the machine moves. Every time a dishwasher is pulled out for a floor, a leak, or a deep clean, the drain hose is at risk of being folded when it goes back. Look before you push it home.
Those habits sit alongside the rest of the house in our eight-point appliance maintenance plan, which is the calendar the whole rotation hangs on.
The five minute check worth doing twice a year
Twice a year, or whenever the machine gets moved, run this sequence. It is short enough that it actually gets done.
Pull the lower rack and look at the sump floor. A damp surface is healthy. A film of standing water is an early warning worth acting on.
Remove and rinse the filter, hold the mesh up to a light, and confirm the light comes through evenly rather than in patches. Refit it and check that it locks home.
Wipe out the sump with gloves and a paper towel, and clear the opening toward the pump.
Open the cabinet under the sink and follow the drain hose. Confirm it rises to a high loop secured under the counter, or that an air gap is fitted and clear, and check the clamp at the disposal or drain connection is tight.
Lift the air gap cover if you have one and check the chamber and its outlet hose for debris.
Run the disposal with cold water and listen. A change in sound or a slow sink is the branch line asking for attention before the dishwasher finds it for you.
Run a drain cycle and time it. Under a minute of active pumping and a damp sump afterwards is a healthy machine. Anything longer, or any water left behind, is a restriction at an early stage.
Our washing machine leak report runs the equivalent routine for the other water-connected machine in the house, and the two checks share a calendar comfortably.
When to call a pro, and which one
Choosing the right trade is worth as much as the diagnosis, because the wrong call buys a visit fee and no answer.
Call an appliance technician when the whole external path is verifiably clear and the machine still holds water, when the pump is silent or runs without moving water, when error codes point at the drain circuit, or when you want a control board verdict confirmed before spending replacement money. Expect a diagnostic call-out in an illustrative range of roughly $80 to $150 before parts, and ask on the phone whether that fee is credited against the repair, because policies differ between firms.
Call a plumber when the sink itself drains slowly, when water backs up into the second sink bowl or out of the air gap while the dishwasher drains, when other fixtures gurgle at the same time, or when the trap and branch line are beyond what you want to open.
Call an electrician when the machine has tripped a breaker, when the outlet inside the cabinet shows heat damage, or when a GFCI keeps tripping once everything is dry.
Call nobody yet if you have not cleaned the filter and checked the disposal connection. Those two checks are free, take under an hour together, and resolve about half of all cases. Making them first is what turns a vague complaint into a specific question, and a specific question is what makes any of the calls above efficient.
And if the verdict is a control board on a machine near its typical window, the productive call is to a retailer rather than a repairer. Feed the replacement price and the years you expect from it into our cost-per-use calculator before deciding.
The bottom line
Why is my dishwasher not draining has a better answer than the puddle suggests, and finding it is a matter of order rather than skill. Standing water tells you the fault is on the drain path and nowhere else, which eliminates most of the machine in one observation. Then work outward from the cheapest suspect: the filter and the sump, which is where the majority of these cases end and which costs nothing; the drain hose and whether it is kinked, blocked, or missing the high loop that stops sink water running back into the tub; the garbage disposal knockout plug, which is the first thing to check if anyone has worked under that sink recently; the air gap if one is fitted; and only then the pump, the check valve, and the control board, where the job moves from a towel to a technician.
Handle the safety part properly, because it is the only place a wrong move costs more than a repair bill. Power off at the breaker before reaching into the sump, since the drain pump can start on its own. Gloves on and scoop rather than reach blind, because that cloudy water routinely hides glass. And keep drain cleaner out of the machine entirely: it is not designed for those chemicals, and a machine that cannot drain simply holds them for whoever opens the door next. Then let the arithmetic close it out. A mechanical repair on a machine with years left is usually worth doing, a quote above half the price of a comparable new dishwasher is a replacement signal, and a control board on a machine near ten years old is generally the end of the road. Clean the filter monthly and check the hose whenever the machine moves, and most of this report will never apply to you.
These test notes are general information about appliance faults, not professional repair, plumbing, or electrical advice. Every cost, share, and lifespan quoted here is an illustrative planning figure rather than a quote or a measured statistic, and your machine, your plumbing, your water, and local labor rates will move all of them. Isolate the circuit at the breaker panel before opening any part of a dishwasher, wear gloves in a sump you cannot see the bottom of, and keep chemical drain products out of the appliance entirely. Anything involving wiring, a scorched smell, a shared drain line, or a repair you cannot confirm belongs with a qualified trade, and where the manufacturer’s manual for your machine contradicts a general principle stated here, the manual wins.
Frequently asked questions
Why is there standing water in the bottom of my dishwasher?
Standing water at the end of a cycle means the machine washed but did not evacuate, so the fault sits somewhere on the drain path rather than in the wash system. The path runs from the sump at the floor of the tub, through a filter, into the drain pump, out through a hose, and into either a garbage disposal inlet, a sink drain branch, or an air gap on the counter. A blockage or a failure anywhere along that chain produces the same puddle. The order that saves money is to check the filter and sump first, because they cause the largest share of these complaints and cost nothing to clear, then the hose and the disposal connection, and only then the pump.
Can I fix a dishwasher that will not drain myself?
Most of the time, yes. Clearing the filter and sump, straightening a kinked drain hose, refitting a high loop, punching out a garbage disposal knockout plug, and clearing an air gap are all genuine home jobs that need a screwdriver, a towel, and half an hour. Those account for the majority of cases. Replacing a drain pump is an intermediate job on machines with reasonable access and an unpleasant one on machines without it, and anything involving the control board, the wiring, or a diagnosis you cannot confirm belongs with a technician. Cut power at the breaker before reaching into the sump, since the drain pump can start unexpectedly.
Should I pour drain cleaner into a dishwasher that will not drain?
No. Chemical drain cleaners are formulated for household waste pipes, not for a machine full of rubber seals, plastic impellers, and a stainless tub, and they can damage the components they sit against. The bigger problem is that a dishwasher that is not draining will hold that chemical, so the next person who opens the door meets a caustic solution at face height, and a later cycle sprays it around the tub. If the blockage is in the sink drain rather than the machine, the honest fix is mechanical: clear the trap or the branch line, or call a plumber. Nothing about a dishwasher fault is improved by pouring chemicals into it.
Why does my dishwasher fill with dirty water from the sink?
Water arriving in the tub from outside the machine is a siphoning or backflow problem, and it usually means the drain hose has no high loop and no air gap. If the hose runs flat from the machine to the drain connection, sink water and disposal debris can run downhill straight into the dishwasher. The fix is to route the hose up under the counter, secure it at the highest point the cabinet allows, and then back down to the connection, or to fit an air gap on the sink deck if local practice calls for one. This is an installation fault rather than an appliance fault, and it is one of the most common causes of this exact symptom after a kitchen job.
How much does it cost to fix a dishwasher that is not draining?
It ranges from nothing to most of the price of the machine, which is exactly why the checking order matters. Clearing a filter, a sump, a kinked hose, or a knockout plug costs nothing but time and covers most cases. A drain pump replacement typically lands in an illustrative range of roughly $150 to $300 with labor, depending on access. A control board is commonly quoted higher, in an illustrative $250 to $450 band, which on a machine near the end of its life usually fails the repair test. A diagnostic call-out alone often runs in the region of $80 to $150 before parts, and it is worth asking whether that fee is credited against the repair.
Is a new garbage disposal really a common cause of this?
It is one of the most common causes after a kitchen job, and the mechanism is simple. A new disposal ships with a solid plug sealing its dishwasher inlet, because not every installation uses that inlet. If the installer connects the dishwasher drain hose to the inlet without knocking that plug out, the hose ends at a wall. The dishwasher pumps against a sealed port, drains nothing, and the standing water appears on the very next cycle. The tell is timing: if the dishwasher stopped draining within days of a disposal being fitted, check the plug before anything else, because it takes ten minutes to confirm and nothing to fix.
How long should a dishwasher take to drain?
On a healthy machine the drain phase is short, typically under a minute of active pumping, and you can hear it as a distinct change in sound partway through the cycle. If the pump runs noticeably longer than it used to, or the tub is left with a thin film of water rather than a damp floor, that is a partial restriction rather than a complete blockage, and it is worth acting on early. Partial restrictions come from the same causes as total ones, mostly a loading filter, a narrowing hose, or a sluggish sink branch, and they are far easier to clear before they close entirely.
Is it worth repairing a dishwasher that will not drain, or should I replace it?
Work the same two tests used on every appliance here. If the repair quote exceeds roughly half the price of a comparable new machine, replacement usually wins, and a dishwasher is commonly cited at around 10 years of typical service life, so age decides the tie. An illustrative case: a $650 replacement, a $200 drain pump repair, and a machine at year seven. The quote is about 31 percent of a new machine, well under the line, so repair is reasonable even with only a few years likely left. Change the quote to a $400 control board on a nine-year-old machine and both tests point the other way.