What's on this page
- Why your garbage disposal smells
- Before you start: safety first
- Step 1: Cut the power and check the disposal safely
- Step 2: Clear out visible debris with tongs
- Step 3: Scour the grind chamber with ice and salt
- Step 4: Clean with baking soda and vinegar
- Step 5: Scrub the splash guard and baffle
- Step 6: Freshen with citrus peels
- Step 7: Flush with cold running water
- Step 8: Restore power and set a cleaning schedule
- A worked example: a full garbage disposal deep clean
- What not to put down a garbage disposal
- How often to clean a garbage disposal
- How to deodorize a garbage disposal
- How to unclog a garbage disposal
- Common mistakes when cleaning a garbage disposal
- Troubleshooting: harder garbage disposal problems
- When to call a plumber
- Your garbage disposal cleaning checklist
- The bottom line
Short answer: Clean a garbage disposal by cutting the power, grinding two cups of ice with rock salt to scour the chamber, following with baking soda and vinegar to cut grease and odor, hand-scrubbing the underside of the rubber splash guard, grinding citrus peels for scent, and flushing with cold water. Never put your hand inside; use tongs or pliers. The job takes about fifteen minutes, repeated about monthly.
Learning how to clean a garbage disposal is the fix for the sour smell that drifts up from the sink, and it is a genuinely simple job you can do in about fifteen minutes with ice, salt, baking soda, and things already in your kitchen. The disposal is the one appliance people expect to clean itself, since it grinds and flushes food every day, but it never does. Tiny food particles cling to the grind chamber walls, grease congeals into a film, and a slick, smelly layer builds on the underside of the rubber splash guard that no running water ever reaches. Left alone, that hidden buildup turns warm and damp, bacteria move in, and the result is the sour odor you cannot trace and cannot rinse away.
These notes give you a safe, step-by-step method for cleaning a garbage disposal, starting with the one rule that never bends: the power comes off first and your hand never goes inside. From there it is an ice-and-salt scour, a baking soda and vinegar treatment, a scrub of the splash guard the smell hides under, citrus peels for scent, and a cold-water flush. We also cover what not to put down it, how often to clean it, and when a problem has crossed from cleaning into a call to a plumber. For a neighboring kitchen appliance, see our companion walkthrough on how to clean a dishwasher, the grease story overhead in how to clean a range hood, and for how this fits a whole-home routine, our eight-point appliance maintenance plan. Feed how often you run the disposal and how much you cook into the cleaning-schedule planner as you read, and it will tell you how often to run each step.
Key takeaways
- The one hard safety rule is that your hand never goes into a disposal: cut the power first and use tongs or pliers to reach inside, never your fingers.
- The smell is physical buildup, not a broken machine: food film on the chamber walls, congealed grease, and a slick layer under the rubber splash guard that no running water reaches.
- The core clean is a two-cup ice and rock salt scour for the chamber, baking soda and vinegar to cut grease and odor, a hand-scrub of the splash guard, citrus peels for scent, then a cold-water flush.
- Keep grease, fibrous foods, starchy foods, bones, and coffee grounds out: those cause most smells and clogs, so scrape them into the trash or compost.
- Match frequency to use: cold water every grind, a freshen weekly, an ice scour every week or two, and a full hand clean about monthly.
Why your garbage disposal smells
Before you clean anything, it helps to know what you are actually removing, because a disposal collects several different kinds of grime and each hides in a different spot. A disposal does not store waste on purpose, but it never fully empties either. Every grind leaves a thin film of food particles on the grind chamber walls and grinding ring, a layer of grease that congeals as it cools, and a damp residue in the crevices around the baffle. That mix sits warm and moist between uses, which is the ideal home for the bacteria that produce the sour, rotten smell. The stacked bar below shows an illustrative breakdown of what builds up inside a neglected disposal, so you can see where the trouble concentrates and why running more water alone never fixes it.
What builds up inside a garbage disposal
An illustrative split of the residue that collects in a neglected home garbage disposal. Segments sum to 100 percent. Your mix varies by diet and habits.
Food film and grease are the biggest slices, which is why the ice scour and the baking soda step do most of the work. The splash guard gunk is the most overlooked slice. The split is illustrative and shifts by home.
The shape of that split is the whole strategy in one picture. The two biggest slices, food film and grease, are exactly what the ice-and-salt scour and the baking soda step target, which is why those do most of the heavy lifting. The splash guard gunk is the sleeper: it is a fifth of the problem and the single most overlooked spot, because its underside never touches the grinding action and no running water reaches it, so it needs a brush by hand. The biofilm is the bacteria layer that actually produces the smell, and it lives on all of those surfaces, which is why a physical scrub beats any scented product. Mineral scale is the small wildcard that grows faster in hard-water homes. Keep that ranking in mind as you work the steps, because it tells you where to spend your effort.
Before you start: safety first
This is a hands-on but genuinely low-skill task, and the difficulty is beginner if you respect one rule. Nothing in the steps requires a tool you do not already own or any plumbing knowledge. Plan on about fifteen minutes for a full clean, most of it hands-on but light, and none of it messy if you work in order. The single thing that turns this from a chore into a hazard is treating the disposal as safe because it is switched off, so we start with the rule that governs everything else.
Your hand never goes into a garbage disposal. Not to grab a lost spoon, not to check for a clog, not even when the switch is off. The grinding components can cut, and a disposal that is only off at the wall can still be energized by someone flipping the switch or by a fault, so whenever you need to reach inside you cut the power at the breaker first and use a tool, never your fingers. Keep a flashlight nearby so you can see rather than feel for whatever you are removing.
Gather a small, ordinary kit before you begin so you are not stopping mid-job.
- Ice cubes and rock salt or coarse kosher salt, the two workhorses for scouring the grind chamber.
- Baking soda and white vinegar, to loosen grease and deodorize, run one at a time.
- Dish soap, an old toothbrush or a dedicated scrub brush, for the splash guard underside and the visible chamber.
- Tongs or needle-nose pliers and a flashlight, so your hand stays out of the disposal.
- The hex wrench that came with the unit, kept for freeing a jam, plus your disposal manual or model number.
With the kit ready and the safety rule fixed in mind, start by making the machine safe to work around.
Step 1: Cut the power and check the disposal safely
The first step is the setup that makes everything after it safe, and it is worth doing deliberately rather than rushing past. Switch the disposal off, then cut its power at the source: either flip the breaker that feeds it or, on units wired to a wall switch, turn that switch off and keep it in view so no one flips it while your hands are near the drain. If the disposal plugs into an outlet under the sink, unplug it. This is not an optional precaution you can skip on a quick job, because the whole method depends on the machine being unable to start while you work.
With the power confirmed off, shine the flashlight down into the drain and take a look at what is there. You are checking for two things: obvious debris caught in the grinding ring or against the splash guard, and any hard object like a bone shard, a bottle cap, or a fruit pit that should not be there. Do not reach in yet and do not run your fingers around the rim. Just observe, so you know what the next step needs to remove. Watch out for the temptation to test the switch to see if the disposal is truly off while your hand is near the opening: confirm the power is dead by the breaker or plug, not by poking at the drain.
Step 2: Clear out visible debris with tongs
With the power off and a clear view of what is inside, remove any visible debris using a tool, keeping your hand well clear of the opening. Reach in with tongs or needle-nose pliers and pull out anything you spotted: a lodged piece of food, a stray utensil, a bottle cap, or the fibrous strings that wrap around the grinding components. Work slowly and pull items straight up rather than dragging them across the ring. If something is wedged tightly, do not force it with the tool in a way that could make it slip from your grip, and never switch to your fingers to get a better hold.
This step matters more than it looks, because loose debris left in the chamber will just get pushed around by the cleaning steps that follow rather than removed, and a hard object left behind is exactly what jams the grinders the next time the disposal runs. Pay special attention to the area right under the lip of the splash guard, where fibrous scraps and small hard bits collect out of sight. Watch out for the classic mistake of assuming a slow or noisy disposal needs cleaning when it actually has an object stuck in it: clearing the debris first tells you whether you have a dirt problem or a jam. Once the chamber is clear of loose material, you can restore power for the scouring step.
Step 3: Scour the grind chamber with ice and salt
Now that the loose debris is gone, the ice-and-salt scour cleans the grind chamber walls and the grinding components you cannot otherwise reach. Restore power to the disposal for this step, because it needs to run. Drop about two cups of ice cubes into the disposal followed by a handful, roughly half a cup, of rock salt or coarse kosher salt. Turn on the cold water, switch on the disposal, and let it grind the ice and salt until the grinding noise clears, usually less than a minute. The hard, blunt edges of the ice knock the food film loose from the chamber walls while the coarse salt acts as a scouring abrasive, and the two together scrape off the buildup that clinging cold water leaves behind.
You will often see grayish, gritty water wash down as it runs, which is the buildup leaving the chamber. Keep the cold water running throughout, because cold keeps any grease solid so it breaks off and flushes away rather than smearing. This step handles the single largest slice of the buildup, the food film on the chamber walls, which is why it does so much of the work. It is worth clearing up a common myth here: the ice does not sharpen the grinders, and disposals do not have blades to sharpen in the first place, but the ice absolutely does dislodge debris and lift a light greasy coating. Watch out for using too little ice, since a token handful will not generate the scrubbing action; two full cups is what makes it work.
Step 4: Clean with baking soda and vinegar
The ice scour handles the loose film; the baking soda and vinegar step that follows loosens the grease and cuts the smell. With the disposal switched off again, sprinkle about half a cup of baking soda down into the drain and let it sit for a few minutes, because the baking soda is a mild alkaline that begins neutralizing odor and loosening the greasy residue on contact. Then pour in about a cup of white vinegar. The mixture will fizz up in the drain, and that foaming action helps carry the baking soda into the crevices and lift the grease film off the surfaces it coats. Let it work for five to ten minutes while the fizzing does its job.
The reason this pairing works is that the two do different jobs: the baking soda deodorizes and scours gently, while the vinegar is a mild acid that helps dissolve the grease film and any light mineral scale. Run them as described, baking soda first and vinegar after, rather than premixing, so the reaction happens down in the disposal where you want it. After the fizzing subsides, you will finish by flushing it through in a later step, but the loosening happens now. Watch out for two things: never follow or precede this with bleach, because bleach plus vinegar releases a harmful gas, and do not expect the fizz alone to clean the splash guard, which sits above the reaction and still needs a brush. For the same acid-and-base logic applied to a bigger appliance, see our note on how to clean a washing machine.
Step 5: Scrub the splash guard and baffle
The chamber is clean, so turn to the part every quick method misses: the rubber splash guard, the flexible baffle at the mouth of the disposal. Its underside never touches the grinding action and no running water reaches it, so it collects a slick, smelly layer that is a fifth of the whole problem and the number one source of a smell that survives every other step. With the power off, lift or fold back each flap of the splash guard and look underneath with the flashlight, where you will usually find a gray or brown film coating the rubber. This is the spot people spend years never cleaning while they pour scented products down a drain that was never the source of the smell.
Dip an old toothbrush or a dedicated scrub brush in warm soapy water and scrub the underside of each splash guard flap thoroughly, working into the folds and the base where the rubber meets the drain. Some splash guards are removable, and if yours lifts out, take it to the sink and scrub both sides directly, which is easier and more complete. Scrub until the rubber is its original color and the film is gone, rinsing the brush as you go. Watch out for stopping at the top surface you can see; it is the hidden underside that holds the smell, so the flashlight and a hand under the flap are what make this step count. When the splash guard is clean, the largest hidden odor source is finally gone.
Step 6: Freshen with citrus peels
With the disposal physically clean, the citrus step adds a fresh scent and gives the grinding components a final light pass. Restore power, turn on the cold water, and drop in the peels of a lemon, lime, or orange, cut into a few pieces, then run the disposal until they are ground through. The peels release citrus oils that leave a clean, bright smell, and the mild abrasiveness of the rind gives the chamber one more gentle scrub on the way through. This is the step that makes the sink actually smell clean rather than merely neutral, and it is pleasant enough that it is the easiest habit to keep up between deep cleans.
It is worth being honest about what this step does and does not do. Citrus peels freshen and lightly clean, but they do not remove established buildup or a biofilm that a scrub has not already lifted, so they are a finisher and a maintenance habit, not a substitute for the ice scour and the splash guard clean. Used on their own on a neglected disposal, they mask the smell for a day and it returns, which is why they come last here rather than first. Watch out for grinding a thick pile of peels all at once, which can overload the chamber; a handful at a time with plenty of cold water is the way. Drop a few peels in weekly and the disposal stays fresh far longer between full cleans.
Step 7: Flush with cold running water
The cleaning is done, so the flush carries everything you loosened out of the disposal and down the drain for good. Let cold water run at a strong, steady flow through the disposal for fifteen to thirty seconds with the unit running, so the moving water and the spinning components push the last of the baking soda, loosened grease, citrus pulp, and dislodged film out through the trap and into the drain line. This final rinse is what turns a chamber full of loosened debris into a genuinely clean one, and skipping it leaves the residue you worked to free sitting right back where it started.
Use cold water, not hot, and this is not arbitrary: cold water keeps any remaining grease congealed into solid bits that break off and flush away, whereas hot water melts grease so it flows down the pipe and re-hardens further along, building the clog you are trying to prevent. Run the water a beat longer than feels necessary, since the last few seconds are what clear the trap just past the disposal where debris likes to settle. Watch out for shutting off the disposal before the water, because letting the water run a couple of seconds after the motor stops clears the chamber completely. This cold-water flush is also the single habit to keep after every normal grind, not just after a deep clean. Set your usage in the cleaning-schedule planner to see how the flush habit stretches the time between deep cleans.
Step 8: Restore power and set a cleaning schedule
The deep clean is done, so the last step locks it in: confirm the disposal runs normally and turn the routine into a rhythm you will actually keep. Restore power at the breaker or switch if you have not already, run cold water, and briefly turn the disposal on to confirm it spins freely and drains clear with no new noise. That quick test tells you the clean went well and nothing was left behind. From here, the value is not in doing this once but in doing the light parts often enough that a deep clean is rarely a big job.
The trick is to sort each task by how fast the mess it fights builds up and attach it to a habit you will not forget. The chart below groups the routine by interval so you can see that most of the work is quick and frequent while the full clean comes around far less often.
Garbage disposal cleaning tasks by frequency
An illustrative count of disposal cleaning jobs that fall into each interval. Bars scale with the number of tasks. Your list varies by home and diet.
The fast-building habits, running cold water and scraping scraps, are every-use jobs. Freshening is weekly, the ice scour every couple of weeks, and the full hand clean about monthly. Counts are illustrative.
Turn that grouping into a calendar you can keep. Make the cold-water flush and scraping heavy scraps into the trash an automatic part of every grind. Slot the baking soda, vinegar, and citrus freshen to a weekly chore day, run the ice-and-salt scour every week or two, and reserve the full hand clean of the splash guard for the first of the month. Watch out for the classic failure, which is not the doing but the remembering, so lean on a recurring reminder. Set how often you run the disposal and how much you cook in the cleaning-schedule planner to get a starting read on how often your disposal needs each step.
A worked example: a full garbage disposal deep clean
Put the steps together on one illustrative afternoon so you can see how the routine flows. Picture a household that cooks most nights and runs the disposal several times a day, and has not deep-cleaned it in a couple of months. A sour smell now rises from the sink within a day of every clean-up, and cold water alone does nothing to shift it, which is the classic sign that the splash guard and the chamber walls are coated and the odor is coming from buildup rather than anything down the drain.
The clean starts with safety. The breaker feeding the disposal is switched off, and a flashlight shows a wad of fibrous scraps caught under one flap of the splash guard and a fruit sticker stuck to the grinding ring. Tongs pull both out, no hand goes near the opening, and the chamber is left clear of loose debris. Power goes back on, two cups of ice and a half cup of rock salt grind through under cold water, and grayish grit washes out as the food film comes off the walls. With the disposal off again, half a cup of baking soda goes in, then a cup of vinegar, and the mixture fizzes for several minutes while it loosens the grease.
The splash guard is where the real culprit hides. Folded back and lit by the flashlight, its underside is coated in a gray film, and a soapy toothbrush scrubs each flap back to clean rubber, which removes the smell that survived every previous attempt. A handful of lemon peels grinds through for scent, and a thirty-second cold-water flush carries everything out through the trap. A quick test run confirms the disposal spins and drains clear. By the end, the smell is gone and stays gone, and a weekly reminder is set for the freshen with a monthly one for the splash guard. None of these numbers are measured on one specific home; they are an illustrative walkthrough, and your own diet, usage, and buildup will differ. The value is the sequence: make it safe, scour the chamber, then clean the splash guard the smell actually lives on.
What not to put down a garbage disposal
A disposal is built for the soft food scraps that rinse off a plate, not as a second trash can, and most smells and clogs trace back to a handful of things that should never go down it. Knowing the list is half the battle, because keeping these out prevents far more trouble than any cleaning routine can fix afterward.
- Grease, oil, and fat. These pour in as a liquid and congeal into a solid film inside the disposal and the drain, which is the leading cause of both odor and clogs. Wipe greasy pans with a paper towel and bin it instead.
- Fibrous and stringy foods. Celery, corn husks, artichokes, asparagus, and onion skins have long fibers that wrap around the grinding components and tangle rather than break down.
- Starchy foods. Pasta, rice, and potato peels absorb water and swell into a thick paste that packs the trap and drain line, so they belong in the trash or compost.
- Bones, pits, and hard items. Bones, fruit pits, and similar hard objects can jam the grinders or bounce around without breaking down, and they are a common cause of a stuck flywheel.
- Coffee grounds. They seem harmless because they are small, but they accumulate into a dense, wet sludge that settles in the pipe and builds a clog over time.
- Non-food items. Produce stickers, twist ties, wrappers, and utensils obviously do not belong, and the produce sticker in particular slips down unnoticed and gums up the works.
Scrape these into the trash or compost and save the disposal for the leftover soft scraps it was designed to handle. That single habit does more to prevent smells and clogs than anything you can pour in after the fact.
How often to clean a garbage disposal
The right frequency ties each task to how fast its particular mess builds up, and the honest answer is that it depends on how much you cook and what you put down the drain. A household that cooks most nights and runs the disposal many times a day needs a shorter interval than one that uses it lightly, so treat the rhythm below as a starting point and shorten it if the smell returns faster. The table pairs each cleaning method with what it actually does and how often it earns a place in the routine, so you can build a schedule around the jobs that matter rather than a vague sense that you should clean it sometime.
| Method | What it does | How often |
|---|---|---|
| Cold water flush while grinding | Carries waste through and keeps fats solid so they move down the line | Every use |
| Run water a few seconds after | Clears the trap of the last loose debris | Every use |
| Baking soda and vinegar | Loosens the grease film and deodorizes the chamber | Weekly |
| Citrus peels | Freshens the scent and gives the chamber a light pass | Weekly or as needed |
| Ice and rock salt scour | Scrubs food film and buildup off the grind chamber walls | Every 1 to 2 weeks |
| Splash guard hand scrub | Removes the hidden gunk under the rubber baffle that holds the smell | Monthly |
| Full deep clean | Combines every step to reset a neglected or smelly disposal | Monthly or as needed |
The pattern in that table is the same one the frequency chart showed: the cheap, fast habits happen constantly and the deeper jobs come around far less often. If you only take two things from it, make them the cold-water flush after every grind, which prevents most buildup, and the monthly splash guard scrub, which removes the odor source everything else misses. Everything in between is maintenance that keeps a deep clean from ever becoming a big job. Set your own usage in the cleaning-schedule planner for a starting read tuned to your kitchen.
How to deodorize a garbage disposal
Deodorizing deserves its own note, because most people reach for it first and in the wrong order, expecting a scented product to fix a smell that is actually coming from buildup they have not removed. The durable way to deodorize a disposal is to clean the surfaces the odor lives on, then add scent, not the reverse. If the smell keeps coming back within a day of a freshen, that is your signal that the splash guard underside or the chamber walls still hold a biofilm, and no amount of citrus or scented cube will out-compete rotting food you have not scrubbed off. Deodorizing is the finishing touch on a clean disposal, not a substitute for cleaning one.
Once the disposal is genuinely clean, several simple deodorizers keep it fresh between deep cleans. Grinding a few citrus peels is the most pleasant and effective, since the oils leave a bright scent and the rind gives a light scrub. Baking soda sprinkled in and left for a few minutes before a cold-water flush neutralizes odor gently. Some people freeze vinegar or lemon juice in an ice cube tray and grind a few of those cubes, which combines the scouring action of ice with a deodorizing rinse in one step, a tidy trick worth knowing. Whatever you use, run cold water afterward to flush the residue. Avoid relying on heavily perfumed commercial drops as your only approach, because they cover the smell without removing its cause, and the odor returns as soon as the scent fades.
How to unclog a garbage disposal
Cleaning and unclogging are different problems, and telling them apart is the first move, because the fixes and the risks are not the same. Start by listening. If you flip the switch and the motor hums but the grinders do not turn, you have a jam: something is physically stopping the flywheel. If the motor spins freely but the sink drains slowly or backs up, you have a drain clog: the grinding works but water cannot get past a blockage in the trap or the line. And if nothing happens at all when you flip the switch, no hum and no spin, the unit has likely tripped its internal overload and needs a reset. Each of those has its own safe fix, and forcing the wrong one is how people damage a disposal or flood a cabinet.
For a jam, cut the power first, then find the hex wrench that came with the disposal and fit it into the hex socket in the bottom center of the unit underneath the sink. Work the wrench back and forth to manually rotate the flywheel until it turns freely, which frees whatever was stuck, then use tongs to remove the object from inside the chamber. Press the small red reset button on the bottom of the disposal, restore power, and test it. For a drain clog, the critical rule is to never pour chemical drain cleaner into a disposal, because it can sit against the components and splash back dangerously: instead, clear the P-trap under the sink by hand into a bucket, or plunge the drain gently with the disposal off. For anything past the trap, or a jam the wrench will not free, the next section covers when it has stopped being a cleaning job.
Common mistakes when cleaning a garbage disposal
Most disposal trouble traces back to a small number of avoidable habits rather than a failing machine. These are the pitfalls that quietly keep a disposal smelly or, in one case, create a real hazard.
- Reaching in with your hand. This is the dangerous one and it has no safe version. Even off, the disposal can cut, so always cut the power and use tongs. No lost spoon is worth a hand injury.
- Running hot water while grinding. Hot water melts grease so it flows down the pipe and re-hardens further along, building a clog. Cold water keeps grease solid so it breaks off and flushes away.
- Ignoring the splash guard. The underside of the rubber baffle holds a fifth of the buildup and the bulk of the smell, and no cycle or scented product reaches it. It has to be scrubbed by hand.
- Masking instead of cleaning. Pouring in scented drops on a dirty disposal covers the smell for a day. Clean the surfaces first, then add scent, or the odor always returns.
- Using bleach or drain cleaner. Bleach can harden grease and should never meet vinegar, and chemical drain cleaner can damage the unit and splash back. Stick to ice, salt, baking soda, and vinegar.
- Putting the wrong things down it. Grease, fibrous and starchy foods, bones, and coffee grounds cause most smells and clogs. Keeping them out prevents more trouble than any clean fixes.
Clear these six and you have removed the causes behind almost every smelly-disposal complaint, at the cost of a few minutes a week and one hand clean a month.
Troubleshooting: harder garbage disposal problems
The steps cover routine cleaning, but some situations need a judgment call. Here is how to think through the common ones without guessing, and without putting a hand where it should not go.
What if the smell survives a full clean? Go back to the splash guard first, because a gray film left on its underside is the most common reason a smell returns within a day. Pull or fold each flap and scrub harder, and if the guard is removable, take it out and clean both sides at the sink. If the guard is genuinely clean and the smell persists, the odor may be coming from the drain line past the disposal rather than the unit itself, which is a plumbing clean rather than a disposal one.
What if the disposal hums but will not spin? That is a jam, not a dirt problem. Cut the power, use the hex wrench in the bottom socket to free the flywheel by hand, remove the stuck object with tongs, then press the red reset button and test. Do not keep flipping the switch on a humming disposal, since running the motor against a jam can burn it out.
What if nothing happens when I flip the switch? First check that it has power, then press the red reset button on the underside, which pops out when the internal overload trips. If it resets and runs, you are fine. If it trips again immediately, or there is no response even with power confirmed, the motor or switch may have failed, which is past a cleaning fix.
What if water backs up into the sink? That is a drain clog, not buildup in the chamber. Never use chemical drain cleaner in a disposal. Clear the P-trap under the sink by hand into a bucket, or plunge gently with the unit off. If the blockage sits past the trap in the main line, it is time for the next section.
When to call a plumber
Most disposal cleaning and minor unclogging is a confident do-it-yourself job, but a few signs mean the problem has crossed from maintenance into repair, and pushing past them risks damage, a flood, or an injury. Knowing where that line sits saves you both a wrecked unit and an unnecessary service call, so it is worth being clear about which symptoms are yours to handle and which belong to a professional.
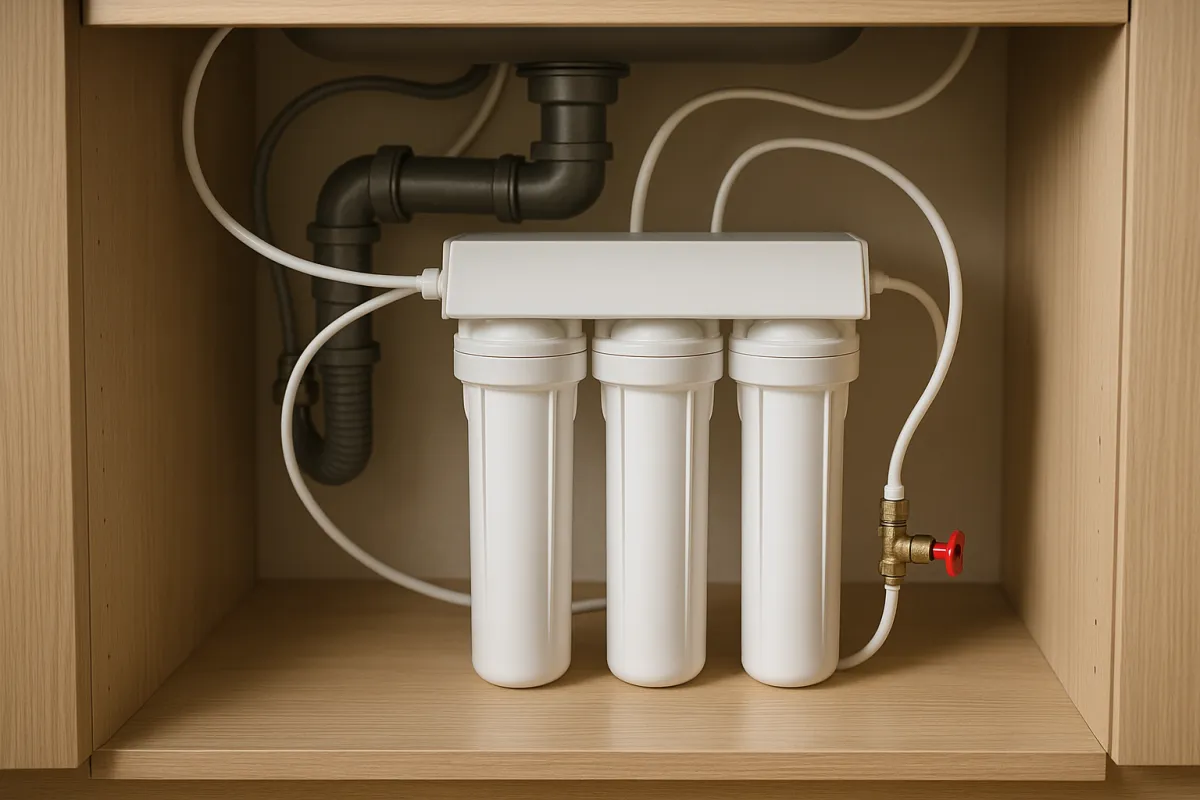
Call a plumber when the disposal leaks from its body, its base, or the connections under the sink, because a cracked housing or a failed seal is a repair, not a clean, and a slow leak can rot the cabinet. Call one when a jam will not free with the hex wrench, when the reset button keeps tripping right after you press it, or when the unit hums or stays dead after a proper reset, since those point to a mechanical or electrical failure. Call one when a clog sits past the P-trap in the main drain line and hand-clearing the trap does not fix the backup. And call one for any job that would tempt you to reach into the disposal or to use a chemical drain cleaner, because the safe alternative is a professional, not a shortcut. For how a disposal fits alongside the rest of your appliances in a preventive routine, see our appliance maintenance plan, which sets the same keep-ahead-of-it posture across the home.
Your garbage disposal cleaning checklist
Save this list and work it by interval. Clearing it keeps the disposal smelling clean and running freely, and stops smells and clogs before they start.
- Every use: run cold water during the grind and for a few seconds after, and scrape grease and heavy scraps into the trash rather than the drain.
- Weekly: freshen with baking soda and vinegar or a handful of citrus peels, followed by a cold-water flush.
- Every one to two weeks: run the ice-and-rock-salt scour to clean the grind chamber walls.
- Monthly: cut the power and hand-scrub the underside of the splash guard, the spot that holds the smell.
- As prevention: keep grease, fibrous foods, starchy foods, bones, and coffee grounds out entirely, the habit that prevents most trouble.
- Never: put your hand into the disposal, use chemical drain cleaner in it, or run hot water while grinding.
Set how often you run the disposal and how much you cook in the cleaning-schedule planner to see how often your machine needs each step, then work the list one interval at a time.
The bottom line
Cleaning a garbage disposal is not a specialist job or an expensive one; it is a short, safe routine that stops a self-cleaning myth from turning into a sink that smells sour a day after every wash-up. Cut the power and keep your hand out, clear the loose debris with tongs, scour the chamber with ice and rock salt, loosen the grease with baking soda and vinegar, scrub the splash guard the smell actually lives on, freshen with citrus, and flush it all out with cold water. Keep grease, fibrous and starchy foods, bones, and coffee grounds out of it, run cold water with every grind, and give the splash guard a hand clean about monthly. Do that on a rhythm matched to how much you cook, know a jam from a clog, and call a plumber for a leak or a failure rather than forcing it, and the disposal goes back to doing its one job quietly and without the smell.
A note on scope: these notes exist to hand you a safe, repeatable routine for cleaning a home garbage disposal, not to promise any specific result. Every interval and figure above is an illustrative planning number drawn from typical guidance rather than measured on one unit, and your own diet, usage, and manufacturer instructions will change what and how often you should do each job, so treat your disposal manual as the authority. Nothing here is professional advice. The safety rules are not optional: cut the power before you reach toward the disposal, never put your hand inside it, run cleaners one at a time and never combine bleach with vinegar or any acid since that releases a harmful gas, and keep chemical drain cleaner out of a disposal entirely. If a problem points to a leak, a failed motor, or a clog past the trap rather than dirt, call a qualified plumber.
Frequently asked questions
How do I clean a garbage disposal?
Start by cutting the power at the wall switch or the breaker, because the one rule that never bends is that your hand never goes into the disposal. With the power off, use tongs or pliers to pull out any visible debris, then restore power and grind a couple of cups of ice with a handful of rock salt to scour food film off the grind chamber walls. Follow that with baking soda and vinegar to loosen grease and cut the smell, scrub the underside of the rubber splash guard with dish soap and a brush, drop in a few citrus peels for scent, and finish by flushing with cold running water. The whole routine takes about fifteen minutes and uses only things already in your kitchen. Match the parts you cannot reach, the splash guard and the chamber walls, with a brush and a scour rather than trusting the grind to clean itself.
Why does my garbage disposal smell so bad?
A disposal smells because food does not fully leave it after every grind. Small particles cling to the grind chamber walls, coat the underside of the rubber splash guard, and settle in the crevices around the baffle, where they sit damp and warm and feed bacteria that produce the sour odor. Grease is the worst offender, because it congeals into a film that traps everything else and does not rinse away with cold water. The splash guard is the single most overlooked spot, since its underside never touches the grinding action and collects a slick, smelly layer that no amount of running water reaches. Cleaning the smell means physically scrubbing those hidden surfaces, not just running more water or pouring in a scented product.
What can you not put down a garbage disposal?
Keep grease, oil, and fat out first, because they congeal inside the drain and are the leading cause of both smells and clogs even though they pour in as a liquid. Fibrous and stringy foods like celery, corn husks, artichokes, and onion skins wrap around the grinding components, and starchy foods like pasta, rice, and potato peels swell and turn to a paste that packs the trap. Bones, fruit pits, and other very hard items can jam or dull the grinders, and coffee grounds, while small, accumulate into a dense sludge that settles in the pipe. When in doubt, scrape those items into the trash or compost and save the disposal for the soft food scraps that rinse off a plate, which is what it was designed to handle.
How often should I clean my garbage disposal?
A workable rhythm ties each job to how fast its mess builds up. Run cold water through the disposal during and for a few seconds after every grind, since that is the habit that prevents most buildup in the first place. Freshen it about weekly with baking soda and vinegar or a few citrus peels, because that is roughly how fast the odor returns in a normally used kitchen. Run the ice and rock salt scour every week or two to keep food film off the chamber walls, and do a full hand clean of the splash guard about monthly. The honest answer is that the interval depends on how much you cook and what you put down it, so treat any schedule as a starting point and clean more often if the smell comes back faster.
Is it safe to put your hand in a garbage disposal?
No, and this is the one safety rule in the whole job that has no exceptions. Even with the disposal switched off, reaching into the grind chamber risks a serious cut on the grinding components, and a disposal that is only switched off at the wall can still be energized by someone else flipping the switch or a wiring fault. When you need to remove something from inside, always cut the power at the breaker first, then use tongs, needle-nose pliers, or a similar tool to reach in, never your fingers. Keep a flashlight handy so you can see what you are grabbing rather than feeling for it. Treat the disposal as if it could turn on at any moment, because that assumption is exactly what keeps your hand safe.
Do ice and salt really clean a garbage disposal?
Yes, and it is the most effective mechanical clean you can do without taking anything apart. Grinding a couple of cups of ice cubes scrubs the grind chamber walls and the grinding components with hard, blunt edges that knock loose the food film and buildup that cling there, and the rock salt or coarse kosher salt acts as a scouring abrasive that scrapes the surfaces the ice alone would miss. The ice also does not sharpen the grinders, a common myth, but it does dislodge debris and helps clear a light greasy coating. Run cold water while you grind the ice and salt, and you will often see grayish, gritty water wash out, which is the buildup leaving. It does not replace scrubbing the splash guard by hand, but it handles the chamber walls you cannot otherwise reach.
Can I use bleach or vinegar in a garbage disposal?
Vinegar is a good choice and a common one, because it is a mild acid that helps cut the grease film and works well paired with baking soda to loosen buildup and deodorize. Bleach is generally discouraged for routine disposal cleaning, because it can harden grease into a more stubborn deposit, may damage certain internal components over time, and should never be combined with other cleaners: mixing bleach with an acid like vinegar releases a harmful gas. Stick to the gentle household approach of baking soda followed by vinegar, run one cleaner at a time, and rinse thoroughly with cold water afterward. If you want a commercial disposal cleaner, follow its label directions exactly and do not layer it with anything else. For any product, check your disposal manufacturer's guidance first, since they will note anything to avoid on your specific model.
How do I unclog a garbage disposal, and when should I call a plumber?
First tell a jam from a clog. If the motor hums but the grinders do not turn, it is a jam: cut the power, use the hex wrench that came with the unit in the socket on the bottom center of the disposal to manually free the flywheel, clear whatever caused it with tongs, then press the small red reset button underneath before restoring power. If the sink drains slowly or backs up but the motor spins freely, it is a drain clog: never use chemical drain cleaner in a disposal, and instead clear the trap under the sink by hand or plunge gently. Call a plumber when the disposal leaks from the body, when a jam will not free with the wrench, when the reset button keeps tripping, or when a clog sits past the trap in the main line. Those point to a mechanical failure or a blockage beyond a household fix, and forcing them risks damage or a flood.