What's on this page
- Why flushing a water heater matters
- Draining versus flushing: what the two jobs do
- Before you start: tools, time, and safety
- Step 1: Turn off the power or gas supply
- Step 2: Shut off the cold water and let the tank cool
- Step 3: Connect a hose and open a hot water tap
- Step 4: Open the drain valve and empty the tank
- Step 5: Flush the tank with the cold water supply
- Step 6: Close up, refill, and restore power
- Step 7: Relight, check the temperature, and set a schedule
- How to flush a tankless water heater
- How often should you flush a water heater
- Gas versus electric: what changes in the routine
- A worked example: flushing a 50-gallon tank
- Common mistakes when draining a water heater
- Troubleshooting: when the drain valve or sediment fights back
- Your water heater flushing checklist
- The bottom line
Short answer: Flush a tank water heater in seven steps: turn off the power or gas, shut the cold supply, connect a hose to the drain valve, drain the tank, flush with the cold supply until the water runs clear, refill, then restore power and set a schedule. Turning off the power first is non-negotiable, because an energized electric element in a draining tank burns out in seconds. Flush roughly yearly, more often in hard water.
A water heater is the appliance most people never think about until the morning it runs out of hot water, and the quiet culprit behind a surprising share of those failures is sediment. Every gallon of water that enters the tank carries dissolved minerals, and over months and years those minerals settle out and build a hard layer across the bottom of the tank, right where the burner or the lower heating element does its work. That layer insulates the water from the heat, makes the unit run longer and hotter to do the same job, and eventually announces itself with a popping or rumbling sound. Flushing carries that sediment back out, and it is one of the few pieces of appliance maintenance that genuinely earns its keep.
These notes give you a clear, seven-step method for how to flush and drain a water heater safely, covering both a conventional tank and, in its own section, a tankless unit that gets descaled rather than flushed. Every step is something a careful homeowner can do with a garden hose and about an hour, and the safety points that matter, especially turning off the power before you drain, are called out where they belong. For how this task fits your whole home, see our eight-point appliance maintenance plan, and if your unit is old and noisy enough that you are weighing a swap, our tank versus tankless replacement cost breakdown walks through that decision. Feed your water hardness and tank size into the planner further down as you read, and it will suggest how often your unit needs this.
Key takeaways
- Sediment, the mineral layer that settles on the bottom of the tank, is what a flush removes, and it is behind most popping noises, slow reheating, and lost efficiency.
- The whole tank job is seven steps: cut the power or gas, shut the cold supply, connect a hose, drain the tank, flush with the cold supply until clear, refill, then restore power and set a schedule.
- The one non-negotiable safety rule is to turn off the power or gas first, because an electric element energized in a draining tank burns out in seconds.
- A tankless unit has no tank to drain, so it is descaled by circulating vinegar or an approved solution through the heat exchanger, following the manufacturer instructions.
- How often you flush depends on water hardness far more than the calendar: roughly yearly in soft water, as often as every few months where the water is very hard.
Why flushing a water heater matters
Before you touch a valve, it helps to understand what sediment actually costs you, because that is what turns flushing from a chore into a habit worth keeping. When minerals settle into a crust on the tank floor, they sit directly between the heat source and the water. On a gas unit the burner underneath now has to drive heat through an insulating layer, and on an electric unit the lower element can end up buried in sediment and scaling faster. The result is a heater that runs longer to reach temperature, recovers more slowly after a big draw, and wastes energy doing it. The stacked bar below shows an illustrative breakdown of the problems a neglected sediment layer causes, so you can see why the bottom of the tank is where the trouble concentrates.
What sediment does to a water heater
An illustrative split of the problems a heavy sediment layer causes in a neglected tank. Segments sum to 100 percent. Your mix varies by water and unit age.
Lost efficiency and slower recovery are the biggest slices, which is why a flush pays back in performance. The split is illustrative and shifts with water hardness and how long the tank has gone unmaintained.
The shape of that split is the argument for the whole job. The two largest slices, lost efficiency and slower recovery, are exactly the things you feel: a bill that creeps up and a shower that runs cold sooner than it used to. The popping and rumbling are the audible symptom that tells you sediment has arrived, and the smaller slices, corrosion and valve wear, are the slower damage that shortens the unit’s life. A flush addresses all of them at once by carrying the loose sediment out before it hardens. That is why it sits on our appliance maintenance plan as one of the higher-value annual jobs, and why letting it slide quietly raises what the unit costs you to run, a theme we cover in how to lower your electric bill.
Draining versus flushing: what the two jobs do
People use the words interchangeably, but draining and flushing are two related jobs, and knowing the difference tells you when you need which. Draining simply means emptying the tank of water, which you might do before moving the unit, before a repair, or ahead of a long absence in a home that could freeze. Flushing means draining and then rinsing, running fresh cold water through the emptying tank to stir up and carry out the sediment on the bottom. Every flush includes a drain, but not every drain is a flush.
For routine maintenance, flushing is the job you want, because the goal is to remove sediment rather than just move water. A plain drain leaves much of the settled sediment behind, since it packs down and does not all wash out on its own. The flushing step, opening the cold supply in short bursts while the drain valve is open, is what agitates that layer and sweeps it toward the drain valve and out the hose. When these notes refer to the seven-step routine, that is a full flush. If you only need to empty the tank for a repair, you can stop after the drain, but the same safety rules apply either way, starting with cutting the power.
Before you start: tools, time, and safety
This is a hands-on job, but it is a low-skill one that needs no plumbing expertise, only care and a few common items. Plan on roughly an hour for a full flush, most of which is the tank draining and rinsing while you wait, so your active time is closer to twenty minutes. The difficulty is beginner, with one important caveat: you are working around hot water and either electricity or gas, so the safety steps are not optional. If anything about the gas control or wiring is unfamiliar, there is no shame in having a plumber do the first one while you watch.
Gather a small kit before you begin so you are not hunting mid-job.
- A garden hose long enough to reach from the drain valve at the base of the tank to a floor drain, a driveway, or outside.
- A flathead screwdriver or a pair of pliers, since some drain valves have a slotted stem rather than a handle.
- A bucket, useful for catching a sample of the draining water to check for sediment and for tankless descaling.
- Gloves and safety glasses, because the water leaving the tank can be scalding and the sediment is gritty.
- Your owner’s manual, or the model number to find it, since it is the authority on your specific valves, the anode, and any manufacturer cautions.
Two ground rules keep the job safe. First, always cut the power or gas before you drain, and never restore it until the tank is completely refilled, because an electric element run dry fails almost instantly. Second, respect the heat: either let the tank cool for an hour or two before draining, or handle the very hot water with real care and keep children and pets away from the hose outlet. With your kit ready and those rules in mind, start at the top of the sequence.
Step 1: Turn off the power or gas supply
The first step is the one that protects both you and the unit, so make it a firm habit rather than an afterthought. For an electric water heater, go to your breaker panel and switch off the dedicated double-pole breaker that feeds the heater. This matters because the heating elements are designed to be submerged, and if they are energized while the water drops below them during a drain, they overheat and burn out in seconds, turning a maintenance job into a repair. For a gas water heater, turn the gas control knob on the front of the unit to the pilot or off setting, which stops the main burner from firing against a draining or empty tank.
Take a moment to confirm the shutoff actually took. On an electric unit, the breaker should be fully in the off position, and if you are unsure which breaker it is, the safest move is to test that the water stops reheating or to shut the main. On a gas unit, setting the control to pilot keeps the pilot light going but stops the burner, which is what you want. Watch out for the most common and most expensive mistake in this whole job: draining an electric tank with the breaker still on. If you do only one thing carefully today, make it this. With the heat source safely off, you can move to the water side.
Step 2: Shut off the cold water and let the tank cool
With the power or gas off, close the cold water supply valve, which sits on the cold inlet pipe at the top of the water heater and is usually a lever or a round handle. Shutting it stops fresh water from flowing into the tank, so that when you open the drain valve the tank actually empties instead of endlessly refilling. If you cannot find a dedicated valve at the heater, you can use the home’s main water shutoff instead, though that cuts water to the whole house while you work.
Now decide about heat. The water inside a running heater is hot enough to scald, often set around 120 degrees or higher, so you have two safe options. The cautious approach is to let the tank cool for an hour or two, or even overnight, before you drain, which makes the whole job more comfortable and removes the burn risk at the hose outlet. The faster approach is to drain it hot but treat every drop as dangerous: wear gloves, keep the hose outlet where no one can touch the water, and never let the stream splash back. For most homeowners the cautious route is worth the wait, especially the first time. Once the temperature is handled, prepare the drain path.
Step 3: Connect a hose and open a hot water tap
Attach a standard garden hose to the drain valve at the bottom of the tank, threading it on snugly so it does not weep under pressure, and run the other end to a safe discharge point. A floor drain near the unit is ideal, but a driveway, a patio, or a spot outside works as long as the hot, sediment-laden water can flow away without harming anything and the outlet sits lower than the tank so gravity does the work. Lay the hose without kinks, since a kink slows the drain to a trickle and hides sediment problems behind what looks like a clog.
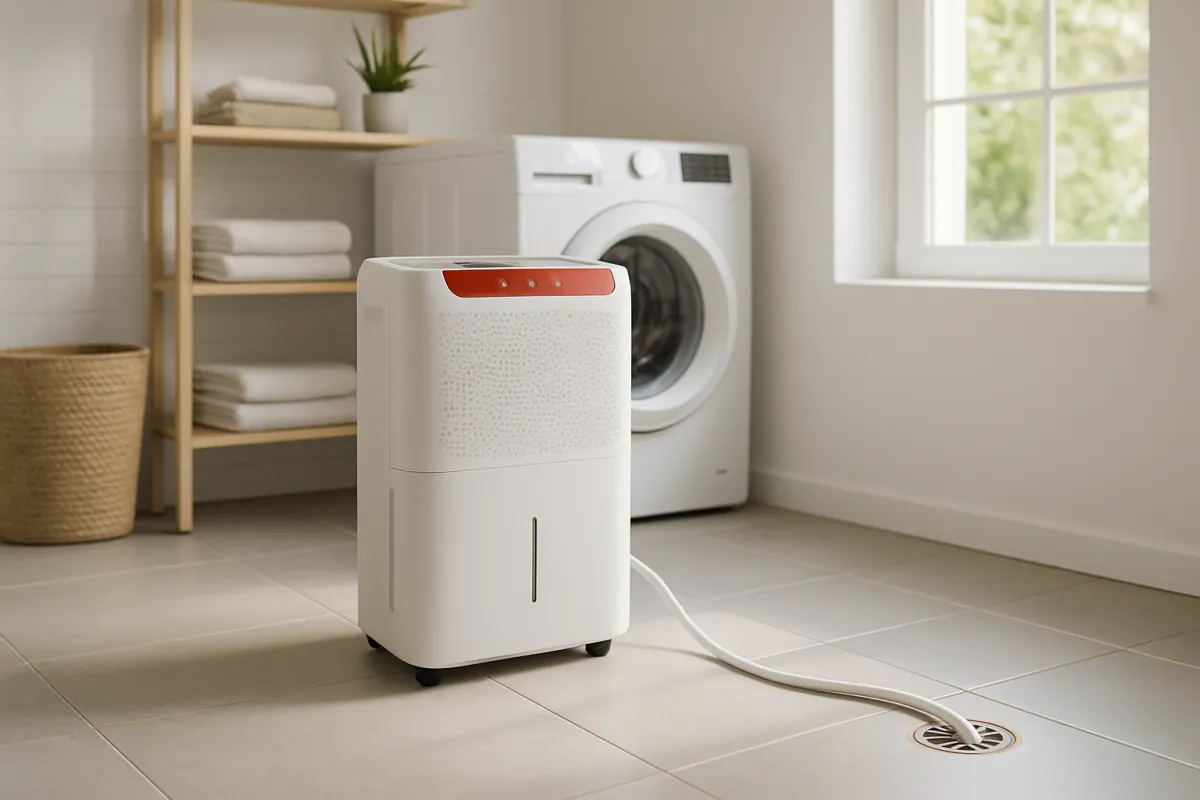
Before you open the drain valve, open a hot water faucet somewhere in the house, ideally the highest and nearest one, and leave it open. This step is easy to skip and important: with the cold supply shut, the draining tank would otherwise pull a vacuum that slows or stalls the flow, exactly the way holding your thumb over a straw traps the liquid inside. Opening a hot tap lets air into the system so the tank drains freely and steadily. You will hear the faucet sputter and then run dry as the tank empties, which is a normal sign the drain is working. With the hose routed and a hot tap open, you are ready to empty the tank.
Step 4: Open the drain valve and empty the tank
Now open the drain valve at the base of the tank. Many valves have a small plastic handle you turn counterclockwise, while others have a slotted stem that needs a flathead screwdriver, which is why it is on the tool list. As the valve opens, water should begin flowing through the hose to your discharge point. Keep an eye and an ear on it: a strong, steady stream means the drain is clear, while a weak trickle usually means sediment is partly blocking the valve or a kink is throttling the hose. Let the tank drain completely, which for a typical residential tank commonly takes somewhere in the range of twenty minutes to an hour depending on size, sediment, and whether that hot tap is doing its job.
Catch a little of the draining water in your bucket partway through and look at it. Clear water means little sediment, while cloudy, gritty, or rust-colored water is exactly the buildup you came to remove and a sign the flush is overdue. Watch out for a valve that slows to nothing before the tank is empty, which points to sediment jamming the opening rather than an empty tank. If that happens, the troubleshooting section further down covers how to coax it clear. Once the flow stops and that upstairs faucet has gone quiet, the tank is empty and you are ready for the part that actually removes the sediment.
Step 5: Flush the tank with the cold water supply
Draining empties the tank, but flushing is what carries the sediment out, and it happens now while the drain valve is still open and the hose is still running to the drain. Briefly open the cold water supply valve at the top of the tank that you closed in step two, let cold water rush in for a few seconds, then shut it again. That surge of fresh water hits the sediment on the tank floor, stirs it into suspension, and pushes it toward the open drain valve and out the hose. Watch the water leaving the hose, or catch it in your bucket, and you will often see it run cloudy and gritty on these bursts.
Repeat the cycle, open the cold supply for a few seconds, let the tank partly fill and drain, then open it again, until the water coming out of the hose runs clear rather than cloudy. This may take several bursts on a neglected tank and only one or two on a well-maintained one, which is why the water clarity, not a fixed count, tells you when to stop. The bursts are more effective than simply leaving the cold supply running, because the on-and-off surge does a better job of agitating the settled layer. Take your time here, since this rinsing is the entire reason for the job, and a rushed flush leaves the sediment you came to remove sitting on the bottom of the tank.
Step 6: Close up, refill, and restore power
With the water finally running clear, the sediment is out and it is time to reassemble in the right order. Close the drain valve firmly at the base of the tank, then remove the garden hose. Go back to the hot water faucet you left open upstairs, but leave it open for now, because it has one more job during the refill. Double-check that the drain valve is fully closed and not weeping, since a valve that will not reseat after a flush is a known nuisance covered in the troubleshooting section.
Now refill the tank by fully opening the cold water supply valve at the top. You will hear water rushing into the empty tank, and at the open faucet upstairs the flow will sputter with air and then, after a minute or two, run in a smooth steady stream. That steady stream is your signal that the tank is full and the air has been pushed out. Only once the tank is completely refilled do you restore the heat: switch the electric breaker back on, or turn the gas control knob from pilot back to its normal on setting. This order is critical, because energizing an electric element in a tank that is not yet full is the same dry-firing that step one was designed to prevent.
Step 7: Relight, check the temperature, and set a schedule
The tank is full and the power is back, so the last step confirms everything is working and turns the job into a repeatable habit. For a gas unit, make sure the burner lights and runs when the thermostat calls for heat, following the lighting instructions printed on the unit if the pilot went out. For an electric unit, give it thirty to sixty minutes and confirm the water is heating again. Check around the drain valve and the cold and hot connections for any drips now that the system is under full pressure and temperature. A small seep at the drain valve sometimes appears after a flush and usually means the valve did not reseat cleanly.

While you are here, confirm the temperature setting is sensible. Many households keep a water heater around 120 degrees, which balances scald safety, comfort, and energy use, though your needs and manufacturer guidance may differ. Then set the schedule, because the flush only pays off if it happens on a rhythm rather than once when something goes wrong. Use the planner below to turn your water hardness and tank size into a target interval, put a recurring reminder on your calendar, and if you want to weigh whether an aging unit is worth maintaining at all, our cost-per-use calculator helps frame that against the price of a replacement.
How to flush a tankless water heater
A tankless water heater works completely differently, so its maintenance is different too. There is no tank sitting full of water for sediment to settle in, which is the whole efficiency advantage, but the heat exchanger the water passes through still collects mineral scale in hard water. Left alone, that scale narrows the passages, reduces flow, cuts efficiency, and can trigger error codes, so a tankless unit is descaled rather than drained. The job circulates a mild acid through the heat exchanger to dissolve the scale, and most manufacturers recommend it somewhere around once a year, more often in very hard water.
The process needs a few specific items: a small submersible pump, two hoses, a bucket, and either several gallons of food-grade white vinegar or a manufacturer-approved descaling solution. Turn off the power or gas to the unit first. Most tankless heaters are installed with a pair of isolation valves and service ports on the cold and hot lines for exactly this purpose. Close the two isolation valves so the unit is separated from the household plumbing, then connect a hose from the cold service port down to the pump sitting in the bucket of vinegar, and another hose from the hot service port back into the same bucket, forming a loop. Open the service ports, switch on the pump, and let the solution circulate through the heat exchanger for the time your manual specifies, commonly around forty five minutes to an hour.
When the circulation time is up, switch off the pump and pour out the used vinegar, which will carry the dissolved scale with it. Refill the bucket with clean water and circulate that through for several minutes to rinse the acid out of the exchanger, or follow your manual’s rinse procedure. Then close the service ports, disconnect the hoses, and reopen the two isolation valves to reconnect the unit to the household water. Most tankless units also have an inlet screen filter that catches debris, so unscrew it, rinse it clean, and reinstall it while you are here. Finally, restore the power or gas and run a hot tap to confirm normal operation. Because valve layouts and approved solutions vary by brand, treat your own manufacturer instructions as the final word over any general description here.
How often should you flush a water heater
The single question this task raises most often is how frequently to do it, and the honest answer is that it depends on your water far more than on a fixed calendar. Water hardness, the amount of dissolved mineral in your supply, is what determines how quickly sediment builds, so a home with soft water and one with very hard water can sit years apart on the right interval. The chart below shows an illustrative flushing interval by hardness level, so you can find roughly where your home falls rather than defaulting to a one-size number.
Illustrative flush interval by water hardness
A rough guide to how often to flush a tank by water hardness. Bars scale with the number of months between flushes. Your interval varies by usage and unit.
The harder your water, the more often sediment builds and the shorter the interval. These figures are illustrative starting points, not measured values; let the popping noise and slow recovery move your schedule sooner.
Read the signs alongside the calendar, because they are the more reliable trigger. A popping or rumbling sound, hot water that runs out faster than it used to, cloudy or gritty water from a tap, or a visible drop in efficiency all say sediment is building and the interval should shorten. If you do not know your water hardness, an inexpensive test strip or a call to your water utility will place you on the chart, and a whole-home water softener can push your interval toward the longer end. Whatever number you land on, the reliable part is the reminder: put the flush on a recurring schedule the way our appliance maintenance plan suggests for every major appliance, and set your hardness and tank size in the planner to get a personalized starting point.
Gas versus electric: what changes in the routine
The seven steps are nearly identical for gas and electric tank heaters, but a few differences are worth calling out so you handle each correctly. The largest is at step one. On an electric unit you cut power at the breaker, and the reason is specific: the heating elements sit inside the tank and will burn out in seconds if energized while the water level drops, which makes the breaker shutoff absolutely mandatory before draining. On a gas unit you set the control knob to pilot instead, which stops the burner underneath the tank from firing without extinguishing the pilot light.
The restore step differs to match. On an electric unit, you switch the breaker back on only after the tank is completely refilled, never before. On a gas unit, you turn the control knob from pilot back to on once the tank is full, and if the pilot happened to go out, you relight it following the printed instructions on the unit before turning the knob up. The flushing itself, connecting the hose, opening a hot tap, draining, and rinsing with cold bursts, is the same for both. If your home uses a heat pump or hybrid unit, treat it like an electric tank for the drain and flush, but check its manual, since these units have extra components and their own maintenance notes. When you eventually weigh a replacement, the fuel type is one of the big cost drivers we break down in the tank versus tankless cost comparison.
A worked example: flushing a 50-gallon tank
Put the seven steps together on one illustrative afternoon to see how the routine flows in practice. Picture a household with a fifty gallon gas water heater in a hard-water area that has not been flushed in more than two years. The giveaways are a rumbling sound when the burner runs and showers that turn lukewarm sooner than they used to, both classic signs of a heavy sediment layer. This is a catch-up flush that sweeps through every step.
The job starts with safety. The gas control knob is turned to pilot, the cold water supply valve at the top of the tank is closed, and because the water is scalding, the household waits about ninety minutes for it to cool before going further. A garden hose is threaded onto the drain valve at the base and run out to the driveway, sloping downhill, and a hot faucet in the upstairs bathroom is opened to let air in. The drain valve is opened with a flathead screwdriver, and the water that comes out first is visibly cloudy and rust-tinged, a bucket sample confirming just how much sediment was waiting. The tank takes close to forty minutes to empty, slowing near the end as sediment partly blocks the valve.
With the tank empty, the flush begins. The cold supply valve is cracked open for a few seconds and shut again, sending a surge through the tank that stirs the sediment and pushes a gritty cloud out the hose. It takes five or six of these bursts before the water leaving the hose finally runs clear. Then the drain valve is closed, the hose removed, and the cold supply opened fully to refill, with the upstairs faucet sputtering and then running smooth to signal a full tank. Only then is the gas knob turned back to on and the burner confirmed lighting. The rumble is gone and the hot water lasts again. Every figure here is illustrative rather than measured on one specific home, and your tank size, sediment, and timing will differ. The value is the sequence: cut the gas, drain safely, rinse until clear, refill, then restore heat.
Common mistakes when draining a water heater
Most water heater flushing trouble traces back to a short list of avoidable mistakes rather than anything difficult. These are the pitfalls that turn a simple maintenance job into a repair or a mess.
- Leaving the power on while draining. This is the costly one: an electric element energized in a draining tank burns out in seconds. Always cut the breaker on an electric unit and set a gas unit to pilot before you drain.
- Forgetting to open a hot tap. Without an open faucet to admit air, the tank pulls a vacuum and drains to a slow trickle, which people misread as a clogged valve. Open the highest nearby hot tap before you open the drain.
- Draining scalding water carelessly. The water leaving the tank can burn. Either let the tank cool first or handle the hose outlet with gloves and keep people and pets clear of the discharge.
- Skipping the rinse and calling a drain a flush. Simply emptying the tank leaves most of the settled sediment behind. The cold-water bursts that follow are what actually carry the sediment out, so run them until the water is clear.
- Restoring power before the tank is full. Refill completely and confirm a steady stream at the open faucet before switching the breaker back on or turning the gas up, or you repeat the dry-fire risk.
- Ignoring a very old, never-flushed tank’s risk. On a neglected aging unit, flushing can occasionally expose a weak spot. Weigh the job against the tank’s age, and consider having a plumber flush and assess it together.
Clear these six and you have removed the causes behind almost every flushing problem, at the cost of a little patience and attention to the order of operations.
Troubleshooting: when the drain valve or sediment fights back
The seven steps cover a normal flush, but a few situations need a judgment call, especially on tanks that have gone too long between services. Here is how to think through the common ones without guessing.
What if the drain valve is clogged with sediment? If the flow slows to a trickle or stops before the tank is empty, sediment is likely jamming the valve opening. First confirm the hose is not kinked and a hot tap is open. Then try opening and closing the valve a few times to dislodge the blockage, or briefly open the cold supply to push a surge of pressure behind the clog. If it still will not clear, the sediment has hardened, which is itself a sign the tank was overdue and may point toward a unit near the end of its life.
What if the drain valve will not stop dripping afterward? Plastic drain valves sometimes fail to reseat after being opened, especially older ones. Make sure no grit is caught in the seat by flushing it once more, then close it firmly. If it still weeps, a garden-hose cap threaded onto the outlet can stop the drip as a temporary fix, and replacing the valve is a straightforward plumbing job for a lasting one.
What if I hear popping again soon after flushing? If the noise returns quickly, the sediment layer had likely hardened into a crust that a flush cannot fully remove. That is common on tanks that went many years without maintenance, and it usually means the unit is aging. At that point the honest question is whether to keep flushing or to plan a replacement, which our tank versus tankless cost breakdown is built to help you weigh.
What if no hot water returns after the flush? First confirm you restored the heat: the breaker back on for electric, or the gas knob back to on with a lit pilot for gas. If a gas pilot went out, relight it per the instructions on the unit. If everything is restored and the water still will not heat, the dry-fire you were trying to avoid may have already happened on a prior drain, or another component has failed, and that is the point to call a professional.
Your water heater flushing checklist
Save this list and work it in order. Following the sequence is what keeps the job safe and keeps the sediment from ever building into a problem.
- First, always: cut the power at the breaker for electric, or set the gas control to pilot, before touching the water side.
- Set up: close the cold water supply, let the tank cool or handle hot water with care, connect a hose to the drain valve, and open a hot tap to admit air.
- Drain and flush: open the drain valve, empty the tank, then pulse the cold supply on and off until the water leaving the hose runs clear.
- Close up in order: close the drain valve, remove the hose, refill the tank fully, confirm a steady stream at the open faucet, then restore power or gas last.
- Tankless instead: descale by circulating vinegar or an approved solution through the heat exchanger via the service valves, then rinse and clean the inlet filter.
- On a schedule: flush roughly yearly in soft water and as often as every few months in very hard water, and set a recurring reminder so it actually happens.
Set your water hardness and tank size in the planner to turn this into a schedule for your home, and if the unit is old and noisy, use our cost-per-use calculator to weigh another year of maintenance against a replacement.
The bottom line
Flushing and draining a water heater is not a specialist job, it is a careful one, and it is among the highest-value pieces of appliance maintenance you can do yourself. The whole routine is seven steps: cut the power or gas, shut the cold supply, connect a hose and open a hot tap, drain the tank, rinse it with cold-water bursts until the water runs clear, refill it completely, then restore the heat and set a schedule. The one rule you never bend is turning off the power before you drain, because an electric element run dry fails in seconds. A tankless unit swaps the drain for a vinegar descale through its service valves, but the goal is the same: clear the mineral buildup before it costs you efficiency, hot water, and years of the unit’s life. Do it on a rhythm matched to your water hardness, and the appliance you never think about keeps quietly doing its one job.
A note on scope: these notes exist to hand you a careful, repeatable routine for flushing and draining a home water heater, not to promise any specific result, saving, or lifespan. Every interval and figure above is an illustrative planning number drawn from typical guidance rather than measured on one unit, and your own water hardness, usage, and manufacturer instructions will change what and how often you should do each job, so treat your owner’s manual as the authority on your specific model, valves, and cautions. Nothing here is professional plumbing advice. You are working around scalding water and either electricity or gas, so cut the power or gas before you drain, never energize an electric element in a tank that is not full, and if the gas controls, the wiring, or an aging tank leave you unsure, stop and call a qualified plumber.
Frequently asked questions
How do you flush a water heater?
Flushing a tank water heater is a drain-and-rinse job you can do in about an hour. Turn off the power at the breaker for an electric unit or set a gas unit to pilot or vacation, then shut the cold water supply valve at the top of the tank and let the water cool. Connect a garden hose to the drain valve at the bottom, run the other end to a floor drain or outside, open a hot tap upstairs to break the vacuum, and open the drain valve to empty the tank. Once it drains, briefly open the cold supply in short bursts to stir and rinse the sediment out until the water runs clear, then close the drain, remove the hose, refill the tank fully, and restore power or gas. The whole point is to carry out the loose mineral sediment that settles on the bottom, so treat any time estimate here as illustrative and let the water running clear tell you when you are done.
How often should you flush a water heater?
A common starting rhythm is once a year, but the honest answer is that it depends almost entirely on your water hardness. In a soft-water home you may stretch a flush to every twelve to eighteen months without much sediment building up, while a hard-water area can pack the bottom of the tank fast enough to justify flushing every four to six months. The signs matter more than the calendar: a popping or rumbling sound, slower recovery of hot water, or cloudy water from the tap all say sediment is building and it is time. Treat any interval as an illustrative planning number rather than a rule, and shorten it if you see or hear the warning signs sooner. Setting a recurring reminder is the reliable part, because the job only helps if it actually happens on a schedule.
How do you drain a water heater?
Draining is the first half of flushing and is sometimes done on its own before a repair or a long absence. Switch off the power or set the gas control to pilot, close the cold water inlet valve, and let the water cool if you want to avoid handling scalding water. Attach a garden hose to the drain valve near the bottom of the tank and route it to a floor drain, a driveway, or outside where hot water and sediment can safely flow. Open a hot water faucet somewhere in the house to let air in so the tank does not hold a vacuum, then open the drain valve and let the tank empty completely. If you are draining fully rather than flushing, you can stop once the tank is empty, but never turn the power back on until the tank is refilled, because an electric element energized in an empty tank can burn out in seconds.
How do you flush a tankless water heater?
A tankless unit has no tank of sediment to drain, but the heat exchanger still collects scale in hard water, so it is descaled rather than flushed with plain water. Turn off the power or gas, then close the two isolation or service valves on the cold and hot lines. Connect hoses and a small submersible pump to the service ports, put the pump in a bucket of food-grade white vinegar or a manufacturer-approved descaler, and circulate the solution through the heat exchanger for the time the manual specifies, commonly around forty five minutes to an hour. Flush the loop with clean water afterward, clean the inlet screen filter, close the service valves, reopen the isolation valves, and restore power. Descaling is what keeps a tankless unit heating efficiently, so follow the manufacturer instructions for your specific model, since the valve layout and recommended solution vary.
Do you need to turn off the water heater before draining it?
Yes, and this is the safety step that matters most in the whole job. For an electric water heater, switch off the dedicated breaker before you drain, because the heating elements sit inside the tank and will overheat and fail within seconds if they are powered while the water level drops below them. For a gas water heater, turn the gas control knob to pilot or the off position so the burner does not fire against an empty or draining tank. You should also shut off the cold water supply valve at the top of the tank so it does not keep refilling as you drain. Leaving the power on during a drain is the single most common way people ruin an otherwise healthy water heater, so make the shutoff your first move every time.
Why is my water heater making a popping or rumbling noise?
A popping, rumbling, or crackling sound almost always means sediment has built up on the bottom of the tank. As minerals settle into a hard layer over the burner or element, water gets trapped underneath and boils through the sediment, and those bubbles forcing their way up are the noise you hear. Beyond the sound, that sediment layer insulates the water from the heat source, so the unit works harder, recovers hot water more slowly, and can wear out sooner. Flushing the tank is the direct fix, since it carries out the loose sediment that causes the noise. If the tank has gone years without a flush the sediment can harden into a crust that a flush cannot fully clear, in which case the noise may persist and points toward a unit near the end of its life.
Can flushing an old water heater cause a leak?
It can, and this is a real risk worth understanding before you flush a neglected older unit. On a tank that has gone many years without maintenance, sediment and corrosion can partly seal a weak spot, and the disturbance of draining and refilling occasionally exposes it, so a drain valve that will not reseat or a seep that appears afterward is possible. That is not a reason to avoid flushing a well-maintained tank, where the job is low risk and clearly beneficial, but it is a reason to weigh it carefully on a unit already near the end of its service life. If your heater is old, noisy, and never flushed, it may be worth reading our note on when replacement makes more sense than another repair. When in doubt on an aging unit, a plumber can flush it and assess the tank at the same time.
How long does it take to drain a water heater?
Draining a typical residential tank usually takes somewhere in the range of twenty to sixty minutes, though that is an illustrative range rather than a fixed figure. The biggest variables are the tank size, how much sediment is restricting the drain valve, and whether you opened a hot tap to let air in, since a tank under vacuum drains slowly to a trickle. A clean fifty gallon tank with a hot faucet open and a clear drain valve empties fairly quickly, while a sediment-clogged valve can slow it to a crawl or even block it entirely. Flushing adds more time on top of draining, because you then run the cold supply in bursts until the water leaving the hose runs clear. Plan on the better part of an hour for the full flush and do not rush the rinse, since carrying out the sediment is the entire reason you are doing it.